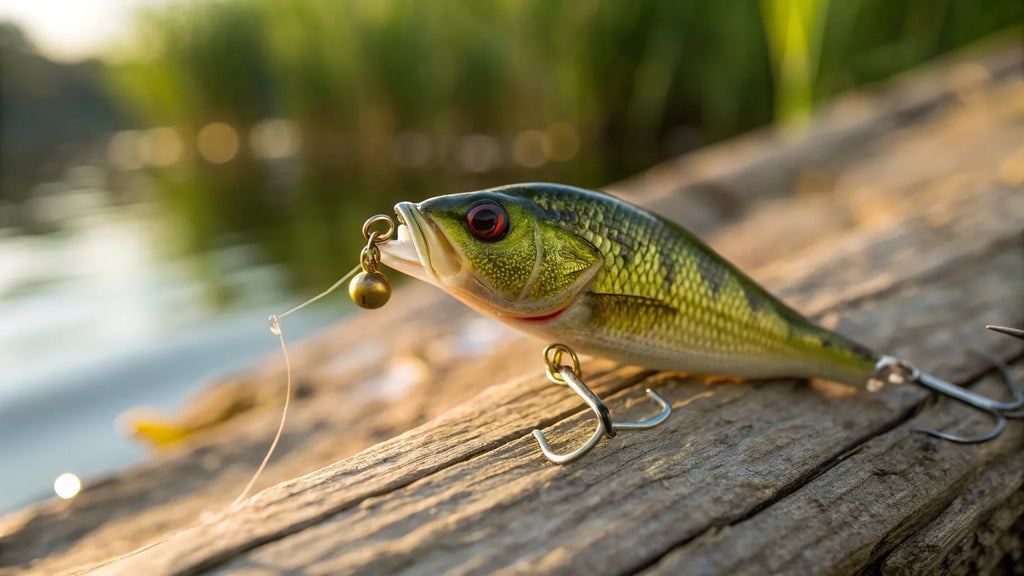
Have you ever wanted to catch more fish by using lures you made yourself? Making your own fishing lures is easier than you think, and it can completely change your fishing experience.
Imagine having unique, custom baits that attract fish better than store-bought ones. You’ll discover simple steps to create your own effective fishing lures. Get ready to boost your fishing success and enjoy the satisfaction of crafting something with your own hands.
Keep reading, and you’ll be ready to start making lures that work!

Credit: www.amazon.com
Choosing Materials
Making your own fishing lures starts with picking the right materials. The materials affect how the lure looks and moves in water.
Choosing good materials helps you create lures that attract fish and last longer.
Types Of Lure Materials
There are many materials to choose from. Each has its own use and effect on the lure’s action.
- Wood:Classic and easy to shape. Common woods are balsa and cedar.
- Plastic:Durable and can be molded into many shapes. Good for soft and hard lures.
- Metal:Used for spoons and spinners. Reflects light to attract fish.
- Rubber and Silicone:Perfect for soft lures like worms and grubs.
- Feathers and Hair:Added to give natural movement and color.
Tools You’ll Need
| Tool | Purpose |
|---|---|
| Knife | Cut and shape wood or plastic |
| Sandpaper | Smooth surfaces and edges |
| Drill | Make holes for hooks and eyes |
| Paintbrushes | Apply paint and finishes |
| Glue | Attach parts and decorations |
| Pliers | Bend wire and attach hooks |
Designing Your Lure
Designing your own fishing lure is both fun and rewarding. The right design attracts fish and improves your catch.
Focus on shapes, sizes, colors, and patterns to make lures that work well in different waters.
Selecting Shapes And Sizes
Choose shapes and sizes based on the type of fish you want to catch. Different fish prefer different lure styles.
- Small, slender shapes work for trout and panfish.
- Large, bulky shapes attract bass and pike.
- Thin, flat shapes mimic injured baitfish.
- Round shapes create more vibration in the water.
- Longer lures move faster and cover more water.
Color And Pattern Ideas
Colors and patterns affect how fish see your lure. Use colors that stand out in the water conditions.
| Water Type | Suggested Colors | Pattern Ideas |
|---|---|---|
| Clear Water | Natural colors like silver, green, and brown | Subtle stripes or dots |
| Murky Water | Bright colors like chartreuse, orange, and white | Bold patterns with high contrast |
| Deep Water | Dark colors like black, blue, and purple | Solid or gradient patterns |
| Shallow Water | Light colors like yellow, pink, and light green | Speckled or spotted patterns |
Crafting The Lure Body
Creating your own fishing lures can be fun and rewarding. The lure body is the starting point for any fishing lure project.
It is important to focus on the shape and size of the body. This will affect how the lure moves in the water.
Carving And Shaping Techniques
Carving the lure body requires patience and precision. You can use different tools like a knife or sandpaper.
Start by sketching the desired shape on the wood. Carefully carve along the lines to form the basic shape.
- Use a sharp knife for detailed work
- Sandpaper smooths rough edges
- Test the balance in water frequently
Assembling Components
Once the body is shaped, it’s time to add components. These include hooks, eyes, and weights for the lure.
Ensure each component is securely attached. This will help the lure function properly and last longer.
| Component | Purpose |
| Hooks | Catches the fish |
| Eyes | Makes the lure look real |
| Weights | Controls the sinking depth |

Credit: www.youtube.com
Adding Hooks And Hardware
Adding hooks and hardware is key to making your fishing lures work well. These parts help the lure catch fish and stay strong in the water.
Choosing the right hooks and attaching split rings and eyes properly will make your lure last longer and catch more fish.
Choosing The Right Hooks
Pick hooks that match the size and type of fish you want to catch. Small hooks work for small fish and big hooks for big fish. The hook should be sharp and rust-resistant.
- Use barbless hooks for easy catch and release
- Choose stainless steel hooks to prevent rust
- Match hook size to lure size for better balance
- Try different hook shapes for different fishing styles
Attaching Split Rings And Eyes
Split rings and eyes connect the hooks to the lure and add movement. Attach them tightly so they do not come off during fishing.
| Hardware | Purpose | Tips |
| Split Rings | Connect hooks to lure | Use pliers to open and close rings without damage |
| Eyes | Attach line or hardware | Glue eyes firmly for extra strength |
| Hooks | Catch fish | Check sharpness before attaching |
Painting And Finishing
Painting and finishing your fishing lures adds color and protection. It helps lures look real and last longer in water.
Good paint and finish make your lure more attractive to fish. Use the right methods for the best results.
Applying Base Coats
Start with a smooth, clean lure surface. Apply a base coat to create a strong paint foundation. This layer hides imperfections and prepares the lure for detail work.
- Use spray paint or airbrush for even coverage
- Choose a color that matches your final design
- Apply thin, light coats to avoid drips
- Let each coat dry completely before adding the next
- Sand lightly between coats for smoothness
Detailing With Paint And Sealants
Add details like stripes, spots, and eyes to make your lure stand out. Use fine brushes or markers for precise work. Seal the paint to protect it from water damage and wear.
| Paint Type | Use | Dry Time | Water Resistance |
|---|---|---|---|
| Acrylic Paint | Details and base coats | 20-30 minutes | Moderate |
| Epoxy Paint | Durable finish | 1-2 hours | High |
| Clear Sealant | Protects paint | 30 minutes to 1 hour | High |

Credit: www.amazon.ca
Testing Your Lures
Testing your fishing lures helps you see how they move in water. You can find out if they attract fish or need changes.
Try different conditions to check the lure’s action. This way, you know if your lure works well before fishing.
Water Testing Tips
Use a clear water container or a small pond for testing. Watch how the lure swims and floats. Look for smooth, natural movements.
- Check if the lure sinks or floats as planned
- Pull the lure slowly to see its swimming action
- Test in calm water to observe details
- Try different speeds to mimic real fish movement
- Look for wobbling or spinning that may scare fish
Adjusting For Better Action
Small changes can improve your lure’s action. Adjust weights, hooks, or fins to get better swimming. Test after each change to see results.
| Adjustment | Effect on Lure |
| Add weight | Makes lure sink faster |
| Remove weight | Makes lure float higher |
| Bend fins | Changes swimming angle |
| Change hook size | Alters lure balance |
| Trim lure body | Reduces drag in water |
Safety And Maintenance
Making your own fishing lures can be fun and rewarding. It is important to keep safety in mind while working. Proper maintenance helps your lures last longer and work better.
Use safe habits when handling sharp tools. Store and care for your lures to avoid damage and injuries.
Handling Tools Safely
Sharp tools like knives and pliers are common in lure making. Always keep your workspace clean. Use tools with care and attention to avoid accidents.
- Wear safety glasses to protect your eyes.
- Cut away from your body to prevent injuries.
- Keep tools sharp to reduce slipping.
- Store tools in a safe place after use.
- Keep children and pets away while working.
Storing And Caring For Lures
Proper storage protects your lures from damage and rust. Clean lures after each use to remove dirt and water. Dry them well before storing.
| Storage Tip | Why It Helps |
| Use tackle boxes with compartments | Keeps lures organized and prevents tangling |
| Apply a light coat of oil on metal parts | Prevents rust and corrosion |
| Avoid direct sunlight | Protects paint and materials from fading |
| Check hooks regularly | Keeps lures sharp and ready to use |
Frequently Asked Questions
What Materials Do I Need To Make Fishing Lures?
You need hooks, paint, wood or plastic bodies, split rings, and eyes. Basic tools include pliers, glue, and a drill. Quality materials ensure durable, effective lures that attract fish.
How Do I Choose The Best Lure Shape?
Select shapes based on target fish species and water conditions. Minnow shapes suit clear water, while bulky shapes work in murky water. Experiment with designs for best results.
Can I Customize Lure Colors For Better Fishing?
Yes, customizing colors can match local baitfish and water clarity. Use waterproof paint and sealants for durability. Bright colors attract fish in low visibility conditions.
How Long Does It Take To Make A Fishing Lure?
Making a basic lure takes about 1-2 hours, including drying time. Complex designs may take longer. Practice improves speed and quality.
Conclusion
Making your own fishing lures can be a fun and rewarding hobby. You control the design and colors to attract more fish. It saves money compared to buying lures from the store. Each lure you create can match the type of fish you want to catch.
Practice improves your skills and results. Start simple and try different materials to see what works best. Enjoy the process and the thrill of catching fish with lures you made yourself. Give it a try and see how it changes your fishing experience.