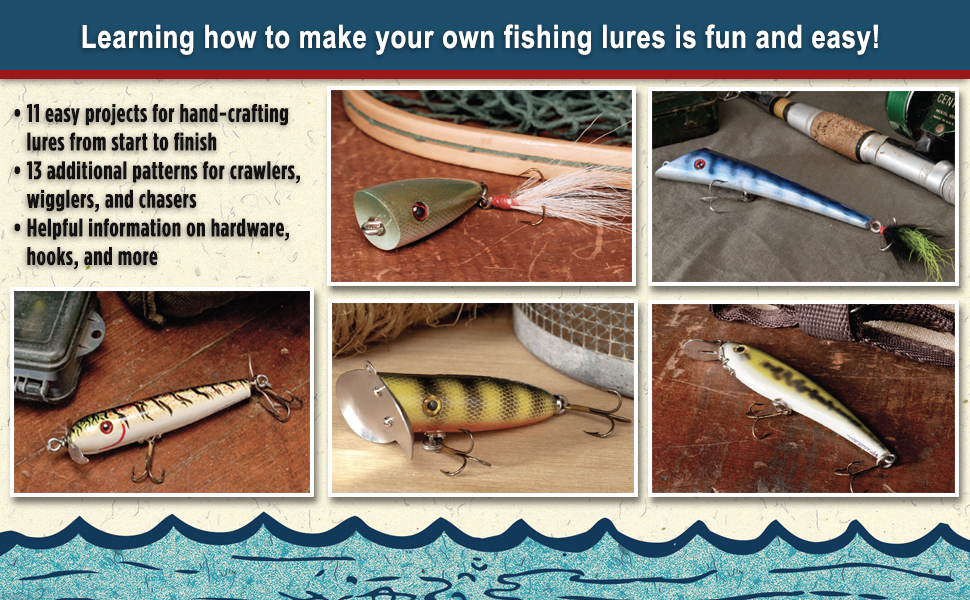
Are you tired of buying expensive fishing lures that don’t always work? Imagine catching more fish with lures you made yourself.
Making your own fishing lures is easier than you think, and it gives you complete control over the size, color, and style. In this guide, you’ll discover simple steps to create lures that attract fish like a magnet. Keep reading, and soon you’ll be casting with confidence using gear you crafted with your own hands.
Choosing Materials
Making your own fishing lures starts with picking the right materials. Your choice affects how the lure looks and works in water.
Good materials help create lures that attract fish and last a long time.
Wood Vs Plastic
Wood and plastic are the main materials for fishing lures. Each has its own benefits and challenges.
Wood feels natural and floats well. Plastic is easy to shape and very durable.
- Wood:Lightweight, good for floating lures, easy to carve.
- Plastic:Strong, can be molded, good for detailed shapes.
- Wood may need sealing to prevent water damage.
- Plastic lures last longer in rough water.
Essential Tools
You need some tools to make your fishing lures properly. The right tools make work easier and the lure better.
Start with basic tools and add more as you get skilled.
- Carving knives or rotary tools for shaping wood or plastic
- Sandpaper for smoothing surfaces
- Drill for making holes for hooks and eyes
- Files for fine shaping
- Paintbrushes for applying colors and finishes
Paints And Finishes
Paint and finish protect your lure and make it look real. Choose paints safe for water use.
Use finishes to seal your lure and stop water from damaging it.
- Acrylic paints dry fast and come in many colors
- Water-resistant finishes protect wood lures
- Clear coats add shine and extra protection
- Use thin layers to keep lure light
Designing Lure Shapes
Making your own fishing lures starts with designing the right shape. The shape affects how the lure moves in water.
Good shapes can attract more fish by mimicking real prey or creating interesting motions.
Popular Lure Types
There are many lure shapes used by anglers. Each shape works for different fish and water conditions.
- Crankbaits: Rounded bodies that dive when pulled
- Spoons: Curved metal that flashes and wobbles
- Jigs: Weighted heads with soft tails
- Spinnerbaits: Blades that spin to catch light
- Soft Plastics: Flexible shapes that imitate worms or minnows
Sketching Your Design
Start by drawing your lure idea on paper. Sketch the side and top views for a clear plan.
Use simple lines to show curves and angles. Mark where hooks and eyes will go.
- Draw smooth curves for natural movement
- Keep shapes balanced for easy casting
- Include details like fins or scales if needed
Balancing And Weight
Balance affects how your lure swims and casts. Too much weight in one spot can make it spin or dive wrong.
Add weight inside or outside the lure. Test by tossing it in water to see how it moves.
- Use small metal balls or lead strips for weight
- Place weight near the center for smooth swimming
- Adjust weight to control depth and speed
Cutting And Shaping
Cutting and shaping are key steps to make your own fishing lures. These steps give the lure its form and size.
Careful cutting and shaping help create lures that move well in water and attract fish.
Using Hand Tools
Hand tools like knives and files let you cut and shape lures slowly. They give good control for small details.
Use sharp blades to cut wood or soft plastic. Files smooth rough edges and shape curves.
- Start with a sharp craft knife for rough cuts
- Use small files to refine the shape
- Work slowly to avoid mistakes
- Wear gloves to protect your hands
Power Tools Tips
Power tools speed up cutting and shaping. A rotary tool or small saw works well for larger pieces.
Keep the tool steady and cut in small steps. This prevents cracks and uneven shapes.
- Use a rotary tool with a cutting bit for detailed shapes
- Try a small band saw for straight cuts
- Wear eye protection when using power tools
- Keep tools clean and sharp for best results
Sanding Techniques
Sanding smooths the lure’s surface and shapes curves. Use different sandpaper grits for best results.
Start with coarse grit to remove big bumps. Finish with fine grit for a smooth finish.
- Begin sanding with 80 or 100 grit paper
- Switch to 220 grit for finer smoothing
- Use very fine grit (400 or higher) for final polish
- Sand with light pressure to keep shape

Credit: www.battlbox.com
Painting And Detailing
Painting and detailing are key steps in making your own fishing lures. These steps help your lure look attractive to fish.
Good paint work can add lifelike colors and patterns. Details make the lure stand out in the water.
Base Coating
Start with a smooth base coat to protect the lure. Use a primer or white paint for good coverage.
Apply thin layers and let each dry well. This helps the paint stick and last longer.
- Use spray or brush-on primer
- Apply 2-3 thin coats for even coverage
- Let each coat dry fully before the next
Adding Patterns
Patterns make your lure look like real bait. Use different colors and shapes to copy fish scales and spots.
Try using fine brushes, sponges, or stencils to add details. Paint small spots or stripes carefully.
- Use thin brushes for small lines and dots
- Sponges add texture and color blending
- Stencils help create consistent patterns
- Let paint dry between layers
Sealing For Durability
Seal your painted lure with a clear coat. This protects the paint from water and scratches.
Use a glossy or matte finish based on your style. Apply several thin layers and let each dry.
- Choose a waterproof clear sealer
- Spray or brush on thin coats
- Allow drying time between coats
- Seal both sides of the lure well
Attaching Hooks And Hardware
Adding hooks and hardware is key to making your fishing lure work well. These parts help catch fish and give the lure movement.
Learn how to pick hooks, install split rings, and add eyes and rattles to improve your lure.
Choosing Hooks
Choose hooks based on the fish size and lure type. Strong hooks work best for big fish. Small hooks suit small fish.
Look for hooks with sharp points and good rust resistance. Stainless steel hooks last longer in water.
- Match hook size to lure size
- Use sharp, rust-resistant hooks
- Choose treble or single hooks as needed
Installing Split Rings
Split rings connect hooks to the lure body. They allow the hook to move freely and keep it strong.
Use split ring pliers to open the ring. Slide the ring through the lure’s eyelet, then attach the hook to the ring.
- Use the right size split ring for your hook
- Open rings carefully with pliers
- Attach rings to eyelets and hooks securely
Adding Eyes And Rattles
Eyes make your lure look real to fish. Rattles add noise to attract fish in murky water.
Glue or stick eyes on the lure’s head. Place rattles inside the body before sealing the lure.
- Use waterproof glue for eyes
- Choose rattles that fit lure size
- Test rattles to make sure they sound well
Testing Your Lures
Testing your fishing lures is a key part of making sure they work well in water. This process helps you see how the lure moves and attracts fish.
Try your lure in different ways to find the best action. Check for problems and fix them before using your lure for fishing.
Water Trials
Start by testing your lure in calm water. Watch how it swims and moves. Look for natural motion that will attract fish.
- Use a small container or bucket for quick tests.
- Try the lure in a pond or slow river to see real water action.
- Pull the lure at different speeds to observe changes in movement.
- Note how the lure behaves when paused or jerked.
Adjusting Action
Change your lure to improve its action if needed. Small tweaks can make a big difference in how it attracts fish.
| Adjustment | Effect on Lure |
| Bend the lip slightly | Changes diving depth |
| Add split rings | Increases lure wobble |
| Attach a different hook | Affects lure balance |
| Trim or shape the body | Alters swimming action |
Troubleshooting Common Issues
If your lure does not work as expected, check these common problems. Fixing them will improve lure performance.
- Lure sinks too fast: add buoyant materials or adjust weight.
- No action or stiff movement: check joints or replace hooks.
- Lure spins or rolls: adjust the weight distribution.
- Paint or finish chips easily: use waterproof sealant or better paint.
Safety Tips
Making your own fishing lures can be fun and rewarding. It is important to stay safe while working with tools and materials.
Follow these safety tips to protect yourself during the lure-making process.
Tool Handling
Use tools carefully to avoid cuts and injuries. Always hold tools firmly and work slowly.
Keep sharp tools like knives and scissors away from your body and fingers.
- Wear protective gloves when using sharp tools.
- Keep tools clean and in good condition.
- Store tools safely after use.
Safe Workspace Setup
Choose a well-lit area to work in. Make sure the workspace is clean and free of clutter.
Use a stable table and chair to keep your materials steady while you work.
- Keep children and pets away from your workspace.
- Have good ventilation if using paints or glues.
- Keep a first aid kit nearby.
Proper Disposal Of Materials
Dispose of leftover paint, glue, and other chemicals safely. Do not pour them down the drain.
Throw away sharp or broken materials in a sturdy container to prevent injuries.
- Follow local rules for chemical disposal.
- Recycle plastic and metal parts if possible.
- Keep hazardous waste out of reach of children.

Credit: www.amazon.com
Maintenance And Storage
Taking care of your fishing lures keeps them ready to use. Good maintenance helps lures last longer.
Proper storage protects your lures from damage and rust. Organize them well to find lures quickly.
Cleaning After Use
Rinse lures with fresh water after each use. This removes salt, dirt, and fish slime.
Dry lures completely before storing them. Use a soft cloth to wipe off moisture carefully.
Preventing Rust
Keep hooks and metal parts dry to stop rust. Use rust remover if you see any spots.
Apply a thin coat of oil on metal parts for extra protection. This helps keep them shiny and strong.
- Store lures in a dry place
- Check hooks often for rust
- Replace rusty parts quickly
Organizing Your Lures
Use tackle boxes with separate compartments for different lures. This prevents tangling and damage.
Label compartments by lure type or size to find them fast. Keep your storage neat and clean.
- Sort by color, size, or style
- Keep similar lures together
- Check storage regularly for damage

Credit: www.youtube.com
Frequently Asked Questions
What Materials Are Needed To Make Fishing Lures?
Basic materials include hooks, paint, wood or plastic, glue, and feathers. Some lures need wire or beads for added attraction. These materials are affordable and easy to find at craft or fishing stores.
How Do I Choose The Right Lure Design?
Select a design based on the fish species you want to catch. Consider local water conditions and common prey. Simple shapes work well for beginners, while detailed designs attract specific fish types.
Can Homemade Lures Catch Big Fish Effectively?
Yes, homemade lures can catch big fish if designed properly. Use strong hooks and durable materials. Customize size and color to mimic local baitfish for better results.
How Do I Paint And Finish Fishing Lures?
Use waterproof, non-toxic paint for durability. Apply multiple thin coats for even coverage. Finish with a clear sealant to protect the lure from water damage and wear.
Conclusion
Making your own fishing lures can be fun and rewarding. It lets you choose colors, shapes, and sizes that fish like. With some simple tools and materials, anyone can create lures at home. This skill saves money and adds a personal touch to fishing trips.
Practice makes perfect, so keep trying new designs. Enjoy the process and watch how fish respond to your handmade lures. Give it a shot and see the difference yourself. Fishing becomes more exciting with your own custom bait.