
Are you tired of using floor cleaners filled with harsh chemicals that leave your home smelling artificial? What if you could make your own floor cleaner that’s safe, effective, and affordable?
Imagine having a sparkling clean floor without worrying about harmful ingredients or breaking the bank. You’ll discover simple steps to create your own floor cleaner using ingredients you probably already have at home. Stick with me, and by the end, you’ll have a natural solution that keeps your floors shining and your space healthy.
Ready to transform your cleaning routine? Let’s get started!
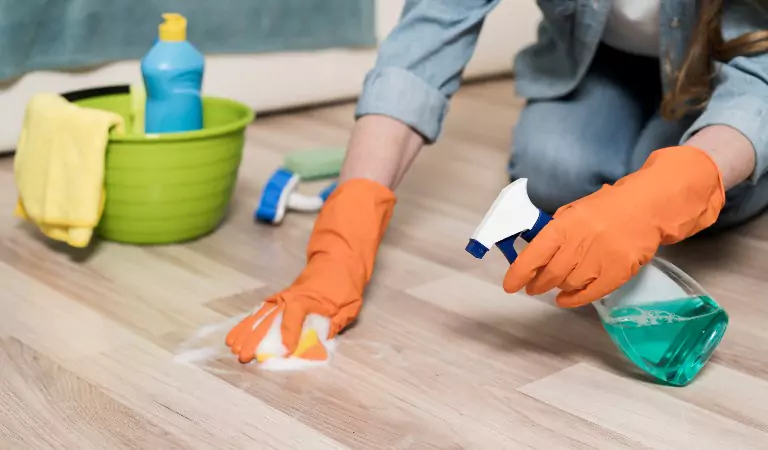
Credit: www.bondcleaninginperth.com.au
Benefits Of Homemade Floor Cleaners
Making your own floor cleaner brings many benefits. It lets you control ingredients and save money. Homemade cleaners suit your needs and keep your home safe. They also help protect the environment.
Cost Savings
Homemade floor cleaners use simple, cheap ingredients. Baking soda, vinegar, and water cost less than store brands. You buy small amounts and make large batches. This reduces waste and lowers cleaning costs over time.
Eco-friendly Ingredients
Natural ingredients break down easily and do not pollute. They avoid harsh chemicals found in many commercial cleaners. Using homemade cleaners helps keep air and water clean. It supports a healthier planet and reduces plastic waste.
Customizable Scents And Strengths
You choose scents using essential oils like lemon or lavender. Adjust the strength for different floor types or dirt levels. Make a gentle cleaner for wood or a stronger one for tiles. This flexibility lets you create exactly what your floors need.
Safety For Pets And Children
Homemade cleaners avoid toxic chemicals that harm pets and kids. They use safe, non-irritating ingredients. This lowers the risk of allergies and accidents. Your home stays clean and safe for everyone living there.
Essential Ingredients To Have
Knowing the essential ingredients for making your own floor cleaner can save you money and reduce exposure to harsh chemicals. These simple components are easy to find and work well together to keep your floors spotless. Let’s look at what you need to have on hand to create an effective and natural floor cleaner.
Vinegar And Baking Soda
Vinegar is a powerful natural cleaner. It cuts through grease and disinfects surfaces without leaving harmful residues.
Baking soda adds gentle scrubbing power and helps neutralize odors. Together, they tackle tough grime and brighten floors.
Have you noticed how vinegar’s acidity can break down dirt but still stay safe for most floor types? Pairing it with baking soda creates a fizz that lifts away stubborn stains.
Castile Soap
Castile soap is a versatile, plant-based soap that cleans without harsh chemicals. It’s gentle yet effective on various floor surfaces.
Adding a small amount of Castile soap gives your cleaner a good lather and helps dissolve oils and dirt easily.
If you want a cleaner that’s safe around kids and pets, Castile soap is a reliable choice that won’t irritate skin or lungs.
Essential Oils
Essential oils do more than make your floor cleaner smell great. Many have antibacterial and antifungal properties.
Popular oils like tea tree, lavender, and lemon add freshness and extra cleaning power.
Do you enjoy customizing your cleaner’s scent? Adding a few drops of your favorite essential oil can make cleaning feel less like a chore and more like a refreshing ritual.
Water And Other Additives
Water is the base of your floor cleaner. Use warm water to help dissolve ingredients better.
You can also add ingredients like rubbing alcohol for faster drying or a bit of salt for extra scrubbing power.
Think about your floor type—some additives work better on tile, while others suit wood or laminate floors. Adjust your recipe accordingly to protect your surfaces.
Basic Floor Cleaner Recipe
Creating your own floor cleaner is simpler than you might think. This basic floor cleaner recipe uses everyday ingredients that you probably already have at home. It’s effective, safe, and budget-friendly—perfect for keeping your floors spotless without harsh chemicals.
Materials Needed
- 1 cup of white vinegar
- 1 gallon of warm water
- 1 tablespoon of liquid dish soap (preferably biodegradable)
- A spray bottle or bucket
- A mop or microfiber cloth
These materials are easy to find and cost very little. White vinegar acts as a natural disinfectant and deodorizer. Dish soap helps break down dirt and grease, making your floors shine.
Step-by-step Preparation
- Pour 1 gallon of warm water into your bucket or spray bottle.
- Add 1 cup of white vinegar to the water.
- Mix in 1 tablespoon of liquid dish soap carefully to avoid excessive suds.
- Stir the mixture gently to combine all ingredients well.
Mixing the ingredients is quick and doesn’t require any special tools. You’ll notice the vinegar smell fades as it dries, leaving your floors fresh. Have you ever tried a cleaner that’s both powerful and simple to make?
Usage Tips
- Test a small area first to ensure the cleaner is safe for your floor type.
- Use a mop for large areas or a microfiber cloth for spot cleaning.
- Rinse the floor with clean water if you have sensitive flooring like marble or hardwood.
- Store any leftover cleaner in a labeled spray bottle for easy use later.
Using this cleaner regularly can save money and reduce exposure to chemicals. Remember, a little goes a long way—over-wetting floors can cause damage. How often do you think you could switch to a homemade cleaner for your floors?
Recipes For Different Floor Types
Different floor types need different cleaning solutions. Using the right recipe keeps floors safe and shiny. Homemade cleaners save money and avoid harsh chemicals. Here are easy recipes for wood, tile, laminate, and stone floors.
Wood Floors
Wood floors need gentle cleaning to avoid damage. Use this mild mix:
- 1 cup warm water
- 1/4 cup white vinegar
- 1 tablespoon olive oil
- Few drops of essential oil (optional)
Mix well. Dampen a cloth or mop, not soaking wet. Clean in the direction of wood grain. Olive oil helps keep wood shiny and nourished.
Tile And Ceramic Floors
Tile and ceramic floors handle stronger cleaners. Try this fresh recipe:
- 1 gallon warm water
- 1/2 cup white vinegar
- 1 tablespoon liquid dish soap
Combine ingredients. Mop the floor thoroughly. Vinegar removes dirt and kills germs. Rinse with clean water if needed.
Laminate Floors
Laminate floors can swell from too much water. Use a light cleaner:
- 1 cup warm water
- 1/4 cup rubbing alcohol
- 1 teaspoon dish soap
Mix well. Use a damp mop, not wet. Alcohol evaporates fast, preventing damage. Wipe dry quickly to avoid water spots.
Stone Floors
Stone floors need pH-neutral cleaning to avoid etching. Try this safe recipe:
- 1 gallon warm water
- 1/4 cup mild liquid soap (pH-neutral)
Mix gently. Mop the floor with this solution. Avoid vinegar or acidic cleaners. Rinse well and dry to keep stone beautiful.
Natural Disinfecting Floor Cleaners
Natural disinfecting floor cleaners offer a safe way to keep floors clean and germ-free. They avoid harsh chemicals and reduce indoor air pollution. These cleaners use ingredients known for their antibacterial and antiviral properties. Using natural disinfectants protects your family and pets from harmful residues.
Many natural products also leave a fresh scent. They clean effectively without damaging surfaces. These options are easy to make at home with common items. Here are some popular natural disinfecting ingredients for floor cleaners.
Using Tea Tree Oil
Tea tree oil is a powerful natural disinfectant. It fights bacteria, viruses, and fungi on contact. Adding a few drops to water creates a strong floor cleaner. It also leaves a fresh, medicinal scent in the room.
- Mix 10 drops of tea tree oil with 1 cup of water.
- Add 1/2 cup white vinegar for extra cleaning power.
- Use a mop or cloth to apply to floors.
Tea tree oil works well on tile, wood, and laminate floors. Avoid using it on sensitive surfaces without testing first.
Lemon Juice Benefits
Lemon juice is a natural disinfectant and deodorizer. Its acidity helps kill germs and remove stains. Lemon also adds a clean, citrus scent to floors.
- Combine 1/2 cup lemon juice with 1 gallon of warm water.
- Add 1/4 cup baking soda for extra scrubbing power.
- Mop floors and let air dry for fresh results.
Lemon juice works best on sealed hardwood and tile floors. It brightens surfaces and reduces bacteria.
Hydrogen Peroxide Options
Hydrogen peroxide is a strong, natural disinfectant. It kills germs quickly and breaks down into water and oxygen. Using it dilutes the risk of damage to floors.
- Mix 1/2 cup 3% hydrogen peroxide with 1 gallon of water.
- Optionally add a few drops of essential oil for scent.
- Use a mop or spray bottle for application.
This solution works well for grout, tile, and vinyl floors. Avoid using on unfinished wood or delicate surfaces.

Credit: housewifehowtos.com
Storage And Shelf Life
Proper storage is essential to keep your homemade floor cleaner effective and safe to use. Without the right container and handling, the cleaner can lose its cleaning power or even become contaminated. Understanding how to store your cleaner and when to refresh it can save you money and effort.
Proper Containers
Choose containers made of glass or high-quality plastic with tight-fitting lids. Avoid metal containers, as some ingredients can react and alter the cleaner’s effectiveness. Clear containers let you see the cleaner’s condition, but dark bottles help protect against light damage if you use essential oils.
Label your container with the date you made the cleaner. This simple step helps you track how long it’s been stored and when it might be time to make a fresh batch. Consider using spray bottles for easy application and storage convenience.
Avoiding Contamination
Always use clean utensils when scooping or pouring your cleaner to prevent introducing dirt or bacteria. Never dip dirty mops or cloths back into the container. This habit can quickly spoil your cleaner and reduce its shelf life.
Keep the container tightly closed when not in use. Exposure to air can allow dust and microbes to enter, weakening the cleaner’s effectiveness. Think about where you store it—avoid damp or overly warm areas that encourage bacterial growth.
When To Make Fresh Batches
Homemade floor cleaners typically last about one to two weeks, depending on the ingredients used. If your cleaner starts to smell off, changes color, or separates, it’s time to discard it and make a new batch. Trust your senses and don’t hesitate to refresh the cleaner for the best results.
Have you noticed any changes in your cleaner after a week? Keeping a close eye on its condition helps you avoid ineffective cleaning and maintain a fresh, safe home environment. Making small batches often ensures your floors get the best care every time.
Common Mistakes To Avoid
Making your own floor cleaner is simple and cost-effective. Avoid mistakes that reduce its power or damage floors. Knowing common errors helps you get the best results every time.
Mixing Incompatible Ingredients
Some ingredients react badly together. Mixing bleach with vinegar creates harmful gases. Combining ammonia and bleach is toxic. Use safe, tested recipes only. Stick to one type of cleaner per batch.
Using Too Much Cleaner
More cleaner does not mean cleaner floors. Excess cleaner leaves a sticky residue. This attracts dirt and dulls shine. Follow the recipe amounts carefully. Measure ingredients to avoid waste and damage.
Ignoring Floor Material Sensitivities
Different floors need different cleaners. Wood floors can get damaged by water or harsh acids. Tiles and vinyl handle more moisture but avoid abrasive scrubs. Always check what your floor type can handle. Use gentle cleaners for delicate surfaces.

Credit: housewifehowtos.com
Tips For Best Cleaning Results
Getting the best results from your homemade floor cleaner requires more than just mixing ingredients. How you prepare, apply, and care for your floors afterward makes a huge difference. Let’s look at key tips that will help you clean smarter, not harder.
Pre-cleaning Preparation
Start by clearing the floor of any loose dirt, dust, or debris. Sweep or vacuum thoroughly to avoid scratching the surface during mopping.
Spot clean any sticky or stubborn stains before mopping. This prevents spreading grime and helps your cleaner work more effectively.
Think about the type of floor you have—wood, tile, or laminate—and choose your cleaner ingredients accordingly. Using the wrong mix can damage surfaces.
Proper Mopping Techniques
Dip your mop into the solution and wring it out well. Too much water can leave streaks or cause damage, especially on wooden floors.
Use smooth, even strokes, moving in the direction of the floor’s grain or tile lines. This helps lift dirt without pushing it around.
Rinse the mop regularly to avoid redistributing dirt. Changing your cleaning water halfway through can also keep your floor cleaner.
Drying And Maintenance
After mopping, dry the floor with a clean, dry cloth or let it air dry quickly to prevent water spots or damage.
Regularly clean your mop and storage area to avoid bacterial growth and unpleasant odors. A clean mop means cleaner floors.
Consider applying a natural polish or floor conditioner occasionally to protect the surface and extend the life of your floors.
Frequently Asked Questions
What Ingredients Are Needed For Homemade Floor Cleaner?
Common ingredients include water, vinegar, baking soda, and essential oils. These are natural, effective, and safe for most floors.
How Do I Make A Natural Floor Cleaner At Home?
Mix 1 cup vinegar with 1 gallon warm water. Add a few drops of essential oil for fragrance.
Is Homemade Floor Cleaner Safe For All Floor Types?
Homemade cleaners are safe for tile, vinyl, and sealed wood floors. Avoid vinegar on natural stone as it may damage it.
How Often Should I Use Homemade Floor Cleaner?
Use it once a week or as needed for regular cleaning. It helps maintain cleanliness without harsh chemicals.
Conclusion
Creating your own floor cleaner is simple and effective. You use natural ingredients that are safe and eco-friendly. This saves money and reduces chemical exposure. Plus, you get a fresh and clean home. Experiment with different scents and ingredients. Find what works best for your floors.
Homemade cleaners offer flexibility and control. They make cleaning less of a chore. Enjoy a sparkling floor with your custom solution. Give it a try today. Discover the joy of DIY cleaning. Your floors will thank you.