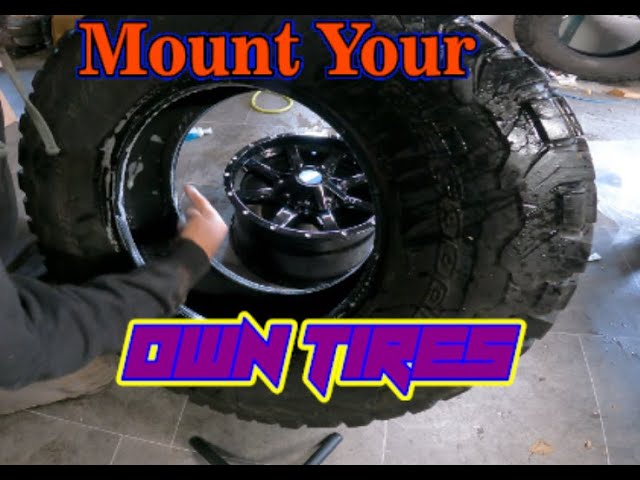
Mounting a car tire might seem tricky if you’ve never done it before. But with the right steps, you can do it quickly and safely on your own.
Imagine saving time and money by handling this yourself instead of waiting for help. In this guide, you’ll learn simple, clear instructions that anyone can follow. Keep reading, and you’ll gain the confidence to mount your car tire like a pro.
Your car—and your wallet—will thank you.
Tools Needed
Mounting a car tire requires some specific tools. These tools help you do the job safely and correctly.
Using the right equipment makes the process faster and prevents damage to your tire and wheel.
Essential Equipment
You need several tools to mount a tire properly. Each tool has a special purpose during the mounting process.
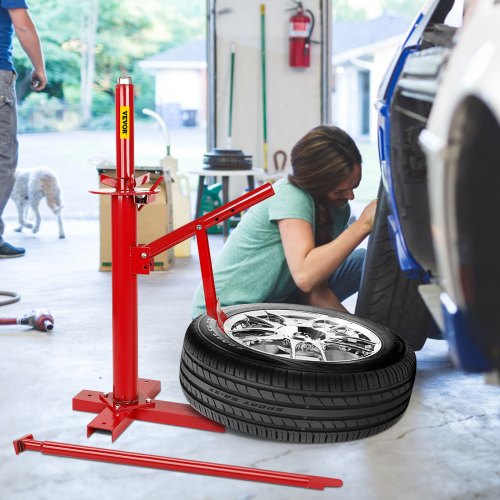
- Tire Iron or Pry Bar: To help remove and fit the tire on the rim.
- Bead Breaker: To separate the tire bead from the wheel.
- Tire Mounting Lubricant: To make tire installation easier and protect the bead.
- Air Compressor with a Tire Inflator: To inflate the tire after mounting.
- Valve Stem Tool: To install or remove valve stems.
- Tire Balancer (optional): To balance the tire after mounting.
Safety Gear
Wearing safety gear helps protect you during tire mounting. Tires and tools can cause injury if not handled carefully.
Safety gear keeps your hands, eyes, and body safe from sharp edges and flying debris.
- Work Gloves: Protect your hands from cuts and scrapes.
- Safety Glasses: Guard your eyes against dust and debris.
- Closed-Toe Shoes: Protect feet from heavy tools or tires.
- Long Sleeves or Protective Clothing: Prevent skin scrapes and dirt.
Credit: www.vevor.com
Preparing The Tire
Mounting a car tire starts with proper preparation. Getting the tire ready helps ensure safety and performance.
Preparation includes checking the tire for damage and cleaning the rim. These steps help the tire fit well.
Inspecting The Tire
Look over the tire carefully before mounting. Check for cuts, cracks, or bulges that could cause problems.
Also, check the tire’s tread depth. Worn tread can reduce grip on the road and make driving unsafe.
- Check for visible damage like cuts or punctures
- Feel for cracks or dry rot on the sidewalls
- Measure tread depth to ensure it is above legal limits
- Look for any unusual bulges or bumps
Cleaning The Rim
Clean the rim to remove dirt, rust, and old tire residue. A clean rim helps the tire seal properly.
Use a wire brush or cloth with cleaner to scrub the rim surface. Make sure the rim is dry before mounting.
- Remove old rubber and dirt from the rim edge
- Clean rust spots to avoid air leaks
- Wipe the rim dry to prevent slipping
Removing The Old Tire
Removing an old tire is the first step to mount a new one. It needs care and the right tools. Follow these simple instructions to do it safely.
This guide covers loosening the lug nuts, lifting the vehicle, and taking off the wheel.
Loosening The Lug Nuts
Before lifting the vehicle, loosen the lug nuts on the tire. This makes removal easier and safer.
- Use a lug wrench that fits your lug nuts.
- Turn the wrench counterclockwise to loosen each nut.
- Do not remove the nuts yet; just break their tight grip.
- If nuts are too tight, apply firm pressure carefully.
Lifting The Vehicle
After loosening the lug nuts, lift the vehicle to take off the tire safely. Use a jack designed for your car.
| Tool | Purpose | Safety Tip |
|---|---|---|
| Car jack | Raises the vehicle | Place on flat ground |
| Jack stand | Supports the vehicle | Never rely on jack alone |
| Wheel chocks | Stops car movement | Place behind wheels |
Position the jack under the vehicle’s frame near the tire. Pump the jack handle to raise the car. Secure the vehicle with jack stands.
Taking Off The Wheel
Once the vehicle is lifted, fully remove the lug nuts and take the wheel off.
- Remove the loosened lug nuts completely.
- Keep the nuts safe so you don’t lose them.
- Pull the wheel straight off the hub.
- Place the wheel aside on a flat surface.

Credit: www.youtube.com
Mounting The New Tire
Mounting a new car tire needs care and the right steps. This guide shows you how to do it safely and correctly.
Follow each part carefully to ensure the tire fits well and works properly on your vehicle.
Aligning The Tire And Rim
Place the tire close to the rim. Make sure the tire’s valve stem lines up with the rim’s valve hole. This helps with proper inflation later.
- Check the tire size matches the rim size.
- Position the tire so the tread faces outward.
- Align the tire bead with the rim edge all around.
- Ensure the tire sits evenly on the rim without gaps.
Seating The Bead
The bead is the edge of the tire that seals against the rim. You need to seat it evenly for a good fit and to avoid air leaks.
Use a tire lever or similar tool to push the bead over the rim edge. Do this slowly and evenly on both sides.
| Tool | Purpose |
|---|---|
| Tire Lever | Helps lift and seat the tire bead on the rim |
| Soapy Water | Lubricates bead for easier seating |
| Gloves | Protects your hands during the process |
Inflating The Tire
Inflate the tire slowly to seat the bead fully against the rim. Watch and listen for the bead snapping into place.
- Attach the air hose to the valve stem securely.
- Start inflating the tire with low pressure.
- Check that the bead seats evenly around the rim.
- Inflate to the tire’s recommended pressure.
- Remove the air hose and replace the valve cap.
Securing The Wheel
Securing a car tire properly is important for safety. It ensures the wheel stays attached while driving.
This guide explains how to place the wheel, tighten lug nuts, and lower the vehicle safely.
Placing The Wheel On The Hub
Align the wheel holes with the hub bolts carefully. Make sure the wheel fits flush against the hub.
- Lift the wheel and hold it steady.
- Line up the holes with the wheel studs.
- Slide the wheel onto the hub fully.
- Check that the wheel sits flat on the hub surface.
Tightening Lug Nuts
Tighten the lug nuts in a star pattern to secure the wheel evenly. This prevents wobbling and damage.
| Step | Action |
| 1 | Place lug nuts on studs and hand-tighten. |
| 2 | Use a wrench to tighten each nut slightly in a star pattern. |
| 3 | Repeat tightening until all nuts are snug. |
| 4 | Use a torque wrench to tighten nuts to the manufacturer’s specs. |
Lowering The Vehicle
Once the wheel is secured, lower the vehicle slowly. Do this to safely bring the car back to the ground.
- Remove the jack stand if used.
- Use the jack to lower the car carefully.
- Ensure the vehicle rests fully on the ground.
- Double-check lug nuts for tightness after lowering.
Final Checks
After mounting a car tire, you must do some final checks. These checks keep you safe and ensure the tire works well.
Pay close attention to pressure, lug nuts, and how the car drives. These steps help avoid problems on the road.
Checking Tire Pressure
Check the tire pressure with a reliable gauge. Use the car’s recommended pressure from the manual or sticker.
Proper pressure helps with tire life, fuel efficiency, and safety. Adjust pressure if needed before driving.
- Remove valve cap
- Press gauge firmly on valve
- Read and compare pressure
- Add or release air to match recommended level
- Replace valve cap
Ensuring Lug Nuts Are Tight
Make sure lug nuts are tight after mounting the tire. Loose nuts can cause the wheel to wobble or fall off.
Use a torque wrench if possible. Tighten nuts in a star pattern to apply even pressure on the wheel.
- Hand tighten all lug nuts first
- Tighten one nut, then move across diagonally
- Repeat until all nuts are tight
- Check torque to match vehicle’s specs
Test Drive Tips
Drive slowly at first after mounting the tire. Listen and feel for any unusual sounds or vibrations.
If you notice shaking, pulling, or noise, stop and check the tire and lug nuts again. Safe driving depends on this.
- Start with slow speeds in a safe area
- Check steering and braking feel
- Listen for strange noises
- Stop and inspect if something feels wrong
Common Mistakes To Avoid
Mounting a car tire may seem simple, but many people make errors. These mistakes can cause damage or unsafe driving conditions. Avoiding them ensures your tire lasts longer and works well.
Learn about common errors to watch for during tire mounting. Fixing these will save time and money in the long run.
Overtightening Lug Nuts
Many people tighten lug nuts too much. This can damage the wheel or break the studs. It also makes future tire changes harder. Use a torque wrench and follow the car maker’s torque guide.
- Use a torque wrench, not just a regular wrench.
- Tighten nuts in a star pattern for even pressure.
- Check torque after driving a few miles.
- Do not use impact tools for final tightening.
Ignoring Tire Balance
Unbalanced tires cause vibration and uneven wear. Many skip balancing, but it is important. Balancing fixes weight differences around the tire and wheel. It helps the car run smoothly and safely.
| Problem | Effect |
| Unbalanced Tire | Vibration in steering wheel |
| Uneven Wear | Shorter tire life |
| Poor Handling | Less control on road |
| Increased Fuel Use | More fuel consumption |
Skipping Safety Precautions
Not using safety gear or tools can cause injury. Always protect yourself and secure the car before working on tires. This keeps you safe and helps prevent accidents.
- Wear gloves to protect your hands.
- Use wheel chocks to stop the car from rolling.
- Lift the car with a jack on a flat surface.
- Never go under a car supported only by a jack.
- Keep tools organized and within reach.

Credit: www.vevor.ca
Frequently Asked Questions
How Do I Prepare My Tire For Mounting?
Start by inspecting the tire for damage or debris. Clean the tire and rim thoroughly. Ensure both are dry before proceeding. Check the tire’s directional arrows for proper alignment. Have your tools ready, including a tire iron and lubricant. Proper preparation ensures a smoother mounting process.
What Tools Do I Need For Tire Mounting?
You’ll need a tire iron, lubricant, and an air compressor. A mounting machine or tire changer is helpful. Make sure you have safety gloves and goggles. Having the right tools makes the process easier and safer. Ensure all tools are in good working condition before starting.
How Do I Safely Mount A Tire?
Begin by placing the tire over the rim. Use lubricant to ease the mounting process. Carefully use a tire iron to secure the tire on the rim. Inflate the tire gradually, checking the pressure. Ensure the tire is evenly mounted and balanced.
Follow safety guidelines to prevent accidents.
Can I Mount A Tire Without A Machine?
Yes, you can mount a tire manually with some effort. Use a tire iron and lubricant. Begin by securing one side of the tire onto the rim. Use the iron to work the other side onto the rim. This method requires patience and caution to avoid damage.
Conclusion
Mounting a car tire is easier than many think. Follow each step with care and patience. Use the right tools to avoid damage or injury. Check the tire pressure after mounting for safety. Practice makes the process quicker and smoother.
Taking your time helps prevent costly mistakes. Now, you can handle tire mounting with more confidence. Keep safety your top priority at all times. You are ready to maintain your car tires well.