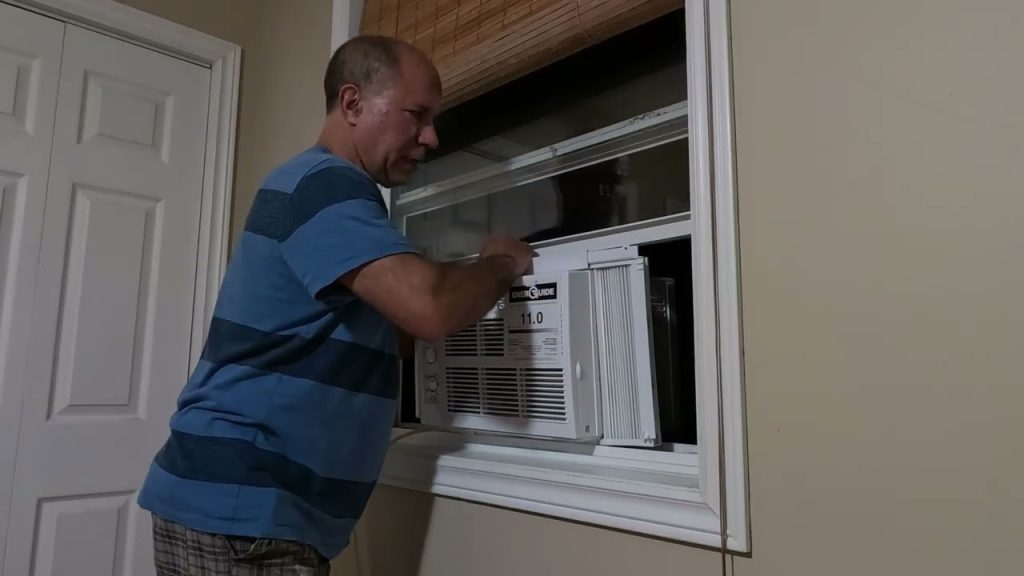
Are you ready to beat the heat without breaking the bank? Mounting an air conditioner in your window might seem tricky, but with the right steps, you can do it yourself quickly and safely.
Imagine enjoying cool, refreshing air in your room, all set up by your own hands. In this guide, you’ll discover simple, clear instructions that take the guesswork out of installation. Keep reading, and by the end, you’ll have the confidence to mount your air conditioner perfectly—no expert needed.
Your comfort is just a few easy steps away!

Credit: thefurnaceoutlet.com
Choose The Right Air Conditioner
Picking the right air conditioner for your window is important. It helps cool your room efficiently and saves energy.
You should check your window size and the room space before buying an AC unit. This guide will help you choose well.
Measure Your Window
Measure the width and height of your window opening. This ensures the AC unit fits perfectly.
Use a tape measure to get accurate numbers. Write down the measurements in inches.
- Measure the width from left to right
- Measure the height from top to bottom
- Check if the window opens horizontally or vertically
Select Appropriate Ac Unit Size
Choose an AC unit size that matches your room’s square footage. Too small or too large units do not cool well.
Look at the BTU (British Thermal Unit) rating on the AC. It shows how powerful the unit is.
| Room Size (sq ft) | Recommended BTU |
|---|---|
| Up to 150 | 5,000 – 6,000 |
| 150 – 250 | 6,000 – 8,000 |
| 250 – 350 | 8,000 – 10,000 |
| 350 – 450 | 10,000 – 12,000 |
| 450 – 550 | 12,000 – 14,000 |

Credit: archexteriors.com
Gather Necessary Tools And Materials
Mounting an air conditioner in a window needs careful preparation. You should gather all tools and materials before starting.
Having the right items ready helps you work safely and finish faster. This guide covers what you need to collect.
List Essential Tools
These tools are necessary to install your air conditioner correctly. Make sure each item is in good condition.
- Screwdriver (flathead and Phillips)
- Measuring tape
- Level tool
- Drill with drill bits
- Utility knife
- Caulk gun and weatherproof sealant
- Support brackets (if required)
- Extension cord (heavy duty, if needed)
Prepare Safety Equipment
Safety is very important during installation. Use the right equipment to protect yourself from injury.
| Safety Item | Purpose |
| Work gloves | Protect hands from sharp edges |
| Safety glasses | Protect eyes from dust and debris |
| Stable ladder | Help reach high windows safely |
| Non-slip shoes | Prevent falls and slips |
| Mask | Keep dust and particles out of your nose and mouth |
Prepare The Window Area
Mounting an air conditioner in a window needs a clean and clear space. Prepare the window area well for a safe and steady installation.
This guide focuses on cleaning the window frame and removing anything blocking the space.
Clean The Window Frame
Start by cleaning the window frame thoroughly. Dirt and dust can stop the air conditioner from fitting tightly.
- Remove dust with a dry cloth.
- Use soapy water to clean stubborn grime.
- Dry the frame completely to avoid moisture damage.
- Check for cracks or damage that need fixing before installation.
Remove Obstructions
Clear the area around the window to allow easy access. Obstructions can make installation difficult and unsafe.
Here is a checklist of common obstructions to remove:
- Furniture near the window
- Window screens or bars
- Heavy curtains or blinds
- Plants or decorations on the sill
Install Mounting Brackets
Mounting brackets hold your air conditioner safely in the window. Installing them correctly keeps the unit stable.
Follow clear steps to place and secure the brackets. This helps avoid damage and ensures good support.
Locate Bracket Positions
Start by checking the window frame for strong spots. The brackets need solid support to hold the air conditioner.
Measure the width and height of the air conditioner. Mark where the brackets will fit best on the window sill.
- Look for sturdy parts of the window frame
- Mark bracket spots evenly spaced
- Keep brackets level for balance
Secure Brackets Properly
Use screws that match the bracket holes. Tighten them well to avoid any movement or wobbling.
Check that brackets hold firm before placing the air conditioner. Test by gently shaking the brackets after installation.
- Use screws suitable for your window frame material
- Double-check bracket tightness
- Make sure brackets are level and stable
Place The Air Conditioner
Placing your air conditioner correctly in the window is important for its performance. This step helps the unit cool your room efficiently.
Follow simple guidelines to lift and position the unit safely. Also, make sure the AC is level to avoid problems.
Lift And Position Ac Unit
Ask for help if the AC unit is heavy. Lift it carefully and slide it into the window opening from outside. The back should rest on the window sill.
- Hold the unit firmly with both hands.
- Place the bottom of the unit on the window sill first.
- Slide the top part into the window frame gently.
- Make sure the unit fits securely without gaps.
- Close the window sash behind the top of the AC.
Ensure Proper Leveling
Leveling the air conditioner helps water drain outside. This stops leaks inside your home and keeps the unit working well.
| Check Point | Correct Position |
| Front of AC | Slightly lower than back |
| Back of AC | Raised for drainage |
| Side to Side | Level to window frame |
Use a carpenter’s level to check. Adjust by placing small shims under the unit’s front corners if needed. This keeps the unit stable and draining correctly.
Credit: www.angi.com
Seal Gaps Around The Unit
Sealing gaps around your window air conditioner keeps air from escaping. It helps your room stay cool and saves energy.
Small gaps let warm air in and cold air out. Sealing these gaps is an important step after mounting the unit.
Use Foam Or Weatherstripping
Foam and weatherstripping fill the spaces between the air conditioner and the window frame. They stop air from leaking through.
Cut foam pieces to fit the gaps. Press weatherstripping along edges where the unit meets the window. This creates a tight seal.
- Use foam strips for large gaps
- Apply weatherstripping for narrow spaces
- Choose weatherproof materials for durability
- Check the seal after installation
Check For Air Leaks
After sealing, check for air leaks to make sure the job is done right. Leaks reduce cooling efficiency.
Close the window and feel around the edges of the air conditioner. You can also use a candle flame or incense stick to spot moving air.
- Look for drafts near foam or weatherstripping
- Fix any gaps by adding more foam or weatherstripping
- Repeat the test until no leaks are found
Secure The Window And Unit
Properly securing your air conditioner in the window keeps it safe. It also stops air leaks and helps the unit work well.
Follow these simple steps to close and lock the window, and attach the side panels correctly.
Close And Lock The Window
After placing the air conditioner in the window, close the window sash firmly against the top of the unit. This keeps the unit steady and prevents it from moving or falling.
- Lower the window sash slowly until it rests on the unit.
- Check that the window is flush against the air conditioner frame.
- Use window locks or screws to keep the window sash from opening.
- Seal any gaps with weatherstripping or foam to stop air leaks.
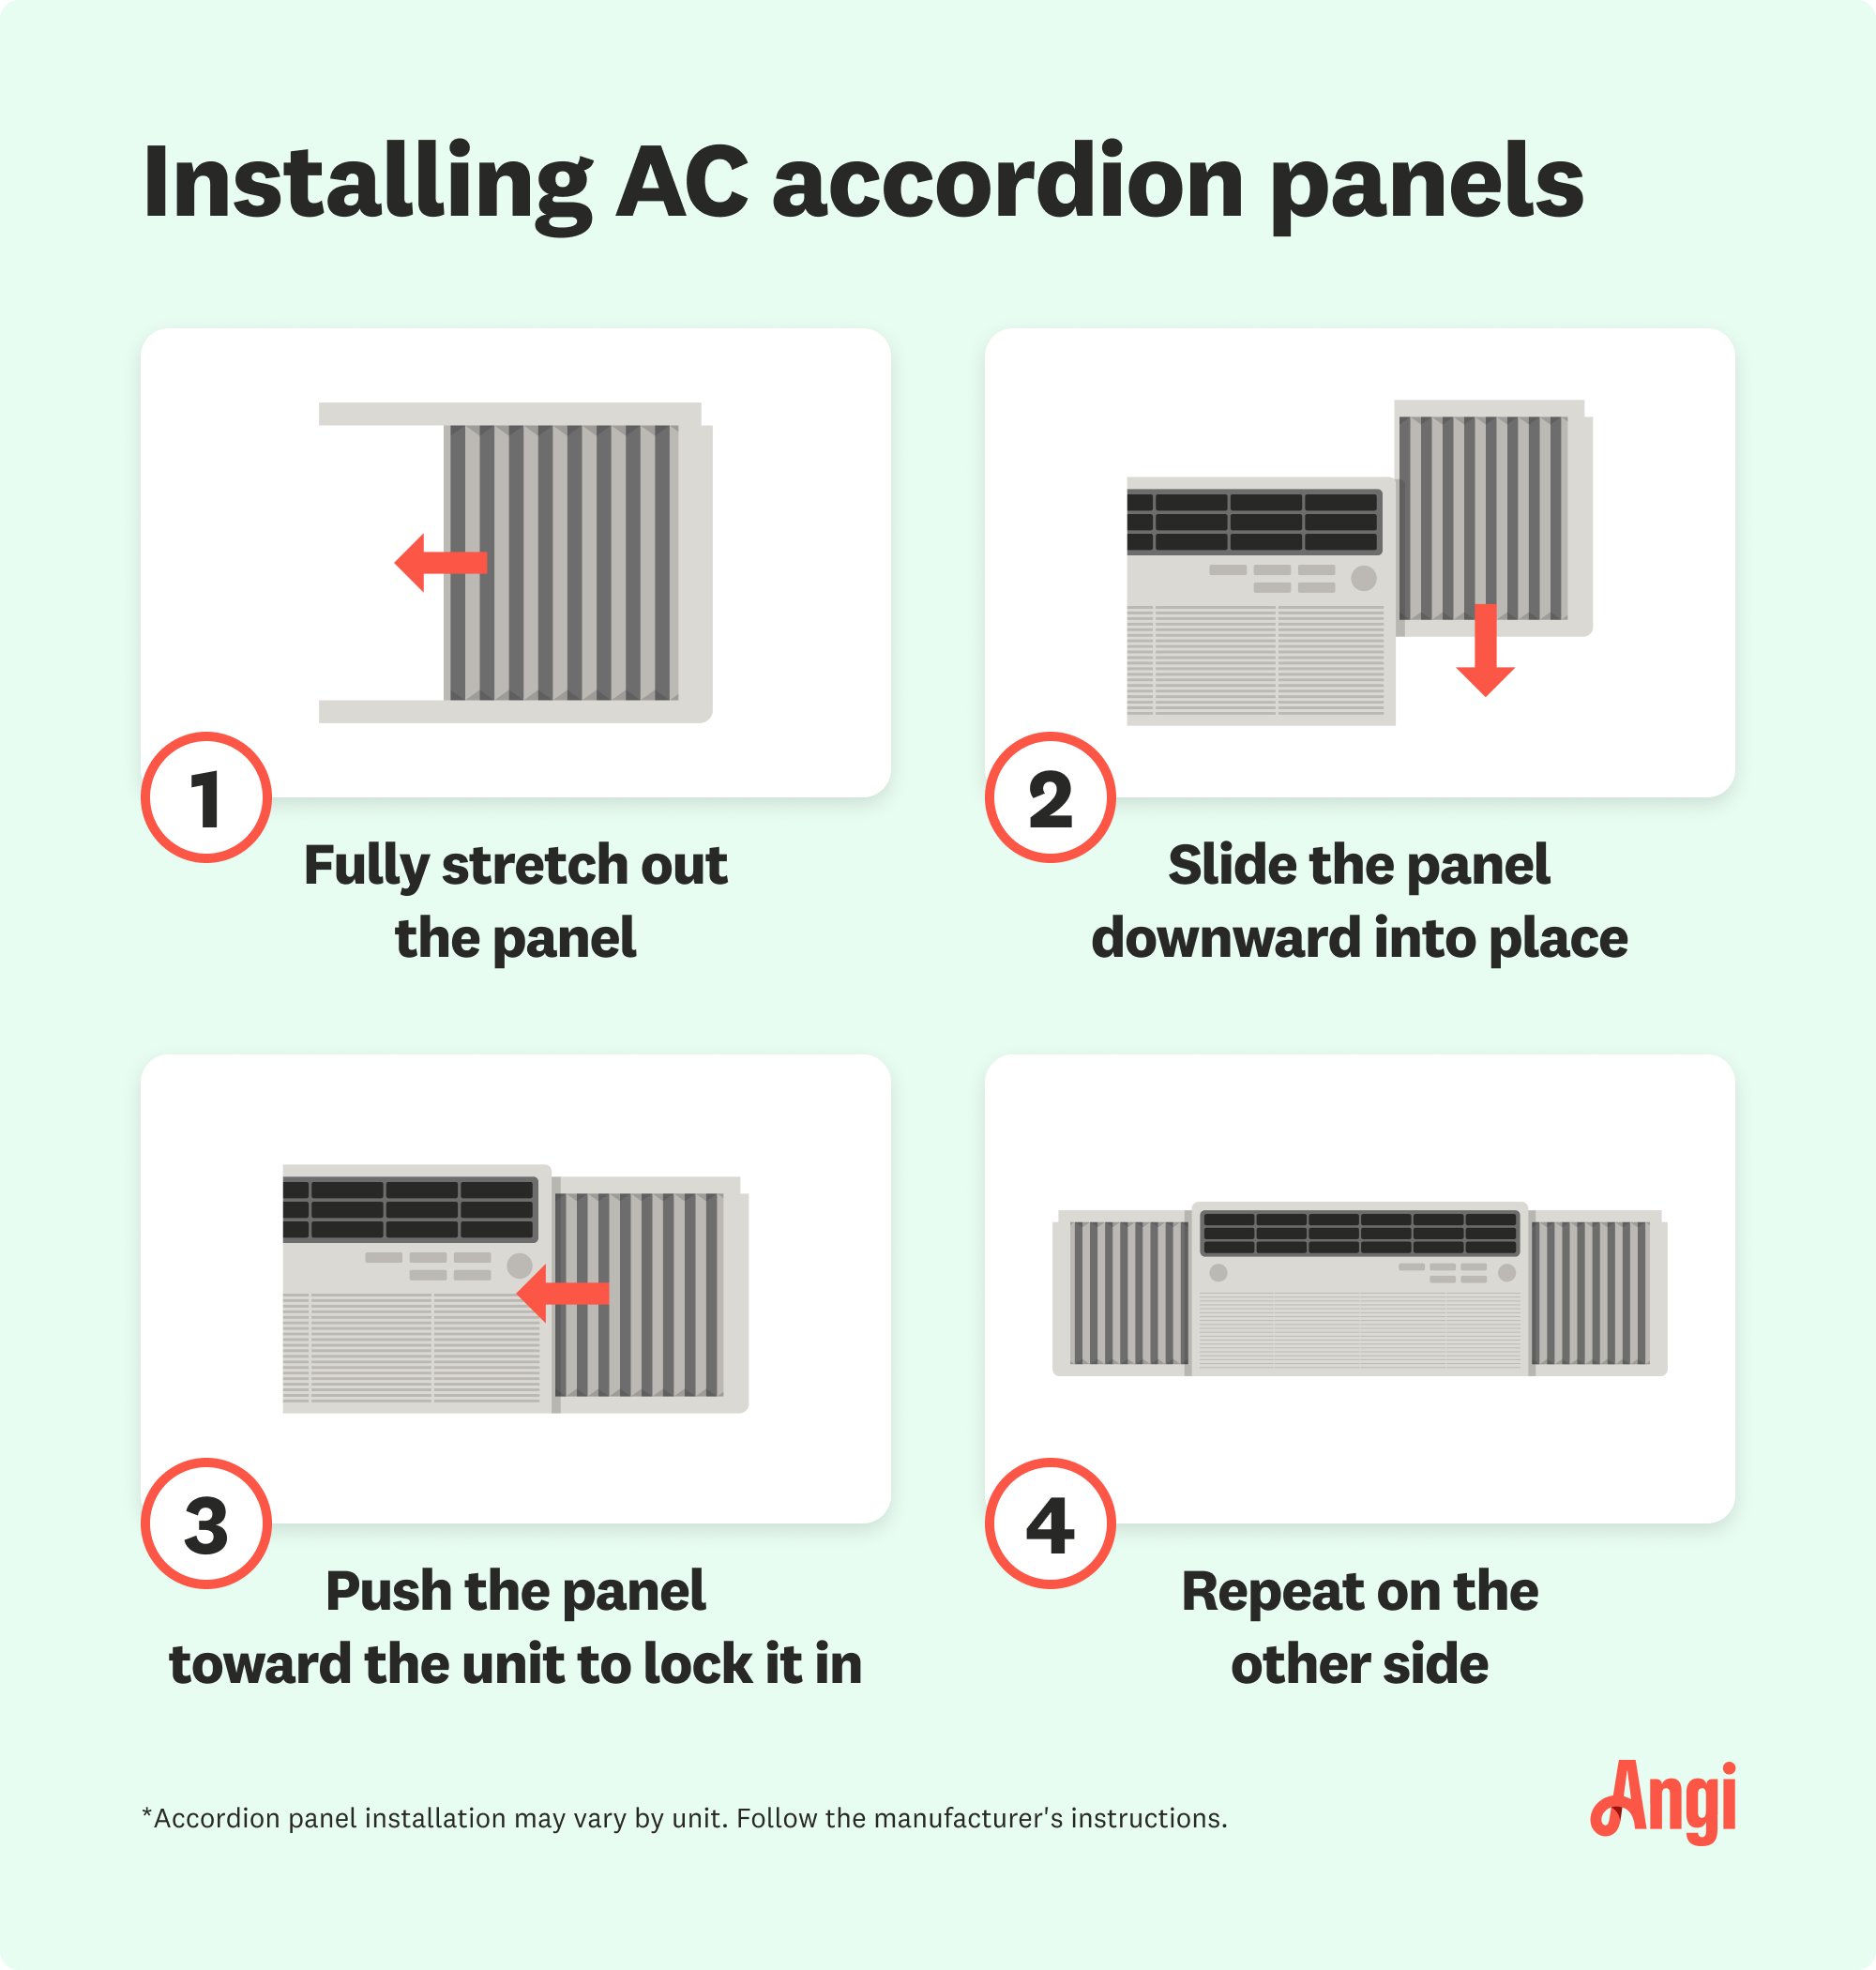
Attach Side Panels
Side panels fill the space between the air conditioner and the window frame. Attach them tightly to keep bugs and air outside.
| Panel Part | Purpose | Attachment Tips |
|---|---|---|
| Left Panel | Closes gap on left side | Slide panel into window track and secure with screws or clips |
| Right Panel | Closes gap on right side | Extend panel fully and lock into place |
| Weatherstripping | Seals edges of panels | Apply along panel edges to block drafts |
Test The Air Conditioner
After mounting your air conditioner in the window, testing it is important. This ensures it works correctly and cools the room well.
Follow simple checks to confirm the unit runs smoothly and keeps the air cool.
Plug In And Turn On
First, plug the air conditioner into a power outlet. Use a properly grounded socket for safety. Turn the unit on using the control panel or remote.
- Ensure the power cord is not damaged.
- Check that the power outlet works by testing with another device.
- Turn the air conditioner to the desired mode, usually “cool.”
- Set the fan speed and temperature controls.
Check Cooling Performance
Wait about 5 to 10 minutes for the air conditioner to start cooling. Measure the temperature near the unit to check its effectiveness.
| What to Check | Expected Result |
|---|---|
| Airflow from the front vent | Strong and steady |
| Temperature near the air outlet | Noticeably cooler than room temperature |
| Noise level | Normal, no unusual sounds |
| Condensation or leaks | No water dripping inside the room |
Maintain Your Window Ac Unit
Keeping your window air conditioner in good shape helps it work well. Regular care saves money and energy.
Simple steps like cleaning filters and storing the unit properly make a big difference.
Clean Filters Regularly
Dirty filters block airflow and lower cooling power. Clean filters every month during use.
- Turn off and unplug the AC unit before cleaning.
- Remove the filter carefully from the front panel.
- Use a vacuum or wash with warm water and mild soap.
- Let the filter dry completely before reinserting it.
- Regular cleaning keeps the air fresh and the unit efficient.
Store Unit During Off-season
Proper storage protects your AC in winter or when not in use. Follow these steps to keep it safe.
| Storage Step | Description |
| Turn Off and Unplug | Disconnect power to avoid damage or fire risk. |
| Drain Water | Remove any water inside to prevent mold and rust. |
| Clean Filters and Coils | Clean parts to avoid dirt buildup during storage. |
| Cover Unit | Use a plastic or cloth cover to keep dust out. |
| Store in a Dry Place | Keep the AC in a cool, dry area away from moisture. |
Frequently Asked Questions
How Do I Prepare The Window For Mounting An Ac?
Clean the window frame and remove any obstructions. Measure the window opening to ensure the AC fits properly. Open the window and clear the sill for easy installation.
What Tools Are Needed To Install A Window Ac Unit?
You need a screwdriver, measuring tape, level, and mounting brackets. Some models may require additional tools like a drill. Always check the AC manual before starting.
How To Secure The Air Conditioner In The Window?
Use mounting brackets and screws to fasten the unit firmly. Ensure the AC is level to prevent water leakage. Seal gaps with weather stripping or foam.
Can I Install A Window Ac Alone?
Yes, but having a helper makes the process easier and safer. The unit can be heavy and awkward to handle alone. Assistance helps in balancing and securing the AC.
Conclusion
Mounting an air conditioner can be simple with the right steps. Begin by gathering necessary tools. Then, measure the window space carefully. Ensure the unit fits snugly. Secure it firmly to avoid any accidents. Check that it’s level and stable.
Seal any gaps to prevent air leaks. Regular maintenance keeps it running efficiently. Stay cool and enjoy your newly installed air conditioner. Remember, safety first in every step. Follow these easy tips for a hassle-free installation. With patience, you’ll achieve a comfortable home environment.
Your comfort is worth it.