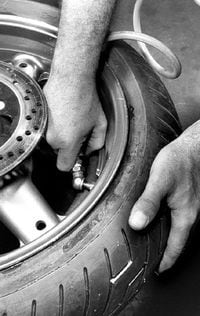
Are you ready to take control of your motorcycle maintenance and save time and money? Learning how to mount a motorcycle tire yourself is easier than you think.
Whether you’re fixing a flat or upgrading your tires, doing it right ensures your safety and keeps your ride smooth. In this guide, you’ll discover simple steps and insider tips that make mounting your motorcycle tire quick and hassle-free. Keep reading, and soon you’ll handle tire changes like a pro.

Credit: www.youtube.com
Tools And Materials Needed
Mounting a motorcycle tire requires the right tools and materials. Using proper gear makes the job easier and safer.
This guide covers the essential tools and safety gear you need before starting the tire mounting process.
Essential Tools
You need specific tools to remove and mount a motorcycle tire correctly. These tools help protect the rim and tire.
- Tire irons or tire levers to pry the tire off the rim
- Bead breaker to separate the tire bead from the rim
- Air compressor or tire inflator to inflate the tire safely
- Valve core remover to release air from the tire
- Lubricant such as soapy water to ease tire mounting
- Torque wrench to tighten axle nuts to correct specs
- Rim protectors to avoid scratching the wheel rim
Safety Gear
Safety gear protects you during the tire mounting process. It reduces the risk of injury from tools or tire pressure.
- Work gloves to protect your hands from sharp edges
- Safety glasses to shield your eyes from debris
- Long sleeves to protect your arms from scrapes
- Closed-toe shoes to protect your feet from heavy parts
Preparing The Motorcycle Wheel
Mounting a motorcycle tire starts with preparing the wheel. This step ensures safety and smooth riding.
Proper preparation helps avoid damage to the tire and wheel during mounting.
Removing The Wheel
First, place the motorcycle on a stable stand. This keeps it steady while you work.
Then, loosen the axle nut and remove any brake components attached to the wheel.
- Use the correct tools to avoid damage
- Keep all nuts and bolts safe
- Carefully slide the wheel out from the forks or swingarm
Cleaning The Rim
Clean the rim to remove dirt, grease, and old tire residue. This helps the new tire fit properly.
Use a mild detergent and a soft brush to clean the rim surface. Avoid harsh chemicals.
- Remove all debris from rim edges
- Check for damage or cracks on the rim
- Dry the rim completely before mounting the tire
Inspecting The Tire And Rim
Before mounting a motorcycle tire, you must inspect both the tire and the rim. This ensures safety and proper fit. Careful inspection helps avoid accidents and tire damage.
Focus on checking for any damage and confirming the tire size matches the rim. These steps prepare you for a smooth mounting process.
Checking For Damage
Look closely at the tire and rim for signs of damage. Small cracks, dents, or bends can cause problems. The rim should be smooth and round without any rust or sharp edges.
- Inspect the tire sidewall for cuts or cracks
- Check the tread area for punctures or uneven wear
- Look over the rim for dents or corrosion
- Spin the rim to see if it wobbles or is bent
- Ensure valve stems are intact and not cracked
Verifying Tire Size
Match the tire size to the rim size before mounting. Using the wrong size causes poor fit and unsafe riding. Check the size on the tire sidewall and the rim label carefully.
| Measurement | Tire Sidewall | Rim Label |
| Diameter | Example: 17 inches | Example: 17 inches |
| Width | Example: 120 mm | Example: Fits 120 mm tire |
| Aspect Ratio | Example: 70 (percent) | N/A |

Credit: www.reddit.com
Lubricating The Bead
Lubricating the bead helps the motorcycle tire fit onto the rim easily. It reduces friction and prevents damage during mounting.
Using the right lubricant and applying it correctly ensures a smooth and safe tire installation.
Choosing The Right Lubricant
Pick a lubricant that is safe for rubber and metal parts. Avoid harsh chemicals that can damage the tire or rim.
Common lubricants include soapy water, tire mounting paste, and specialized tire lubricants made for motorcycle tires.
- Soapy water is easy to make and works well for small jobs.
- Tire mounting paste offers good slip and protects the tire bead.
- Special lubricants dry quickly and leave no residue.
Applying Lubricant Properly
Apply lubricant evenly on the tire bead. Cover the entire area that touches the rim for smooth mounting.
Use a brush or your fingers to spread the lubricant. Avoid using too much or too little to keep the bead flexible and safe.
- Clean the tire bead and rim before applying lubricant.
- Apply a thin, even layer around the whole bead circumference.
- Do not let lubricant get inside the tire or on the braking surface.
- Reapply if the bead dries before mounting.
Mounting The Tire On The Rim
Mounting a motorcycle tire on the rim is an important skill for bike maintenance. Doing it right ensures a safe and smooth ride.
This process needs care and the right tools. Follow each step carefully to avoid damage or injury.
Positioning The Tire
Place the tire so the side with the label faces outward. This helps you see the tire’s direction and size.
Lay the rim flat on a clean surface. Align the tire’s beads with the rim edges to prepare for mounting.
- Check the tire’s rotation direction
- Position the tire on the rim carefully
- Ensure tire beads line up with rim edges
Using Tire Irons Safely
Use tire irons to lift the tire bead over the rim edge. Handle them carefully to avoid pinching the tube or damaging the tire.
Work slowly and avoid sharp movements. Keep your hands clear of the tire iron tips to prevent injury.
- Use smooth, steady force with tire irons
- Keep tools away from inner tubes
- Wear gloves to protect your hands
- Use multiple irons if needed for leverage
Seating The Bead
Once the tire is on the rim, seat the bead by inflating the tire. The bead should snap into the rim groove evenly around the wheel.
Check the bead all the way around. If it is not seated properly, the tire may leak air or cause a rough ride.
- Inflate the tire slowly and evenly
- Watch the bead as it moves into the rim
- Stop inflation if you see damage or leaks
- Ensure the bead is fully seated before riding
Inflating The Tire
Inflating a motorcycle tire correctly is essential for safety and performance. Proper inflation keeps the tire firm and helps it last longer.
Use a good air pump and a pressure gauge to get the right pressure. Avoid over or under-inflating the tire.
Recommended Pressure Levels
Check your motorcycle’s manual or the tire sidewall for the right pressure. Different bikes need different levels of air.
| Motorcycle Type | Front Tire (psi) | Rear Tire (psi) |
| Sport Bike | 32 | 36 |
| Cruiser | 30 | 36 |
| Touring | 36 | 42 |
| Off-Road | 18 | 22 |
Checking For Leaks
After inflating, check the tire for leaks to avoid sudden air loss. A leak can cause an accident or damage the tire.
- Listen for hissing sounds near the valve or tire surface.
- Apply soapy water to the tire and valve area.
- Look for bubbles forming, which signal air escape.
- Fix leaks by tightening the valve or using a repair kit.
- Recheck pressure after repair to ensure the tire holds air.
Balancing The Wheel
Balancing a motorcycle wheel helps it spin smoothly. It reduces wobbling and vibrations.
Proper balance improves riding comfort and tire life. It is an important step after mounting a tire.
Why Balancing Matters
Unbalanced wheels cause shaking at high speeds. This can make riding unsafe and tiring.
- Prevents uneven tire wear
- Reduces strain on suspension parts
- Improves fuel efficiency
- Makes steering more stable
Balancing Techniques
There are several ways to balance a motorcycle wheel. The right method depends on your tools and experience.
| Technique | Description | Tools Needed |
| Static Balancing | Wheel is balanced at rest on a stand. | Balancing stand, wheel weights |
| Dynamic Balancing | Wheel spins on a machine to find heavy spots. | Balancing machine, wheel weights |
| Bubble Balancer | Uses a bubble level to find imbalance. | Bubble balancer tool, weights |
Reinstalling The Wheel
Reinstalling the motorcycle wheel is a key part of mounting a tire. This process needs care and accuracy to keep the bike safe to ride.
Focus on aligning the wheel properly and securing all bolts and nuts tightly. These steps ensure the wheel stays in place during use.
Aligning The Wheel
First, position the wheel between the forks or swingarm. Make sure the axle fits evenly into the slots or holes on both sides. Check that the wheel is centered and straight to avoid wobbling.
- Lift the wheel carefully to avoid damaging the brake discs or chain.
- Slide the axle through the wheel hub and fork or swingarm.
- Adjust the wheel so the tire is straight and centered.
- Check the alignment marks on the swingarm if available.
- Ensure the chain or belt is properly seated on the sprockets.
Securing Bolts And Nuts
After the wheel is aligned, tighten all bolts and nuts. Use a torque wrench to reach the correct tightness. Loose fasteners can cause accidents or damage.
| Bolt/Nut | Torque Range (Nm) | Notes |
|---|---|---|
| Axle Nut | 80 – 100 | Check manufacturer specs |
| Brake Caliper Bolts | 20 – 30 | Tighten evenly |
| Chain Adjuster Nuts | 25 – 35 | Keep chain tension correct |
Final Safety Checks
After mounting your motorcycle tire, safety checks are important. These checks help avoid accidents and ensure a smooth ride.
Take time to inspect the tire and test ride carefully. This keeps you safe on the road.
Inspecting Tire Fit
Check that the tire fits snugly on the rim. It should sit evenly with no gaps or bulges.
Look for correct alignment and balance. A poorly fitted tire can cause handling problems.
- Ensure bead seats well on the rim
- Check for uniform tire shape around the wheel
- Verify there are no air leaks
- Confirm tire direction matches rotation arrows
Test Riding Tips
Start your ride slowly after mounting the tire. This helps you notice any issues early.
Pay attention to how the bike handles. Stop and check again if you feel wobbling or pulling.
- Ride at low speed for the first few miles
- Test braking gently to check tire grip
- Listen for unusual noises from the wheel
- Inspect the tire again after the test ride

Credit: www.lowbrowcustoms.com
Frequently Asked Questions
How Do I Start Mounting A Motorcycle Tire?
Begin by removing the old tire using tire levers. Ensure the rim is clean and free from debris. Lubricate the new tire’s bead with soap water for easy installation. Align the tire’s dot with the rim’s valve stem. Use tire levers to mount the tire onto the rim carefully.
What Tools Are Needed For Tire Mounting?
You’ll need tire levers, a bead breaker, and a valve core remover. Also, have a tire pressure gauge and air compressor on hand. A tire balancer is useful for ensuring proper balance. Soap water acts as a lubricant for easier tire mounting.
Can I Mount A Motorcycle Tire Myself?
Yes, you can mount a motorcycle tire yourself with the right tools. It requires patience and care to avoid damaging the tire or rim. Follow step-by-step guides for safe and effective mounting. Ensure the tire is balanced and inflated to the recommended pressure.
How To Ensure Proper Tire Alignment?
Align the tire’s dot with the rim’s valve stem. Use a balancing stand to check for any wobbling. Adjust weights as needed to ensure even balance. Proper alignment ensures smooth riding and extends tire life. Recheck alignment after a test ride.
Conclusion
Mounting a motorcycle tire takes patience and care. Follow each step slowly and double-check your work. Use the right tools to avoid damage or injury. Remember to balance the tire properly for smooth riding. Regular tire checks keep your bike safe on the road.
Practice makes the process easier and faster. Keep learning, and soon you will do it with confidence. Stay safe and enjoy your ride!