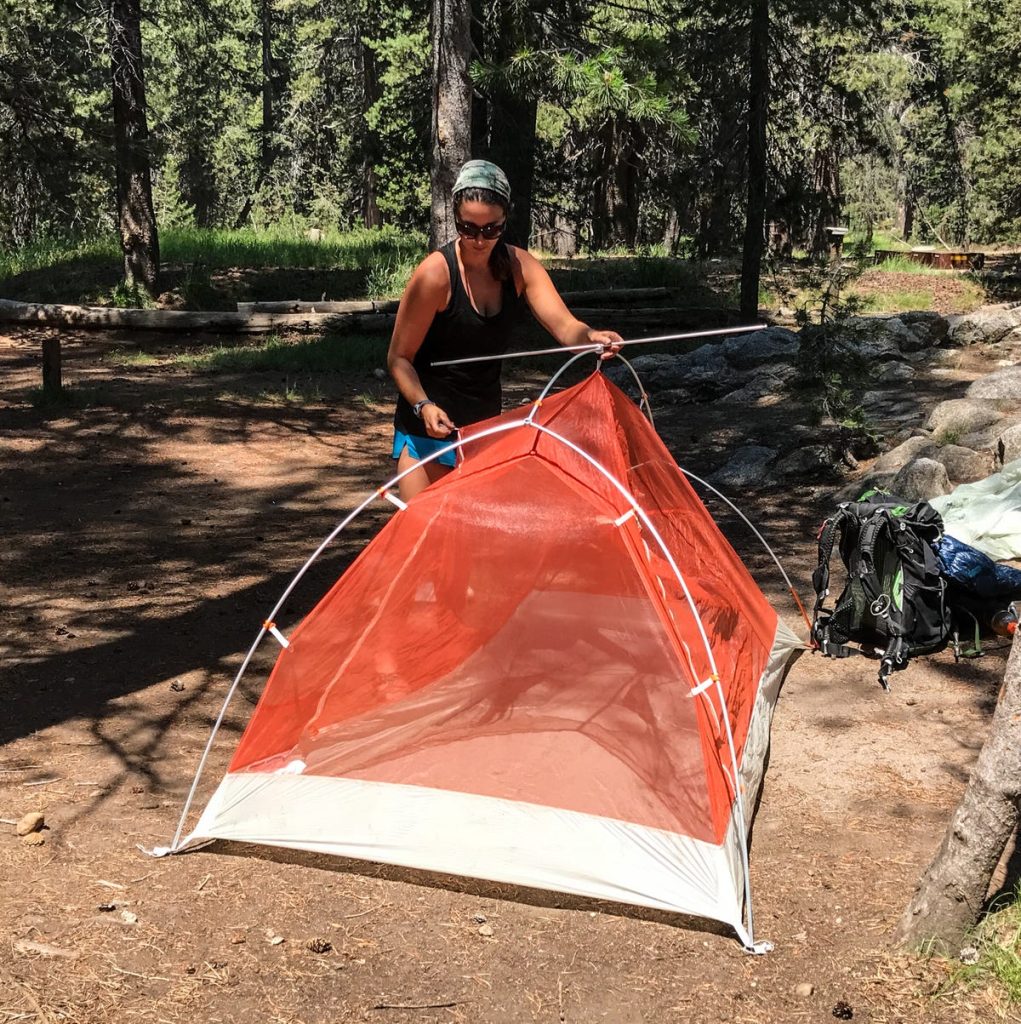
Setting up your tent might seem tricky at first, but with the right steps, you can do it quickly and easily. Imagine arriving at your campsite, ready to relax, and having your shelter ready in no time.
You don’t want to waste daylight or struggle with confusing instructions. This guide will walk you through how to pitch a tent like a pro, so you can focus on enjoying your outdoor adventure. Keep reading, and you’ll be ready to set up your tent with confidence every time.
Choosing The Right Spot
Picking the right place for your tent makes camping safer and more comfortable. The ground and surroundings affect how well your tent will hold up.
Look closely at the area before you set up. Small details can make a big difference in your camping experience.
Flat And Level Ground
Choose flat ground to keep your tent steady. A level spot stops you from sliding or rolling while you sleep.
- Clear away rocks, sticks, and debris before pitching
- Check for small holes or bumps that can cause discomfort
- Use a tarp to protect the tent floor from moisture
Avoiding Hazards
Stay away from dangers like falling branches, flooding, or unstable ground. These risks can harm you or damage your gear.
| Hazard | What to Avoid |
| Falling Branches | Stay clear of dead trees or loose limbs |
| Flooding | Do not camp in dry riverbeds or low areas |
| Unstable Ground | Avoid steep slopes or loose soil |
Considering Wind Direction
Check the wind before setting up. Position your tent so the smallest side faces the wind.
Here are tips to handle wind when pitching a tent:
- Use natural windbreaks like bushes or rocks
- Stake the tent firmly on the windward side
- Face the tent door away from strong winds

Credit: sunny-outdoors.com
Preparing The Area
Preparing the ground before pitching your tent helps keep you safe and comfortable. It also protects your tent from damage.
Focus on clearing the space, protecting the floor, and making sure there are no hazards around.
Clearing Debris
Remove sticks, stones, leaves, and any trash from your tent spot. This keeps the area clean and prevents damage to the tent floor.
- Pick up branches and twigs
- Clear away rocks and pine cones
- Remove old leaves and grass clumps
- Check for trash left by others
Laying A Groundsheet
A groundsheet adds a protective layer between your tent and the soil. It helps keep moisture out and prevents tears.
Groundsheet Tips:
- Choose a groundsheet slightly smaller than your tent’s base.
- Spread it flat with no wrinkles.
- Make sure it covers the entire tent footprint.
- Remove the groundsheet before packing the tent to avoid trapping moisture.
Checking For Sharp Objects
Look closely for sharp rocks, broken glass, or roots that can poke through your tent floor. These can cause damage or discomfort.
| Object | Risk |
| Sharp rocks | Tears in tent floor |
| Broken glass | Injury and tent damage |
| Tree roots | Uneven ground and punctures |
| Thorns | Fabric snags and discomfort |
Unpacking Your Tent
Unpacking your tent carefully helps you set it up quickly. It also protects your gear from damage.
Take your time to unpack and check all parts before pitching your tent.
Organizing Components
Start by removing all items from the tent bag. Lay them out in a clear space.
Group the main parts: tent body, poles, stakes, and rainfly. This makes setup easier.
- Fold the tent body neatly
- Separate and align poles by size
- Keep stakes in one container or bag
- Place rainfly flat and untangled
Inspecting For Damage
Check each component for damage before setting up. Look for holes, tears, or broken parts.
Damaged poles or holes can cause problems during camping. Fix or replace items if needed.
- Look for tears in the tent fabric
- Check poles for bends or cracks
- Inspect stakes for bending or rust
- Make sure zippers work smoothly
Setting Up The Tent Body
Setting up the tent body is an important step in pitching a tent. It means laying out the main fabric part of the tent on the ground.
Doing this well helps make the rest of the setup easier and protects your tent from damage.
Spreading The Tent
Start by finding a flat, clear area to spread the tent. Remove rocks or sticks that could tear the fabric.
- Unfold the tent body carefully.
- Lay it flat on the ground with the bottom side down.
- Make sure the tent’s corners are stretched out evenly.
- Check for wrinkles and smooth them out.
- Align the tent’s edges with the footprint or groundsheet if you have one.
Aligning Doors And Windows
Next, position the tent so the doors and windows face the direction you want. This helps with ventilation and ease of access.
| Feature | Purpose |
| Door | Easy entry and exit |
| Windows | Ventilation and light |
| Rain Flaps | Keep water out |
| Vents | Allow airflow to reduce condensation |
Assembling Poles
Assembling your tent poles correctly is important for a stable shelter. Take your time to connect each part carefully.
Poles come in sections that fit together. After assembling, you insert them into the tent sleeves to give shape to the tent.
Connecting Pole Sections
Start by laying out all pole sections on the ground. Match the ends that fit together easily. Most poles have shock cords inside to keep sections connected.
- Hold two matching ends and slide the thinner end into the thicker end.
- Push until the pole sections snap together securely.
- Repeat this process until all sections form one long pole.
- Check for any gaps or loose connections.
- Make sure the pole bends smoothly without forcing it.
Inserting Poles Into Tent Sleeves
After assembling poles, the next step is to slide them through the tent sleeves. This supports the tent structure and holds it up.
| Tip | Reason |
|---|---|
| Start at one end of the sleeve | It helps avoid bending poles too much. |
| Push poles gently through the sleeves | Prevents damage to the fabric and poles. |
| Follow the tent’s pole layout | Keeps the tent stable and shaped correctly. |
| Secure pole ends in grommets or clips | Holds poles in place and resists wind. |
Raising The Tent
Raising a tent is an important step in camping. It creates a safe and dry place to sleep.
Follow simple actions to make sure your tent stands strong and steady.
Securing Poles In Place
Start by fitting the poles into the tent sleeves or clips. This gives the tent its shape.
Make sure each pole is fully inserted and locked. Loose poles can cause the tent to fall.
- Insert poles carefully into the correct sleeves or clips.
- Check all pole joints to ensure they snap or lock firmly.
- Place poles in the ground sleeves if your tent has them.
- Adjust poles gently to avoid bending or breaking them.
Adjusting Tent Shape
After setting poles, pull the tent fabric tight to remove wrinkles. This helps keep rain out.
Use tent stakes and guy lines to secure the tent. Tighten them evenly on all sides.
- Pull the tent corners outward for a flat floor.
- Stake the tent securely into the ground at each corner.
- Tighten guy lines to keep the tent stable in wind.
- Check all connections and adjust if the tent sags.
Staking The Tent
Staking the tent keeps it secure and stable on the ground. Proper staking helps the tent resist wind and stay in place.
Choosing the right spots for stakes and driving them correctly are important steps. This guide explains how to do both well.
Choosing Stake Locations
Pick stake points where the tent fabric is tight and the ground is firm. Avoid rocky or soft soil that won’t hold the stakes well.
- Stake corners first to set the tent shape.
- Use points where the tent has loops or webbing designed for stakes.
- Avoid areas with roots or large stones under the surface.
- Check for slopes; stake on the lower side to prevent slipping.
- Keep stakes angled away from the tent for better hold.
Driving Stakes Properly
Drive stakes into the ground at an angle to increase holding power. Use a hammer or rock to push them firmly.
| Step | Action | Tip |
|---|---|---|
| 1 | Place the stake at a 45-degree angle pointing away from the tent. | Angle helps resist pull from the tent. |
| 2 | Tap the stake gently at first to avoid bending it. | Start slow to keep stakes straight. |
| 3 | Drive the stake fully into the ground until only the hook is visible. | Ensure it is deep enough to hold well. |
| 4 | Check tension on the tent fabric and adjust if needed. | Loose stakes can let the tent flap in wind. |
Attaching The Rainfly
The rainfly is a waterproof cover that protects your tent from rain and wind. Attaching it correctly keeps you dry and comfortable inside the tent.
Make sure the rainfly fits well over the tent before securing it. This helps avoid leaks and lets air flow properly.
Aligning Over The Tent
Spread the rainfly over the top of the tent. Match the rainfly’s doors and windows with those of the tent. Check that it covers the tent fully, including the sides.
Adjust the rainfly so it is centered and not hanging unevenly. This prevents water from pooling on one side. Make sure the rainfly’s vents line up with the tent vents for good airflow.
Securing Clips And Straps
Attach all clips on the rainfly to the tent poles or loops. These clips hold the rainfly tight and stop it from moving in the wind. Use the straps at the corners to pull the rainfly taut.
Tighten the straps so the rainfly stays firm but does not tear. Check that all fasteners are secure before you finish. This keeps the rainfly stable during bad weather.
- Clip rainfly hooks onto tent pole loops
- Fasten straps at all corners of the rainfly
- Tighten straps to remove slack without stretching
- Check for gaps or loose parts around the tent
Final Adjustments
After setting up your tent, you need to make final adjustments. This helps keep the tent safe and comfortable.
Check all parts carefully and fix any loose or unstable areas before using your tent.
Tightening Guy Lines
Guy lines help hold your tent in place during wind or bad weather. Make sure they are tight but not too tight.
Loose guy lines can cause the tent to collapse. Tighten each line evenly to keep the tent strong.
- Pull each guy line away from the tent firmly.
- Use tensioners or knots to secure the lines.
- Check that the lines are not rubbing on sharp objects.
- Adjust lines again if the tent feels loose or shaky.
Checking For Stability
Once the guy lines are tight, check the tent’s overall stability. The tent should stand firm without wobbling.
Look at the poles and stakes to make sure they are secure and not bent or loose.
- Press gently on the tent walls to test firmness.
- Make sure all stakes are driven fully into the ground.
- Check the tent floor for wrinkles or loose spots.
- Adjust poles or stakes if the tent feels weak or uneven.

Credit: www.yahoo.com
Tips For Easy Setup
Pitching a tent can be simple with the right approach. Knowing some tips helps you set up your tent fast.
These tips make camping more fun and less stressful. Follow them to enjoy your outdoor experience.
Practice At Home
Try setting up your tent in your yard before the trip. Practice helps you learn the parts and how they fit.
Doing this lets you find any missing pieces or problems early. It also speeds up your setup time later.
Packing Efficiently
Pack your tent and gear in a way that is easy to carry and find. Keep things organized to avoid delays.
- Use a bag that fits your tent snugly
- Keep stakes and poles in separate small bags
- Label bags or use clear ones for easy access
- Place heavy items at the bottom of your backpack
Weather Considerations
Check the weather before you start pitching your tent. Different weather needs different setup steps.
- Pick a flat, dry spot to avoid water pooling
- Use a rainfly if rain is expected
- Secure your tent with extra stakes in windy weather
- Ventilate your tent to reduce moisture inside

Credit: stouttent.com
Frequently Asked Questions
How Do You Choose The Best Spot To Pitch A Tent?
Choose a flat, dry area free from rocks and debris. Avoid low spots prone to flooding. Look for natural wind barriers like trees or bushes for protection and privacy.
What Essential Tools Are Needed To Pitch A Tent?
Carry tent stakes, a mallet, and a ground tarp. Some tents include poles and guylines. These tools secure your tent and protect it from wind and moisture.
How Can I Make My Tent Stable In Strong Winds?
Use all stakes and guylines provided. Anchor guylines to sturdy objects or rocks. Tighten all ropes to keep the tent firm and prevent collapse during wind.
What Is The Best Way To Prevent Moisture Inside The Tent?
Use a ground tarp to prevent water seepage. Keep the tent door slightly open for ventilation. Avoid cooking or wet gear inside to reduce condensation.
Conclusion
Setting up a tent can be a fun adventure. Practice makes it easier. Always choose a flat spot for better stability. Remember to secure the tent pegs tightly. This prevents the tent from blowing away. Double-check the weather forecast before your trip.
Bring extra supplies like ropes and stakes. This ensures a backup in case of emergencies. With these simple tips, your camping experience will be more enjoyable. You’ll feel more confident each time you camp. Enjoy the great outdoors and make lasting memories!