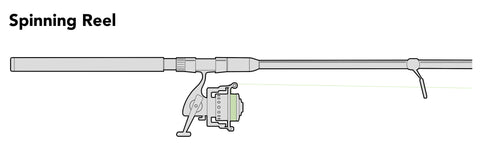
Learning how to put string on a fishing rod might seem tricky at first, but once you know the right steps, it becomes easy and even enjoyable. If you want to avoid tangles, improve your casting, and catch more fish, getting this skill down is essential.
In this guide, you’ll find simple instructions that anyone can follow, whether you’re a beginner or just need a quick refresher. Stick with me, and by the end, you’ll feel confident setting up your fishing rod like a pro. Let’s dive in and make sure your next fishing trip starts off right!

Credit: mossyoakgamekeeper.com
Choose The Right Fishing Line
Choosing the right fishing line is important for a good fishing experience. The line connects your rod to the lure and fish.
Different lines work best for different types of fishing. Knowing the right line helps you catch more fish and avoid breakage.
Types Of Fishing Lines
There are three main types of fishing lines: monofilament, fluorocarbon, and braided. Each has strengths and weaknesses.
- Monofilament:Flexible and easy to handle. Good for beginners.
- Fluorocarbon:Almost invisible underwater. Best for clear water fishing.
- Braided:Very strong and thin. Good for heavy cover and long casts.
Line Strength And Length
Line strength is measured in pounds (lb). It shows how much weight the line can hold before breaking.
| Fish Type | Recommended Line Strength (lb) | Recommended Line Length (yards) |
|---|---|---|
| Small Fish | 4 – 8 | 100 – 150 |
| Medium Fish | 10 – 20 | 150 – 200 |
| Large Fish | 25 – 50 | 200 – 300 |
Matching Line To Rod And Reel
Match the line strength with your rod and reel. Using too strong or too weak line can cause problems.
- Check the rod’s recommended line weight range on its label.
- Use a reel that can hold the length of line you choose.
- Balance the line with the rod’s power and action for best casting.
Prepare The Rod And Reel
Putting string on a fishing rod needs some simple preparation. Getting your rod and reel ready makes the process easier.
Check your equipment first. A well-prepared rod and reel help you fish smoothly.
Check Rod Guides And Reel Condition
Look at the rod guides. These are the rings on the rod that the string passes through. Make sure they are clean and not cracked.
Also, check the reel. It should spin freely without noise. Clean any dirt or old string from the reel before you start.
- Inspect each rod guide for cracks or damage
- Clean the guides with a soft cloth if dirty
- Turn the reel handle to check smoothness
- Remove old string or dirt from the reel spool
Attach The Reel To The Rod
Place the reel foot into the reel seat on the rod. Tighten the reel seat to hold the reel firmly in place.
Make sure the reel is aligned with the rod guides. This helps the string flow evenly when you cast.
- Slide the reel foot into the reel seat
- Turn the reel seat rings to tighten
- Check that the reel is straight and secure
Open The Reel Bail
The bail is the metal arm on the reel that controls the string. Open it by lifting the bail arm up.
Opening the bail lets you wrap the string around the reel spool. Keep it open while you thread the string.
- Lift the bail arm to open it
- Keep the bail open during stringing
- Close the bail after the string is on
Attach The Line To The Reel
Attaching the fishing line to the reel is the first step to prepare your rod. It ensures the line stays secure while you fish.
This guide will help you attach the line correctly for smooth casting and reeling.
Threading The Line Through Guides
Start by pulling the line from the reel spool. Pass it through each guide on the fishing rod. Guides help control the line during casting.
- Hold the rod firmly with one hand.
- Feed the line through the guide closest to the reel.
- Continue threading through all guides up to the tip.
- Make sure the line sits inside each guide properly.
Tying The Arbor Knot
The arbor knot secures the line to the reel spool. It is strong and easy to tie.
- Wrap the line around the reel spool.
- Tie an overhand knot around the main line.
- Make a second overhand knot on the tag end.
- Pull the first knot tight against the spool.
- Pull the second knot tight against the first one.
- Trim the excess tag end close to the knot.
Securing The Line On The Spool
Keep the line tight while winding it onto the spool. This prevents tangles and loose loops.
| Tip | Reason |
|---|---|
| Apply slight tension to the line | Keeps the line tight and neat on the spool |
| Wind slowly and evenly | Prevents line from overlapping or tangling |
| Fill the spool to about 1/8 inch from the edge | Allows smooth casting and reduces line slap |
Spool The Line Evenly
Spooling your fishing rod line evenly helps it last longer. It also prevents problems when casting or reeling.
Proper spooling makes fishing more enjoyable and reduces line damage. Follow these tips for the best results.
Maintaining Line Tension
Keep steady tension on the line while spooling. This stops loose loops that can tangle or catch on the reel.
- Hold the line firmly between your fingers as you wind.
- Pull the line tight but avoid stretching it too much.
- Ask a helper to turn the reel slowly while you control tension.
- Stop and adjust if the line looks slack or uneven.
Winding The Line Properly
Wind the line smoothly onto the spool. Spread the line evenly from one side to the other.
| Common Mistake | Fix |
|---|---|
| Line piled up on one side | Guide the line back and forth evenly |
| Loose loops on spool | Keep tension while winding |
| Line slipping on spool | Attach line securely to spool before winding |
Avoiding Line Twists And Tangles
Line twists cause knots and weak spots. Avoid twisting by following these tips.
- Use a swivel to reduce line twisting.
- Let the line fall freely without spinning the spool too fast.
- Check for twists regularly and fix them before spooling more line.
- Keep the rod tip up to guide the line straight onto the spool.
Finish The Setup
After threading the fishing line through the guides, it is important to complete the setup carefully. This ensures your rig works well and lasts longer. The last steps include cutting the line, attaching the leader or tackle, and testing the entire setup.
Each part of the finishing process helps prepare your rod for fishing. Follow these simple instructions to get your rod ready.
Cutting The Line To Length
Cut the line so it extends about 12 inches beyond the tip of your rod. This extra length gives room to tie knots and add terminal tackle. Use sharp scissors or a line cutter for a clean cut. Avoid frayed ends to keep knots strong.
Tying The Leader Or Terminal Tackle
Tie the leader or terminal tackle carefully to the main line. Use a strong fishing knot like the improved clinch knot or Palomar knot. These knots hold tight and are easy to tie. Make sure the knot is moist before pulling it tight to prevent damage.
- Pass the line through the eye of the hook or lure.
- Wrap the tag end around the main line 5-7 times.
- Thread the tag end back through the loop near the eye.
- Moisten the knot with water or saliva.
- Pull the knot tight and trim excess tag end.
Testing The Setup
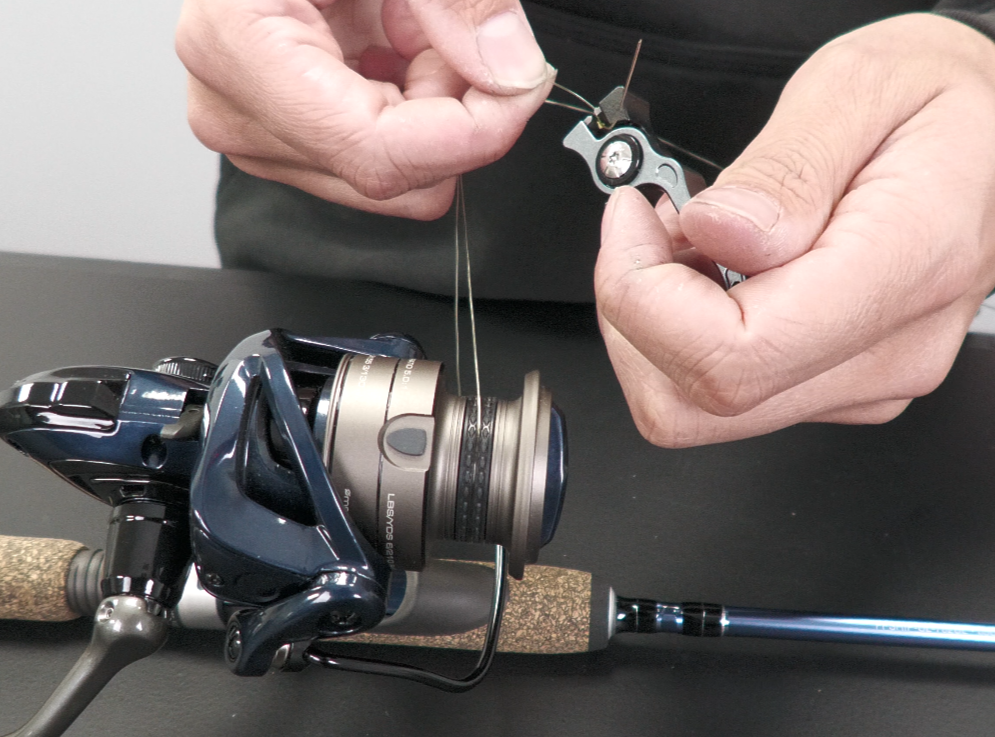
Check your setup before fishing. Test the knots and line strength by pulling gently but firmly. Look for any weak spots or loose knots. Also, make sure the reel operates smoothly with the new line and tackle attached.
| Test Step | What to Check | Action if Problem Found |
|---|---|---|
| Pull Knots | Knots hold tight, no slipping | Retie knot securely |
| Line Tension | Line feels strong, no frays | Replace damaged line section |
| Reel Operation | Line spools smoothly | Adjust reel drag or spool |

Credit: www.youtube.com
Tips For Maintenance
Keeping your fishing rod and line in good shape helps you fish better. Regular care prevents problems and keeps your gear ready.
Simple maintenance steps can extend the life of your fishing equipment. Checking and storing your gear properly is key.
Regular Line Inspection
Look over your fishing line before every use. Check for cracks, nicks, or fraying that can cause breaks.
- Run your fingers along the line to feel for rough spots.
- Check for discoloration or stiffness.
- Look for any knots or twists that could weaken the line.
- Replace the line if you find any damage.
Replacing Old Or Damaged Line
Old or weak line can break easily and cause lost fish. Change the line regularly to avoid this.
| Signs to Replace Line | Why Replace |
|---|---|
| Fraying or visible cuts | Line can snap under tension |
| Discoloration or stiffness | Line loses flexibility and strength |
| Line older than six months | Material degrades over time |
| Line memory causing tangles | Leads to poor casting and knots |
Proper Storage Of Rod And Reel
Store your fishing rod and reel in a dry, cool place. Avoid direct sunlight and damp areas.
- Loosen the drag on your reel to protect internal parts.
- Keep the rod in a rack or holder to avoid bending.
- Cover the reel to keep dust and dirt away.
- Remove the line if you will not use the rod for a long time.
Credit: www.fishusa.com
Frequently Asked Questions
How Do You Attach A Line To A Fishing Rod?
To attach a line, first thread it through the rod’s guides. Tie the line to the reel using an arbor knot. Ensure the line is evenly distributed on the spool. Securely tighten the knot and trim any excess line. Test the setup by gently pulling on the line.
What Type Of Line Is Best For Beginners?
Monofilament line is ideal for beginners. It is affordable and easy to handle. Its flexibility reduces tangles and knots, making it beginner-friendly. Monofilament is suitable for various fishing conditions. Start with a 10-12 lb test for general fishing.
How Often Should I Replace My Fishing Line?
Replace your fishing line every 6-12 months. Factors like UV exposure and usage frequency affect its lifespan. Regularly inspect the line for signs of wear or damage. Replacing the line ensures optimal performance and reduces the risk of breakage during fishing trips.
Can I Use The Same Line For All Fishing Rods?
Yes, you can use the same line, but consider the rod type. Match the line strength to the rod’s specifications. Different rods have different weight and action, affecting line suitability. Ensure the line complements the fishing conditions and target species for best results.
Conclusion
Putting string on a fishing rod is simple and quick. Follow the steps carefully for best results. Use the right string type for your fishing needs. Make sure the string is tight and secure. Check your work before you start fishing.
This helps avoid problems while casting or reeling. Practice makes the process easier over time. Enjoy your fishing with confidence and readiness. Keep your gear in good shape for longer use. Happy fishing!