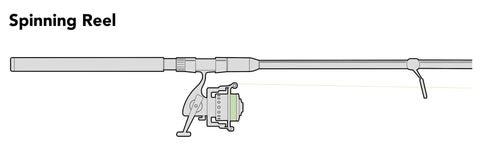
Getting your fishing rod ready starts with one simple but crucial step: putting the string on it correctly. If you’ve ever struggled with tangled lines or weak casts, this guide is for you.
You’ll learn how to string your fishing rod quickly and easily, saving time and avoiding frustration. By the end, you’ll feel confident and ready to reel in your next big catch. Keep reading, and let’s get your fishing gear set up the right way!

Credit: www.youtube.com
Choosing The Right Fishing Line
Choosing the right fishing line is important for a good fishing experience. The line must match the type of fish and fishing style.
Different lines have different strengths, thicknesses, and uses. Picking the right one helps you catch fish more easily.
Types Of Fishing Lines
There are three main types of fishing lines: monofilament, fluorocarbon, and braided. Each type has its own features and uses.
- Monofilament:This is a single strand of nylon. It is flexible and easy to handle.
- Fluorocarbon:This line is less visible underwater. It sinks faster and is good for clear water.
- Braided:Made of many fibers woven together. It is very strong and thin but can be more visible in water.
Line Strength And Thickness
Line strength is how much weight a line can hold before breaking. Thickness affects how strong and visible the line is.
Stronger lines can hold bigger fish but are thicker. Thinner lines are less visible but may break with big fish.
| Line Strength (Pounds) | Thickness (Inches) | Use |
|---|---|---|
| 4-8 | 0.006 – 0.010 | Small fish, light fishing |
| 10-15 | 0.011 – 0.015 | Medium fish, general use |
| 20-30 | 0.016 – 0.025 | Large fish, heavy fishing |
Best Line For Beginners
Beginners should use monofilament lines. They are easy to handle and work well in many situations.
A 6-12 pound monofilament line is a good choice. It is strong enough for most fish and easy to tie knots with.
- Monofilament is flexible and forgiving
- Good for learning casting and knot tying
- Less expensive than other types

Credit: www.youtube.com
Preparing The Fishing Rod
Putting the string on a fishing rod starts with good preparation. A well-prepared rod helps you fish better and avoid problems later.
This guide covers three main areas: inspecting the rod and reel, setting up the reel, and cleaning the guides.
Inspecting The Rod And Reel
Check the rod for cracks or damage. Look at the reel for smooth movement and no rust. Make sure all parts fit well and work properly.
- Look for cracks or breaks on the rod
- Turn the reel handle to check smoothness
- Ensure reel seats are tight and secure
- Check the drag system for proper tension
Setting Up The Reel
Attach the reel to the rod firmly. Spool the fishing line onto the reel evenly. Make sure the line is not twisted or tangled.
| Action | Tip |
| Attach reel | Secure with reel seat screws |
| Spool line | Keep tension on the line while spooling |
| Check line | Pull line gently to remove twists |
Cleaning The Guides
Clean the rod guides to help the line run smoothly. Dirt or salt can cause damage to the line or rod.
- Use a soft cloth or brush to clean guides
- Rinse with fresh water if used in saltwater
- Dry guides completely before use
- Check for cracks or rough spots on guides
Attaching The Line To The Reel
Attaching the fishing line to the reel is the first step in setting up your fishing rod. It helps you cast smoothly and control the line well.
Follow simple steps to thread the line, tie a secure knot, and make sure the line stays in place.
Threading The Line
Start by pulling the fishing line from the spool. Thread it through the rod guides, starting from the tip toward the reel.
Pass the line through the reel’s spool opening. Pull enough line out to work with for tying the knot.
Tying The Arbor Knot
The arbor knot connects the fishing line to the reel spool securely. Follow these easy steps to tie it:
- Wrap the line around the spool.
- Tie an overhand knot around the main line.
- Tie a second overhand knot at the tag end.
- Pull both knots tight against the spool.
- Trim the excess tag end.
Securing The Line
| Action | Why It Is Important |
| Pull the line tight | Prevents slipping and loosening of the knot |
| Check knot tightness | Ensures strong connection to spool |
| Wind line onto spool evenly | Helps smooth casting and line release |
| Trim excess line | Keeps setup neat and avoids tangles |
Spooling The Line Onto The Reel
Putting the string on a fishing rod starts with spooling the line onto the reel. This step is important for a smooth fishing experience.
Correct spooling helps prevent tangles and line damage. Follow simple tips to make sure your line is ready for fishing.
Maintaining Proper Tension
Keep the line tight as you spool it. Proper tension stops loose coils that cause tangles.
Use your fingers or a cloth to hold the line firmly. This control helps the line wrap evenly on the reel.
Avoiding Line Twist
Line twist makes casting and reeling difficult. Avoid it by attaching the line correctly and spooling carefully.
- Make sure the line comes off the filler spool the same way it goes onto the reel.
- Check that the reel handle turns in the right direction.
- Stop spooling if you see loops forming on the line.
- Use a swivel to reduce twists if using certain lures.
Filling The Spool Correctly
Fill the spool almost to the edge but not over it. Too much line causes tangles, too little reduces casting distance.
| Spool Size | Recommended Fill Level |
| Small (1000-2500) | 1/8 inch below spool rim |
| Medium (3000-4000) | 1/4 inch below spool rim |
| Large (5000+) | 3/8 inch below spool rim |
Threading The Line Through The Rod Guides
Putting the string on a fishing rod needs care and patience. Threading the line through the guides is a key step.
This guide covers how to thread the line starting from the bottom to the tip of the rod. It also explains how to check for snags.
Starting From The Bottom
Begin by attaching the fishing line to the reel. Pull a few feet of line off the reel to work with. Find the first guide closest to the reel seat at the bottom of the rod.
Carefully thread the line through this guide. Make sure the line sits inside the ring without twisting or tangling.
Working Toward The Tip
Slowly move the line through each guide along the rod toward the tip. Keep the line taut but gentle. This helps avoid catching the line on the rod.
- Hold the rod steady with one hand.
- Use the other hand to pull the line through each guide.
- Check that the line passes smoothly through the center of every guide.
- Keep the line tight to prevent it from slipping out.
- Stop when you reach the tip guide at the end of the rod.
Checking For Snags
After threading, test the line for any snags or catches. Pull the line gently back and forth while watching the guides.
| Problem | Cause | Fix |
|---|---|---|
| Line stuck in guide | Twisted line or dirt | Remove and clean guide, then re-thread |
| Line rubbing rod blank | Line not centered in guide | Adjust line position through guide |
| Line slipping out | Line too loose | Keep line taut when threading |

Credit: mossyoakgamekeeper.com
Tying The Hook Or Lure
Tying the string on your fishing rod securely is important. A good knot keeps your hook or lure in place while fishing.
This guide helps you choose the right knot, tie it correctly, and test its strength for better fishing.
Choosing The Right Knot
Different knots work best for certain hooks and lines. Pick a knot that matches your fishing style and gear.
- Improved Clinch Knot: Good for most hooks and lures.
- Palomar Knot: Strong and easy to tie with braided lines.
- Loop Knot: Allows the lure to move freely for better action.
Step-by-step Knot Tying
Follow these steps to tie a simple Improved Clinch Knot for your hook or lure.
- Thread the line through the hook eye.
- Wrap the tag end around the standing line 5 to 7 times.
- Pass the tag end through the loop near the eye.
- Thread the tag end back through the big loop you just made.
- Moisten the knot with water or saliva.
- Pull both ends to tighten the knot firmly.
- Trim the excess tag end close to the knot.
Testing Knot Strength
Check your knot to avoid losing fish or gear while fishing.
| Test Method | Description | Why It Matters |
| Pull Test | Firmly pull on the line and hook. | Ensures knot holds under tension. |
| Visual Check | Look for slips or loose wraps. | Detects weak or incomplete knots. |
| Water Test | Wet the knot before testing pull strength. | Prevents line damage and ensures tightness. |
Final Checks Before Fishing
Before you start fishing, check your rod and line carefully. These checks help avoid problems while fishing.
Make sure the string is properly set on the rod. Then review the line tension, reel drag, and safety tips to fish safely.
Line Tension And Movement
Check the line tension by pulling the string lightly. It should feel firm but not too tight. The line should move smoothly without sticking.
- Pull the line gently to test tension
- Look for any knots or tangles
- Ensure the line moves freely through guides
- Adjust if the line feels too loose or tight
Reel Drag Settings
The drag controls how much resistance a fish feels when pulling the line. Set the drag so it stops strong pulls but does not break the line.
| Drag Setting | Use For |
| Low (Light) | Small fish or light line |
| Medium | Most fishing conditions |
| High (Heavy) | Big fish or heavy line |
Safety Tips
Fishing can be fun but also risky. Follow simple safety tips to avoid accidents and injuries.
- Wear protective glasses to shield your eyes
- Keep hooks covered when not in use
- Check your surroundings before casting
- Use gloves to protect your hands
- Make sure the reel and rod are secure
Frequently Asked Questions
How Do You Attach A String To A Fishing Reel?
To attach a string, first open the bail arm of the reel. Thread the line through the rod’s guides, starting from the top. Tie the line to the spool with an arbor knot. Close the bail arm and wind the line onto the spool, keeping tension on it for even distribution.
What Type Of Fishing Line Should I Use?
Choose a fishing line based on the fish species and water conditions. Monofilament is versatile and affordable for beginners. Braided line offers strength and sensitivity, ideal for heavy cover. Fluorocarbon is nearly invisible underwater, perfect for clear waters. Match the line strength to the targeted fish size.
How Much Line Should I Put On The Spool?
Fill the spool with line until it’s approximately 1/8 inch from the rim. Overfilling can cause tangles and reduce casting distance. Underfilling limits casting range and reduces efficiency. Check the reel’s specifications for recommended line capacity. Always ensure the line is evenly distributed across the spool.
Can I Use Any Knot To Tie The Line?
Not all knots work well with fishing lines. The arbor knot is recommended for attaching the line to the spool. It ensures a secure connection and prevents slippage. For connecting lines or lures, use strong knots like the Palomar or improved clinch knot.
Practice these knots for optimal performance.
Conclusion
Putting the string on a fishing rod is simple with practice. Follow the steps carefully and take your time. Check the line for any twists or knots before you start. Make sure the string is tight and secure on the reel.
Proper stringing helps your fishing rod perform better. Keep your gear ready for the next fishing trip. Enjoy your time by the water with confidence. Practice often, and you will improve quickly. Fishing becomes more fun when your rod is set up right.