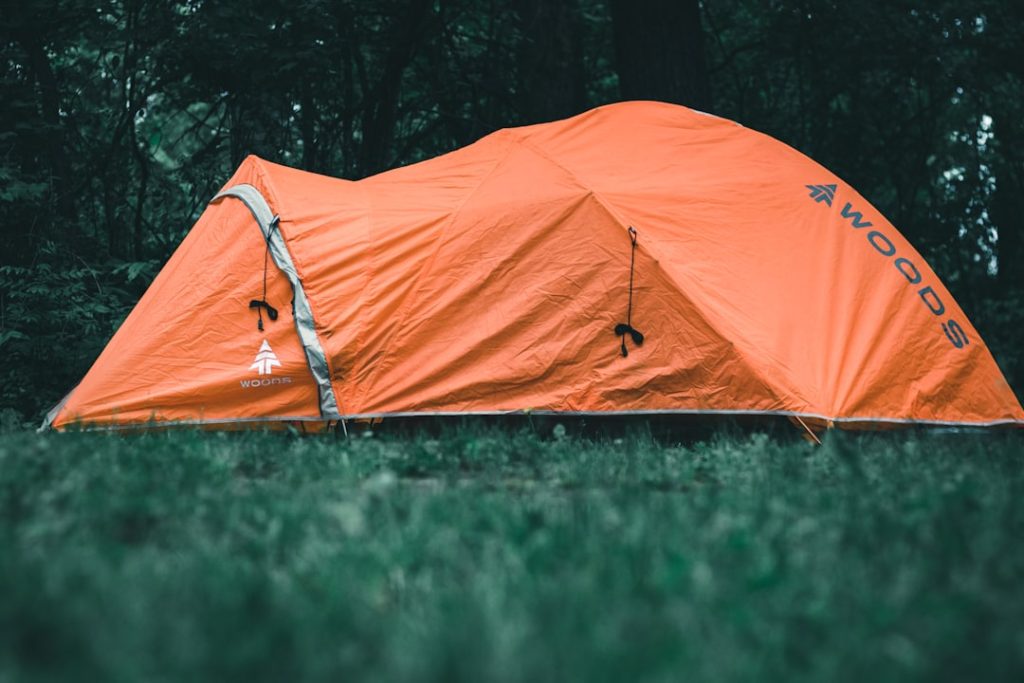
Setting up a tent might seem tricky at first, but once you get the hang of it, it becomes quick and even fun. Imagine having your own cozy shelter ready in minutes, giving you more time to relax and enjoy the outdoors.
Whether you’re camping for the first time or just want to improve your skills, this guide will walk you through every step. You’ll learn simple tips that make pitching your tent easier and stress-free. Keep reading, and soon you’ll be confident in putting up your tent like a pro.

Credit: campandclimb.co.za
Choosing The Right Tent
Picking the right tent is important for a good camping trip. The tent you choose should fit your needs and camping style.
Think about the type, size, and weather before buying or renting a tent. This helps you stay safe and comfortable.
Types Of Tents
Tents come in many shapes and designs. Each type is good for different camping styles and places.
- Pop-up tents:Easy to set up and good for beginners.
- Dome tents:Stable and roomy, good for most weather.
- Cabin tents:Tall and spacious, good for families.
- Backpacking tents:Lightweight and small for hikers.
- Tunnel tents:Good for windy places and lots of space.
Selecting Tent Size
Pick a tent size that fits the number of people camping. Also, think about extra space for gear and comfort.
Too small tents feel cramped. Too big tents are heavy to carry. Balance size and weight for your trip.
- One-person tents are compact but tight.
- Two or three-person tents are good for couples or small groups.
- Four-person or larger tents suit families or groups.
- Consider extra room for pets or gear.
Considering Weather Conditions
Weather affects which tent you should pick. Some tents handle rain, wind, or cold better than others.
Check the tent’s rating for seasons. This tells you if it can handle tough weather or just mild conditions.
- 3-season tents:Good for spring, summer, and fall. Handle light rain and wind.
- 4-season tents:Stronger for winter and heavy weather.
- Rainfly and ventilation:Make sure the tent has good rain protection and airflow.

Credit: www.popularmechanics.com
Preparing Your Campsite
Setting up your tent starts with preparing the right campsite. This helps keep you safe and comfortable during your stay.
Take time to select and clear the area before pitching your tent. This makes the process easier and your camp better.
Finding A Flat Spot
Look for a flat area to pitch your tent. A level spot keeps you stable and helps the tent stand well.
Avoid hills or slopes. Water can run into your tent if the ground is uneven.
Clearing Debris
Remove sticks, rocks, and leaves from your camping spot. These can damage your tent floor and cause discomfort.
- Pick up sharp objects that might poke the tent
- Clear small branches and twigs
- Remove leaves and loose dirt
- Make sure the ground is smooth and clean
Checking For Safety Hazards
Look around your campsite for hazards. This keeps you safe while you rest and sleep.
- Avoid spots near dead or unstable trees
- Check for insect nests or animal trails
- Stay away from low areas that flood easily
- Watch for sharp rocks or uneven ground nearby
Unpacking And Organizing
Setting up a tent can be easy if you organize well. Start by unpacking and laying everything out properly.
Make sure you have all parts before you begin. This saves time and avoids frustration.
Laying Out Tent Components
Open the tent bag and take out all the contents. Lay the tent, poles, stakes, and rainfly neatly on the ground.
Ensure each component is visible and accessible. This helps you identify parts easily when assembling.
- Place the tent body flat on the ground.
- Arrange poles by length and type.
- Keep stakes together in one spot.
- Unfold the rainfly and spread it out.
Checking For Missing Parts
Count each part to ensure nothing is missing. Missing parts can delay your setup.
Use the tent manual to check the list of components. Compare it with the items you have.
- Check for the correct number of poles.
- Count the tent stakes needed for your setup.
- Ensure zippers and buckles are working.
Arranging Tools And Accessories
Gather tools and accessories needed for setup. Keep them close to your workspace.
Having tools ready speeds up the process. It also ensures you are prepared for any adjustments.
- Place a hammer or mallet nearby for stakes.
- Have extra rope or cord for securing.
- Keep a small repair kit on hand.

Credit: www.familyhandyman.com
Setting Up The Tent
Setting up your tent properly makes your camping trip more comfortable. Follow these steps to put your tent up safely and securely.
This guide covers assembling poles, attaching the tent body, and securing the tent with stakes.
Assembling Poles
Start by laying out all the tent poles on flat ground. Connect each pole section by sliding them together until they click or fit snugly. Make sure the poles are straight and fully extended.
Attaching Tent Body
Unfold the tent body and spread it on the ground over your chosen site. Insert the assembled poles through the tent’s pole sleeves or clip them onto hooks. Ensure the poles fit tightly to give the tent its shape.
- Start with one corner and work your way around.
- Attach clips or sleeves to poles firmly.
- Check that the tent stands upright and taut.
Securing The Tent With Stakes
After the tent is standing, use stakes to hold it in place. Push each stake through the tent’s loops at the base. Angle the stakes away from the tent for better grip. Hammer them into the ground until secure.
| Tip | Reason |
| Place stakes in firm soil | Prevents tent from moving |
| Use extra stakes for windy weather | Improves tent stability |
| Check tension after staking | Keeps tent tight and dry |
Adding The Rainfly And Guy Lines
After setting up your tent, adding the rainfly and guy lines is important. They protect you from rain and wind. Proper setup helps keep the tent stable and dry.
Follow simple steps to position the rainfly and tighten the guy lines. This will improve your camping comfort and safety.
Positioning The Rainfly
Place the rainfly over the tent so it covers the roof and sides. Make sure the rainfly does not touch the tent’s body directly to avoid leaks. Align the rainfly’s doors with the tent’s doors for easy entry.
Secure the rainfly’s corners to the tent’s base or stakes. Check for any wrinkles or loose areas that could catch wind.
Tightening Guy Lines
Tighten the guy lines to keep the tent steady in wind and rain. Attach the lines to the rainfly loops and stake them firmly into the ground. Use tensioners or knots to adjust the tightness.
- Find the guy line loops on the rainfly.
- Pull the guy lines away from the tent at a 45-degree angle.
- Secure the lines with stakes in firm ground.
- Adjust the tension to remove slack.
- Check that all lines are even and tight.
Ensuring Proper Ventilation
Good ventilation prevents moisture build-up inside your tent. Make sure vents on the rainfly are open and not blocked by guy lines or gear. This helps reduce condensation and keeps air flowing.
| Vent Location | Purpose | Tip |
|---|---|---|
| Roof Vents | Release hot air and moisture | Keep open even in rain |
| Side Vents | Allow fresh air inside | Clear away any obstacles |
| Door Vents | Increase airflow when door is closed | Use mesh screens to keep bugs out |
Final Adjustments And Tips
After setting up your tent, making final adjustments helps keep it secure. Small changes improve comfort inside the tent. This guide shares tips to check stability, organize space, and care for your tent.
Following these simple steps helps you enjoy your camping trip without worries. Take time to prepare well and maintain your tent throughout your stay.
Checking Tent Stability
Check all tent poles and stakes for firmness. Make sure the tent fabric is tight but not overstretched. Adjust guy lines to avoid sagging. Look for loose or slack parts that may catch wind.
- Push tent stakes deeper if they are loose.
- Tighten all ropes and guy lines evenly.
- Check pole joints for secure connections.
- Test tent stability by gently pushing on sides.
- Adjust as needed to prevent flapping in wind.
Organizing Inside Space
Keep the tent space tidy for comfort and safety. Separate sleeping and storage areas. Use bags or bins to avoid clutter. Keep important items in easy reach near the entrance.
- Place sleeping bags and pads flat on the floor.
- Store cooking gear and food outside the sleeping area.
- Use pockets or small containers for personal items.
- Keep shoes near the door to avoid dirt inside.
- Clear pathways inside the tent for easy movement.
Maintaining Tent During Your Stay
Care for your tent daily to protect it from damage. Remove dirt and moisture regularly. Avoid touching the tent walls too much to keep them clean. Watch for signs of wear or tears.
| Task | Frequency | Tip |
| Remove dirt and debris | Every day | Use a soft brush or cloth |
| Air out tent | Each morning | Open vents to reduce moisture |
| Check seams and zippers | Every 2-3 days | Fix small tears quickly |
| Secure guy lines | After strong wind | Retighten ropes if loose |
| Store wet gear outside | As needed | Prevent mold inside tent |
Frequently Asked Questions
How Do I Choose The Right Spot For Pitching A Tent?
Choose a flat, dry area free from rocks and roots. Avoid low spots prone to flooding. Look for natural wind barriers like trees or bushes to protect your tent.
What Basic Tools Are Needed To Set Up A Tent?
You’ll need tent stakes, poles, a mallet or hammer, and a ground tarp. These tools help secure your tent and protect it from the ground’s moisture and roughness.
How Do I Secure A Tent In Windy Conditions?
Use extra stakes and guy lines to anchor the tent firmly. Position the tent’s narrow end into the wind to reduce resistance and prevent damage.
What Is The Best Way To Avoid Condensation Inside The Tent?
Ventilate your tent by opening windows or vents. Avoid cooking or drying wet clothes inside. Proper airflow reduces moisture buildup and keeps the interior dry.
Conclusion
Putting up a tent is easier than it seems. Follow the steps carefully and take your time. Practice makes the process faster and smoother. Remember to choose a flat, clear spot for your tent. Secure all stakes tightly to keep it stable.
Check your tent for any damage before camping. Enjoy the comfort and shelter your tent provides. Camping becomes more fun with a well-set tent. Try it yourself and feel confident outdoors.