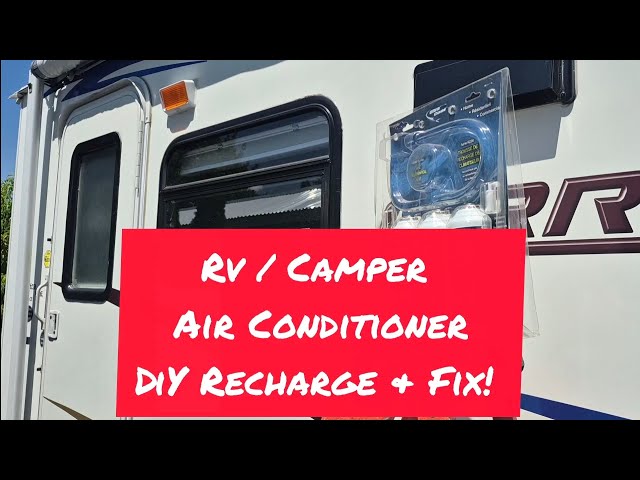
Is your RV air conditioner not keeping you cool like it used to? You’re not alone.
When your AC starts losing its chill, it’s often a sign it needs a recharge. But don’t worry—recharging your RV air conditioner isn’t as tricky as it sounds. In this guide, you’ll learn simple, step-by-step tips to bring back the cool comfort you deserve on the road.
Ready to save money and avoid expensive repairs? Keep reading and take control of your RV’s cooling system today.

Credit: www.youtube.com
Essential Tools And Materials
Recharging your RV air conditioner needs the right tools. Using the correct materials helps the job go smoothly.
This guide shows the basic tools and supplies you need to recharge your RV air conditioner safely.
Refrigerant Gas
Refrigerant is the gas that cools the air in your RV air conditioner. It is important to use the right type.
Most RV air conditioners use R-22 or R-410A refrigerants. Check your unit’s manual to find the correct type.
- R-22 (Freon) – Older models
- R-410A – Newer models
Manifold Gauge Set
A manifold gauge set measures pressure in the air conditioner system. It helps you monitor the refrigerant levels.
This tool has hoses and gauges to connect to the service ports on your AC unit. It is essential for safe recharging.
Vacuum Pump
A vacuum pump removes air and moisture from the AC system before adding refrigerant. This step prevents damage.
Without a vacuum pump, the system can have air pockets that reduce cooling efficiency and cause corrosion.
Safety Gear
Safety gear protects you while working with refrigerants and tools. Always wear safety glasses and gloves.
Refrigerants can cause frostbite or eye injury if they touch your skin or eyes. Proper protection is important.
- Safety glasses or goggles
- Protective gloves
- Long sleeves and pants
Leak Detector
A leak detector helps find leaks in the AC system. Leaks can let refrigerant escape and reduce cooling power.
Using a leak detector before recharging ensures your system is sealed and ready for the refrigerant refill.
Thermometer
A thermometer measures the temperature of the air coming from the AC vents. It shows if the unit cools properly.
Check the temperature before and after recharging to confirm the AC works well.

Credit: www.microair.net
Safety Precautions
Recharging your RV air conditioner needs care. You must follow safety rules to avoid injuries.
This guide shows important safety steps before and during the recharge process.
Turn Off The Power
Always switch off the RV air conditioner and disconnect power. This stops electric shocks and accidents.
Unplugging the unit prevents damage to the air conditioner and tools.
Wear Protective Gear
Wear safety glasses and gloves to protect your eyes and skin. Refrigerant can cause injuries on contact.
Long sleeves help avoid skin exposure to chemicals and sharp parts.
Work In A Ventilated Area
Make sure you recharge the AC in a place with fresh air. Refrigerants can be harmful if inhaled.
Avoid closed spaces to reduce the risk of breathing dangerous fumes.
Use The Correct Tools
Use tools made for AC recharging. Wrong tools can cause leaks or damage the system.
- Manifold gauge set
- Refrigerant can tap valve
- Leak detector
- Protective gloves and goggles
Handle Refrigerants Properly
Only use refrigerants approved for your RV air conditioner model. Using wrong types can harm the system.
Do not release refrigerants into the air. It is bad for the environment and illegal in many places.
Check For Leaks Before Recharging
Inspect your air conditioner for leaks before adding refrigerant. Leaks cause poor cooling and waste gas.
Use a leak detector or soapy water to find leaks on pipes and joints.
Identifying The Problem
Knowing when your RV air conditioner has low refrigerant is key. This helps you fix it before damage occurs.
Look for signs that show the cooling system is not working well. These clues point to low refrigerant levels.
Symptoms Of Low Refrigerant
Low refrigerant causes your RV air conditioner to cool less effectively. Watch for these common symptoms.
- Warm air coming from the vents instead of cold air
- The air conditioner runs longer than usual but does not cool well
- Ice forming on the air conditioner’s coils or pipes
- Unusual noises coming from the unit
- Increased humidity inside the RV
Common Causes
Low refrigerant usually happens because of leaks or wear and tear. Knowing the cause helps prevent future problems.
| Cause | Description |
| Leaks in the system | Small holes or cracks let refrigerant escape |
| Old or damaged seals | Seals lose tightness over time, causing leaks |
| Poor installation | Incorrect setup can lead to refrigerant loss |
| Wear and tear | Parts break down after long use |
| Physical damage | Impact or vibration can damage components |
Locating The Service Port
The service port is where you add refrigerant to your RV air conditioner. Finding it is the first step to recharge the system.
Knowing the exact location helps you connect tools safely and correctly. This guide shows where to look for the service port.
Check The Outside Unit
The service port is often on the outside part of the RV air conditioner. It looks like a small valve with a cap.
Look near the refrigerant lines or on the metal casing. It may be labeled with “Low” or “Service Port.”
- Locate the metal pipes going in and out of the unit
- Find a small valve with a plastic or metal cap
- Check for labels or markings on the unit
Identify Low-pressure And High-pressure Ports
There are two service ports: low-pressure and high-pressure. Recharging uses the low-pressure port only.
The low-pressure port is usually larger and closer to the compressor. It often has a blue or black cap.
- Low-pressure port: larger size, blue or black cap
- High-pressure port: smaller size, red or no cap
- Use only the low-pressure port for adding refrigerant
Consult Your Rv Air Conditioner Manual
The manual shows exact service port locations for your model. It also gives details on the correct port to use.
If you cannot find the port, check the manual before trying to recharge. This helps avoid mistakes.
- Look for diagrams of the air conditioner unit
- Find labels for service ports and refrigerant lines
- Follow instructions for safe recharging
Use A Flashlight And Mirror For Hard-to-see Areas
Sometimes the service port is in a tight or dark spot. A flashlight helps you see clearly.
A small mirror can help view hidden areas. Move slowly to avoid damaging parts.
- Shine the flashlight on pipes and valves
- Use a mirror to view behind or under parts
- Look for valve caps or labels
Connecting The Refrigerant Kit
Recharging your RV air conditioner starts with connecting the refrigerant kit correctly. This connection ensures the refrigerant flows safely and efficiently into the system.
Understanding how to choose the right kit and connect it properly will help keep your AC running smoothly during your travels.
Choosing The Right Kit
Select a refrigerant kit that fits your RV air conditioner model. The kit should include all necessary hoses, gauges, and connectors for safe handling.
- Check the refrigerant type your AC uses (R-22, R-410A, etc.)
- Pick a kit with clear instructions and durable parts
- Ensure the pressure gauges match your AC specifications
- Look for kits with color-coded hoses for easy identification
- Confirm the kit includes a refill can tap valve for controlled release
Proper Connection Techniques
Follow safe connection steps to avoid leaks and damage. Always work in a well-ventilated area and wear protective gloves and goggles.
| Connection Point | Action | Note |
|---|---|---|
| Low-Pressure Port | Attach the blue hose securely | This is where refrigerant enters the system |
| High-Pressure Port | Leave disconnected to prevent overfilling | Only connect if testing high pressure |
| Refrigerant Can | Connect the can tap valve to the red hose | Keep the can upright to avoid liquid release |
| Gauge Manifold | Attach securely to both hoses | Check for tight seals to prevent leaks |
Recharging The Air Conditioner
Recharging an RV air conditioner keeps it cool during hot days. It involves adding refrigerant to the system. Proper care is needed to avoid damage and ensure the unit works well.
You should watch pressure levels and avoid adding too much refrigerant. This guide explains how to do both safely.
Monitoring Pressure Levels
Check the pressure levels with a gauge before and during recharging. Correct pressure keeps the air conditioner running smoothly. Too low or too high pressure can cause problems.
| Pressure Type | Normal Range (PSI) | Effect if Incorrect |
| Low Side Pressure | 25 – 45 | Low cooling, possible leaks |
| High Side Pressure | 200 – 300 | Overheating, system damage |
Avoiding Overcharging
Overcharging adds too much refrigerant. It can harm the compressor and reduce cooling. Follow these tips to avoid overcharging your RV air conditioner.
- Read the manufacturer’s refrigerant capacity.
- Use a scale to measure refrigerant amount.
- Add refrigerant slowly and check pressure often.
- Stop adding when pressure reaches recommended levels.
- Never guess the amount of refrigerant to add.
Testing The System
After recharging your RV air conditioner, it is important to test the system. Testing helps make sure the AC works well and cools your RV properly.
Check the system carefully to find any problems. Fixing issues early saves time and money later.
Checking For Leaks
Leaks can cause your AC to lose refrigerant quickly. Look for oily spots or damage around AC parts. Use a leak detector if you have one.
Check these areas carefully:
- Connections and fittings
- Compressor and condenser coils
- Refrigerant lines and valves
- Evaporator coil area
If you find a leak, fix it before recharging again. Small leaks can become big problems fast.
Ensuring Optimal Cooling
After recharging, run the air conditioner for at least 15 minutes. Check if the air feels cool and steady.
Measure the temperature difference between the air entering and leaving the AC. It should be about 15 to 20 degrees Fahrenheit cooler.
- Check fan speed and airflow
- Listen for unusual sounds
- Make sure vents are open and clean
- Verify thermostat settings
If cooling is weak, inspect the system again. Low refrigerant or clogged parts may need attention.

Credit: www.youtube.com
Maintenance Tips
Keeping your RV air conditioner in good shape helps it work better. Regular care can stop problems before they start.
Here are some tips to help you recharge and maintain your RV air conditioner.
Regular Inspection
Check your RV air conditioner often to find issues early. Look for leaks, dirt, or broken parts.
Inspect the refrigerant level to know if it needs recharging. Low refrigerant can reduce cooling power.
- Look for oil stains around pipes and connections
- Check the air filter and clean or replace if dirty
- Examine the fan and motor for damage or noise
- Test the thermostat for accurate temperature control
Preventive Measures
Take steps to avoid damage and keep your air conditioner running well. Proper care saves money and time.
Keep the unit clean and protect it from harsh weather and debris. Use covers when not in use.
- Clean or replace air filters every few months
- Clear leaves and dirt from vents and coils
- Check seals around the unit to stop air leaks
- Run the air conditioner regularly to keep parts working
- Schedule professional checkups for refrigerant and system health
Frequently Asked Questions
How Often Should I Recharge My Rv Air Conditioner?
Recharge your RV air conditioner when cooling efficiency drops. Typically, check refrigerant levels annually or if performance worsens. Low refrigerant causes poor cooling and higher energy use. Regular maintenance helps avoid costly repairs and ensures optimal function.
What Tools Are Needed To Recharge An Rv Air Conditioner?
You need a refrigerant gauge set, a can of approved refrigerant, and a vacuum pump. Use protective gloves and goggles for safety. Proper tools ensure accurate pressure readings and safe refrigerant handling. Always follow manufacturer guidelines to avoid damage.
Can I Recharge My Rv Air Conditioner Myself?
Yes, if you have basic HVAC knowledge and proper tools. Follow safety protocols and manufacturer instructions carefully. Incorrect handling can harm the system or cause injury. Otherwise, hire a certified technician for safe and effective service.
How Do I Know If My Rv Air Conditioner Needs Recharging?
Signs include weak airflow, warm air output, or longer cooling times. Also, ice buildup on coils or unusual noises indicate low refrigerant. Regular inspections help detect issues early and maintain efficient cooling performance.
Conclusion
Recharging your RV air conditioner keeps it cool and comfortable. Follow the steps carefully to avoid damage. Check for leaks and use the right refrigerant. Regular maintenance helps your AC last longer. Stay safe by wearing gloves and goggles. Taking time now saves money on repairs later.
Your RV trips will feel better with a cold breeze. Keep your AC in good shape for every adventure.