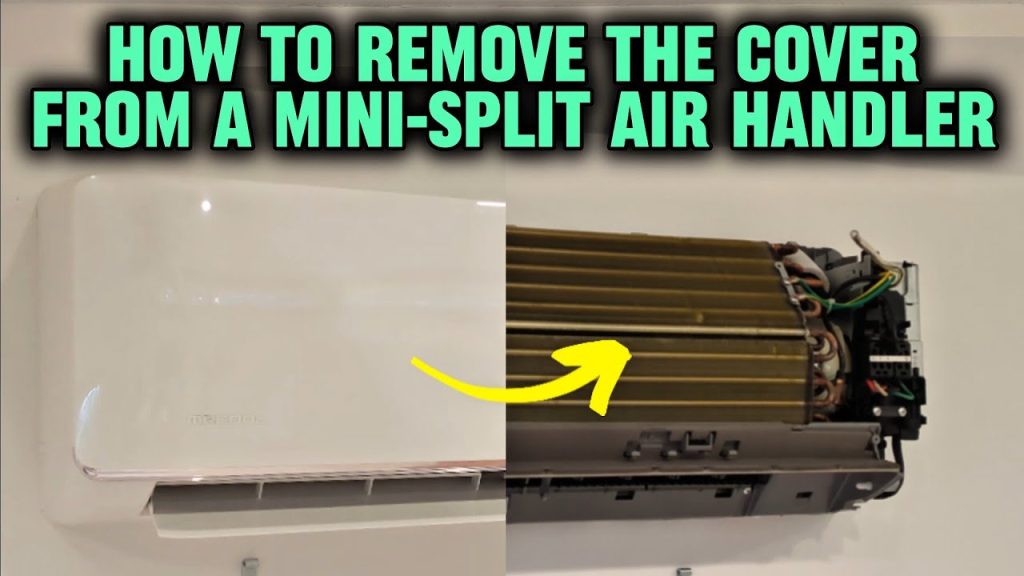
Are you ready to give your air conditioner a quick and easy refresh? Removing the front cover of your AC might sound tricky, but with the right steps, you can do it yourself without any hassle.
Knowing how to take off the front cover is the first step to cleaning, maintaining, or fixing your unit. Stick with me, and you’ll learn a simple, clear method that saves you time and money. Let’s get started and make your air conditioner work like new again!
Tools Needed
Removing the front cover of an air conditioner is simple if you have the right tools. These tools help you open the cover safely without damage.
Gathering these tools before you start will save time and avoid frustration.
Screwdriver
A screwdriver is needed to remove screws that hold the front cover. Most air conditioners use Phillips or flathead screws.
Check the type of screws on your unit before choosing your screwdriver.
- Phillips screwdriver fits cross-shaped screws
- Flathead screwdriver fits straight-line screws
Soft Cloth Or Towel
Use a soft cloth or towel to place under the air conditioner. This protects the unit and catches any falling parts.
The cloth also prevents scratches on surfaces and helps keep your workspace clean.
Plastic Pry Tool
A plastic pry tool helps to gently open clips or tabs holding the cover. It avoids damage to the plastic parts.
Do not use metal tools for prying to prevent scratches or cracks.
Gloves
Wear gloves to protect your hands from sharp edges and dust inside the air conditioner. Gloves also improve grip on tools and parts.
Choose gloves that are comfortable and flexible to handle small screws and clips.
Flashlight
A flashlight helps you see screws and clips inside the unit clearly. It is useful in dim or shadowed areas.
Use a small, handheld flashlight or a headlamp for hands-free lighting.
Prepare The Air Conditioner
Before removing the front cover of your air conditioner, you need to prepare it properly. This makes the process safer and easier.
Taking the right steps helps protect you and the air conditioner from damage.
Turn Off Power
Always turn off the power to your air conditioner before you start. This stops electricity from running through the unit.
Switch off the unit using its control panel. Then, turn off the circuit breaker or unplug it.
- Use the remote or control panel to power off
- Locate your home’s circuit breaker
- Turn off the breaker connected to the AC
- If possible, unplug the air conditioner
Clear Surrounding Area
Make sure the area around the air conditioner is clear. Remove any objects that block your access.
This space helps you work safely and prevents items from falling or breaking.
- Move furniture or decorations away
- Keep the floor clear of clutter
- Have a clean place to set removed parts
- Ensure good lighting in the workspace
Locate The Front Cover
The front cover of an air conditioner protects the internal parts. Removing it helps with cleaning or repairs. Knowing its location is the first step.
Most front covers are easy to find but vary by model. Look for clips, screws, or tabs that hold it in place.
Check The Air Conditioner Type
Different air conditioners have different front covers. Wall-mounted units often have a front panel that flips open. Window units usually have a front grille that snaps off.
Look For Fasteners
The front cover is usually secured with screws or clips. These fasteners keep the cover stable during operation.
- Screws near the edges or corners
- Plastic clips that snap into place
- Tabs that slide under slots on the unit
Identify The Front Cover Edges
The front cover edges are often smooth and visible. You can see a seam between the cover and the air conditioner body.
Remove Screws And Clips
Removing the front cover of an air conditioner needs care and the right tools. Start by finding all screws and clips that hold the cover in place.
Taking out these screws and clips properly helps avoid damage to the unit and makes reassembly easier.
Identify Screw Types
Air conditioner covers use different screw types. Look closely to see if screws are Phillips, flathead, or hex.
Use the correct screwdriver for each type. This stops screws from stripping or breaking.
- Phillips screws have a cross shape
- Flathead screws have a single straight slot
- Hex screws have a six-sided shape
Handle Clips Carefully
Clips hold the cover firmly but can break if forced. Find the clip locations before you try to remove the cover.
Gently press or slide clips to release them. Avoid pulling hard to protect the plastic parts.
- Locate each clip on the cover edges
- Use a flat tool to press or pry clips gently
- Work slowly around the cover to free all clips
Detach The Front Cover
Removing the front cover of an air conditioner helps you access internal parts. This is necessary for cleaning or repairs.
Be careful during removal to avoid breaking any parts. Follow these tips for safe detachment.
Lift Or Slide Off
The front cover usually lifts or slides off the unit. Check how it is attached before trying to remove it.
Lift the cover gently from the bottom or slide it sideways if it fits in grooves. Do not force it.
- Look for clips or hooks holding the cover
- Lift slowly if it is hooked at the bottom
- Slide sideways if the cover has tracks
- Use both hands to support the cover
Avoid Damaging Components
Do not pull the cover hard. Air conditioner parts are delicate and can break easily.
Check for screws or tabs before removing. Keep tools ready to loosen fasteners if needed.
- Turn off power before starting
- Remove screws holding the cover
- Release clips carefully without bending them
- Do not touch electrical parts inside
- Keep removed parts safe for reassembly

Credit: www.reddit.com
Clean And Inspect
Removing the front cover of your air conditioner lets you clean and check it well. This helps the unit work better and last longer.
Regular cleaning and inspection can stop problems early. It keeps your air conditioner running smoothly.
Remove Dust And Debris
Dust and dirt build up on the front cover and inside the unit. Removing them improves air flow and cools better.
Use a soft brush or cloth to clean the cover. Be gentle to avoid damage. You can also use a vacuum with a brush tool.
- Turn off and unplug the air conditioner before cleaning
- Detach the front cover carefully
- Use a soft brush or cloth to wipe dust off
- Vacuum the vents and filters gently
- Dry the cover fully before reattaching
Check For Wear And Tear
Look closely at the front cover and parts for cracks or damage. Small problems can cause bigger issues later.
Check the clips and screws that hold the cover. Make sure they are tight and not broken.
- Inspect the cover for cracks or warping
- Check clips and hinges for damage
- Look for signs of rust or corrosion
- Make sure screws are secure and not loose
- Replace damaged parts if needed
Reattach The Front Cover
After cleaning or inspecting your air conditioner, you need to put the front cover back. This guide explains how to reattach it safely and correctly.
Follow the steps carefully to avoid damage and ensure proper fit. The front cover keeps your unit protected and running well.
Align Properly
Start by holding the front cover near the air conditioner. Line up the edges with the unit’s frame. Make sure the clips and slots match perfectly. If it does not align well, it can cause gaps or loose fitting.
- Check the top edge for clip placement
- Match the sides with the unit’s grooves
- Hold the cover firmly but gently
- Adjust the angle until it fits flush against the unit
Secure Screws And Clips
Once aligned, fasten the cover with screws and clips. This step keeps the cover stable and stops it from falling off. Use a screwdriver that fits the screw heads.
| Tool | Action | Tip |
|---|---|---|
| Screwdriver | Tighten screws evenly | Do not overtighten to avoid cracking |
| Hands | Snap clips into place | Press firmly but carefully |
| Flashlight | Check all screws and clips | Ensure none are loose or missing |

Credit: www.youtube.com

Credit: www.reddit.com
Frequently Asked Questions
How Do I Safely Remove An Ac Front Cover?
To safely remove an AC front cover, first turn off the power. Use a screwdriver to unscrew any visible screws. Gently pull the cover away, being cautious of any attached wires. Consult your AC’s manual for specific instructions to avoid damage.
What Tools Are Needed For Ac Cover Removal?
To remove an AC front cover, you’ll need a screwdriver, preferably a Philips head. Depending on your model, you may also need pliers. Always refer to your air conditioner’s manual for specific tool requirements to ensure safety and prevent damage.
Can Removing The Ac Cover Affect Performance?
Removing the AC front cover for cleaning can improve its performance. Dust and debris can obstruct airflow. Cleaning ensures efficient cooling. However, improper removal can damage components, so handle with care and follow the manufacturer’s guidelines.
How Often Should I Remove The Ac Cover?
You should remove and clean your AC front cover at least once a year. Regular maintenance ensures optimal performance and energy efficiency. More frequent cleaning may be necessary in dusty environments. Always follow your manufacturer’s recommendations for specific maintenance schedules.
Conclusion
Removing your air conditioner’s front cover is simple and quick. Just follow the steps carefully and take your time. This helps you clean or fix your AC better. Always remember to turn off the power first. Keep the screws safe to avoid losing them.
Doing this regularly can improve your AC’s performance and lifespan. Now, you can handle this task with confidence and ease. No need to call a professional every time. Try it yourself and save time and money.