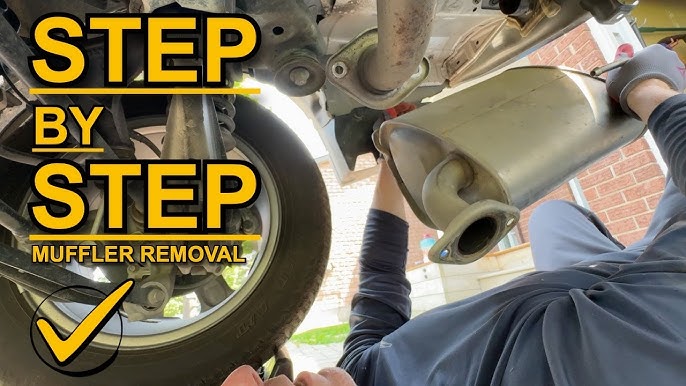
Are you ready to tackle your car’s exhaust system but don’t know where to start? Removing your exhaust system might sound tricky, but with the right steps, you can do it yourself and save time and money.
In this guide, you’ll discover simple, clear instructions that anyone can follow—even if you’re not a mechanic. By the end, you’ll feel confident handling your exhaust system like a pro. Keep reading, and let’s get your car running smoother together!

Credit: www.reddit.com
Tools And Materials Required
Removing an exhaust system needs the right tools and materials. Using proper items makes the job safe and easier.
This guide lists the essential tools and materials you need before starting the removal process.
Basic Hand Tools
These tools help you loosen bolts and nuts holding the exhaust system parts together.
- Socket wrench set with various sizes
- Combination wrenches
- Penetrating oil spray
- Rubber mallet
- Flathead and Phillips screwdrivers
Safety Equipment
Safety gear protects you from injuries and harmful substances during the removal.
- Safety glasses
- Mechanic gloves
- Dust mask or respirator
- Protective clothing
Additional Tools And Materials
You may need these items for better access and to handle parts safely.
| Item | Purpose |
| Jack and jack stands | Lift and support the vehicle safely |
| Exhaust pipe cutter | Cut rusted or welded parts |
| Wire brush | Clean rust and dirt from connections |
| Replacement gaskets | Seal joints when reinstalling |
| Shop rags | Clean surfaces and hands |

Credit: www.youtube.com
Preparing The Vehicle
Removing the exhaust system needs careful preparation. Getting the vehicle ready keeps you safe.
Proper steps help make the job easier and prevent damage to your car.
Ensuring Safety First
Safety is the top priority before starting any work under the car. Wear protective gloves and glasses.
Make sure the car engine is off and cooled down to avoid burns. Disconnect the battery to stop accidents.
- Wear gloves and safety glasses
- Turn off the engine and wait for cooling
- Disconnect the battery cables
- Work in a well-ventilated area
Lifting The Car Properly
Lift the car with the right tools to get good access to the exhaust system. Use a strong jack and jack stands.
Never rely only on a jack to hold the car. Place jack stands under the car frame for stability and safety.
- Park on a flat surface and apply the parking brake
- Use a hydraulic jack to lift the car
- Place jack stands at manufacturer’s recommended points
- Lower the car slowly onto the stands
- Check that the car is stable before working underneath
Locating The Exhaust System
The exhaust system runs from the engine to the rear of the vehicle. It carries gases away safely. Knowing where it is helps with removal and repair.
Look under the car to find the exhaust parts. They are usually metal pipes and components attached below the vehicle.
Identifying Exhaust Components
The exhaust system has several key parts. Each part plays a role in directing and cleaning exhaust gases.
- Exhaust manifold:Connects to the engine and collects gases.
- Catalytic converter:Reduces harmful emissions from the gases.
- Resonator:Controls sound and reduces noise.
- Muffler:Further reduces noise before gases exit.
- Tailpipe:The final pipe where gases leave the vehicle.
Checking For Damage Or Rust
Check the exhaust system for damage or rust before removal. These issues can cause leaks or weaken parts.
| Type of Damage | Signs to Look For | Effect on Exhaust |
| Rust | Flaking metal, holes, rough surface | Weakens pipes, causes leaks |
| Dents or Bends | Visible dents, misshaped pipes | Blocks gas flow, reduces performance |
| Cracks | Small splits or breaks in metal | Causes gas leaks, noise increase |
| Loose Connections | Wobbly parts, rattling sounds | Leaks and noise, unsafe |
Removing The Exhaust System
Removing the exhaust system is an important task for car repairs. It helps you access parts or replace old components.
Make sure to work safely and use the right tools. Follow the steps carefully to remove the system properly.
Loosening Bolts And Clamps
First, find all bolts and clamps that hold the exhaust system. These parts keep the pipes and muffler in place.
Use a wrench or socket set to loosen the bolts and clamps. Do this slowly to avoid breaking them.
- Spray lubricant on rusty bolts to help loosen them
- Wear gloves to protect your hands
- Keep all bolts and clamps safe for reassembly
Detaching The Exhaust Pipes
After loosening bolts and clamps, gently pull the exhaust pipes apart. Pipes may be tight, so wiggle them carefully.
Check for rubber hangers or mounts holding the pipes. Remove these to free the exhaust system fully.
- Use a pry bar if pipes are stuck
- Take care not to damage the pipes or hangers
- Support the pipes to avoid dropping them
Handling Stubborn Components
Removing an exhaust system often involves dealing with parts that do not want to budge. Rust, dirt, and heat can make bolts and joints very tight. You need the right tools and methods to loosen these stubborn components safely.
Two common techniques to ease removal are using penetrating oil and applying heat. Both methods help break down rust and corrosion that hold parts together.
Using Penetrating Oil
Penetrating oil seeps into small gaps and loosens rust and dirt. It makes bolts and nuts easier to turn and reduces the chance of breaking parts during removal.
- Spray the oil directly on the stuck bolts or joints.
- Let it sit for 10 to 15 minutes to soak in well.
- Reapply if needed for very rusty or old parts.
- Use a wrench or socket to try turning the components gently.
- Avoid forcing the parts too hard to prevent damage.
Applying Heat For Stuck Parts
Heat expands metal and can break the rust bond holding parts together. It is a useful option when penetrating oil alone does not work.
| Heat Source | Use | Safety Tips |
| Propane torch | Apply flame to the stuck joint carefully. | Wear gloves and eye protection. Avoid fuel tanks. |
| Heat gun | Use hot air to warm the bolts evenly. | Keep a safe distance and avoid plastic parts. |
| Electric heater | Use in a well-ventilated area on metal surfaces. | Do not touch hot surfaces directly. |
Inspecting And Cleaning
Removing the exhaust system requires careful inspection and cleaning. This keeps the parts working well and helps find issues early.
Focus on checking for damage and cleaning connection points before reinstalling or replacing parts.
Checking For Further Repairs
Look closely at all parts of the exhaust system. Check for cracks, rust, or holes that may cause leaks or noise.
- Inspect the muffler for rust spots or holes.
- Check the pipes for dents or cracks.
- Look at the hangers and clamps for wear or damage.
- Examine the catalytic converter for clogging or damage.
- Listen for unusual noises that suggest leaks.
Cleaning Connection Points
Clean all joints and connection points to ensure a tight fit and prevent leaks after reassembly.
| Connection Point | Cleaning Method |
| Flanges | Use wire brush to remove rust and debris |
| Clamps | Wipe with a rag soaked in degreaser |
| Pipe ends | Sand lightly to remove corrosion |
| Gaskets | Replace if damaged or worn |
Reassembling The Exhaust System
Reassembling the exhaust system needs care and focus. Proper assembly ensures your vehicle runs well and stays safe.
Follow each step closely to fit parts correctly. Tight connections stop leaks and noise.
Aligning New Components
Place the new exhaust parts in the right order. Check that pipes and mufflers line up with the mounting points.
- Start by loosely fitting the main pipe.
- Align the muffler so it fits under the car frame.
- Make sure hangers and brackets match the old system.
- Adjust parts to avoid touching the car body.
- Check for a smooth path from engine to tailpipe.
Securing With Bolts And Clamps
Tighten bolts and clamps to hold the exhaust parts firmly. Use the right tools to avoid damage.
| Component | Tool Needed | Tightening Tip |
| Flange Bolts | Socket wrench | Tighten evenly in a crisscross pattern |
| Clamps | Adjustable wrench | Secure but do not over-tighten |
| Hangers | Pliers | Hook firmly without bending parts |
Testing The New Installation
After installing a new exhaust system, testing is important. It helps find problems early.
This guide covers two key tests: listening for leaks and checking system function.
Listening For Leaks
Start the engine and listen closely near the exhaust joints and pipes. Leaks sound like hissing or popping.
- Check all connection points for noise
- Look for visible signs of escaping gases
- Use a mechanic’s stethoscope for better hearing
- If leaks appear, tighten clamps or replace gaskets
Ensuring Proper Functionality
Verify that the exhaust system works well with the engine running at different speeds.
| Test | What to Check | Expected Result |
| Idle | Noise and vibration | Quiet and smooth |
| Acceleration | Exhaust flow and sound | Steady and no rattling |
| Deceleration | Backfire or loud pops | None present |
| Visual Check | Exhaust color | Clear or light smoke only |

Credit: www.reddit.com
Frequently Asked Questions
How Do I Safely Remove An Exhaust System?
First, lift the vehicle securely using jack stands. Wear safety gloves and goggles. Use penetrating oil on bolts. Loosen clamps and hangers carefully before detaching the system.
What Tools Are Needed To Remove An Exhaust System?
You need a socket set, wrenches, penetrating oil, a rubber mallet, and jack stands. A pry bar may help with stubborn hangers. Safety gear like gloves and goggles is essential.
How Long Does It Take To Remove An Exhaust System?
Typically, it takes about 1 to 2 hours. Time varies depending on vehicle type and rust level. Proper preparation and the right tools speed up the process.
Can I Remove The Exhaust System Without Professional Help?
Yes, with basic mechanical skills and tools, you can remove it yourself. Follow safety guidelines and vehicle-specific instructions carefully to avoid damage or injury.
Conclusion
Removing an exhaust system can be simple with the right steps. Take your time and follow safety rules. Use the correct tools to avoid damage. Check each part carefully before removal. Clean and inspect parts for wear or rust. Proper removal helps your car run better.
Stay patient and work methodically for best results. You can do it yourself with confidence.