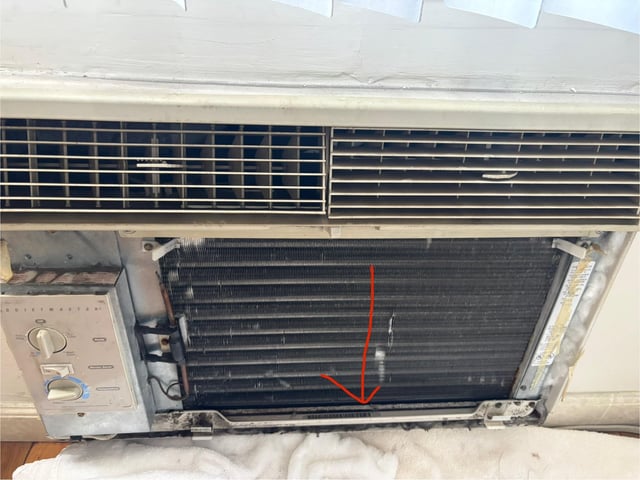
Thinking about removing your in-wall air conditioner but not sure where to start? You’re in the right place.
Taking out an air conditioner built into your wall might seem tricky, but with the right steps, you can do it safely and efficiently. Imagine freeing up space, reducing noise, or upgrading to a better cooling system without calling a pro.
This guide will walk you through everything you need to know, so you can handle the job with confidence. Keep reading to discover simple tips and tricks that make removing your in-wall air conditioner easier than you ever expected.

Credit: www.youtube.com
Tools And Materials Needed
Removing a wall air conditioner requires specific tools and materials. Having the right items helps you work safely and efficiently.
Gather everything before you start. This saves time and keeps the process smooth.
Basic Tools
These tools help you disconnect and remove the air conditioner from the wall.
- Screwdriver set (flathead and Phillips)
- Adjustable wrench
- Pliers
- Utility knife
- Putty knife
- Drill with bits
- Flashlight
Safety Equipment
Safety gear protects you during the removal process.
- Work gloves
- Safety goggles
- Dust mask
- Closed-toe shoes
Materials For Wall Repair
After removing the air conditioner, you may need materials to fix the wall.
| Material | Purpose |
|---|---|
| Spackle or wall putty | Fill holes and cracks |
| Sandpaper | Smooth patched areas |
| Paint and brush | Match wall color |
| Plastic sheeting | Protect floor during work |
Additional Supplies
These items may be needed depending on your wall and air conditioner type.
- Drop cloth
- Painter’s tape
- Vacuum cleaner (for cleanup)
- Helper or assistant
Prepare The Air Conditioner
Before removing a wall air conditioner, you need to prepare the unit carefully. Proper preparation makes the removal safe and easier.
Focus on turning off the power and disconnecting the unit from the wall and electrical sources.
Turn Off Power Supply
Always turn off the power before removing the air conditioner. This stops electricity from flowing to the unit.
Find the circuit breaker or unplug the air conditioner if it has a plug. Make sure no power reaches the unit.
- Locate the circuit breaker for the AC unit
- Switch off the breaker or unplug the unit
- Double-check that the unit is not running
Disconnect The Unit
After cutting power, disconnect the air conditioner from the wall. This includes removing screws and sealing materials.
Be careful with wires and tubing. Disconnect them gently to avoid damage or leaks.
- Remove screws holding the unit to the wall
- Carefully pull the unit out slightly
- Disconnect electrical wires and tubes
- Have a container ready to catch any water leakage
Remove The Front Panel And Filters
Removing the front panel and filters of a wall air conditioner helps with cleaning and maintenance. It is important to do this carefully to avoid damage.
This guide explains how to safely remove these parts for cleaning or replacement.
Remove The Front Panel
First, turn off and unplug the air conditioner. This keeps you safe from electric shock.
Look for clips or screws holding the front panel. Gently press or unscrew these to release the panel.
- Check for clips along the edges of the panel
- Use a screwdriver if screws are present
- Pull the panel away carefully to avoid breaking it
Remove The Filters
After removing the front panel, locate the filters inside. They usually slide or lift out easily.
Handle the filters gently. Clean or replace them based on their condition.
- Slide the filter out from its slot
- Lift the filter carefully if it is secured by tabs
- Inspect filters for dirt or damage before cleaning
Detach The Air Conditioner From The Wall
Removing a wall air conditioner requires care. You must detach the unit safely to avoid damage.
Follow simple steps to unscrew the brackets and support the unit while taking it down.
Unscrew Mounting Brackets
Locate the screws holding the mounting brackets. Use a screwdriver to remove each screw carefully.
Keep the screws and brackets in a safe place for future use or disposal.
- Find all screws on the sides and bottom of the unit
- Use the correct screwdriver size to avoid stripping screws
- Turn screws counterclockwise to loosen and remove them
- Store screws and brackets together for easy access
Support The Unit While Removing
Hold the air conditioner firmly before pulling it from the wall. It can be heavy and unstable.
Ask someone to help you if the unit is large. This prevents dropping or injury.
- Place one hand under the unit to support its weight
- Pull the air conditioner straight out from the wall
- Move slowly to avoid damaging the wall or unit
- Set the unit down on a soft surface once removed
Handle Electrical And Drain Connections
Removing a window air conditioner needs care with electrical and drain parts. These parts keep the unit working safely and properly. You must disconnect them carefully to avoid damage or injury.
Follow simple steps to handle these connections. This guide helps you remove the electrical wiring and drain hose safely.
Disconnect Electrical Wiring
First, turn off power to the air conditioner. This stops electricity from flowing and keeps you safe. Locate the power cord or the wiring box on the unit.
If your unit uses a plug, simply unplug it from the socket. For hardwired units, open the wiring cover. Carefully disconnect the wires by unscrewing the wire nuts or terminals.
- Switch off the circuit breaker or unplug the unit
- Open the wiring cover if hardwired
- Unscrew wire nuts or terminals
- Separate the wires gently without pulling
Remove Drain Hose
The drain hose removes water from the air conditioner. Find the hose connected at the bottom or back of the unit. It may be attached with clips or screws.
Loosen any clips or screws holding the hose. Pull the hose off carefully to avoid spills. Have a towel ready to catch any water left inside.
- Locate the drain hose at the unit’s base
- Remove clips or screws securing the hose
- Pull the hose off slowly
- Use a towel to catch leftover water

Credit: www.reddit.com
Extract The Unit Safely
Removing a wall air conditioner requires care to avoid damage or injury. Follow safe steps to lift and take out the unit.
Check the area after removal to ensure the wall is intact and ready for repair or a new unit.
Lift And Remove From Wall Opening
First, disconnect the unit from power and any external parts. Use a helper if the unit is heavy. Lift the air conditioner straight out of the wall opening with steady, even force. Avoid twisting or tilting to prevent damage.
- Switch off power and unplug the unit.
- Remove any screws or brackets holding the unit in place.
- Have one person inside and another outside to support the unit.
- Lift the unit slowly and pull it out evenly.
- Place the unit on a flat, stable surface.
Inspect For Wall Damage
After removing the air conditioner, look carefully at the wall opening. Check for cracks, holes, or water damage around the frame. This helps decide if repairs are needed before installing a new unit.
| Damage Type | Signs to Look For | Action Needed |
|---|---|---|
| Cracks | Visible lines or gaps in wall or frame | Fill with sealant or patch with plaster |
| Water Damage | Discoloration, softness, or mold around opening | Dry area and treat with mold remover |
| Loose Frame | Wobbly or detached mounting brackets | Tighten screws or replace brackets |
Seal And Repair The Wall Opening
After removing an in-wall air conditioner, you need to seal the opening properly. This keeps out drafts, moisture, and insects.
Follow simple steps to clean, fill, and finish the wall hole to restore your wall’s look and function.
Clean The Area
First, remove any dust, debris, or loose material from the wall opening. Use a brush or vacuum to clear the edges well.
Make sure the surface is dry before you start filling gaps or cracks.
Fill Gaps And Cracks
Use caulk or expanding foam to fill gaps around the opening. This prevents air leaks and moisture entry.
- Apply caulk to small cracks and gaps with a caulking gun.
- Use expanding foam for larger openings or uneven spaces.
- Let the materials dry completely before moving on.
Apply Finishing Touches
Once the filler dries, sand the area smooth to match the wall surface.
| Material | Use | Dry Time |
|---|---|---|
| Caulk | Small gaps | 1-2 hours |
| Expanding foam | Large holes | 4-6 hours |
| Spackle or joint compound | Surface smoothing | 24 hours |
Finally, paint over the repaired area to match your wall color. This hides the patch and protects the surface.
Dispose Or Store The Air Conditioner
Removing a wall air conditioner requires you to decide what to do with the unit. You can either dispose of it properly or store it for future use.
Proper disposal helps protect the environment. Storing the unit safely keeps it ready if you want to use it again.
Check Local Disposal Regulations
Each area has rules for disposing of air conditioners. These rules help keep harmful chemicals from polluting the air and water.
Look for local recycling centers or hazardous waste programs. They often accept old air conditioners for safe disposal.
- Contact your city or county waste department
- Find approved recycling or disposal centers
- Follow guidelines for removing refrigerants
- Avoid throwing the unit in regular trash
Consider Storage Options
If you plan to use the air conditioner later, store it properly. Keep it in a dry, cool place to avoid damage.
Clean the unit before storage. Cover it to protect against dust and pests.
- Remove all dust and dirt
- Drain any water or moisture
- Cover with a plastic sheet or cloth
- Keep away from direct sunlight and heat

Credit: www.reddit.com
Frequently Asked Questions
How Do I Safely Remove A Wall Air Conditioner?
Turn off the power and unplug the unit first. Remove the front panel and screws. Carefully detach the unit from the wall bracket. Have a helper support the weight during removal to prevent damage or injury.
What Tools Are Needed To Remove A Wall Air Conditioner?
You need a screwdriver, pliers, and a utility knife. A helper is recommended for safety. Optionally, use a pry bar if the unit is stuck. Always wear gloves and safety glasses during removal.
Can I Remove A Wall Air Conditioner Myself?
Yes, if you have basic tools and knowledge. Ensure the unit is unplugged and supported. Follow manufacturer instructions for safe removal. For heavy or complex units, consider professional help to avoid damage.
How Do I Handle The Wall Opening After Removal?
Seal the opening with insulation and weatherproof materials. Install a wall cover or patch the wall if needed. Proper sealing prevents drafts and energy loss. Consider repainting or refinishing for a clean look.
Conclusion
Successfully removing a wall air conditioner takes careful steps. Gather your tools first. Disconnect power to ensure safety. Remove any frames or covers gently. Support the unit while removing screws. Slide it out slowly to avoid damage. Seal the wall opening properly.
This prevents drafts and pests. Check for any remaining debris. Clean the area thoroughly. Store your air conditioner safely for future use. With these steps, you can handle the task. Keep your home comfortable and your walls neat. Enjoy a job well done!