Have you ever faced the frustration of a sheared screw stuck tight and refusing to budge? It can stop your project dead in its tracks, leaving you feeling stuck and unsure of what to do next.
But don’t worry—you’re not alone, and there are simple, effective ways to get that stubborn screw out without causing more damage. You’ll discover easy-to-follow steps and tips to remove a sheared screw quickly and safely. Keep reading, and you’ll be back on track before you know it.

Credit: www.amazon.ca
Tools Needed
Removing a sheared screw needs the right tools to work safely and well. Using proper equipment helps avoid damage and saves time.
This guide covers basic tools, special kits, and safety gear you should have before starting.
Basic Screw Removal Tools
These tools are common and often found in home toolboxes. They help loosen or grip the broken screw for removal.
- Flathead and Phillips screwdrivers
- Needle-nose pliers
- Hammer
- Center punch to mark the screw
- Drill with small drill bits
Specialized Extraction Kits
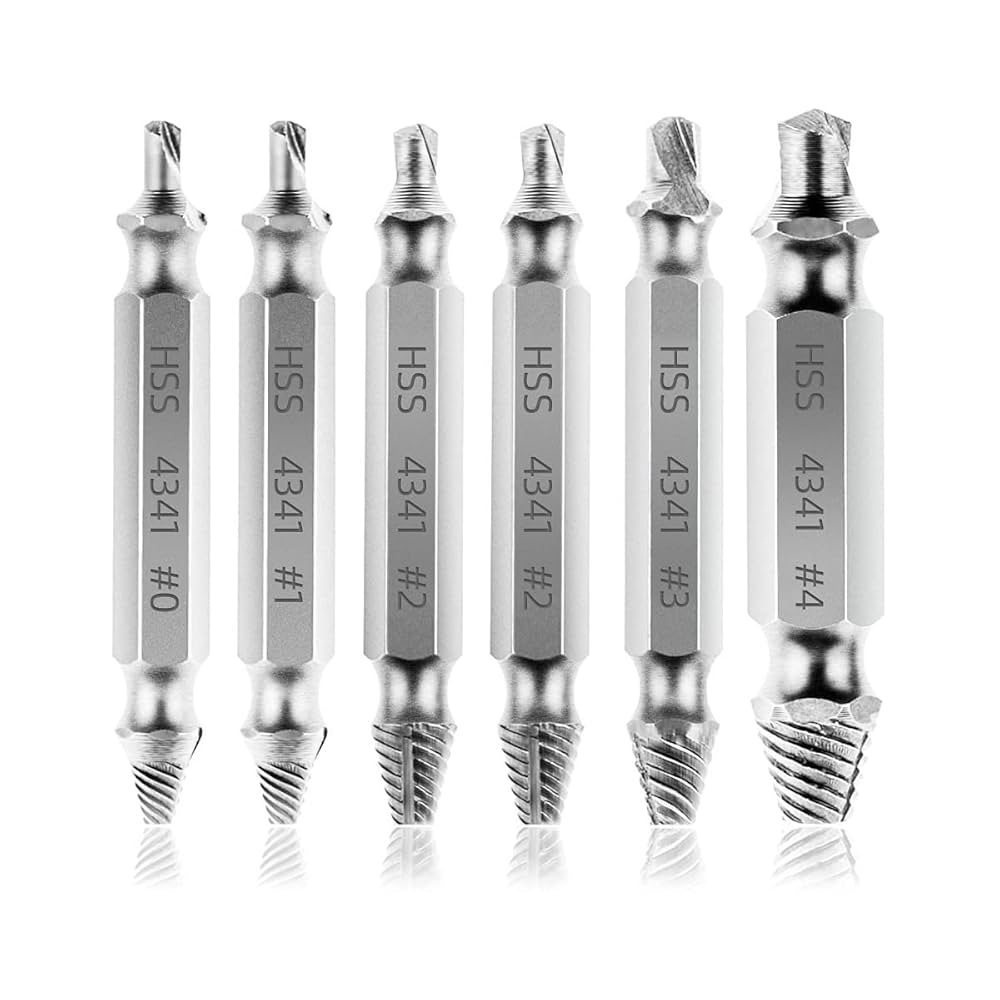
Extraction kits include tools designed to remove sheared screws fast and clean. They often have different sizes to fit various screws.
| Tool | Purpose |
| Screw extractors | Grip and turn broken screws |
| Left-hand drill bits | Drill into the screw while loosening |
| Tap wrench | Hold extractors securely |
| Drill guide | Keep drill steady and straight |
Safety Gear
Safety gear protects you from flying debris and sharp tools during screw removal. Always wear the right protection.
- Safety goggles to protect your eyes
- Work gloves to protect your hands
- Dust mask if drilling creates dust
- Hearing protection if using loud power tools
Assessing The Damage
Removing a sheared screw starts with checking how much damage it has. Understanding the problem helps you choose the right tools.
Look closely at the screw and the surrounding material. This step saves time and effort later.
Identifying The Type Of Shear
Different types of sheared screws need different approaches. Some break cleanly, while others may be bent or worn out.
Check if the screw broke at the head, shank, or inside the material. This helps you decide how to remove it.
- Clean break at the head: easier to grip or drill
- Broken inside the material: might need special extractors
- Bent screw: may require straightening or drilling
Checking Screw Accessibility
Look at how easy it is to reach the sheared screw. Tight spaces make removal harder.
Check if you can use tools like pliers, screwdrivers, or drills around the screw.
- Easy access: use gripping tools or screw extractors
- Limited space: consider small or angled tools
- Hidden screw: remove nearby parts if possible
Quick Removal Methods
Removing a sheared screw can be tricky, but there are quick methods to try. These techniques help you remove the screw without causing further damage.
Each method uses simple tools that you likely have at home. Follow these steps to tackle the task easily.
Using Rubber Bands For Grip
Rubber bands can add grip to help twist out a sheared screw. This method works well when the screw head is not too damaged.
Place a rubber band over the screw head. Press down firmly with your screwdriver. Turn slowly to remove the screw.
- Choose a thick rubber band for best grip
- Use a flathead screwdriver for better contact
- Apply steady pressure to avoid slipping
Applying Penetrating Oil
Penetrating oil helps loosen a sheared screw by reducing friction. This method is effective for screws stuck due to rust or corrosion.
Apply a generous amount of penetrating oil around the screw. Let it sit for 15 minutes to work its magic. Try to turn the screw with a screwdriver after.
- Choose a high-quality penetrating oil for best results
- Be patient and allow time for the oil to work
- Wipe excess oil to avoid mess
Tapping With A Hammer
Tapping a sheared screw with a hammer can help loosen it. This method uses gentle force to break the bond holding the screw.
Place a screwdriver in the screw head. Lightly tap the screwdriver handle with a hammer. This action can help dislodge the screw.
- Use a small hammer for better control
- Avoid hitting too hard to prevent damage
- Repeat tapping if the screw does not budge

Credit: www.youtube.com
Expert Extraction Techniques
Removing a sheared screw can be tough. It needs the right tools and methods to avoid damage.
Below are expert techniques to extract broken screws safely and effectively.
Drilling Out The Screw
Drilling out a sheared screw means making a hole in it. This allows you to push or pull it out.
Use a drill bit smaller than the screw’s diameter. Drill straight to avoid damaging the surrounding material.
- Secure the workpiece firmly.
- Start with a small pilot hole.
- Increase drill size gradually if needed.
- Keep the drill steady and slow.
- Use cutting oil to reduce heat.
Using Screw Extractors
Screw extractors are tools designed to remove broken screws. They grip inside the drilled hole of the screw.
After drilling a hole, insert the extractor and turn it counterclockwise. It bites into the screw and pulls it out.
- Choose the right size extractor for the screw.
- Drill a centered hole in the broken screw.
- Tap the extractor gently into the hole.
- Turn the extractor slowly with a wrench.
- Remove the screw once it loosens.
Welding A Nut For Removal
Welding a nut to the broken screw gives you a new grip point. This works if the screw head is missing.
Weld the nut firmly to the screw stub. Use a wrench on the nut to turn and remove the screw.
- Clean the screw surface before welding.
- Select a nut that fits the screw diameter.
- Use proper welding equipment and safety gear.
- Allow the weld to cool before turning.
- Turn the nut carefully to avoid breaking the weld.
Preventing Future Shearing
Sheared screws are hard to remove and cause project delays. Preventing screw shearing saves time and effort.
Using the right tools and care helps avoid breaking screws in the future.
Choosing The Right Screwdriver
Select a screwdriver that fits the screw head perfectly. A poor fit increases the chance of slipping and breaking the screw.
Use screwdrivers designed for the screw type, like Phillips or flathead. Avoid using worn or damaged screwdrivers.
- Match screwdriver size to screw head
- Use screwdriver type that fits the screw
- Replace worn or damaged tools
Proper Torque Application
Apply steady and controlled force when turning screws. Too much force can shear the screw head.
Use a torque screwdriver if possible. It stops turning when the right force is reached.
- Turn screws slowly and steadily
- Avoid using excessive force
- Use torque screwdrivers for sensitive jobs
Regular Maintenance Tips
Keep screws and tools clean and rust-free. Dirt and rust make screws harder to turn and break easier.
Check tools often for wear. Replace damaged parts to keep work smooth and safe.
- Clean screws and tools before use
- Remove rust with a wire brush or oil
- Inspect tools regularly for damage
- Store tools in a dry place

Credit: m.youtube.com
Frequently Asked Questions
How Can I Remove A Sheared Screw Without Damage?
Use a screw extractor kit for safe removal. First, drill a small hole into the screw head. Then, insert the extractor and turn counterclockwise. This method minimizes damage and works well on most metal screws.
What Tools Are Best For Removing Sheared Screws?
A screw extractor, drill, pliers, and rubber bands are effective. The extractor grips the broken screw for removal. Pliers can sometimes pull out exposed screws. Rubber bands improve grip on stripped heads.
Can I Remove A Sheared Screw Without A Drill?
Yes, if part of the screw is exposed, use locking pliers. Grip the screw tightly and turn counterclockwise. This works for screws sheared near the surface but may not work for deeply embedded screws.
Why Do Screws Shear Off During Removal?
Screws shear due to excessive force, poor quality, or rust. Using the wrong screwdriver size or angle increases risk. Proper tools and gentle pressure help prevent shearing.
Conclusion
Removing a sheared screw can be tricky but not impossible. Use the right tools and stay patient. Small steps often lead to success. Avoid rushing to prevent more damage. Practice safety and work carefully. With these tips, you can handle stuck screws at home.
Keep trying, and you will get the job done. Simple methods often work best.