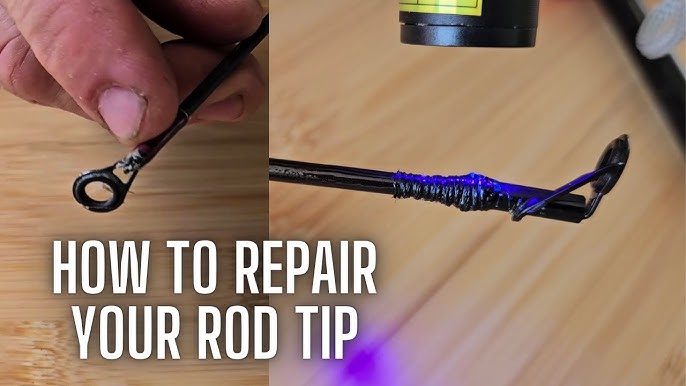
A broken fishing rod can bring your fishing plans to a sudden halt. But before you rush out to buy a new one, what if you could fix it yourself?
Imagine saving money and getting back on the water faster than you thought possible. In this guide, you’ll discover simple, step-by-step methods to repair your fishing rod, even if you have little experience. Keep reading, and you’ll learn how to bring your rod back to life, so your next fishing trip is just around the corner.

Credit: www.amazon.ca
Identify The Damage
Before fixing a broken fishing rod, you must find where it is damaged. Careful checking helps you know what to repair.
Look closely at the rod in good light. This helps you see small cracks or loose parts.
Check For Cracks And Breaks
Cracks and breaks can weaken your fishing rod. Run your fingers along the rod to feel for rough or uneven spots.
Look for lines or splits in the rod’s material. These signs show where the rod may snap during use.
- Examine the entire length of the rod.
- Use a magnifying glass for small cracks.
- Tap gently to hear if the rod sounds hollow or dull.
Inspect The Guides And Tip
The guides and tip help control the fishing line. Check if any guides are bent or missing.
Look at the tip for cracks or if it is loose. Damaged guides or tips can cause line problems.
- See if guides spin freely or are stuck.
- Check guide rings for cracks or rust.
- Make sure the tip is straight and tight.
Assess The Reel Seat And Handle
The reel seat holds the reel firmly. Check if it is loose or cracked. A bad reel seat affects your fishing.
Look at the handle for damage. Cracks, tears, or loose parts make holding the rod hard and unsafe.
- Try tightening the reel seat to test its hold.
- Look for cracks or splits in the reel seat material.
- Check the handle for wear, cracks, or soft spots.

Credit: flexcoat.com
Gather Repair Materials
Repairing a broken fishing rod is possible with the right materials. First, gather everything you need before starting the repair process.
This ensures you won’t have to pause midway to find missing items. Let’s explore the essential tools and supplies needed.
Essential Tools And Supplies
Having the right tools is crucial for a successful repair. Basic tools are often available in most households.
- Sandpaper for smoothing rough edges
- Scissors or a utility knife for trimming
- Small brush for applying adhesives
- Protective gloves to keep your hands safe
Choosing The Right Adhesives
Adhesives hold the broken parts together. It’s important to choose the correct type for your fishing rod material.
- Epoxy resin for strong, durable bonds
- Super glue for quick repairs
- Waterproof glue for rods exposed to moisture
Selecting Replacement Parts
Sometimes, you need new parts to replace broken ones. Choose parts that match your fishing rod’s specifications.
- Replacement rod tips for broken ends
- New guides if the original ones are damaged
- Grip tape for a better handle
Fixing Rod Blank Breaks
Fixing a broken fishing rod blank can save you money and keep your gear ready. The rod blank is the main part of the rod, so repairing it needs care and the right tools.
This guide shows ways to fix rod blank breaks using repair kits, fiberglass wraps, and other bonding methods.
Using Rod Repair Kits
Rod repair kits come with materials made for fixing broken blanks. These kits usually include resin, curing agents, and wraps.
- Clean the broken area well before starting.
- Mix the resin and hardener as per instructions.
- Apply the resin to both broken parts carefully.
- Join the parts and wrap tightly with the supplied wrap.
- Let it cure for the time the kit suggests.
- Sand the area lightly after curing for a smooth finish.
Applying Fiberglass Wraps
Fiberglass wraps strengthen the repair. They add durability and protect the rod blank from future damage.
| Material | Purpose |
| Fiberglass Cloth | Wraps around break to add strength |
| Epoxy Resin | Bonds the fiberglass to the blank |
| Sandpaper | Prepares the blank surface for wrapping |
| Masking Tape | Holds fiberglass in place while curing |
Alternative Bonding Methods
Besides resin and wraps, some other methods help bond the broken rod parts.
Try this simple glue method:
- Dry fit the broken ends to check alignment.
- Use a strong adhesive like super glue or two-part epoxy.
- Apply glue inside the broken parts and join them.
- Hold firmly or clamp until set.
- Wrap with tape or thread for extra support.
Repairing Broken Guides
Fishing rod guides help the line move smoothly. Broken guides can cause line damage or poor casting. Fixing them keeps your rod working well.
This guide explains how to remove damaged guides and install new ones. Proper alignment and securing are important for good repairs.
Removing Damaged Guides
Start by checking the broken guide carefully. Use a sharp blade to cut the thread wrapping the guide. Be careful not to damage the rod blank.
Once the thread is cut, gently slide the damaged guide off. Clean any leftover glue or thread from the rod surface before adding a new guide.
- Inspect the damaged guide
- Cut thread wraps with a sharp blade
- Remove guide carefully
- Clean rod surface
Installing New Guides
Choose a new guide of the same size and style as the old one. Slide it onto the rod blank at the same spot where the old guide was.
Wrap the guide foot with new thread tightly. Start from one end and cover the entire foot evenly. This holds the guide firmly in place.
- Select matching guide size
- Place guide on rod blank
- Wrap guide foot with thread tightly
- Cover the foot evenly with wraps
Aligning And Securing Guides
Make sure the new guide lines up with the other guides on the rod. Proper alignment helps the fishing line flow smoothly.
Apply rod finish or glue over the thread wraps to seal them. Let it dry completely before using the rod. This keeps the guide secure and protected.
- Align guide with other guides
- Apply finish or glue on thread wraps
- Allow finish to dry fully
- Check guide stability before use
Handling Reel Seat And Handle Issues
Fixing a broken fishing rod often means dealing with the reel seat and handle. These parts can become loose or damaged over time. Proper repair helps keep your rod strong and easy to use.
This guide covers tightening loose reel seats, replacing damaged handles, and using epoxy for secure fittings. Each section gives clear steps to help you fix your rod properly.
Tightening Loose Reel Seats
A loose reel seat can cause the reel to wobble or slip. Tightening it keeps your reel steady and your fishing smooth. Follow these tips to fix it:
- Remove the reel and clean the seat area.
- Check for damaged threads or cracks.
- Use a soft cloth to dry the seat.
- Apply a thin layer of non-slip tape inside the seat.
- Reinstall the reel and tighten the locking nut firmly.
- Test the reel to ensure it stays in place.
Replacing Damaged Handles
A broken handle makes fishing hard and uncomfortable. Replace it with a new one for better grip and control. Here is what you need to do:
| Step | Action |
|---|---|
| 1 | Remove the old handle by cutting or pulling it off. |
| 2 | Clean the rod blank to remove old glue or debris. |
| 3 | Fit the new handle to check its size and alignment. |
| 4 | Apply epoxy glue inside the handle and on the rod. |
| 5 | Slide the handle onto the rod and wipe off excess glue. |
| 6 | Let the glue dry for at least 24 hours before use. |
Using Epoxy For Secure Fittings
Epoxy creates a strong bond for reel seats and handles. It keeps parts from moving or falling off. Use these tips for the best results:
- Choose a two-part epoxy made for fishing gear.
- Mix the epoxy well according to the instructions.
- Apply a thin, even layer on all contact surfaces.
- Fit the parts together carefully and remove extra epoxy.
- Clamp or hold parts in place until epoxy cures fully.
- Clean tools and hands immediately after use.
Finishing Touches
After fixing the broken parts of your fishing rod, the next step is to make it smooth and strong. Finishing touches help your rod look good and work well.
These final steps include sanding, applying coatings, and testing the rod. Each step makes sure the repair lasts and the rod performs properly.
Sanding And Smoothing Repairs
Use fine sandpaper to smooth the repair area. Sand gently to avoid damaging the rod.
Remove any rough edges or excess glue. A smooth surface helps coatings stick better.
- Start with medium-grit sandpaper
- Finish with fine-grit sandpaper
- Wipe dust off with a clean cloth
Applying Protective Coatings
Protective coatings keep the repair safe from water and wear. Use clear epoxy or varnish designed for fishing rods.
Apply thin layers and let each dry fully. This builds a strong, water-resistant finish.
- Use a small brush for even application
- Apply 2 to 3 coats for best protection
- Let the rod dry in a dust-free place
Testing The Rod’s Performance
After the coatings dry, test your fishing rod carefully. Check for strength and flexibility near the repair.
Try casting and bending the rod lightly. Make sure it feels secure and works like before.
- Cast without heavy weight first
- Check for any cracks or weak spots
- Increase tension slowly if all feels good
Preventing Future Damage
Fixing a broken fishing rod takes time and care. To avoid more breaks, follow good habits. Protect your rod to keep it strong and ready for use.
Simple steps can stop damage before it starts. Use proper storage, maintain your rod often, and handle it with care. These actions help your rod last longer.
Proper Rod Storage Tips
Store your fishing rod in a safe, dry place. Avoid places with high heat or moisture. These conditions can weaken the rod over time.
Use a rod rack or holder to keep the rod straight. Do not lean it against walls or bend it. Keep it away from sharp objects that can scratch or crack it.
- Keep rods upright or horizontal on a rack
- Store rods in a cool, dry room
- Use rod tubes or cases for extra protection
- Do not stack heavy objects on top of rods
Regular Maintenance Routines
Check your fishing rod after every trip. Look for cracks, loose guides, or worn parts. Catching problems early stops bigger damage.
Clean your rod with fresh water and a soft cloth. Remove dirt and salt that can cause corrosion. Dry it completely before storing.
- Inspect guides and reel seat for damage
- Wash rod with fresh water after saltwater fishing
- Use mild soap for tough dirt
- Dry rod fully before putting away
Handling And Transport Advice
Handle your fishing rod gently to avoid stress points. Do not bend or force it into tight spaces. Be mindful when casting or moving around.
Use a hard case or padded bag for transport. Secure the rod so it does not move during travel. Avoid placing heavy items on it.
- Carry rods by the handle, not the tip
- Use rod socks or sleeves for extra protection
- Secure rods in vehicle racks or inside cases
- Do not toss rods into car trunks or boats carelessly

Credit: www.youtube.com
Frequently Asked Questions
How Do I Fix A Cracked Fishing Rod Blank?
To fix a cracked rod blank, clean the area thoroughly. Apply epoxy resin and wrap with fiberglass tape. Let it cure fully before use. This method restores strength and prevents further damage effectively.
Can I Replace Broken Fishing Rod Guides Myself?
Yes, replacing rod guides is simple. Remove old guides, clean the rod surface, and align new guides. Secure with rod wrapping thread and coat with epoxy. This DIY repair saves money and maintains rod performance.
What Tools Do I Need To Repair A Fishing Rod?
Basic tools include epoxy resin, fiberglass tape, rod wrapping thread, sandpaper, and a small brush. These essentials help fix cracks, replace guides, and restore your fishing rod properly and efficiently.
How Long Does It Take To Repair A Broken Fishing Rod?
Repairs typically take a few hours including curing time. Epoxy usually needs 4-24 hours to harden fully. Proper patience ensures a strong, lasting repair and avoids future breakage.
Conclusion
Fixing a broken fishing rod can save time and money. Small cracks or breaks often need simple tools and materials. Follow the steps carefully to ensure a strong repair. Check your rod before each fishing trip to avoid surprises. A well-maintained rod lasts longer and performs better.
Try to fix minor damage early to prevent bigger problems. Enjoy your fishing with confidence and a reliable rod. Keep practicing these repair tips for easy fixes every time.