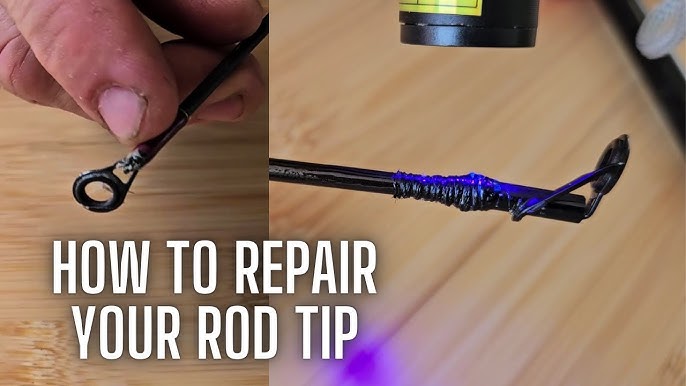
Have you ever experienced the frustration of a broken fishing rod tip just when you’re about to catch the big one? It feels like your fishing trip is ruined, and you might think you need to buy a new rod.
But what if you could fix it yourself quickly and easily? In this guide, you’ll learn simple steps to repair your broken fishing rod tip, saving you time and money. Keep reading, and you’ll be back on the water in no time with a rod that feels as good as new.

Credit: www.youtube.com
Identify The Damage
Before fixing a broken fishing rod tip, you must find the problem. Look closely at the tip to see what is wrong.
Knowing the damage helps you choose the right way to repair the rod tip.
Check The Rod Tip
Look at the very end of the rod. The tip can have cracks, splits, or be missing parts. Sometimes the guide ring is bent or broken.
Use good light and a magnifying glass if needed. Check if the tip fits tightly on the rod or if it moves loosely.
- Look for visible cracks or breaks.
- Check if the guide ring is bent or damaged.
- See if the tip is loose or missing.
- Feel for rough or sharp edges.
Assess The Severity
Decide how bad the damage is. Small cracks may need simple fixes. Large breaks might need replacing the whole tip.
Think about how the rod works when you fish. If the damage stops the rod from bending right, repair it quickly.
- Minor cracks: can be glued or wrapped.
- Broken tip: may need a new tip section.
- Damaged guide ring: might need replacement.
- Loose tip: needs tightening or re-gluing.
Gather Repair Materials
A broken fishing rod tip can be frustrating. Repairing it is simple with the right materials. Gather essential tools and recommended adhesives before starting the repair.
Preparing your materials ensures a smooth repair process. This guide helps you gather what you need for fixing your fishing rod tip.
Essential Tools
Start with the basic tools. These tools help you make precise repairs. Gather them before you begin.
- Small pliers for holding parts
- Fine-grit sandpaper for smoothing edges
- Sharp knife or cutter for trimming
- Heat source like a lighter or a heat gun
Recommended Adhesives
Adhesives are crucial for a strong bond. Choose the right adhesive for your rod material. This ensures durability and strength.
- Epoxy resin for a strong hold
- Hot glue for quick fixes
- Super glue for minor repairs
Prepare The Rod Tip
Fixing a broken fishing rod tip starts with good preparation. Getting the tip ready helps the repair last longer.
Take your time to clean and trim the broken area before you fix it. This makes the glue or tape stick better.
Clean The Broken Area
Remove dirt and old glue from the broken tip. Use a soft cloth to wipe the area gently.
If needed, use rubbing alcohol on a cloth to clean the surface. Let it dry completely before moving on.
Trim Damaged Fibers
Cut off any loose or frayed fibers around the break. Use sharp scissors for a clean cut.
Trimming helps the pieces fit well and keeps the repair strong. Be careful not to cut too much.
Apply The Repair
Fixing a broken fishing rod tip needs care and the right materials. This guide shows how to apply the repair using two common adhesives.
Choose the best method for your rod and follow the steps to restore its strength and use.
Using Super Glue
Super glue dries fast and works well for small breaks. It bonds the parts quickly, so you must act with care.
- Clean the broken tip and the rod end with rubbing alcohol.
- Apply a thin layer of super glue to the broken surfaces.
- Press the tip and rod together firmly for about 30 seconds.
- Let the glue cure for at least 10 minutes before use.
Using Epoxy Resin
Epoxy resin takes longer to dry but creates a stronger bond. It works best for larger breaks or heavy fishing rods.
| Step | Action | Notes |
|---|---|---|
| 1 | Mix equal parts of epoxy resin and hardener. | Use a disposable surface to mix thoroughly. |
| 2 | Clean the broken parts with alcohol. | Remove any dirt or old glue. |
| 3 | Apply the mixed epoxy to both broken surfaces. | Use a small brush or stick for even coverage. |
| 4 | Join the broken tip and rod firmly. | Hold in place or use tape to secure. |
| 5 | Let the epoxy cure for 24 hours. | Do not move the rod during this time. |
Reinforce The Repair
Fixing a broken fishing rod tip needs care to make it strong. Reinforcing the repair helps the rod last longer.
This guide covers how to wrap the tip with thread and seal it with a clear coat for a solid fix.
Wrap With Thread
Use strong thread to wrap the broken tip. This keeps the pieces tight and adds strength.
- Start wrapping near the base of the break.
- Keep the thread tight and close together.
- Cover the entire break area evenly.
- Tie off the thread securely to prevent unraveling.
Seal With Clear Coat
Apply a clear coat over the thread wrap to protect it from water and wear. This step finishes the repair.
| Clear Coat Type | Drying Time | Water Resistance |
| Epoxy Resin | 24 hours | High |
| Polyurethane | 4-6 hours | Medium |
| Nail Polish | 30 minutes | Low |

Credit: anglersresource.net
Alternative Fixes
A broken fishing rod tip can stop your fishing trip early. Fixing it quickly helps you get back on the water.
There are a few easy ways to repair the tip without special tools. These alternatives save time and money.
Use A Rod Tip Replacement
Replacing the broken tip with a new one is a common fix. You can buy rod tip replacements at fishing stores.
To replace the tip, remove the old broken piece carefully. Slide the new tip onto the rod end and secure it with glue or epoxy.
- Remove the broken tip by heating or twisting gently.
- Choose a replacement tip that fits your rod size.
- Apply a small amount of glue inside the new tip.
- Slide the new tip onto the rod and hold it in place.
- Let the glue dry fully before using the rod.
Temporary Tape Solution
Tape can hold a broken tip together until you get a better fix. This is a quick and simple way to keep fishing.
Use strong tape like electrical or duct tape. Wrap it tightly around the broken tip and rod to hold the pieces in place.
- Clean the broken area before taping.
- Use tape that sticks well and resists water.
- Wrap the tape several times for a strong hold.
- Check the tape often and replace if loose.
- Plan to fix the tip properly soon after.
Test The Repair
After fixing the broken fishing rod tip, you need to test the repair. This ensures the rod works well and is safe to use.
Testing helps find any problems early. It also shows if the tip can handle pressure during fishing.
Check Flexibility
Gently bend the rod tip to check its flexibility. It should bend without cracking or feeling stiff.
- Bend the rod slowly and evenly.
- Look for any unusual sounds like cracking.
- Make sure the tip returns to its original shape.
- If it feels too rigid, the repair may need fixing.
Inspect For Weakness
Look closely at the repaired area to find any weak spots or cracks. A weak tip can break again easily.
| Inspection Point | What to Look For | Action If Found |
|---|---|---|
| Surface | Cracks, chips, or rough spots | Smooth or redo the repair |
| Joint | Loose or uneven glue | Apply more adhesive and let dry |
| Tip Strength | Weak bending or snapping | Reinforce with tape or replace tip |

Credit: anglersresource.net
Maintenance Tips
Fixing a broken fishing rod tip is only part of keeping your rod in good shape. Regular maintenance helps your rod last longer and perform well.
Simple care steps prevent damage and keep your fishing trips enjoyable. Here are some tips to avoid future breakage and store your rod properly.
Avoid Future Breakage
Handle your fishing rod gently to stop the tip from breaking again. Avoid bending or forcing the rod beyond its limits.
Check your rod before each use to spot small cracks or weak spots early. Fix minor issues before they become big problems.
- Do not overload the rod with heavy lures or lines
- Keep the rod straight when casting or retrieving
- Do not step on or drop the rod
- Use rod sleeves or covers during transport
- Inspect guides and tip regularly for damage
Proper Storage
Store your fishing rod in a dry place away from direct sunlight. Heat and moisture can weaken the rod material and cause damage.
Keep the rod vertical or horizontal on a rack to avoid bending. Use rod holders or wall mounts to keep it safe and stable.
- Avoid leaning the rod against walls for long periods
- Keep rods separated to prevent tangling or damage
- Use rod tubes or cases for extra protection
- Dry the rod completely before storage to prevent rust
Frequently Asked Questions
How Do I Fix A Broken Fishing Rod Tip?
To fix a broken rod tip, remove the damaged tip and clean the area. Attach a replacement tip with strong epoxy or super glue. Let it dry completely before using the rod again to ensure durability and proper alignment.
What Tools Are Needed To Repair A Fishing Rod Tip?
You need a replacement tip, epoxy or super glue, sandpaper, and a cloth. Optionally, use pliers and a knife to remove the broken tip. These tools help ensure a clean, secure, and long-lasting repair.
Can I Repair A Fishing Rod Tip Myself?
Yes, repairing a fishing rod tip is a simple DIY task. With basic tools and careful steps, you can restore your rod’s function. Follow proper instructions for alignment and drying time to achieve a strong repair.
How Long Does A Fishing Rod Tip Repair Take?
A fishing rod tip repair usually takes 30 minutes to an hour. Most time is spent waiting for the glue or epoxy to dry fully. Proper drying ensures the repair holds during fishing.
Conclusion
Fixing a broken fishing rod tip can save your favorite gear. Follow each step with care and patience. Use the right materials to ensure a strong repair. Small cracks or breaks do not mean the rod is lost. A quick fix gets you back on the water faster.
Keep practicing these repairs to improve your skills. Enjoy your fishing trips without worrying about damage. Simple tools and a little effort make a big difference. Try it yourself and see how easy it can be.