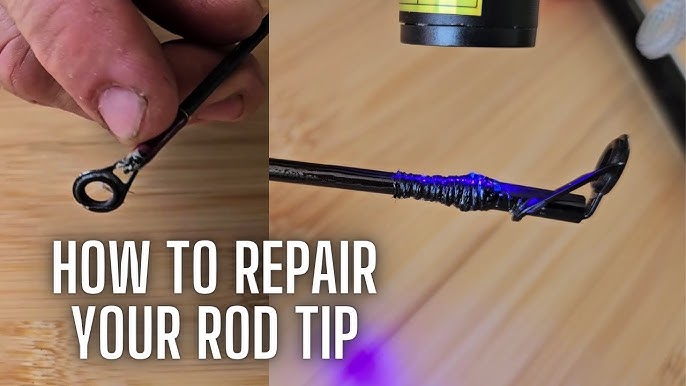
Have you ever felt the frustration of a broken fishing rod just when you were ready to catch the big one? Repairing your fishing rod yourself can save you time, money, and the disappointment of missing out.
In this guide, you’ll discover simple, step-by-step tips to fix common problems quickly and confidently. Whether it’s a cracked tip, a loose guide, or a damaged reel seat, you’ll learn how to bring your rod back to life and get back on the water faster than you think.
Keep reading—you’re about to master the easy fixes every angler should know.
Credit: www.ebay.ca
Tools You Need
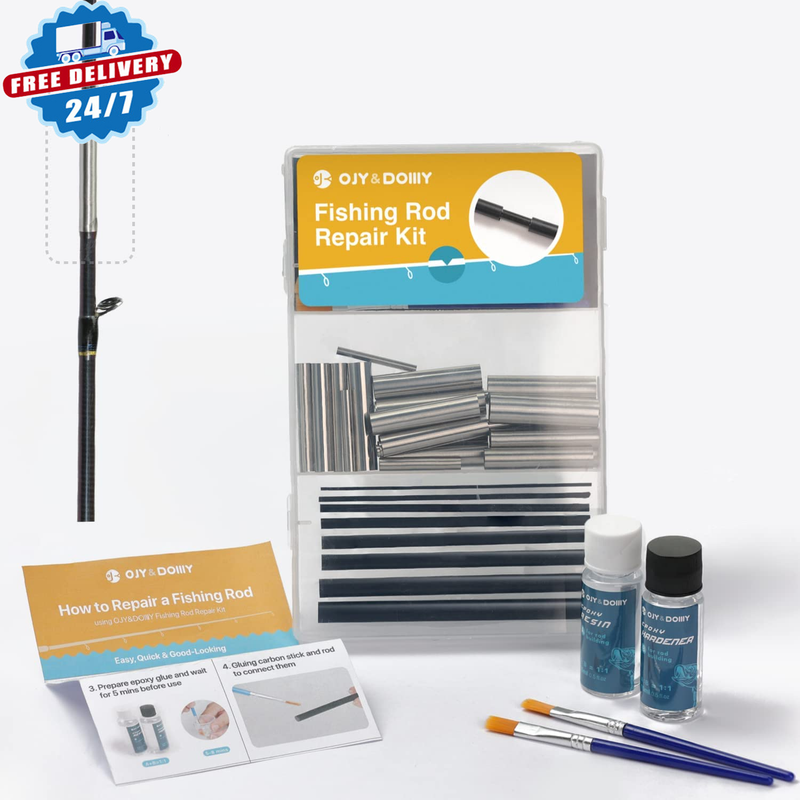
Fixing a fishing rod needs the right tools. Using the correct tools makes the repair easier.
This guide will list the tools you need to repair your fishing rod. Some tools are essential, and others are optional.
Essential Repair Tools
These tools are necessary for most fishing rod repairs. Keep them ready before you start fixing your rod.
- Rod Wrapper or Threader – Helps wrap thread around the rod guides.
- Epoxy Resin – Used to secure the thread and guides in place.
- Small Scissors or Razor Blade – For cutting thread and trimming excess material.
- Sandpaper – Smoothens rough or damaged areas on the rod.
- Replacement Rod Guides – Needed if the old guides are broken or missing.
- Heat Source (like a lighter) – Helps to cure epoxy quickly and fix thread wraps.
- Needle-nose Pliers – Used to remove broken guides or parts carefully.
Optional Supplies
These items are helpful but not always required. They can make repairs cleaner and easier.
- Thread Wax – Keeps the thread tight and prevents fraying during wrapping.
- Fine-tip Paintbrush – For applying epoxy smoothly on small areas.
- Masking Tape – Protects parts of the rod from epoxy or paint.
- Rod Dryer or Motor – Spins the rod while epoxy dries for even coating.
- Replacement Handle or Cork – For fixing damaged grips or handles.
- Measuring Tape – Helps measure thread length and guide positions accurately.

Credit: flexcoat.com
Identify The Damage
Fishing rods can break or develop issues over time. It’s important to identify the type of damage to fix it properly.
Understanding common problems helps in determining the best repair method for your rod.
Common Breaks And Cracks
Breaks and cracks are frequent issues in fishing rods. These can affect the performance and durability of the rod.
- Check for visible cracks along the rod’s length.
- Inspect the tip, as it is prone to breaking.
- Look for any splintering in the fiberglass or graphite.
Guide And Reel Seat Issues
The guides and reel seat are crucial for casting and control. Problems here can lead to poor performance.
Ensure the guides are aligned. Misalignment affects casting accuracy. If the reel seat is loose, it may need tightening or replacement. Here’s a quick check table:
| Part | Issue |
| Guide | Misaligned or bent |
| Reel Seat | Loose or cracked |
Fixing Rod Guides
Rod guides are small rings that help control the fishing line. Broken guides can cause line tangles or damage. Fixing them keeps your rod working well.
This guide shows how to remove broken guides and install new ones. You can do it yourself with some basic tools and care.
Removing Broken Guides
Start by checking which guides need replacing. Broken guides may have cracks, missing rings, or loose wraps. Removing them carefully protects your rod.
- Use a sharp blade to cut the thread wrapping the guide.
- Gently peel away the thread without scratching the rod blank.
- Remove any leftover glue or thread residue with rubbing alcohol.
- Clean the rod surface with a soft cloth before adding a new guide.
Installing New Guides
Choose new guides that match your rod size and type. Position them where the old guides were. Secure the guides tightly with thread wraps and glue.
- Place the new guide on the rod and align it straight.
- Wrap strong thread tightly around the guide foot and rod.
- Cover the thread with thin epoxy or rod finish glue.
- Let the glue dry fully before using the rod again.
| Tool | Purpose |
| Sharp blade | Cut old thread |
| Rubbing alcohol | Clean rod surface |
| Thread | Secure new guide |
| Epoxy glue | Seal and protect wraps |
Repairing Rod Blank
The rod blank is the main part of a fishing rod. It can get damaged by cracks or breaks. Fixing it properly saves your rod and money.
Use the right tools and materials for the repair. Be patient and work carefully to avoid more damage.
Using Epoxy For Cracks
Epoxy glue works well for small cracks in the rod blank. It seals the crack and adds strength to the rod.
Clean the crack area before applying epoxy. Use a small brush to spread the epoxy evenly. Let it dry fully for the best hold.
- Remove dirt and debris from the crack
- Mix epoxy according to instructions
- Apply epoxy carefully to the crack
- Wipe off extra epoxy around the crack
- Let it cure for at least 24 hours
Replacing Broken Sections
If a rod section breaks completely, you can replace it. Match the new section to the original rod size and type.
Cut out the broken part cleanly. Use a rod ferrule or insert to join the new section. Secure it with epoxy or rod glue.
- Measure the broken section length
- Purchase a matching replacement section
- Cut damaged section straight and clean
- Fit replacement section with ferrule or insert
- Glue joint with epoxy and let dry fully
- Test rod strength before use
Reel Seat Maintenance
The reel seat holds the fishing reel in place. It needs regular care to work well. Keeping it tight and in good shape helps your fishing rod last longer.
Check the reel seat often. Fix any loose or damaged parts quickly. This keeps your reel secure and improves your fishing experience.
Tightening Loose Seats
A loose reel seat can cause problems when fishing. It makes the reel wobble and may hurt your catch. You can tighten it with simple tools.
Use a soft cloth to protect the rod. Turn the reel seat clockwise to tighten it. Check if it holds the reel firmly. Do not over-tighten to avoid damage.
- Cover the reel seat with a soft cloth
- Turn the seat clockwise by hand
- Test the reel for any movement
- Stop tightening when it feels secure
Replacing Damaged Seats
If the reel seat is cracked or broken, replace it. A damaged seat cannot hold the reel safely. Replacements are available at fishing stores or online.
Remove the old reel seat by loosening it. Clean the rod handle before installing the new seat. Slide the new seat in place and tighten it firmly.
- Loosen and remove the damaged seat
- Clean the rod handle surface
- Fit the new reel seat onto the handle
- Tighten the new seat securely
- Check the reel fits well in the new seat
Finishing Touches
After fixing your fishing rod, the final steps make it look and work great. These steps protect your repair and give it a smooth finish.
Focus on sanding and painting carefully. Then let the rod cure and dry fully before use.
Sanding And Painting
Sanding smooths the repair area. Use fine sandpaper to remove bumps and rough spots.
After sanding, paint the repaired area. Use paint that matches the rod’s color and is weather-resistant.
- Sand lightly with 220-grit sandpaper
- Clean dust with a soft cloth
- Apply thin paint layers for even coverage
- Let each layer dry before adding the next
Curing And Drying
Let the painted repair cure fully. This makes the fix strong and durable.
Keep the rod in a dry, warm place. Avoid touching the repair until it dries completely.
- Place rod flat or hang it gently
- Dry time usually takes 24 to 48 hours
- Check the repair before using the rod
- Do not rush; full curing ensures long-lasting repair
Preventive Care Tips
Taking care of your fishing rod can help it last longer. Preventive care keeps your rod strong and ready to use.
Simple habits can stop damage before it starts. Follow these tips to protect your fishing rod.
Proper Storage
Store your fishing rod in a dry place to avoid rust and damage. Keep it away from heat and direct sunlight.
Use rod holders or racks to keep rods upright. Do not lean rods against walls or leave them on the floor.
- Keep rods in a cool, dry area
- Avoid placing heavy items on rods
- Use rod sleeves or tubes for extra protection
- Store rods away from chemicals or sharp objects
Regular Inspections
Check your fishing rod often for cracks, loose guides, or broken parts. Early checks help catch problems fast.
Look at the tip, handle, and guides closely. Clean the rod after each use to spot damage more easily.
- Inspect guides for cracks or bends
- Check the rod blank for scratches or cracks
- Make sure the reel seat is tight and secure
- Clean dirt and salt off the rod after fishing

Credit: www.reddit.com
Frequently Asked Questions
How Do I Fix A Broken Fishing Rod Tip?
To fix a broken tip, first remove the damaged section. Then, attach a replacement tip guide using epoxy glue. Allow it to dry completely before use. This restores rod function and prevents line tangles.
What Tools Are Needed To Repair A Fishing Rod?
Essential tools include epoxy glue, replacement guides, a rod tip, sandpaper, and a heat source. These help you remove broken parts and secure new components. Having the right tools ensures a strong, lasting repair.
Can I Repair A Fishing Rod Crack Myself?
Yes, small cracks can be repaired using epoxy resin. Clean the area, apply resin, and let it cure fully. For large cracks, professional repair or rod replacement is recommended.
How Long Does A Fishing Rod Repair Take?
Most minor repairs take 30 minutes to a few hours. Epoxy drying time varies, so patience is key. Complex repairs may require longer or professional help.
Conclusion
Repairing a fishing rod saves money and keeps it ready to use. Small fixes can stop bigger problems later. Take time to check the rod after each trip. Use simple tools and follow steps carefully. Practice makes the process easier and quicker.
Keep your rod in good shape for better fishing trips. Don’t ignore cracks or loose parts—they can cause breaks. A well-maintained rod brings more fun and success on the water. Try these tips next time your rod needs care.