Imagine you’re out camping, ready to enjoy the great outdoors, when you suddenly spot a hole in your tent. It’s frustrating, right?
But don’t worry—fixing that hole doesn’t have to ruin your trip or cost you a fortune. In this guide, you’ll learn simple, effective steps to repair your tent quickly and keep it sturdy for many adventures ahead. Whether it’s a tiny tear or a bigger rip, you’ll discover easy tips that save your gear and give you peace of mind.
Keep reading, and you’ll be ready to handle any tent damage like a pro.
Assess The Damage
Before fixing a hole in your tent, you need to check the damage carefully. This helps you decide the best way to repair it.
Look closely at the hole and the area around it. This will make sure your repair lasts longer and keeps your tent strong.
Identify Hole Size
Measure the hole to know how big it is. Small holes need different fixes than large ones.
- Use a ruler or tape measure to find the hole’s length and width.
- Mark the edges of the hole with a washable marker.
- Note if the hole is a tear, puncture, or a worn spot.
Check Surrounding Fabric
Look at the fabric around the hole. Check if it is thin, weak, or damaged.
| Condition | Action Needed |
|---|---|
| Fabric strong and intact | Patch only the hole |
| Fabric slightly worn | Patch hole and reinforce area |
| Fabric torn or very thin | Replace fabric section or use a large patch |

Credit: www.youtube.com
Gather Necessary Materials
Fixing a hole in a tent needs the right tools. Gather all needed materials before you start.
This makes the repair easier and helps the tent last longer after fixing.
Repair Kits
Repair kits have all the basics for fixing small tears and holes. They are easy to carry and use.
Most kits include patches, glue, and instructions. They suit quick repairs on camping trips.
- Patches of different sizes and shapes
- Special adhesive for tent fabrics
- Cleaning wipes or sandpaper
- Instruction manual
Patch Materials
Patch materials cover the hole to stop air and water from entering. Choose patches that match your tent fabric.
Common patch materials include nylon and vinyl. These materials are strong and waterproof.
- Nylon patches for lightweight tents
- Vinyl patches for heavy-duty tents
- Clear patches for less visible repairs
- Self-adhesive or sew-on patches
Adhesives And Sealants
Adhesives hold the patch in place. Sealants add extra waterproof protection around the patch edges.
Use adhesives made for outdoor fabrics. Sealants keep the repair strong in rain and wind.
- Waterproof fabric glue
- Silicone sealant for flexible sealing
- Seam sealer for extra protection
- Non-toxic and quick-dry options
Clean The Area
Cleaning the area around the hole is important before you start the repair. Dirt and moisture can stop the patch from sticking well.
Take your time to prepare the fabric. This helps make the repair strong and long-lasting.
Remove Dirt And Debris
Remove all dirt, leaves, and small stones from the hole and the area around it. Use a soft brush or cloth for this job.
- Brush gently to avoid making the hole bigger
- Pick out any stuck debris by hand
- Use a damp cloth to wipe away fine dust
- Let the fabric dry a bit before moving on
Dry The Fabric
Dry fabric helps the patch stick better. Avoid fixing the hole when the fabric is wet or damp.
| Drying Method | Details |
| Air Dry | Place tent in sunlight or a warm room for a few hours |
| Towel Dry | Use a clean towel to soak up moisture gently |
| Avoid Heat Sources | Do not use direct heat like a hairdryer or heater |

Credit: www.amazon.com
Apply A Patch
Fixing a hole in your tent helps keep you dry and safe outdoors. Applying a patch is a common and effective way to repair small tears or holes.
This guide explains how to cut the patch and attach it with adhesive for a strong hold.
Cut The Patch
Cut a patch slightly larger than the hole or tear. This gives full coverage and prevents water from leaking through.
- Use tent repair fabric or a strong, waterproof material.
- Make the patch round or oval to avoid corners peeling off.
- Cut clean edges with scissors to ensure good adhesion.
- Allow at least one inch of extra fabric around the hole.
Attach With Adhesive
Attach the patch using a waterproof adhesive made for tents. Follow these steps to make the patch hold well.
| Action | Details |
| Clean Area | Wipe the tent surface around the hole with rubbing alcohol. |
| Apply Glue | Spread adhesive evenly on the patch and tent surface. |
| Press Patch | Firmly press the patch over the hole and hold for a minute. |
| Dry Time | Let the adhesive cure for at least 24 hours before use. |
Seal The Edges
Fixing a hole in your tent needs careful sealing. The edges around the hole must be sealed well. This keeps water out and stops the hole from growing.
Use the right materials and methods to make the repair strong. Sealing the edges is key for a lasting fix.
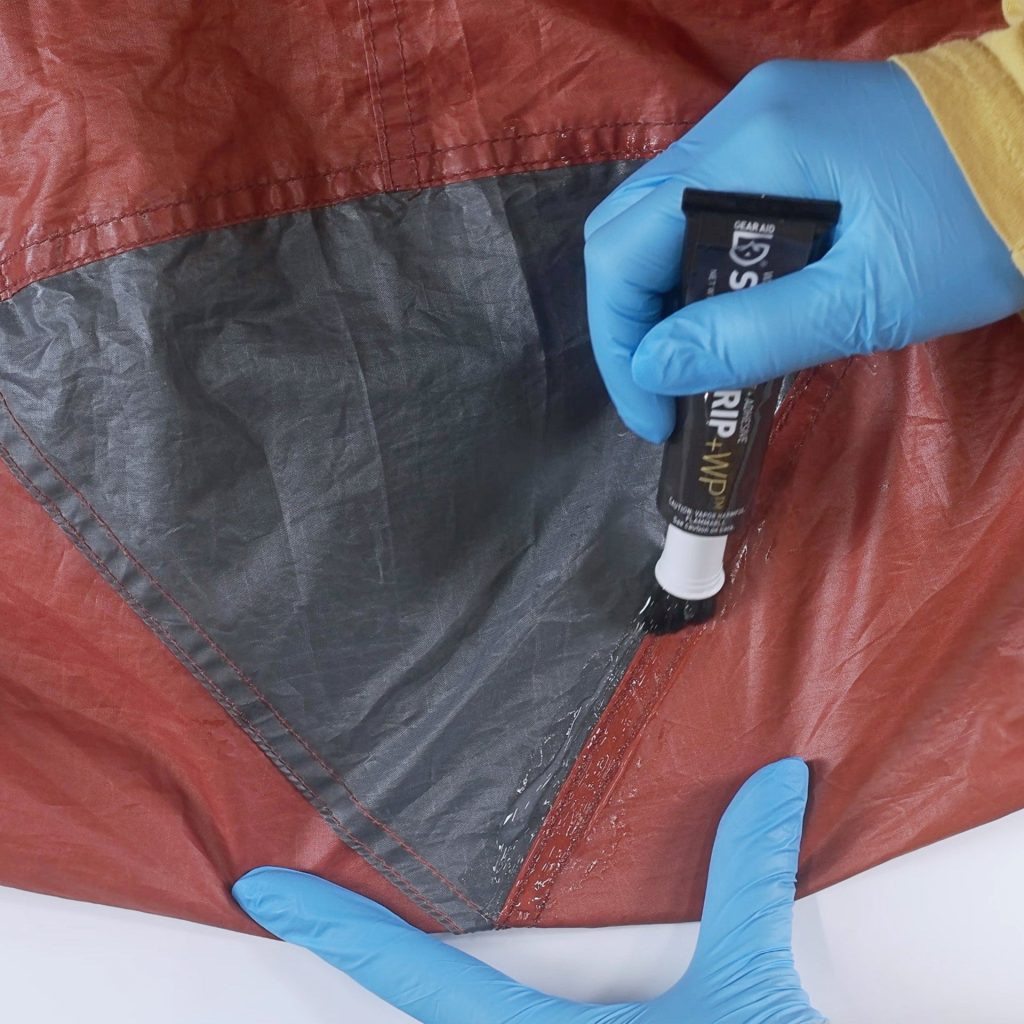
Use Seam Sealer
Apply a seam sealer around the edges of the hole. This liquid glue sticks the fabric and stops water from entering. Make sure the area is clean and dry before applying.
- Choose a seam sealer made for tents or outdoor gear.
- Use a small brush to spread the sealer evenly.
- Cover the entire edge of the patch or tear.
- Let the sealer dry fully as per instructions.
Ensure Watertight Seal
After sealing, check that no gaps or bubbles remain. A watertight seal keeps you dry during rain. Use this table to confirm steps for a solid seal.
| Action | Tip |
| Clean edges | Remove dirt and dry fabric |
| Apply sealer | Use thin, even layer |
| Dry time | Follow product instructions fully |
| Check seal | Look for cracks or bubbles |
Test The Repair
After fixing a hole in your tent, it is important to check if the repair works well. Testing helps you avoid surprises during your next trip.
Take time to make sure the patch holds and the tent stays dry. This step keeps your shelter safe and comfortable.
Check For Leaks
Look closely at the repair area to find any water leaks or weak spots. You can do this by spraying water or using a damp cloth.
- Spray water evenly on the repaired spot
- Look inside the tent for water drops
- Feel for dampness or wet spots on the fabric
- Check edges of the patch carefully
Reinforce If Necessary
If you find leaks or weak points, add more patch material or seam sealer. Reinforcing helps keep the repair strong over time.
| Reinforcement Method | When to Use |
| Extra Patch Layer | Leaks still visible after first repair |
| Seam Sealer | Edges of patch show gaps |
| Stitching | Patch starts to peel off |
Prevent Future Damage
Repairing a hole in your tent is important, but stopping new damage is key. Taking care of your tent keeps it safe and lasts longer.
Simple actions can protect your tent from tears and holes. Learn how to handle your tent well and check it often.
Proper Tent Handling
Handle your tent with care to avoid creating holes. Always set it up on soft, clean ground free of sharp objects.
Use gentle movements when pitching or folding your tent. Avoid pulling or stretching the fabric too hard.
- Clear the area of sticks, rocks, and debris before setup
- Use a groundsheet under your tent for extra protection
- Do not step or kneel on the tent fabric
- Store your tent dry and folded loosely to avoid stress on seams
Regular Inspections
Check your tent often for small tears or weak spots. Fixing them early prevents bigger holes.
Look closely at seams, zippers, and corners. These areas wear out fastest and need extra care.
- Inspect the tent fabric before and after each trip
- Check seams for loose threads or small gaps
- Test zippers for smooth operation and no snags
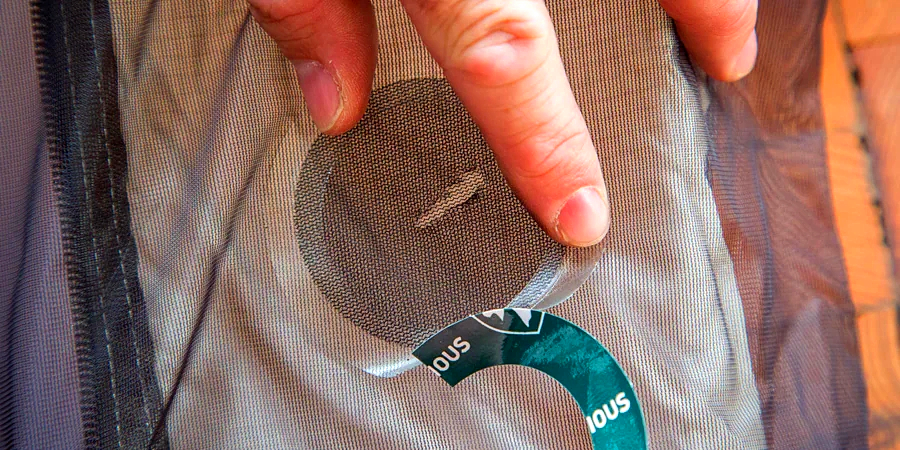
- Repair minor damage quickly with patch kits or tape
Credit: www.pomoly.com
Frequently Asked Questions
How Do I Patch A Hole In My Tent?
Clean the damaged area first. Use a tent repair kit or adhesive patch. Apply the patch firmly and let it dry. This stops water and wind from entering, preserving the tent’s integrity.
What Materials Are Best For Tent Hole Repair?
Silicone or polyurethane patches work well. They are waterproof and flexible. Repair tape can also be effective for small holes. Always choose materials compatible with your tent fabric.
Can I Repair A Tent Hole Without Sewing?
Yes, use strong adhesive patches or repair tape. These products bond securely to the fabric. Sewing is not always necessary and tape offers a quick fix.
How Long Does A Tent Patch Last?
A properly applied patch can last for several camping seasons. Its durability depends on the repair quality and fabric care. Recheck patches regularly for wear and replace if needed.
Conclusion
Fixing a hole in your tent helps keep you dry and safe. Small tears can become big problems if left alone. Use simple patch kits or tape to stop leaks fast. Repairing your tent saves money and extends its life.
Always check your tent before trips to catch damage early. With quick fixes, your tent stays ready for any adventure. Don’t let a hole ruin your outdoor fun. Take care of your gear, and it will take care of you.