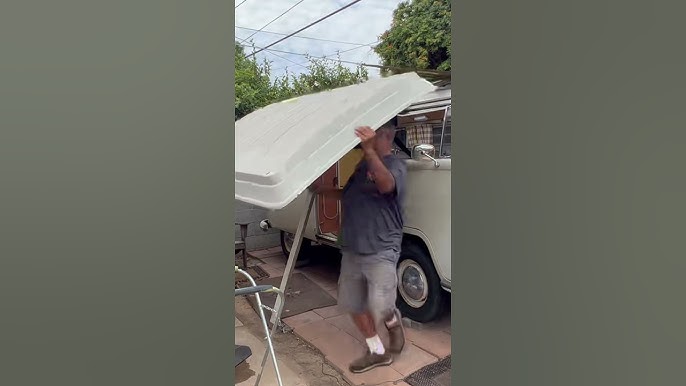
Your tent trailer canvas is your shield against the elements, your cozy shelter on every adventure. But what happens when it tears, leaks, or wears down?
Ignoring those problems can turn your perfect getaway into a stressful mess. Luckily, fixing your tent trailer canvas doesn’t have to be complicated or expensive. In this guide, you’ll discover simple, effective steps to repair your canvas quickly and keep your trailer ready for your next trip.
Keep reading, and you’ll learn how to save time, money, and frustration with easy repairs you can do yourself.

Credit: www.reddit.com
Assessing Damage
Before fixing your tent trailer canvas, you need to check its condition. Look closely for any problems that could cause leaks or wear.
Assessing damage helps you plan repairs well. This saves time and keeps your canvas strong.
Identifying Tears And Holes
Look carefully for any tears or holes in the canvas. These can cause water leaks and make the tent weak.
Check both small and large areas. Even tiny holes can get bigger over time if not fixed.
- Run your hand over the fabric to feel for holes
- Use a flashlight behind the canvas to spot thin spots
- Mark any damage for repair later
Checking For Mold And Mildew
Mold and mildew grow in damp canvas areas. They cause stains and weaken the fabric.
Look for dark spots or musty smells. These signs show mold or mildew is present.
- Inspect corners and folds where moisture hides
- Smell the canvas for damp or sour odors
- Check for soft or discolored fabric patches
Evaluating Frame And Seams
Check the tent frame for rust, bends, or broken parts. A damaged frame can stress the canvas.
Look at the seams on the canvas. Loose or torn seams cause leaks and reduce strength.
- Test frame joints for movement or looseness
- Look closely at stitched seams for gaps or tears
- Press seams to check if the stitching is tight
Gathering Materials
Repairing a tent trailer canvas needs the right materials. Good preparation helps the repair last longer.
Start by collecting all tools and supplies before you begin. This saves time and keeps the work neat.
Essential Repair Tools
Use these basic tools for fixing your tent trailer canvas. They make the process easier and more precise.
- Scissors or fabric shears to cut patches
- Seam ripper to remove damaged seams
- Measuring tape for accurate patch size
- Soft brush to clean the repair area
- Clamps or weights to hold patches in place
- Protective gloves for handling adhesives
- Clean cloths for drying and cleaning surfaces
Choosing The Right Patch Material
Pick a patch material that matches your tent canvas. This ensures the repair blends and stays strong.
| Patch Material | Best Use | Notes |
| Canvas fabric | Heavy canvas tents | Durable and matches original |
| Vinyl patches | Waterproof areas | Easy to clean and waterproof |
| Nylon patches | Lightweight tents | Strong but less breathable |
| Self-adhesive patches | Quick fixes | Temporary, less durable |
Selecting Waterproof Adhesives
Choose an adhesive that keeps water out and bonds well with your patch and canvas.
- Silicone-based adhesives for flexibility and waterproofing
- Polyurethane glue for strong, permanent bonds
- Contact cement for fast drying and firm hold
- Neoprene glue for rubbery, waterproof seals
Cleaning The Canvas
Keeping your tent trailer canvas clean helps it last longer. Dirt and mold can cause damage if left untreated. Proper cleaning protects the fabric and keeps your trailer looking good.
Use gentle methods to clean the canvas. Avoid harsh chemicals that may weaken the material. Follow these steps to clean the canvas safely and effectively.
Removing Dirt And Debris
Start by removing loose dirt and debris from the canvas surface. Use a soft brush or broom to sweep away dust and leaves. This prevents dirt from embedding deeper into the fabric during washing.
- Brush gently with a soft-bristled brush
- Use a vacuum with a brush attachment for stubborn dirt
- Do not scrub too hard to avoid damaging the canvas
- Clean in small sections for better results
Treating Mold Spots
Mold appears as dark or greenish spots on the canvas. Treat it quickly to stop spreading. Mix a solution of one part vinegar and three parts water. Apply it to the mold spots using a spray bottle or cloth.
| Cleaning Agent | Usage Tips |
|---|---|
| Vinegar Solution | Spray on mold, let sit 15 minutes, then scrub gently |
| Water and Mild Soap | Wash off vinegar and remaining dirt carefully |
| Rinse with clean water | Remove all cleaning residues to prevent damage |
After treating mold, rinse the canvas with clean water. Avoid leaving soap or vinegar on the fabric. Dry the canvas completely before storing or using it again.
Drying Techniques
Dry the canvas fully to prevent mold and mildew. Hang the canvas in a shaded, well-ventilated area. Avoid direct sunlight, which can cause fading and fabric weakening.
- Spread the canvas flat or hang it loosely
- Use fans or natural breeze to speed drying
- Check for damp spots and air them out again if needed
- Do not fold or store the canvas until it is fully dry

Credit: www.reddit.com
Repairing Small Tears
Small tears in a tent trailer canvas can cause leaks and damage. Fixing these tears quickly helps keep your canvas strong and weatherproof.
There are simple ways to repair small tears using materials like fabric tape and seam sealer. You can also reinforce weak spots to prevent bigger problems.
Using Fabric Tape
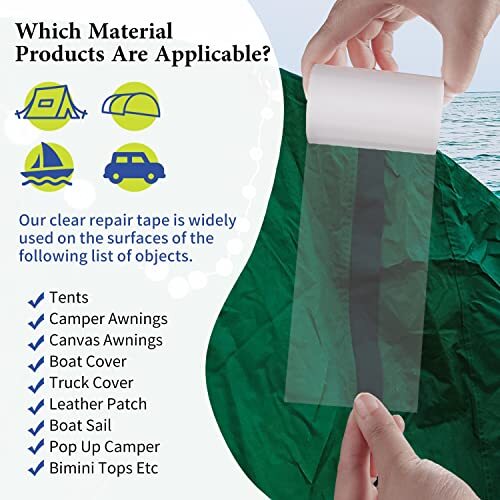
Fabric tape is a quick and easy way to fix small tears on your canvas. It sticks well and can hold the fabric together tightly.
Clean the area around the tear first. Cut a piece of fabric tape bigger than the tear. Press it firmly over the tear on both sides if possible.
- Clean the canvas with mild soap and dry it
- Cut fabric tape larger than the tear
- Apply tape smoothly over the tear
- Press down firmly to remove air bubbles
Applying Seam Sealer
Seam sealer helps seal small tears and weak seams. It creates a waterproof layer over damaged areas.
First, clean the canvas and let it dry. Apply the seam sealer gently along the tear or seam. Let it dry fully before using the trailer again.
- Clean and dry the canvas
- Use a brush or applicator for even coverage
- Cover the tear and surrounding fabric
- Wait for the sealer to dry completely
Reinforcing Weak Areas
Weak areas may tear again if not reinforced. Adding extra fabric or patches helps strengthen these spots.
Cut a patch from similar canvas material. Attach it over the weak area using fabric tape or seam sealer. This adds extra support and stops new tears.
- Identify thin or worn spots on the canvas
- Cut patches larger than the weak areas
- Use fabric tape or seam sealer to attach patches
- Press patches firmly to ensure good adhesion
Fixing Large Holes
Large holes in tent trailer canvas need careful repair. Fixing them keeps the tent strong and dry.
Using the right materials and techniques helps the patch last a long time. Follow simple steps to repair big tears.
Cutting And Preparing Patches
Cut patches from canvas or similar fabric. Make patches bigger than the hole by at least 2 inches on all sides.
Round the patch corners to prevent peeling. Clean the area around the hole before applying the patch.
- Use strong canvas fabric for the patch
- Cut patch 2 inches larger than the hole
- Round the patch edges for better hold
- Clean and dry the repair area
Gluing And Stitching Methods
Apply waterproof glue to the patch and the canvas. Press the patch firmly on the hole and let the glue dry well.
For extra strength, sew around the patch edges. Use heavy-duty thread and a strong needle made for canvas.
- Spread waterproof glue evenly on patch and canvas
- Press patch firmly and let glue dry fully
- Sew around edges with heavy-duty thread
- Use a strong needle for canvas fabric
Ensuring Waterproof Seals
After stitching, apply seam sealer over the stitches. This blocks water from entering through needle holes.
Check the repair for leaks by spraying water on it. Add more sealer if any water gets through.
- Use a quality seam sealer on all stitch lines
- Let the sealer dry before using the tent
- Test repair with water spray for leaks
- Apply more sealer if needed to keep dry
Restoring Seams
Fixing the seams on your tent trailer canvas keeps it strong and waterproof. Seams often wear out first because they face stress and weather.
Knowing how to check and repair seams helps you avoid leaks and damage. This guide covers inspecting, resealing, and stitching seams.
Inspecting Seams For Damage
Look closely at every seam on your tent canvas. Check for holes, loose threads, or worn-out fabric along the stitch lines.
- Run your hand over seams to feel for weak spots
- Look for any signs of water seepage inside the tent
- Use a flashlight to spot small tears or needle holes
- Note seams that separate or have missing stitches
Resealing With Seam Tape
Seam tape seals the stitches and stops water leaks. It is a strong, sticky strip applied over the seam edges.
| Material Needed | Purpose |
| Seam Tape | Waterproofs and seals stitching holes |
| Heat Source (Iron or Heat Gun) | Activates adhesive on the tape |
| Cleaning Cloth | Removes dirt before taping |
| Scissors | Cut tape to needed length |
Clean the seam area first. Cut the tape to fit and press it firmly on the seam. Use heat carefully to bond the tape.
Stitching Techniques For Strength
Strong stitching fixes torn seams and adds extra strength. Use heavy-duty thread and a tight stitch pattern.
- Thread a needle with polyester or nylon thread
- Use a backstitch for a strong, tight seam
- Sew small, even stitches close together
- Double-stitch over the damaged area for extra hold
- Tie knots securely at start and end of stitching
Test the seam by pulling gently to check the strength before applying seam tape.
Maintaining Canvas Longevity
Keeping your tent trailer canvas in good shape helps it last longer. Proper care stops damage and keeps the fabric strong.
Simple habits can protect the canvas from wear and tear. Follow these tips to keep your canvas looking good.
Proper Storage Tips
Store the canvas dry and clean to avoid mold and mildew. Use a breathable cover to protect it from dust and sunlight.
Avoid folding the canvas in the same way every time. Change folds to prevent creases from weakening the fabric.
- Keep canvas dry before storing
- Use breathable covers, not plastic
- Store in a cool, shaded place
- Change fold lines regularly
Regular Cleaning Schedule
Clean your canvas often to remove dirt and stains. Use mild soap and water, avoiding harsh chemicals that damage fabric.
Rinse well and dry the canvas completely before storing. This prevents mold and keeps the material strong.
- Clean canvas with soft brush or cloth
- Use mild soap and lukewarm water
- Rinse thoroughly to remove soap
- Air dry fully before storage
Preventing Future Damage
Check the canvas for small tears and fix them quickly. Early repairs stop damage from getting worse.
Protect the canvas from sharp objects and strong winds. Use extra covers or supports during bad weather.
- Inspect canvas regularly for holes
- Patch small tears immediately
- Keep sharp objects away from canvas
- Use wind guards or tie-downs in storms
Credit: riteacademy.com
Frequently Asked Questions
How Do I Fix Tears In A Tent Trailer Canvas?
To fix tears, clean the damaged area first. Use a canvas repair patch and adhesive. Press firmly and let it dry completely before use.
What Materials Are Best For Tent Trailer Canvas Repair?
Use heavy-duty canvas patches and waterproof adhesive. Seam sealers and UV protectants also help extend the canvas life. Choose materials compatible with your tent fabric.
Can I Repair A Canvas Tent Trailer Myself?
Yes, minor repairs like small tears or holes are doable at home. Follow proper cleaning and patching steps for effective results. For major damage, consult a professional.
How Do I Waterproof A Repaired Tent Trailer Canvas?
After repair, apply a waterproofing spray evenly on the canvas. Allow it to dry fully before exposure to rain. Regular waterproofing maintains canvas durability and protection.
Conclusion
Repairing a tent trailer canvas takes time and care. Small tears can grow if ignored. Fixing them early saves money and effort. Use the right tools and materials for best results. Clean the area before starting any repair work. Follow each step slowly and carefully for a strong patch.
Regular checks keep your canvas in good shape. Enjoy your trips with a safe, dry tent trailer. Keep your gear ready for the next adventure. Simple repairs make camping more comfortable and fun.