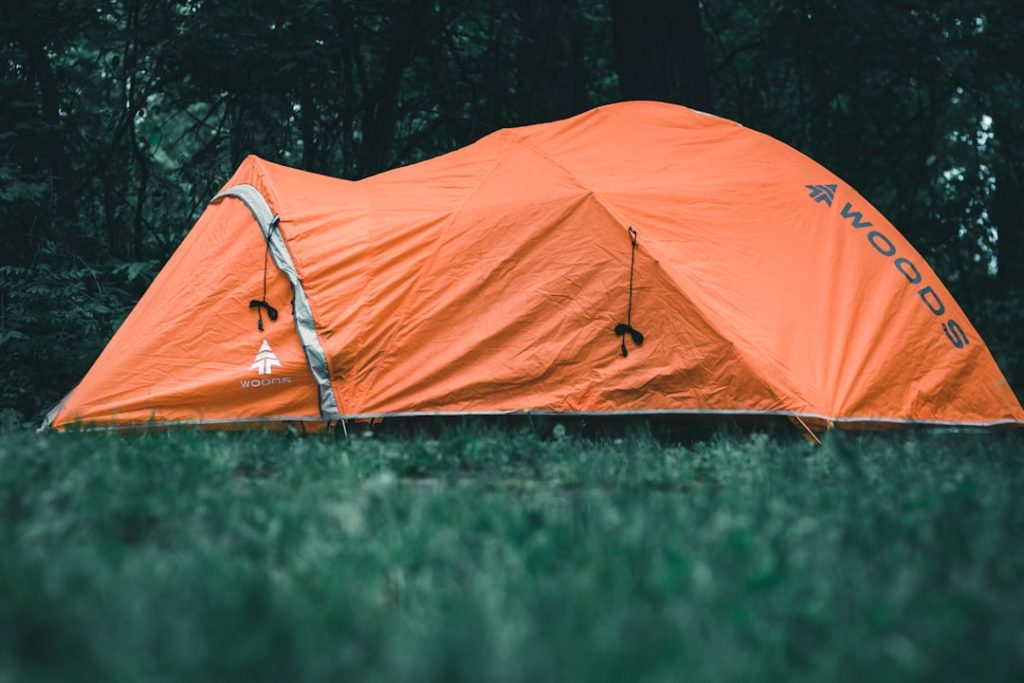
Your tent is more than just a shelter—it’s your safe space in the wild. But what happens when it tears or springs a leak?
You don’t want a small rip to ruin your entire trip. Knowing how to repair a tent quickly and effectively can save you time, money, and stress. In this guide, you’ll discover simple steps and smart tips to fix your tent like a pro.
Keep reading, and you’ll never have to worry about a damaged tent spoiling your adventure again.
Common Tent Damages
Tents face many types of damage during camping trips. Repairing them quickly keeps you safe and dry. Knowing common problems helps you fix tents easily.
This guide covers four common tent damages and how to repair them. Each section explains what to look for and simple repair tips.
Tears And Rips
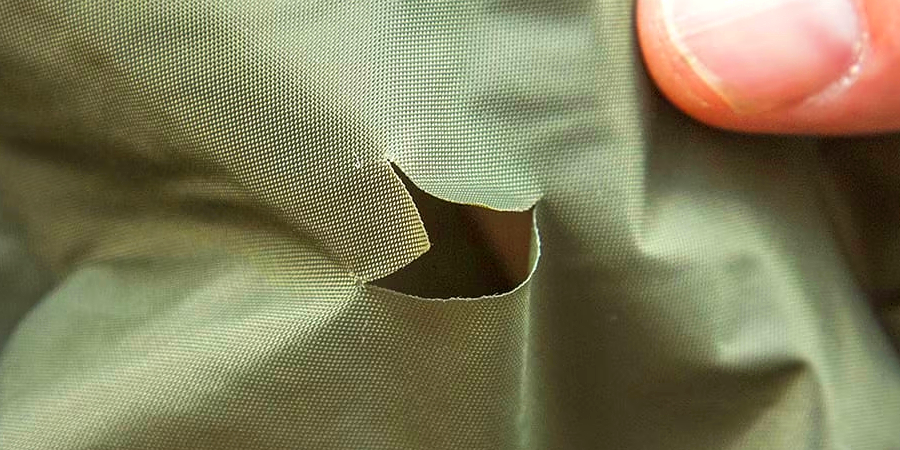
Tears and rips happen from sharp objects or strong wind. Small tears can grow bigger if not fixed fast. Use patch kits or strong tape to cover holes. Sewing works well for bigger rips.
- Clean the torn area before repair
- Use waterproof patches or tape
- Sew large tears with strong thread
- Apply sealant to keep water out
Broken Poles
Poles break from bending or hitting hard surfaces. A broken pole can make your tent unstable. You can fix poles with splints or replace broken sections. Using duct tape helps hold poles temporarily.
| Damage | Repair Method | Notes |
| Small crack | Wrap with duct tape | Temporary fix |
| Broken section | Insert splint inside pole | Use a stick or metal rod |
| Missing piece | Replace pole section | Check with manufacturer |
Zipper Issues
Zippers get stuck or break from dirt and rough use. Cleaning zippers with soap and water clears dirt. Lubricate them with wax or graphite. For broken teeth, use pliers to realign or replace the zipper slider.
Seam Leaks
Seams can leak water if the stitching wears out. You can stop leaks by sealing seams with waterproof tape or seam sealer. Applying sealer after cleaning the area works best.
- Clean seams thoroughly
- Apply seam sealer evenly
- Let sealer dry before use
- Use waterproof tape for quick repairs
Essential Repair Tools
Repairing a tent helps you use it longer and saves money. You need some basic tools for fixing tears and holes.
Having the right tools makes repair easier and stronger. Keep these items ready before your trip.
Patch Kits
Patch kits are made for fixing small holes and tears in tent fabric. They usually include adhesive patches that stick well.
Use patches on clean, dry fabric. Cut a patch larger than the damaged area. Press firmly to seal.
- Fabric patches (nylon or polyester)
- Adhesive glue or self-adhesive patches
- Instructions for use
- Scissors for cutting patches
Sewing Supplies
Sewing supplies help fix tears that are too big for patches. Needle and thread can hold fabric together tightly.
Use strong, weather-resistant thread. A curved needle works well for thick tent fabric and tight spaces.
- Heavy-duty needles or curved needles
- Strong nylon or polyester thread
- Thimble for pushing needle through fabric
- Small scissors or thread snips
Adhesive Tapes
Adhesive tapes are quick fixes for rips and seams. They stick well on tent fabric and resist water.
Clean the area before applying tape. Cut tape slightly bigger than the damage. Press down to ensure good contact.
- Waterproof repair tape
- Seam sealing tape
- Clear or fabric-colored tape
- Scissors for trimming tape
Replacement Parts
Replacement parts help fix broken poles, zippers, or clips. Carrying spare parts keeps your tent usable.
Check your tent before trips. Pack extra poles, zipper sliders, and clips that match your model.
- Extra tent poles or pole sections
- Replacement zipper sliders
- Clips and buckles for straps
- Spare guy line or cord
Fixing Fabric Tears
Tents can get fabric tears from sharp objects or strong winds. Fixing these tears quickly keeps your tent safe and dry.
There are simple ways to repair your tent fabric. You can use tape, sew patches, or apply seam sealer. Each method works well for different tear sizes.
Temporary Tape Repairs
Temporary tape repairs are fast and easy. Use special tent repair tape or duct tape to cover the tear.
Make sure the fabric is clean and dry before applying the tape. Press the tape firmly on both sides of the tear.
- Tear the tape larger than the hole
- Apply tape on inside and outside if possible
- Use this fix only until a permanent repair
Sewing Patches
Sewing patches make strong, long-lasting repairs. Cut a patch bigger than the tear from similar fabric.
Use a needle and strong thread to sew the patch over the tear. Sew small, tight stitches around the edges.
- Trim loose threads before sewing
- Use waterproof thread if available
- Sew both the patch and tent fabric tightly
Using Seam Sealer
Seam sealer closes small holes and strengthens stitches. Apply it over the tear or stitched patch edges.
Let the sealer dry completely before using the tent. It helps stop water leaks and adds durability.
- Clean the area before applying sealer
- Use a brush or applicator for even spread
- Apply extra coats for larger tears
Mending Broken Poles
Broken tent poles can stop your camping trip early. Fixing them quickly helps keep your tent standing. You can repair poles using simple tools and materials.
Here are ways to mend broken poles to make your tent usable again. These tips work for most pole types and sizes.
Splinting Techniques
Splinting means adding support to a broken pole using a strong stick or tube. This keeps the pole straight and stable. Use a stick thicker than the broken section.
Attach the splint with strong tape or zip ties. Wrap it tightly around the break. This method works well for temporary fixes in the field.
- Find a sturdy stick or metal rod
- Place it alongside the broken pole
- Use duct tape or zip ties to secure firmly
- Make sure the splint covers the break on both sides
Pole Sleeve Repairs
Use a pole sleeve to cover the broken part. A sleeve is a short tube that fits over the break. It holds the pieces together and keeps the pole strong.
Cut the sleeve slightly longer than the break area. Slide it over the pole pieces. Secure it with tape or strong glue for a lasting fix.
- Choose a sleeve made of plastic or metal
- Make sure it fits snugly over the broken sections
- Slide the sleeve over the joined pole ends
- Wrap tape around the ends for extra hold
Carrying Spare Sections
Carrying spare pole sections helps avoid big problems. You can replace broken parts quickly and keep your tent up. Spare sections are light and easy to carry.
Check your tent poles before trips. Bring extra parts or buy universal sections that fit many tents. Store them in your tent bag or backpack.
- Buy spare pole sections for your tent model
- Carry universal pole pieces as backups
- Store spares in a protective bag
- Check poles before each trip for damage
Zipper Repair Tricks
Zippers on tents can get stuck, broken, or misaligned. Fixing them saves your tent and money. These tricks help you repair common zipper problems quickly.
Use simple tools and materials to fix zippers. You can do it yourself with easy steps.
Lubricating Stuck Zippers
Stuck zippers often need lubrication to move smoothly. Use a wax or a pencil to help the zipper slide.
Apply a small amount on the teeth and move the slider up and down. This reduces friction and frees the zipper.
- Use candle wax, soap, or graphite pencil
- Rub gently on zipper teeth
- Work the slider back and forth
Replacing Zipper Sliders
If the zipper slider is broken, replace it with a new one. This part moves the zipper teeth together.
Remove the old slider carefully. Slide the new one in place and test the zipper movement.
- Use pliers to open zipper stops
- Slide off the damaged slider
- Put on the new slider
- Close the zipper stops with pliers
Aligning Teeth
Misaligned zipper teeth cause the zipper to jam or split open. Fix this by realigning the teeth carefully.
Use pliers to press bent teeth back into position. Test the zipper after adjusting the teeth.
- Find bent or out-of-place teeth
- Use needle-nose pliers to fix them
- Check zipper function by sliding it up and down
Credit: www.pomoly.com
Sealing Leaks And Seams
Fixing a tent is important to keep it dry and strong. Leaks and broken seams let water inside. You can repair these spots easily with the right tools.
Sealing leaks and seams stops water from entering. This makes your tent last longer and stay comfortable in wet weather.
Applying Seam Sealant
Seam sealant is a special glue for tent seams. It fills small holes and cracks to block water.
Clean the seam area before applying sealant. Use a small brush or applicator. Let it dry fully before using the tent again.
Reinforcing With Tape
Waterproof tape adds extra strength to torn or weak seams. It sticks well to tent fabric and keeps water out.
Cut tape to size. Place it over the damaged area. Press firmly to make sure it sticks without bubbles or wrinkles.
- Use tape designed for tents or outdoor gear
- Apply on dry, clean fabric
- Check tape edges regularly for lifting
Waterproofing Sprays
Waterproofing sprays add a water-resistant layer on tent fabric. They help protect areas that are not sealed.
Spray evenly on clean, dry fabric. Let the tent dry completely before packing it away. Reapply sprays once or twice a year.
Preventive Tent Care
Taking care of your tent helps it last longer and keeps you safe. Small efforts before and after camping can prevent big problems.
This guide covers how to set up, inspect, and fix your tent to avoid damage and keep it in good shape.
Proper Setup And Storage
Always choose a flat, clean area for your tent. Avoid sharp rocks and sticks that can poke holes. Use a groundsheet to protect the tent floor.
- Clear the site of debris before setting up.
- Stake the tent tightly to prevent flapping in the wind.
- Store the tent dry to stop mold and mildew growth.
- Keep the tent in a cool, dark place away from direct sunlight.
- Fold the tent loosely to avoid creases that weaken fabric.
Regular Inspections
Check your tent often to catch damage early. Look for tears, broken zippers, or worn seams. Clean the tent after each trip to remove dirt and bugs.
| Inspection Area | What to Check | Action Needed |
| Fabric | Tears, holes, thin spots | Patch or sew small holes |
| Zippers | Stuck or broken teeth | Lubricate or replace zipper |
| Poles | Cracks or bends | Replace damaged poles |
| Seams | Loose stitching | Reinforce with seam tape |
Quick Field Repairs
Carry a small repair kit on trips. Fix damage fast to keep your tent usable. Simple repairs can stop small issues from becoming big.
- Use duct tape for temporary patches on tears.
- Carry needle and thread to sew small holes or loose seams.
- Apply seam sealer to waterproof weak spots.
- Replace broken guy lines with spare cord.
- Use pole splints to fix bent or broken poles temporarily.

Credit: www.amazon.ca

Credit: www.gearaid.com
Frequently Asked Questions
How Do You Fix A Tear In A Tent?
To fix a tent tear, clean the damaged area first. Then, apply a repair tape or patch kit. Ensure it’s tightly sealed to prevent water leakage. For larger tears, sew the edges before applying the patch. Always carry a repair kit during camping trips for quick fixes.
What Tape Is Best For Tent Repairs?
Tenacious Tape is popular for tent repairs. It’s durable and weather-resistant, ensuring longevity. Duct tape is a temporary solution but not ideal for long-term use. Always choose a tape designed for outdoor gear. This ensures it withstands harsh conditions, like rain and wind.
Can You Sew A Tent?
Yes, you can sew a tent using a heavy-duty needle and strong thread. First, clean the area and align the tear. Use a zigzag stitch for flexibility. After sewing, apply seam sealer to prevent leaks. Sewing is ideal for extensive damage, ensuring a sturdy repair.
How Do You Waterproof A Repaired Tent?
To waterproof a repaired tent, apply a seam sealer to the patched area. Ensure even coverage for effective waterproofing. Additionally, spray a waterproofing solution over the entire tent. This enhances the tent’s overall water resistance, especially after repairs.
Conclusion
Repairing a tent keeps it strong and ready for your trips. Small tears and holes do not need big costs. Use simple tools and follow clear steps. Fixing your tent saves money and time. It also helps the environment by reducing waste.
Try repairs soon after damage appears. This way, your tent lasts many camping seasons. Enjoy your outdoor adventures with a safe, dry shelter. Repairing is easier than you might think. Start with basic fixes and learn more as you go.
Your tent will thank you with many happy nights outside.