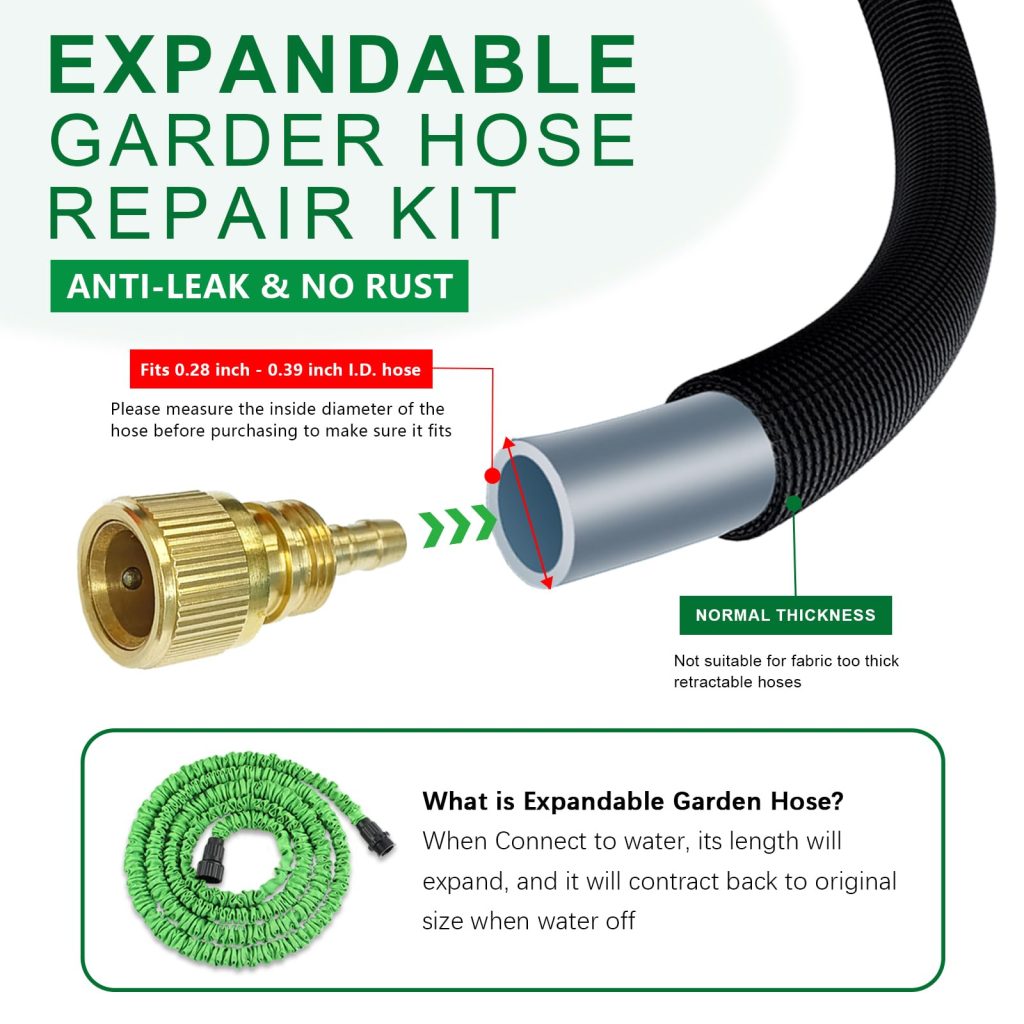
Is your expanding garden hose leaking or not stretching like it used to? You’re not alone.
These handy hoses make watering easier, but they can develop problems over time. The good news is, you don’t have to buy a new one right away. With a few simple steps, you can fix your expanding garden hose yourself and save money.
Keep reading, and you’ll learn easy, effective ways to bring your hose back to life—so your garden gets the care it deserves without any hassle.

Credit: www.youtube.com
Common Issues With Expanding Hoses
Expanding garden hoses are popular for their lightweight and flexible design. They stretch when filled with water and shrink when empty. Despite these benefits, they can face some common problems that affect their use.
Knowing these issues helps you fix them quickly and keep your hose working well. Below are the main problems you might see with expanding hoses.
Leaks And Punctures
Leaks often happen because the hose material is thin and can be easily punctured. Small holes let water escape and lower pressure. You can spot leaks by looking for wet spots or spraying water along the hose.
- Use waterproof tape for small holes.
- Apply a patch kit made for garden hoses.
- Replace severely damaged sections if needed.
- Store the hose away from sharp objects.
Kinks And Tangling
Kinks happen when the hose bends sharply. This stops water flow and can damage the hose inside. Tangling makes the hose hard to use and store. To avoid this, unroll the hose fully before use and store it properly.
| Cause | Effect | Prevention |
| Sharp bends | Water blockage | Unroll hose carefully |
| Improper storage | Tangles and knots | Use hose reel or hanger |
| Twisting during use | Wear and tear | Keep hose straight while watering |
Weak Connections
Connections are the points where the hose attaches to the faucet or nozzle. Weak connections cause leaks or the hose to disconnect under pressure. Check these areas often for wear or cracks.
- Tighten connectors by hand, not too tight.
- Replace worn-out washers inside connectors.
- Use thread tape to improve sealing.
- Choose connectors that fit your hose size.
Tools And Materials Needed
Repairing an expanding garden hose can save you money and time. You will need specific tools and materials for the task.
Gathering the right items before you start ensures a smooth repair process.
Repair Kits
Repair kits make fixing your hose easier. They include essential components for a quick repair.
- Connectors
- Clamps
- Patches
Replacement Parts
Replacement parts are necessary when original parts are damaged. Have extra parts ready for seamless repair.
- Nozzle
- O-rings
- Fittings
Basic Tools
Basic tools help you disassemble and reassemble the hose. These tools are commonly found at home.
- Screwdriver
- Pliers
- Utility knife
Fixing Leaks And Holes
Expanding garden hoses are handy but can get leaks or holes over time. Fixing these issues helps the hose last longer and work better.
This guide shows simple ways to repair your hose using waterproof tape, hose repair tape, and patches for small holes.
Using Waterproof Tape
Waterproof tape works well for quick fixes on expanding hoses. It seals leaks tightly and stops water from escaping.
- Clean the area around the leak and dry it completely.
- Cut a piece of waterproof tape slightly larger than the leak.
- Wrap the tape around the hose, covering the leak fully.
- Press firmly to make sure the tape sticks without air bubbles.
- Let it sit for a few minutes before using the hose again.
Applying Hose Repair Tape
Hose repair tape is a strong option made for fixing garden hoses. It is stretchy and seals leaks well.
| Step | Action | Tip |
| 1 | Turn off water and dry hose area. | Make sure no dirt remains. |
| 2 | Cut tape to cover the leak plus extra. | Overlap edges for better seal. |
| 3 | Stretch tape tightly while wrapping. | Wrap 2-3 layers for durability. |
| 4 | Press edges to stick firmly. | Check no gaps or bubbles appear. |
Patching Small Holes
Small holes need a patch for a lasting repair. Use a patch kit or cut a piece of garden hose material.
Follow these patching tips:
- Dry and clean the hole area well.
- Apply rubber glue or adhesive around the hole.
- Place the patch over the hole and press down firmly.
- Allow the glue to dry as the instructions say.
- Test the hose by turning water on slowly.
Credit: www.amazon.ca
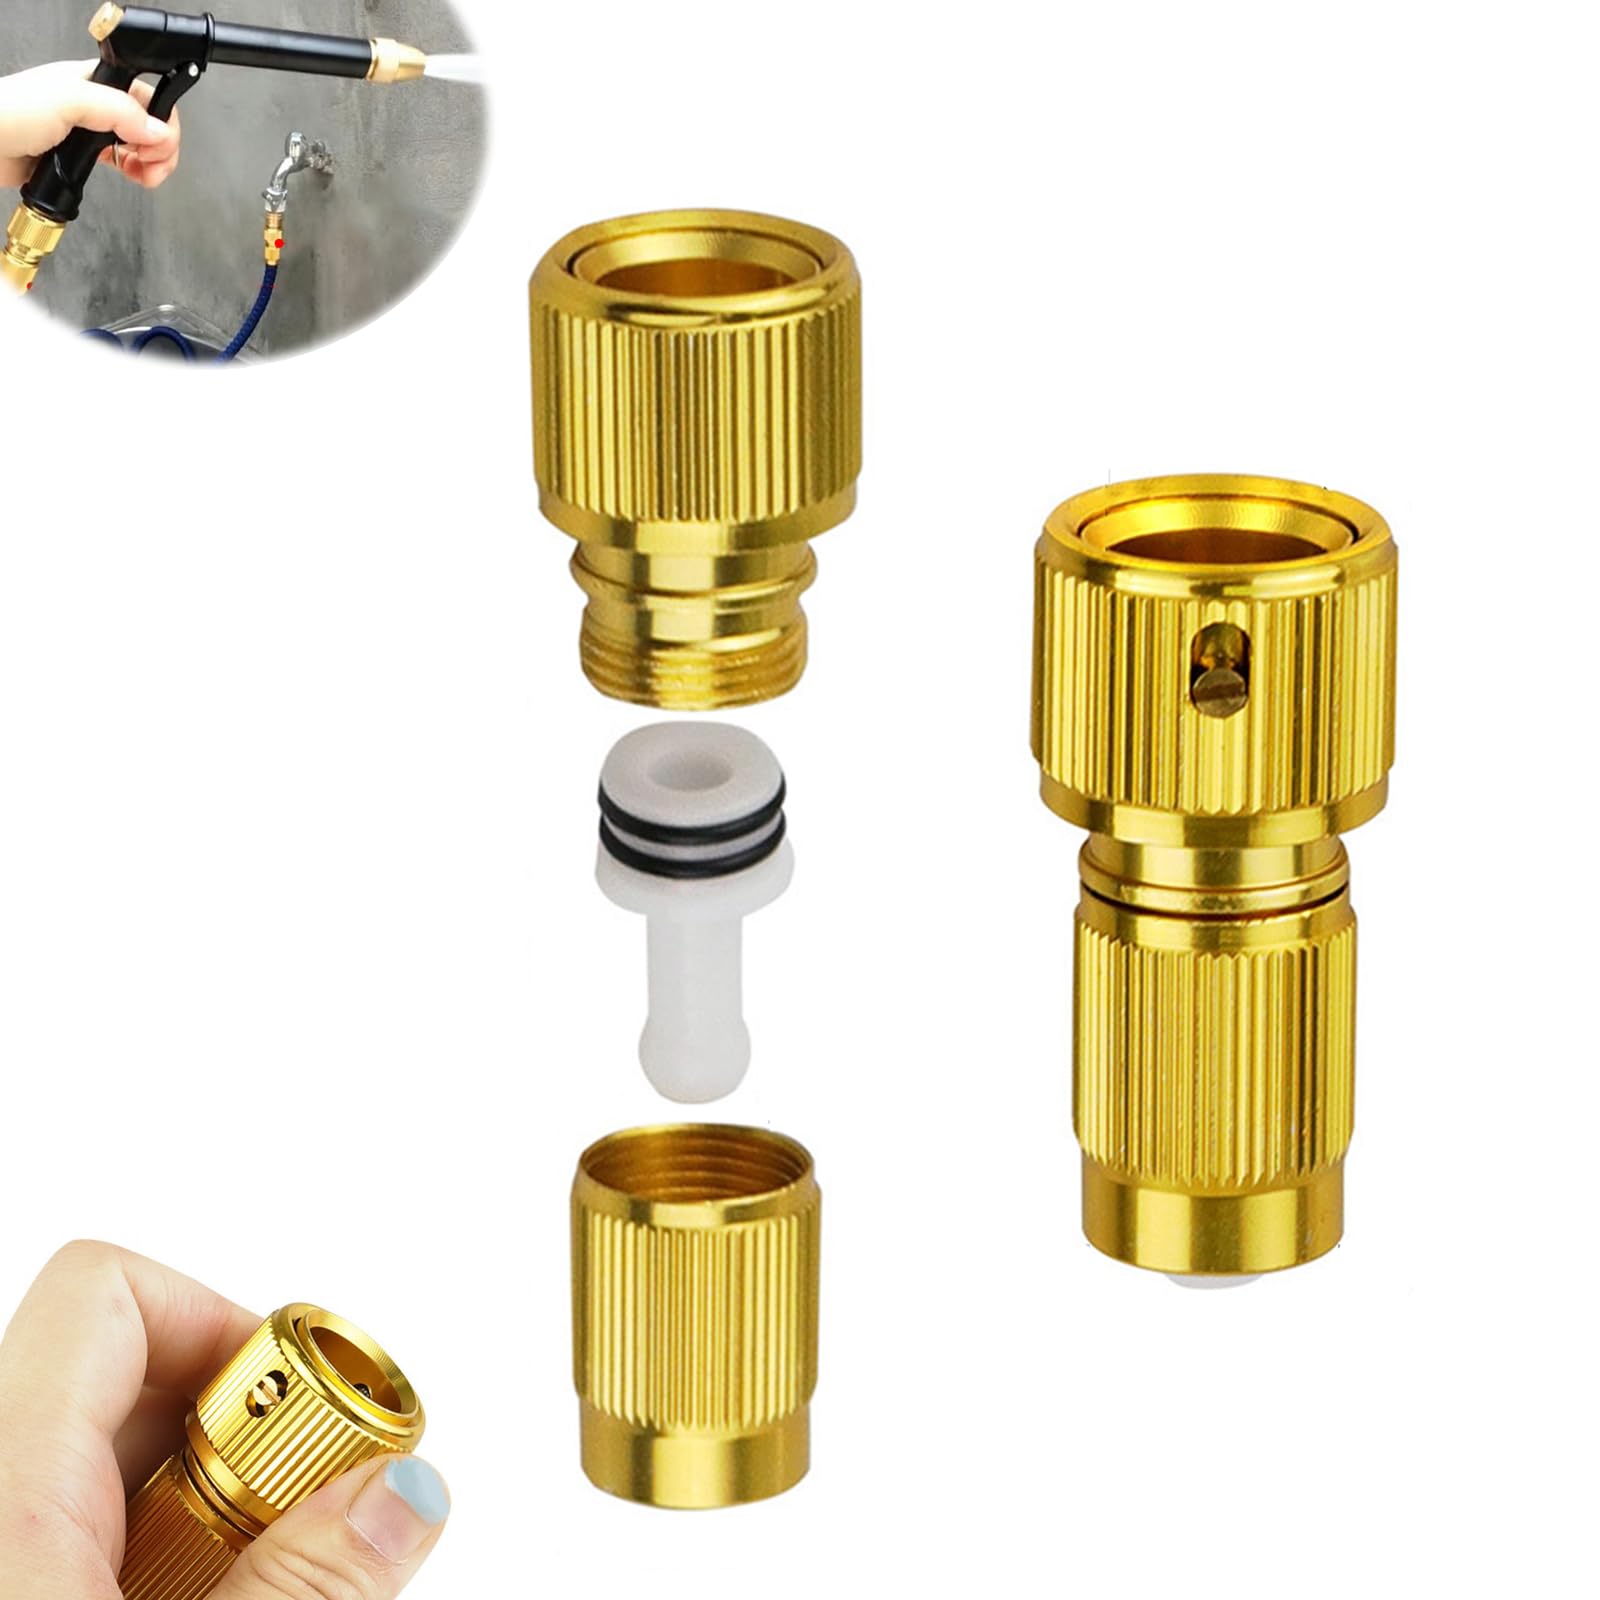
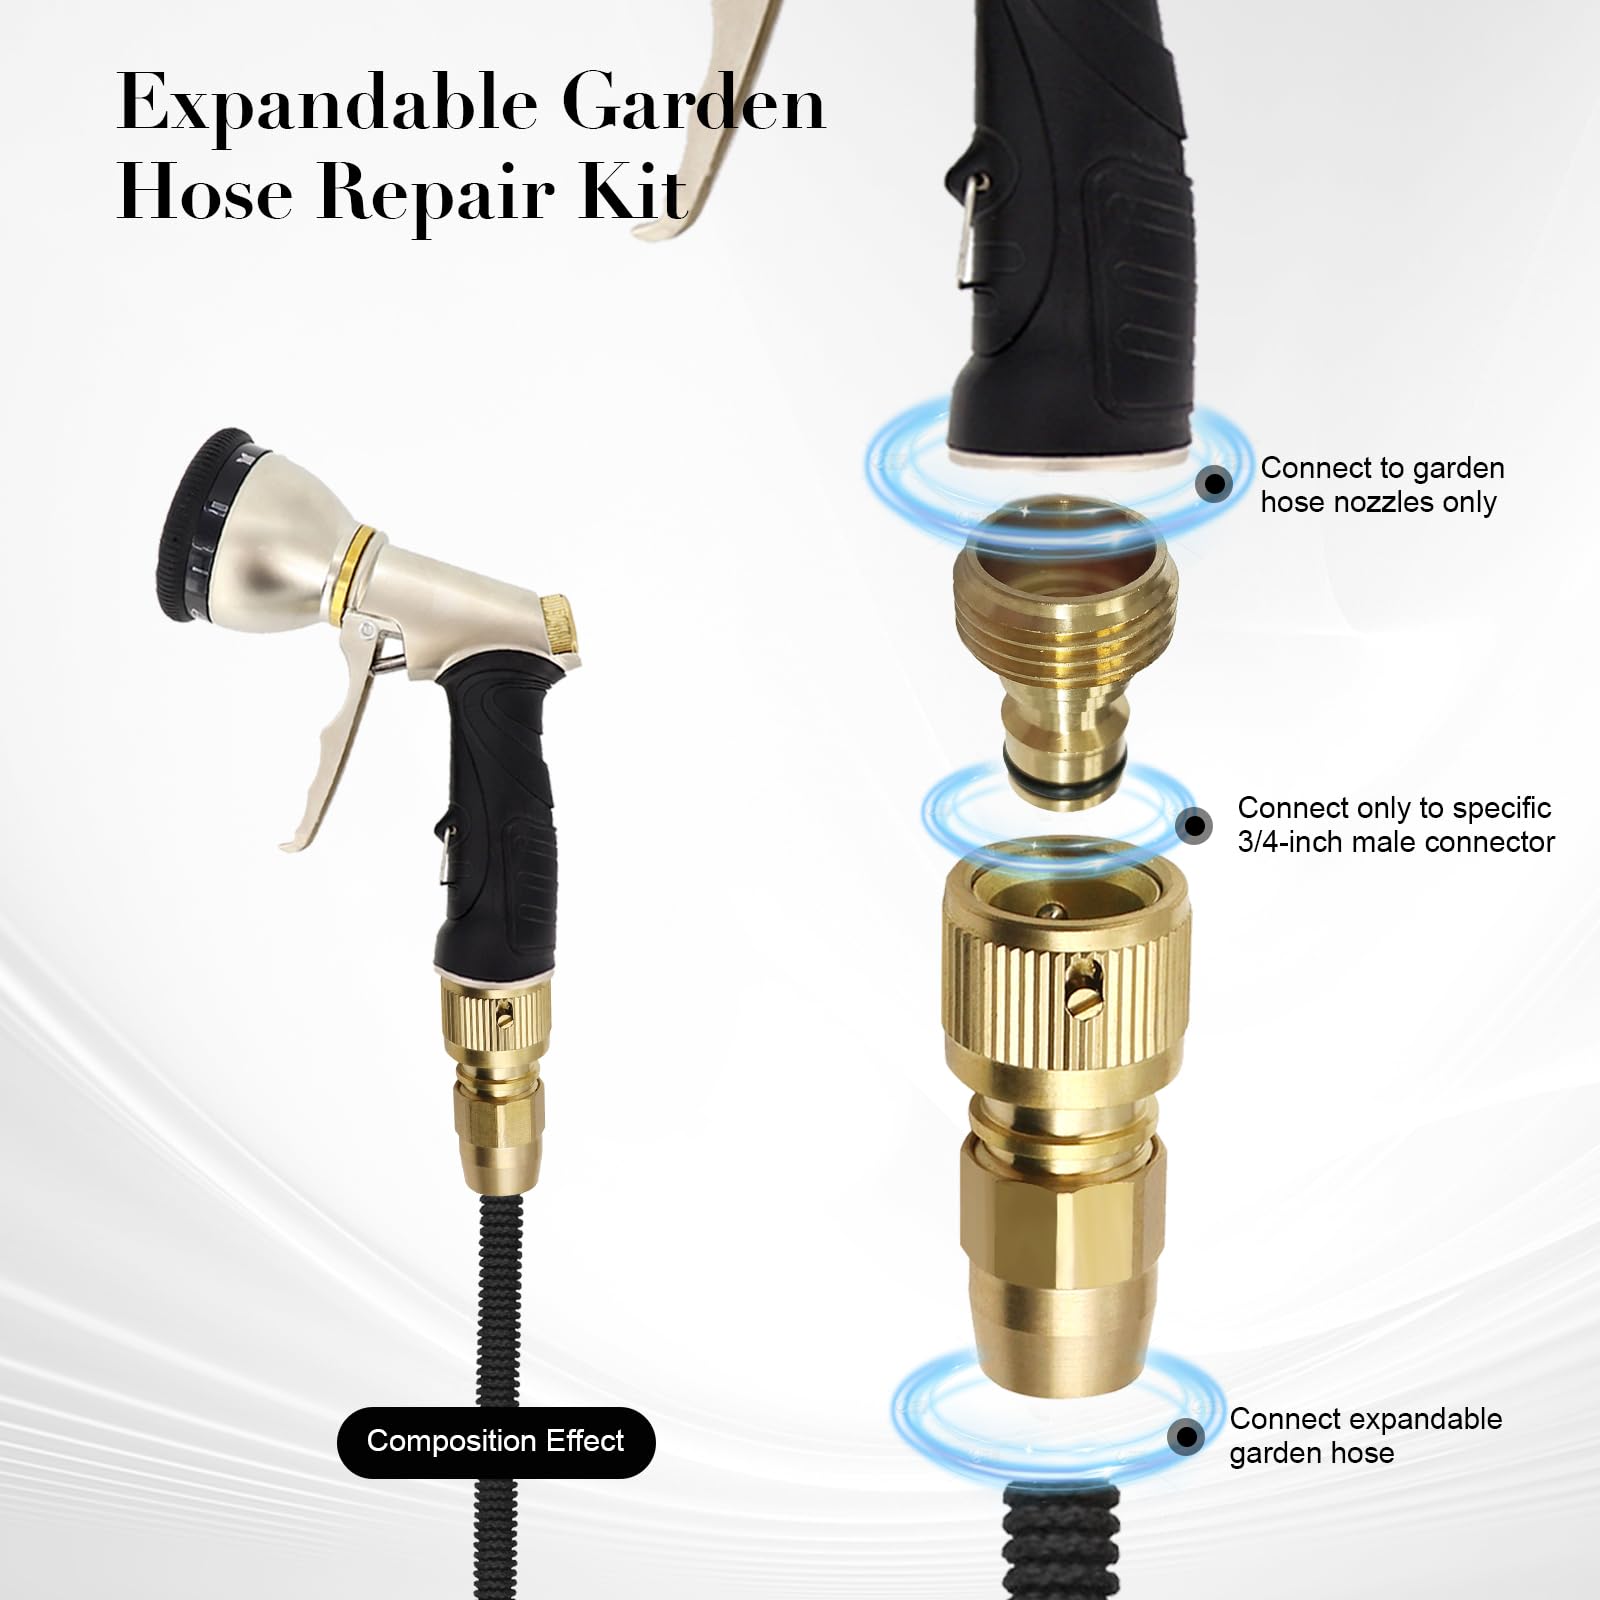
Repairing Hose Connectors
Fixing garden hose connectors keeps your hose working well. Small leaks or loose parts can stop water flow.
Knowing how to repair hose connectors saves money and avoids hose replacement.
Tightening Loose Fittings
Loose fittings cause water leaks and reduce pressure. Tighten them carefully to avoid damage.
- Turn off water supply before working on the hose.
- Use a wrench to gently turn the fitting clockwise.
- Check if the fitting is snug but not over-tightened.
- Turn on water to test for leaks after tightening.
Replacing Damaged Connectors
Damaged connectors cause leaks and block water flow. Replace them to restore hose function.
- Cut off the old connector with a sharp knife or scissors.
- Slide a new connector onto the hose end.
- Secure the connector with a hose clamp.
- Tighten the clamp evenly to hold the connector firmly.
Sealing Threaded Joints
Threaded joints can leak if not sealed well. Use sealing tape to prevent leaks.
| Material | Use | Tips |
|---|---|---|
| PTFE Tape | Wrap around threads | Wrap 3-5 times clockwise |
| Pipe Dope | Apply paste on threads | Use a thin, even layer |
| Rubber Washers | Place inside connector | Check for cracks before use |
Preventing Future Damage
Fixing an expanding garden hose is important. You want it to last a long time. Taking care of it helps avoid more problems.
There are simple ways to stop damage. Proper storage, careful use, and regular checks keep your hose working well.
Proper Storage Tips
Store your hose in a cool, dry place. Avoid leaving it in the sun or cold weather. These can weaken the material.
Use a hose reel or hook to keep it off the ground. This stops kinks and cracks from forming.
- Drain all water before storing
- Keep hose away from sharp objects
- Store indoors or in shade
- Use a reel or hanger to avoid tangles
Avoiding Overstretching
Do not pull the hose too hard. Stretching beyond its limit can cause holes or tears. Use the right length for your garden.
Let the hose expand naturally when water flows. Avoid forcing it to stretch more than needed.
- Measure your garden before buying
- Do not drag the hose across rough surfaces
- Use connectors gently to prevent strain
- Let the hose relax after use
Regular Maintenance
Check your hose often for small holes or weak spots. Fix problems early to stop bigger damage.
Clean the hose inside and out to keep it free from dirt and debris. This helps it last longer.
- Inspect for leaks before each use
- Clear debris from connectors
- Use tape or patches for small holes
- Replace damaged parts quickly
Credit: www.amazon.ca
Frequently Asked Questions
How Do I Fix Leaks In An Expanding Garden Hose?
To fix leaks, first locate the damaged area. Use waterproof tape for small holes or replace the damaged section. Ensure hose connections are tight to prevent leaks. Regular maintenance helps avoid future leaks and extends hose life.
Can I Repair A Burst Expanding Garden Hose?
Yes, you can repair a burst hose using a hose repair kit. Cut out the damaged part, insert the repair connector, and secure it tightly. This restores functionality without needing to replace the entire hose.
What Tools Are Needed To Repair An Expanding Garden Hose?
You need scissors or a utility knife to cut the hose, a hose repair kit or connector, and waterproof tape. These tools help you patch leaks or replace damaged sections quickly and effectively.
How Long Does It Take To Repair An Expanding Garden Hose?
Repairing usually takes 10 to 20 minutes depending on the damage. Small leaks are quicker to fix, while replacing sections may take longer. Proper repair restores hose function efficiently.
Conclusion
Repairing your expanding garden hose is simple and saves money. Small leaks or holes don’t mean the hose is finished. Use the right tools and follow steps carefully. Check the hose regularly to avoid big problems later. Taking care of it helps your garden stay healthy and green.
A little effort keeps your hose working longer. Remember, fixing issues early makes watering easier and more efficient. Keep your garden hose ready for every watering job. Easy repairs make a big difference over time.