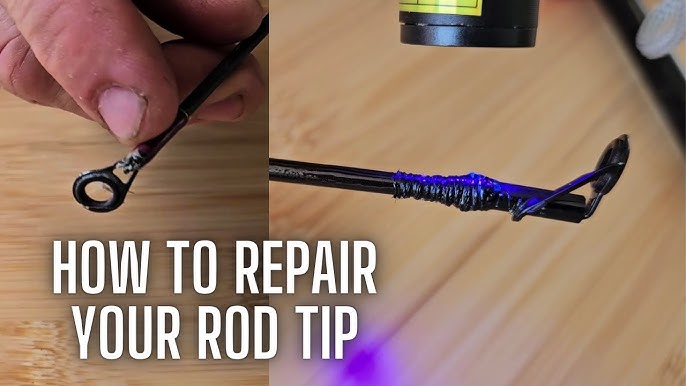
Your fishing rod tip just broke, and you’re wondering if it’s even worth fixing. The good news?
You don’t have to buy a new rod or spend a fortune on repairs. With a few simple steps and some basic tools, you can bring your rod back to life quickly and easily. Imagine casting again with confidence, knowing you fixed the problem yourself.
Keep reading, and you’ll learn exactly how to repair your fishing rod tip, saving time, money, and frustration.

Credit: anglersresource.net
Identify The Damage
Before fixing a fishing rod tip, you must find the exact damage. Careful checking helps you know what to repair.
Look closely at the rod tip and guides. Small problems can cause big issues later.
Check For Cracks And Breaks
Look along the rod tip for cracks or breaks. These can weaken the rod and affect fishing.
Use a bright light or magnifying glass if needed. Even tiny cracks can grow with use.
- Run your fingers gently along the tip
- Look for rough or uneven spots
- Check if the rod feels weaker in some areas
- Inspect the paint or finish for chips or cracks
Assess The Tip Top Guide
The tip top guide is the last ring at the rod’s end. It guides the fishing line.
Check if the tip top guide is loose, bent, or missing. Damaged guides can cause line problems.
- Gently move the tip top guide to test for looseness
- Look for cracks or missing parts on the guide
- Check if the guide ring is smooth and not rough
- Make sure the guide is straight and not bent

Credit: www.youtube.com
Gather Repair Tools
Fixing a fishing rod tip needs the right tools. Gathering them first helps the repair go smoothly.
Having all materials ready saves time and avoids frustration during the repair process.
Essential Materials Needed
These materials are the basic items to repair a broken fishing rod tip. They help you replace or fix the damaged part easily.
- Replacement rod tip guide
- Strong adhesive or rod tip glue
- Sandpaper (fine grit)
- Heat source like a lighter or heat gun
- Clean cloth or paper towel
Use sandpaper to smooth rough edges before gluing the new tip. Heat helps set the glue firmly.
Optional Tools For Advanced Fixes
Advanced tools are useful for stronger repairs or custom work. These are not always needed but improve the fix quality.
- Rod wrapping thread for extra hold
- UV curing glue for quick drying
- Rod tip reamer to shape the tip hole
- Heat shrink tubing for protection
- Small clamps to hold parts while drying
Remove The Broken Tip
Fixing a broken fishing rod tip starts with removing the damaged part. This step is important for a clean repair.
Take your time to avoid hurting the rod or your hands. Careful work makes the repair last longer.
Soften The Glue
Glue holds the tip tightly to the rod. Softening it helps you remove the broken tip without damage.
You can use warm water or heat to make the glue softer. This loosens the bond between the tip and rod.
- Dip the rod tip in warm water for a few minutes
- Use a hairdryer to gently heat the glued area
- Avoid overheating to protect the rod’s finish
Careful Tip Removal
After softening the glue, slowly twist or pull the broken tip. Work gently to avoid breaking the rod.
If the tip is stuck, repeat the softening process. Use tools like pliers carefully to grip the tip.
- Hold the rod steady with one hand
- Twist the tip with your other hand or pliers
- Stop if you feel strong resistance to avoid damage
- Repeat softening if needed before trying again
Prepare The Replacement Tip
Fixing a fishing rod tip starts with preparing the right replacement tip. This step ensures the repair is strong and fits well.
You need to carefully select and clean parts before attaching the new tip. This helps the rod work like new again.
Choosing The Right Tip Size
Use the right tip size to match your rod. A wrong size can cause poor performance or damage.
- Measure the diameter of the broken tip’s base.
- Compare this measurement with the new tip’s base size.
- Choose a tip that fits snugly without forcing.
- Consider the tip’s length to keep rod balance.
Clean The Rod End
Cleaning the rod end helps the new tip stick well. Remove dirt and old glue before starting.
| Cleaning Step | Tools Needed | Purpose |
|---|---|---|
| Remove old tip | Heat source, pliers | Loosen old glue |
| Sand the rod end | Fine sandpaper | Smooth surface for better glue hold |
| Wipe clean | Alcohol and cloth | Remove dust and oils |
Attach The New Tip
Attaching a new tip to your fishing rod is a careful process. It ensures your rod works well and lasts longer.
This guide explains how to apply adhesive and align the tip correctly for the best results.
Applying Adhesive
Use the right adhesive to hold the new tip firmly. Too much glue can cause mess and weaken the bond.
- Clean the rod tip and the inside of the new tip.
- Apply a small amount of adhesive inside the new tip.
- Spread the glue evenly to avoid lumps.
- Slide the new tip onto the rod quickly before the glue sets.
- Wipe off any extra adhesive immediately.
Proper Tip Alignment
Align the new tip straight with the rod guides. Proper alignment keeps the rod balanced and prevents line tangles.
| Check | How to Do It |
|---|---|
| Visual Line | Look along the rod to see if the tip lines up with the other guides. |
| Hold Steady | Keep the rod still until the adhesive dries. |
| Adjust if Needed | If the tip is off, gently twist it before the glue sets. |
Allow Adhesive To Cure
Fixing a fishing rod tip needs careful glue work. Letting adhesive dry fully is key to a strong repair.
Rushing the drying time can weaken the fix. Patience ensures your rod tip stays in place during fishing.
Recommended Drying Time
Most adhesives need at least 24 hours to cure well. Follow the glue label for exact times.
Keep the rod tip still and avoid moving it while drying. This helps the glue bond tightly.
- Allow 24 hours for super glue or epoxy
- Longer drying times may be needed in cold weather
- Do not touch or use the rod during curing
Avoiding Common Mistakes
Do not use too much glue. Excess glue can create weak spots or mess up the rod tip.
Do not try to speed up drying with heat or water. This can cause the glue to fail.
- Apply glue in a thin, even layer
- Keep the rod tip steady during drying
- Clean any glue spills before drying
- Use the right type of adhesive for fishing rods
Test The Repair
After fixing the fishing rod tip, it is important to test the repair. This ensures the rod works well and is safe to use.
Testing helps find any weak spots or problems before you go fishing.
Check Stability
Hold the rod firmly and bend it slowly. Watch the repaired tip closely for any cracks or movement.
If the tip feels loose or wobbly, the repair needs more work. A stable tip will feel tight and strong.
Field Testing Tips
Take the rod to a calm area and try casting with light pressure. Check if the tip responds well during use.
Try different casting angles and distances to ensure the tip holds up under real fishing conditions.
- Cast gently to avoid sudden stress
- Watch for any unusual bends or sounds
- Test with both light and medium weights
- Stop if you feel any weakness or cracking

Credit: www.reddit.com
Prevent Future Damage
Fixing a fishing rod tip is just the start. Protecting it keeps the rod strong longer. Simple care can stop breaks and cracks.
Learn how to store and handle your rod. These tips help avoid damage and save money on repairs.
Proper Rod Storage
Store your fishing rod in a safe place away from heavy items. Keep it off the ground to stop bending and pressure.
Use a rod rack or holder that supports the whole rod. Avoid leaning rods against walls or corners.
- Keep rods dry to prevent rust and weakening
- Store rods vertically or horizontally with support
- Use rod tubes for travel or long storage
- Remove the reel to reduce weight on the tip
Handling Tips
Handle your rod with care. Avoid dropping or hitting the tip on hard surfaces. Use both hands when carrying long rods.
Check your line and guides often. Tangled or snagged lines pull on the tip and cause damage.
- Carry rods with the tip pointing up or in front
- Remove hooks and lures before storage
- Do not lean rods on rough or sharp objects
- Inspect guides and replace damaged ones quickly
Frequently Asked Questions
How Can I Fix A Broken Fishing Rod Tip Myself?
You can repair a broken fishing rod tip by removing the damaged tip. Then, fit a replacement tip of the same size using strong adhesive. Let it dry fully before use. This simple DIY fix saves money and restores rod functionality quickly.
What Materials Are Needed To Repair Fishing Rod Tips?
You need a replacement rod tip, strong epoxy or super glue, sandpaper, and pliers. Sand the rod end lightly for better adhesion. Use pliers to remove the broken tip carefully. These basic tools ensure a secure, durable rod tip repair.
How Long Does Fishing Rod Tip Repair Take?
Fishing rod tip repair usually takes 30 to 60 minutes. This includes cleaning, sanding, gluing, and drying time. Quick drying adhesives can speed up the process. Proper curing ensures the repair is strong and reliable for fishing.
Can I Use Any Glue To Fix Fishing Rod Tips?
No, use epoxy or super glue designed for fishing rods. These adhesives provide strong, waterproof bonds essential for rod tip repair. Avoid regular household glue, as it may not hold under fishing stress or wet conditions.
Conclusion
Repairing a fishing rod tip is simple and rewarding. With basic tools, you can fix it yourself. This saves time and money. Start by gathering the right materials. Follow each step carefully. Take your time to avoid mistakes. Practice makes perfect.
A well-repaired rod enhances your fishing experience. You’ll enjoy casting smoothly again. Regular maintenance keeps your gear in top shape. Always check for damage before fishing trips. A little effort goes a long way. Happy fishing and tight lines!