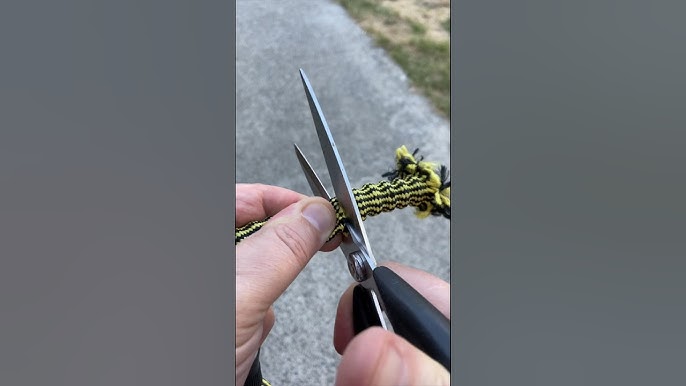
Is your flexible garden hose leaking or damaged? Don’t rush to buy a new one just yet.
You can save time and money by fixing it yourself. Imagine turning a frustrating drip into a smooth flow with just a few simple steps. In this guide, you’ll discover easy, effective ways to repair your garden hose and keep your watering routine hassle-free.
Ready to bring your hose back to life? Let’s get started!
Common Hose Problems
Flexible garden hoses often face damage after regular use. Knowing common problems helps you fix them fast.
This guide explains how to spot leaks, cracks, and damaged fittings on your hose.
Leaks And Punctures
Leaks and punctures happen when sharp objects pierce the hose or wear causes small holes. Water sprays out and pressure drops.
- Look for wet spots or drips while the hose is under pressure.
- Mark the damaged area with a waterproof marker.
- Drain the hose before repair to avoid water flow.
- Use a hose repair kit or strong tape for small holes.
- Replace the hose if the damage is large or multiple leaks appear.
Cracks And Splits
Cracks and splits often occur from sun exposure and cold weather. They reduce hose strength and cause leaks.
| Cause | Effect | Solution |
|---|---|---|
| Sun damage | Plastic weakens, cracks form | Store hose in shade, replace cracked parts |
| Cold weather | Hose stiffens and splits | Drain water before winter, store indoors |
| Old age | Material breaks down, cracks appear | Replace hose after several years |
Damaged Fittings
Fittings connect the hose to faucets or sprinklers. Damage here causes leaks and poor water flow.
Check for these common fitting issues:
- Loose connections that let water drip
- Cracked or bent metal parts
- Worn rubber washers causing leaks
- Corrosion that weakens the fitting
Repair damaged fittings by tightening, replacing washers, or swapping out the fitting. Use tools carefully to avoid more damage.
Tools And Materials Needed
Fixing a flexible garden hose requires some basic tools and materials. Having the right items helps you repair quickly and properly.
This guide covers the main items you need to have on hand before starting your repair.
Basic Repair Kit
A simple repair kit keeps your hose in working condition. It includes common tools that help you fix leaks and breaks.
- Utility knife or scissors for cutting the hose cleanly
- Adjustable wrench for tightening fittings
- Screwdriver to remove and attach clamps or connectors
- Pliers to grip and twist connectors
- Replacement hose clamps for securing joints
- Measuring tape to measure hose length accurately
Sealants And Tapes
Sealants and tapes stop leaks and keep water inside the hose. They provide a tight and lasting seal around damaged areas.
| Item | Purpose |
| Waterproof silicone sealant | Seals small holes and cracks |
| Teflon tape (plumber’s tape) | Wraps threads to prevent leaks |
| Rubber repair tape | Wraps around hose for temporary fixes |
Replacement Parts
Sometimes you must replace parts that are too damaged. These parts restore your hose’s function and water flow.
- Hose connectors or couplings to join hose sections
- End caps to close off hose ends
- Spray nozzles or faucets if damaged
- New hose sections to replace torn parts
Preparing The Hose For Repair
Before fixing a flexible garden hose, you must prepare it well. Proper preparation helps the repair last longer.
This guide covers three key steps: draining the hose, cleaning the area, and cutting damaged sections.
Draining The Hose
Remove all water from the hose to make repair easier. Water inside can cause leaks and weak spots.
- Turn off the water supply connected to the hose.
- Disconnect the hose from the faucet and other attachments.
- Lift one end and let water flow out completely.
- Shake the hose gently to remove any remaining water.
Cleaning The Area
Clean the hose surface where the repair will happen. Dirt and debris stop patches or connectors from sticking well.
- Use a cloth or sponge to wipe off mud and dust.
- Wash the area with mild soap and water.
- Dry the hose completely with a clean towel.
- Inspect the area for any hidden damage or cracks.
Cutting Damaged Sections
Remove broken or cracked parts of the hose to get a smooth surface for repair. Cutting clean edges helps seal tightly.
| Tool | Purpose |
|---|---|
| Sharp scissors | Cut thin or small hose sections |
| Utility knife | Slice through thicker hose parts |
| Measuring tape | Measure how much to cut |
Fixing Leaks And Punctures
Flexible garden hoses can develop leaks and punctures over time. Fixing them is simple and saves money. Follow these steps to repair your hose efficiently.
With a few tools and materials, you can get your garden hose back in working order. Let’s explore different methods to fix leaks and punctures.
Using Waterproof Tape
Waterproof tape is a quick solution for small leaks. It seals the hole and prevents water from escaping.
- Dry the hose completely before applying tape.
- Wrap the tape tightly around the leak area.
- Ensure at least two layers for a secure seal.
Applying Hose Sealant
Hose sealant is ideal for larger leaks. It creates a durable bond that withstands water pressure.
Apply sealant directly on the leak. Spread it evenly and let it dry as per the instructions on the package.
Patching With Rubber
Rubber patches are great for fixing punctures. They provide a long-lasting repair for your garden hose.
| Step | Action |
| 1 | Cut a piece of rubber patch larger than the puncture. |
| 2 | Apply adhesive to the patch and hose. |
| 3 | Press the patch firmly onto the hose. |
| 4 | Allow it to dry completely before use. |
Replacing Hose Sections
Fixing a flexible garden hose by replacing sections is simple. It saves money and avoids buying a new hose.
This guide shows how to remove old parts, attach new ones, and secure connections.
Removing Old Sections
First, find the damaged part of the hose. Turn off the water and drain the hose.
Cut the hose cleanly on both sides of the damaged section using a sharp knife or hose cutter.
Attaching New Pieces
Match the new hose piece to the size of the removed section. Slide hose connectors into each end.
- Push one end of the new hose onto the first connector.
- Push the other end onto the second connector attached to the main hose.
- Make sure the hose fits tightly over each connector.
Securing With Clamps
Use hose clamps to hold the new piece firmly in place on the connectors. Tighten the clamps with a screwdriver.
| Clamp Type | Use | Tip |
| Worm Gear Clamp | Best for flexible hoses | Tighten evenly to avoid damage |
| Spring Clamp | Good for quick fixes | Check pressure regularly |
| Wire Clamp | Use for thin hoses | Ensure clamp is not too tight |

Credit: www.reddit.com
Repairing Or Replacing Fittings
Flexible garden hoses often leak or break at the fittings. Fixing or replacing these parts saves water and extends hose life. This guide shows how to handle damaged fittings safely.
Follow simple steps to remove old fittings and add new connectors. Make sure seals are tight to stop leaks and keep your hose working well.
Unscrewing Damaged Fittings
Start by turning off the water and draining the hose. Use a wrench or pliers to grip the damaged fitting. Turn the fitting counterclockwise to unscrew it.
If the fitting is stuck, apply some lubricant and wait a few minutes. Avoid forcing it too hard to prevent damage to the hose.
Installing New Connectors
Choose a connector that fits your hose size. Slide the connector onto the hose end. Tighten any screws or clamps to hold it firmly in place.
Use a hose clamp for extra security. Place it over the connector and tighten it with a screwdriver. This keeps the connector from slipping off.
- Match connector size to hose diameter
- Use hose clamps for stronger hold
- Tighten screws evenly to avoid leaks
Ensuring Tight Seals
Apply plumber’s tape around the threads of the new fitting. This tape helps prevent leaks by filling gaps. Wrap the tape clockwise to match the thread direction.
After installing, turn on the water slowly. Check for leaks at the fitting. Tighten the connector or clamp if you see any water escaping.
- Use plumber’s tape on threaded connections
- Test for leaks before full use
- Retighten fittings if leaks appear
Preventing Future Damage
Keeping your flexible garden hose in good shape saves money and time. Taking steps to prevent damage helps the hose last longer.
Follow simple habits to avoid cracks and leaks. This guide shows you how to protect your hose with proper care.
Proper Storage Tips
Store your garden hose in a cool, dry place away from sunlight. Sunlight can weaken the hose material over time.
- Keep the hose off the ground to avoid dirt and damage
- Use a hose reel or hanger to coil it neatly
- Drain water before storing to prevent freezing and cracking
- Avoid storing the hose in very hot areas like near heaters
Avoiding Kinks And Twists
Kinks and twists cause weak spots that lead to leaks. Handle the hose gently to keep it smooth.
| Do | Don’t |
|---|---|
| Coil the hose in large loops | Tight bends or sharp angles |
| Pull the hose straight when unrolling | Drag the hose around corners |
| Use hose guides on sharp edges | Force the hose into small spaces |
Regular Maintenance
Check your hose often for leaks and wear. Early fixes stop small problems from growing.
- Inspect the hose for cracks or holes before use
- Clean the hose with mild soap and water to remove dirt
- Tighten fittings to prevent leaks
- Replace damaged parts quickly to keep the hose working well

Credit: www.amazon.com
Credit: www.amazon.com
Frequently Asked Questions
How Do I Fix A Leak In A Flexible Garden Hose?
To fix a leak, first locate the damaged spot. Cut out the damaged section with a sharp knife. Use a hose repair kit to connect the ends. Tighten clamps securely to stop the leak and test the hose for leaks.
What Tools Are Needed To Repair A Garden Hose?
You need a sharp utility knife, hose repair kit, and pliers. The repair kit usually contains connectors and clamps. These tools help cut, connect, and secure the hose parts effectively.
Can I Repair A Garden Hose Without A Repair Kit?
Yes, you can use waterproof tape or hose menders. Wrap tape tightly around the leak or splice the hose with a mender. However, repair kits provide a more durable and long-lasting solution.
How Long Does A Flexible Garden Hose Repair Last?
A proper repair can last from several months to years. Durability depends on the quality of materials and hose usage. Regular inspection helps maintain the hose’s lifespan.
Conclusion
Repairing a flexible garden hose saves money and extends its life. Small leaks and cracks do not mean the hose is useless. With the right steps, you can fix it quickly. Keep your garden healthy by ensuring water flows well.
Regular checks help catch problems early and avoid bigger damage. A working hose makes watering easier and keeps plants happy. Try these simple repairs to keep your garden hose strong and ready. Simple care brings long-lasting results.