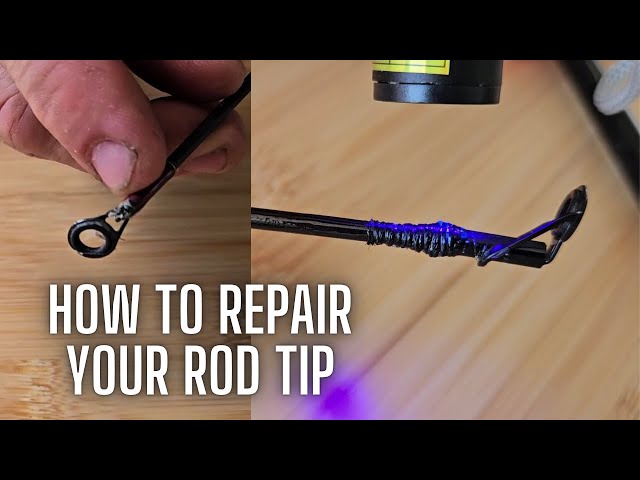
Have you ever been out fishing when suddenly the tip of your rod snaps? It’s frustrating and can ruin your day on the water.
But before you rush to buy a new one, what if you could fix it yourself quickly and easily? Repairing the tip of your fishing rod is simpler than you might think. In this guide, you’ll learn practical, step-by-step tips to bring your rod back to life.
Keep reading to save money, extend the life of your gear, and get back to fishing without delay.

Credit: www.youtube.com
Common Tip Damages
Fishing rod tips often face damage from regular use and accidents. Knowing common tip problems helps you fix them quickly. Proper repair keeps your rod working well and extends its life.
This guide covers three common tip damages: cracks and splinters, broken guides, and loose tip tops. Each section explains the problem and what to check before repairing.
Cracks And Splinters
Cracks and splinters happen when the rod tip hits a hard object or bends too much. Small cracks can grow if not fixed. Splinters make the rod weak and unsafe to use.
- Look for hairline cracks along the tip.
- Check for any wood or fiberglass splinters.
- Test rod strength by gently bending the tip.
- Replace or glue cracks with strong epoxy resin.
Broken Guides
Guides hold the fishing line and keep it smooth. Broken guides cause line tangles and poor casting. Damage comes from dropping the rod or catching guides on branches.
| Damage Type | Signs | Repair Tips |
| Cracked Frame | Visible breaks or bends | Replace guide with new one |
| Missing Insert | Rough line contact | Install new insert or guide |
| Loose Guide | Wobbly or moving guide | Re-wrap with thread and glue |
Loose Tip Tops
Tip tops are the last guide at the rod tip. They can get loose from use or heat. A loose tip top causes line damage and poor casting control.
To fix a loose tip top:
- Remove the tip top carefully.
- Clean the rod end and inside of the tip top.
- Apply a small amount of strong adhesive inside the tip top.
- Place the tip top back on the rod tip and hold firmly.
- Let it dry completely before using the rod.

Credit: www.reddit.com
Tools And Materials Needed
Fixing the tip of a fishing rod needs the right tools and materials. Using proper items helps you repair quickly and safely.
This guide explains the essential tools and materials for a simple rod tip repair.
Basic Repair Kit
A basic repair kit holds the main tools needed for the job. It keeps everything organized and ready.
The kit usually includes items to cut, sand, and hold parts during repair.
- Small sharp knife or blade
- Sandpaper or emery cloth
- Tweezers or pliers
- Small brush for glue
- Clamps or tape to hold parts
Adhesives And Tapes
Choosing the right glue and tape is key for a strong repair. Some adhesives dry fast and hold tight.
Different tapes help protect the rod and secure parts while glue dries.
- Epoxy resin or super glue for bonding
- Electrical tape for temporary holds
- Thin thread or rod wrapping tape
- Heat shrink tubing to protect joints
Replacement Parts
Sometimes the rod tip or guide ring needs replacement. Having spare parts helps finish the repair well.
Buy parts that fit your rod’s size and type to ensure good performance.
- Rod tip tops in matching size
- Replacement guide rings
- Rod wrapping thread or tape
- Small screws or pins if needed
Step-by-step Repair Methods
Fixing the tip of a fishing rod can save you money and extend its life. This guide explains simple ways to repair common problems.
Follow these clear steps to fix cracks, replace broken guides, and secure loose tips on your fishing rod.
Fixing Cracks With Epoxy
Cracks in the rod tip weaken the rod and can get worse over time. Epoxy is a strong glue that seals cracks well.
- Clean the cracked area with rubbing alcohol.
- Mix a small amount of two-part epoxy according to instructions.
- Apply epoxy to the crack using a toothpick or small brush.
- Hold the crack together if needed and let the epoxy dry for 24 hours.
- Lightly sand the dried epoxy for a smooth finish if desired.
Replacing Broken Guides
Guides help the fishing line run smoothly. Broken guides can cause snags or line damage. Replace them carefully.
| Tool | Purpose |
| Heat source (lighter or heat gun) | Soften old glue around the guide |
| Pliers | Remove broken guide |
| New guide | Replacement part matching size |
| Rod wrapping thread | Secure new guide to rod |
| Epoxy or rod finish | Seal the thread wrap |
After removing the old guide, place the new guide in position. Wrap the thread tightly around the foot of the guide. Coat the wraps with epoxy and let dry.
Securing Loose Tips
Loose tips affect casting and control. Tighten them with the right tools and glue.
Follow these steps to secure a loose tip:
- Remove the tip from the rod by gently pulling.
- Clean old glue from the rod end and inside the tip.
- Apply a thin layer of strong adhesive or rod tip glue inside the tip.
- Slide the tip back onto the rod end, aligning it correctly.
- Hold it in place until the glue sets, usually a few minutes.
- Allow full curing time before use, typically 24 hours.
Tips For Long-lasting Repairs
Fixing the tip of a fishing rod takes care and patience. Proper repair helps you enjoy fishing longer without worries.
Follow these tips to make sure your repair lasts and your rod stays strong.
Proper Curing Time
After applying glue or epoxy, give it enough time to dry fully. Rushing this step can weaken the fix.
- Keep the rod still and in a dry place during curing.
- Check the glue instructions for exact drying time.
- Avoid touching or moving the tip until it hardens.
Avoiding Future Damage
Protect your rod tip from breaks and cracks after repair by using careful handling.
- Do not place heavy items on the rod.
- Use a rod sleeve or cover when not fishing.
- Inspect the tip regularly for early signs of wear.
- Handle your rod gently, especially when casting or reeling.
Storage And Handling
Store your fishing rod properly to avoid stress on the tip and other parts.
| Storage Method | Benefit |
| Keep rod vertical with tip up | Prevents bending and pressure on the tip |
| Use padded rod rack | Protects rod from knocks and scratches |
| Remove the reel for long storage | Reduces stress on rod joints and tip |
| Store in a cool, dry place | Prevents damage from moisture and heat |
When To Seek Professional Help
Fixing the tip of a fishing rod can be simple. Some repairs you can do yourself. Other times, the damage is too big. Then, you need a professional.
A professional has the right tools and skills. They can make sure the rod works well again. Know when to get expert help to avoid more damage.
Severe Structural Damage
If the rod has big cracks or breaks near the tip, it is risky to fix alone. Severe damage can weaken the rod’s strength. A pro can check if the rod is safe to use.
Trying to fix serious breaks might make the problem worse. Professionals can replace parts or suggest if you need a new rod.
Complex Guide Replacement
Fishing rods have small rings called guides. These help the line move smoothly. If the guide near the tip breaks, it can be tricky to replace. The placement and alignment must be exact.
Professionals know how to remove old guides and install new ones carefully. Wrong guide replacement can damage the rod or harm your fishing line.
Warranty Considerations
Check your rod’s warranty before fixing it yourself. Some repairs might void the warranty. A professional repair service often follows warranty rules.
Using experts can keep your warranty valid. They use approved parts and methods. This protects your investment in the fishing rod.

Credit: anglersresource.net
Frequently Asked Questions
How Do I Fix A Broken Fishing Rod Tip?
To fix a broken tip, first remove any damaged parts. Then, align a replacement tip with the rod. Secure it using strong adhesive or epoxy. Allow it to dry fully before use. This restores rod performance and prevents further damage.
What Materials Are Needed To Repair A Rod Tip?
You need a replacement rod tip, strong adhesive or epoxy, sandpaper, and a heat source. Optionally, use thread and rod varnish for extra reinforcement. These materials help secure the tip and ensure a long-lasting repair.
Can I Repair A Fishing Rod Tip At Home?
Yes, you can repair a rod tip at home with basic tools and materials. Follow step-by-step guides carefully to avoid further damage. Home repair saves cost and extends the rod’s lifespan if done correctly.
How Long Does Fishing Rod Tip Repair Take?
Repairing a fishing rod tip usually takes 30 minutes to an hour. Drying time for adhesives can vary, often requiring several hours. Planning ahead ensures the repair sets properly for strong performance.
Conclusion
Fixing a broken fishing rod tip is simpler than you think. Follow the steps, and you’ll have it working again. Remember to gather all tools before starting. Patience is key for best results. Practicing these skills can save money and time.
Plus, it keeps your equipment in top shape. Always handle your rod with care after repairing. This ensures longer lifespan and better performance. Share your repair tips with friends. Happy fishing and good luck on your next adventure!