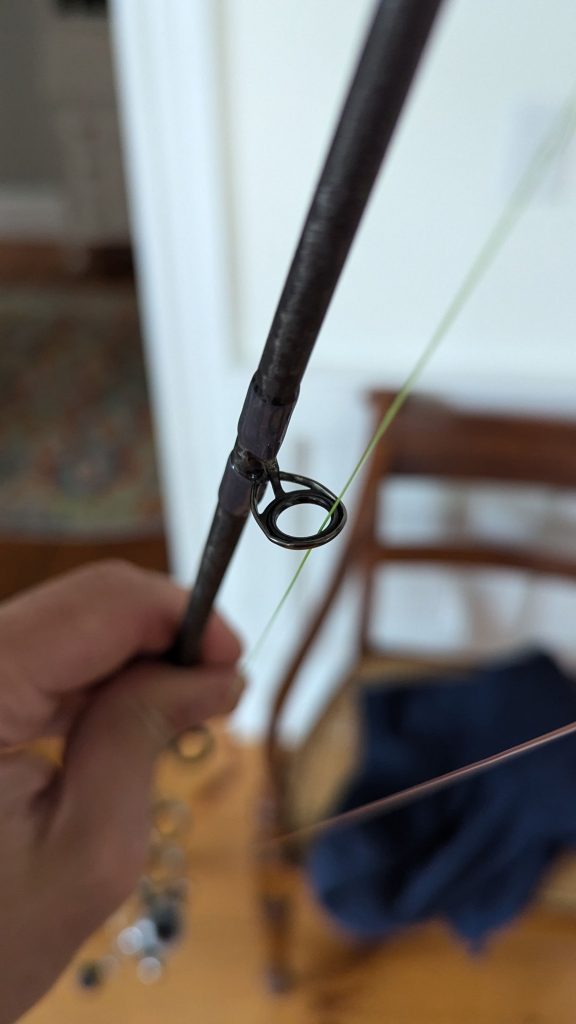
Have you ever been out fishing and noticed your rod’s eye was damaged or missing? It can be frustrating and even stop your fishing trip early.
But don’t worry—replacing a fishing rod eye is easier than you might think. With just a few simple tools and clear steps, you can fix your rod quickly and get back to enjoying the water. Keep reading, and you’ll learn how to restore your fishing rod like a pro, saving time and money in the process.
Tools Needed
Replacing a fishing rod eye needs some simple tools. Using the right tools helps you fix the rod quickly and safely.
Gather everything before starting. This makes the process smooth and avoids mistakes.
Essential Equipment
You need a few basic tools to replace the fishing rod eye. These tools help you remove the old eye and attach the new one firmly.
- Replacement fishing rod eye
- Small flat-head screwdriver or knife
- Heat source like a lighter or match
- Thread or strong glue
- Scissors or cutters
The replacement eye should match the size of the old one. A heat source helps soften glue or wraps.
Optional Supplies
Some extra tools make the job easier but are not required. These supplies improve the finish and durability.
- Rod wrapping thread for a neat look
- Rod finish or clear nail polish to seal
- Small paintbrush for applying finish
- Tweezers for handling small parts
- Sandpaper for smoothing rough areas
These optional items help protect your rod and give it a clean appearance after repair.

Credit: www.amazon.com
Identifying The Damaged Eye
A fishing rod eye is a small ring that guides your fishing line. Over time, it can get damaged and affect your fishing experience. Knowing how to spot damage helps you fix the rod quickly.
This guide covers signs of wear and tear on the rod eye and how to choose the right replacement part.
Signs Of Wear And Tear
Damaged rod eyes can cause line breaks and poor casting. Look for these common signs:
- Visible cracks or chips on the ring
- Rust or corrosion on metal parts
- Loose or bent eye frame
- Rough or sharp edges that can cut the line
- Worn or missing inserts inside the eye ring
Choosing The Right Replacement
Selecting the correct replacement eye keeps your rod working well. Check these factors before buying:
| Factor | Details |
| Size | Match the diameter of the old eye |
| Material | Choose stainless steel or ceramic inserts |
| Type | Fixed or roller eyes depending on rod use |
| Brand Compatibility | Use parts compatible with your rod model |
Removing The Old Eye
Removing the old eye from a fishing rod is an important step before installing a new one. It requires care to avoid damage to the rod.
This guide explains how to soften the adhesive and detach the old eye safely.
Softening The Adhesive
The adhesive holding the eye can be hard. Softening it helps to remove the eye easily. You can use heat or solvent for this task.
- Use a heat gun or hair dryer to warm the adhesive carefully.
- Heat the area evenly for a few minutes.
- Alternatively, apply a small amount of solvent like acetone to the adhesive.
- Allow the solvent to soak for several minutes to loosen the glue.
- Wear gloves and work in a well-ventilated area when using solvents.
Careful Detachment
After softening, gently remove the old eye to avoid damaging the rod. Use proper tools and follow safe steps.
| Tool | Use |
|---|---|
| Tweezers | Grip the eye firmly |
| Plastic scraper | Lift edges of the eye |
| Soft cloth | Protect the rod surface |
| Sandpaper | Clean leftover adhesive gently |
Start by lifting one side of the eye with a plastic scraper. Hold the rod steady and pull the eye slowly with tweezers.
If the eye resists, apply more heat or solvent and try again. Clean the rod surface before adding the new eye.
Preparing The Rod
Before replacing a fishing rod eye, prepare the rod carefully. Proper preparation helps secure the new eye firmly.
Focus on cleaning and smoothing the area where the new eye will be placed. This ensures better adhesion and a longer-lasting repair.
Cleaning The Area
Remove any dirt, old glue, or debris from the rod surface. A clean surface helps the new eye stick properly without slipping.
- Use a soft cloth to wipe the rod gently.
- Apply rubbing alcohol on a cloth to remove grease and residue.
- Let the rod dry completely before moving on.
Sanding And Smoothing
Sanding the area smooths out rough spots and removes old adhesive traces. This step creates a clean surface for the new eye.
| Tool | Purpose |
| Fine grit sandpaper (320-400 grit) | Remove old glue and smooth surface |
| Small sanding block | Keep sanding even and controlled |
| Clean cloth | Wipe away dust after sanding |
Attaching The New Eye
Attaching a new eye to your fishing rod is a careful process. It helps keep your line smooth and strong.
This guide covers how to position the eye, secure it with thread, and apply epoxy or glue for a lasting hold.
Positioning The Eye
Place the new eye where the old one was removed. Align it so the eye faces the same direction as the other eyes on the rod.
Check that the eye sits flat and does not wobble. Proper positioning ensures smooth line flow during fishing.
Securing With Thread
Wrap strong thread tightly around the foot of the eye and rod. This holds the eye firmly in place.
- Start wrapping at one end of the eye foot.
- Keep the thread tight and even.
- Cover the entire foot with thread wraps.
- Tie off the thread with a secure knot.
Applying Epoxy Or Glue
Use epoxy or strong glue to seal the thread and fix the eye firmly. This prevents loosening during use.
| Type | Dry Time | Strength |
| Two-part epoxy | 5-10 minutes | Very strong |
| Super glue | Less than 1 minute | Strong but brittle |
| Rod-building glue | 10-15 minutes | Flexible and strong |
Apply a thin layer over the thread wraps. Let it dry fully before using the rod again.
Finishing Touches
Replacing a fishing rod eye is not complete without proper finishing steps. These steps ensure the repair holds strong and the rod performs well.
Focus on drying, curing, and testing the repair before using the rod again. This will help avoid damage and ensure safety.
Drying And Curing Time
After attaching the new eye, it needs time to dry and cure fully. The adhesive or epoxy must harden to secure the eye firmly.
- Place the rod in a dry, dust-free area.
- Avoid moving or touching the repaired spot.
- Follow the glue or epoxy instructions for curing time.
- Typically, drying takes between 12 to 24 hours.
- Longer curing times may improve strength.
Testing The Repair
Once dry, test the repair carefully to confirm it is secure. This step prevents surprises during fishing trips.
| Test Type | Method | What to Look For |
| Visual Check | Inspect the eye for cracks or gaps | No visible damage or looseness |
| Gentle Pull | Pull on the eye gently with your hand | Eye stays firmly attached |
| Line Threading | Thread the fishing line through the eye | Line moves smoothly without snagging |
| Simulated Casting | Perform slow casting motions | Eye remains stable and secure |
Maintenance Tips
Keeping your fishing rod in good shape helps it last longer. Regular care prevents costly repairs and keeps your gear reliable.
Focus on simple maintenance steps to protect the rod eye. This guide covers how to avoid damage and inspect your rod regularly.
Preventing Future Damage
Protect the fishing rod eye by following these easy habits. Avoid dropping or banging your rod to keep the eye intact.
- Rinse your rod with fresh water after use in saltwater.
- Dry the rod thoroughly before storage.
- Store the rod in a padded case or holder.
- Avoid placing heavy items on the rod.
- Use rod covers during transport to prevent scratches.
Routine Inspections
Check the rod eye and guides before and after each trip. Look for cracks, bends, or rust that can cause line damage.
| Inspection Area | What to Look For | Action Needed |
| Rod Eye | Cracks or chips on the ring | Replace immediately |
| Guide Frame | Bends or warping | Realign or replace |
| Line Contact Surface | Rough spots or corrosion | Smooth or change eye |
| Wraps and Bindings | Loose or frayed thread | Tighten or rewrap |

Credit: www.youtube.com

Credit: naavagreen.com
Frequently Asked Questions
How Do I Remove A Broken Fishing Rod Eye?
To remove a broken rod eye, carefully cut or heat the adhesive. Use pliers to gently twist and pull the old eye off without damaging the rod blank. Clean the area thoroughly before installing a new eye guide.
What Tools Are Needed To Replace A Fishing Rod Eye?
You need pliers, a razor blade, sandpaper, epoxy glue, and a replacement rod eye. Heating tools like a lighter can help soften adhesive. These tools ensure safe removal and secure installation of the new eye guide.
How To Choose The Right Replacement Fishing Rod Eye?
Match the replacement eye size to your rod’s original guides. Consider the rod’s action and line weight. Choose corrosion-resistant materials like stainless steel or ceramic for durability and smooth line flow.
Can I Replace A Fishing Rod Eye At Home?
Yes, you can replace a rod eye at home with basic tools. Follow step-by-step instructions carefully to avoid rod damage. Take your time to ensure proper alignment and secure attachment.
Conclusion
Replacing a fishing rod eye is simple with the right steps. Start by gathering all necessary tools. Remove the broken eye carefully. Attach the new eye securely. Ensure alignment with other guides. Test the rod for smooth line flow. This boosts your fishing experience.
Remember, practice makes perfect. The more you do it, the easier it becomes. Enjoy fishing with your newly fixed rod. Patience and precision are key. Happy fishing adventures await you!