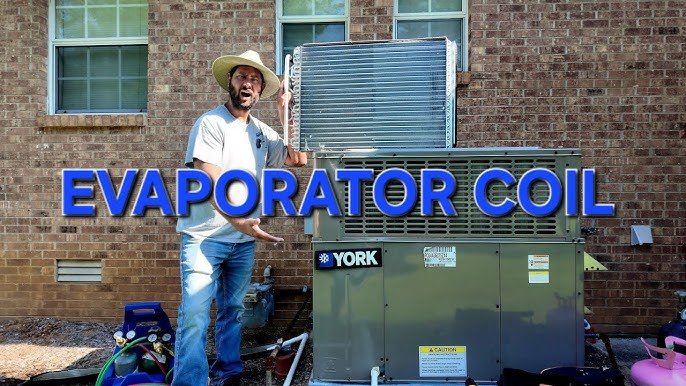
Is your air conditioner not cooling like it used to? The problem might be a worn-out or damaged coil.
Replacing your air conditioner coil might sound complicated, but with the right steps, you can do it yourself and save money. Imagine enjoying cool air again without calling a costly technician. In this guide, you’ll learn exactly how to replace your air conditioner coil quickly and safely.
Keep reading, and you’ll be able to fix your AC like a pro—no hassle, no stress.
Signs Of A Failing Air Conditioner Coil
The air conditioner coil is a key part of your cooling system. It helps remove heat from the air. When the coil starts to fail, your AC cannot cool well.
Recognizing the signs early can save you from bigger repairs. Watch for changes in how your AC works and sounds.
Reduced Cooling Performance
A failing coil can cause your air conditioner to blow warm or less cold air. This happens because the coil cannot absorb heat properly.
Ice Formation On The Coil
You may see ice or frost on the coil or refrigerant lines. This ice blocks heat transfer and lowers cooling efficiency.
Unusual Noises From The Unit
Listen for hissing or bubbling sounds from the outdoor unit. These noises often mean a refrigerant leak or coil damage.
Higher Energy Bills
When the coil fails, your AC works harder to cool your home. This extra work increases your electricity use.
- Look for sudden spikes in your energy bills.
- Compare current bills to previous months.
- Check if your AC runs longer than before.
Leaks Or Moisture Around The Unit
Water leaks near the indoor unit can mean a coil or drain problem. Moisture may form from frozen coils melting or blocked drainage.
| Symptom | Possible Cause |
| Warm air from vents | Damaged coil or low refrigerant |
| Ice on coil | Restricted airflow or refrigerant leak |
| Hissing sounds | Refrigerant leak in coil |
| High energy bills | Coil inefficiency |
| Water leaks | Frozen coil melting or drainage issue |
Gathering Necessary Tools And Materials
Replacing an air conditioner coil needs the right tools and materials. Gathering these before you start makes the job easier.
Having all items ready saves time and helps you work safely and correctly.
Tools Required
You need some basic tools to remove the old coil and install the new one. These tools help you handle metal parts and electrical connections.
- Adjustable wrench for loosening bolts
- Screwdrivers (flathead and Phillips)
- Pipe cutter to cut refrigerant lines
- Refrigerant recovery machine
- Vacuum pump to remove air and moisture
- Manifold gauge set for pressure checks
- Safety gloves and goggles
Materials Needed
Besides tools, you need materials to replace the coil properly. These materials ensure the system works well after replacement.
- Replacement coil compatible with your AC model
- New refrigerant as per the system specification
- Sealant or refrigerant line insulation
- Electrical tape and wire connectors
- Leak detection spray
- Cleaning cloths and rags
Safety Equipment
Safety equipment protects you during coil replacement. Always wear protective gear to avoid injuries.
- Insulated gloves to avoid electric shock
- Safety goggles to protect eyes from debris
- Face mask to avoid dust and chemicals
- Long-sleeve clothing for skin protection
Safety Precautions
Replacing an air conditioner coil can be risky without safety measures. Follow clear safety rules to avoid injuries.
This guide covers key safety steps before and during the coil replacement process.
Turn Off Power Supply
Always switch off the main power to the air conditioner. This prevents electric shock during work.
Use a voltage tester to confirm no electricity flows to the unit before starting.
Wear Protective Gear
Use gloves to protect your hands from sharp metal edges. Wear safety goggles to shield your eyes.
A dust mask can help avoid breathing in dust or debris while working on the coil.
Handle Refrigerant Carefully
Coils contain refrigerant that can be harmful if released. Do not puncture or damage the coil tubing.
Only certified technicians should recover refrigerant to protect the environment and your safety.
Use Proper Tools
Use tools designed for HVAC work to avoid damage and injury. Avoid makeshift tools that can slip or break.
- Insulated screwdrivers
- Pipe wrenches
- Coil fin combs
- Refrigerant gauges
Work In A Well-ventilated Area
Ensure good airflow to avoid buildup of harmful gases. Open windows and doors if indoors.
Avoid working in confined spaces where fumes can cause breathing problems.
Avoid Wet Conditions
Do not work on the air conditioner in rain or wet areas. Water increases the risk of electric shock.
Keep the work area dry and clear of standing water before starting the coil replacement.

Credit: www.youtube.com
Accessing The Coil
Replacing an air conditioner coil starts with accessing the coil itself. You need to open the unit carefully. This allows you to see and reach the coil for removal and replacement.
Before touching any part, make sure the unit is safe to handle. Follow the right steps to avoid damage or injury.
Turning Off Power
Turn off the power to the air conditioner. This stops electricity from flowing and keeps you safe. Find the main breaker for the unit and switch it off.
Also, check if the unit has a disconnect switch nearby. Use it to cut off power completely before starting work.
- Locate the main electrical panel
- Turn off the breaker for the air conditioner
- Use the disconnect switch if available
- Test to confirm the power is off
Removing The Unit’s Cover
After the power is off, remove the cover of the air conditioner unit. This cover protects the coil and other parts inside the unit.
Use a screwdriver to take out the screws holding the cover. Keep the screws safe for reassembly later. Gently lift or slide the cover off to expose the coil.
- Find all screws on the unit’s cover
- Use the right screwdriver to remove screws
- Store screws in a safe place
- Carefully remove the cover without forcing
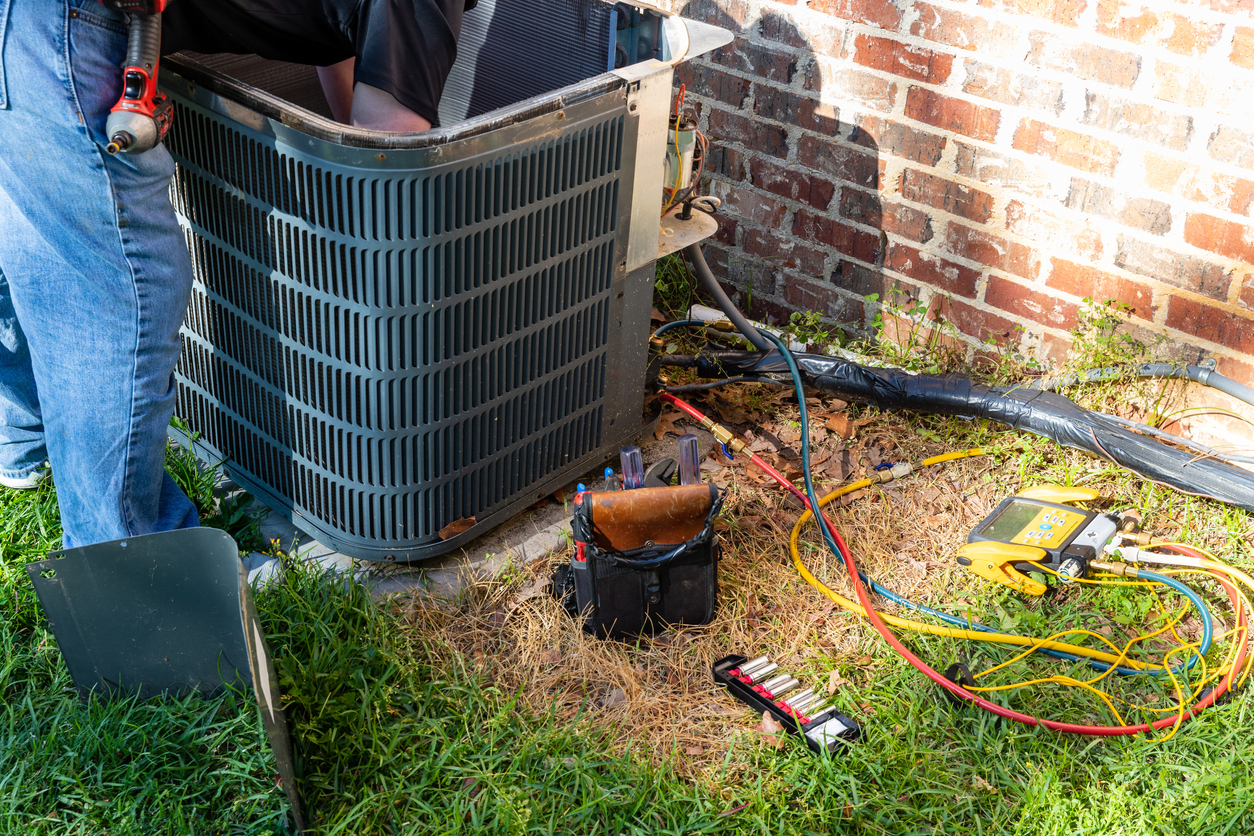
Removing The Old Coil
Replacing the air conditioner coil is important for good cooling. Removing the old coil safely prevents damage to the system. This guide shows how to remove the old coil step by step.
Focus on two main parts: disconnecting refrigerant lines and unfastening the coil. Follow instructions carefully to avoid leaks and injury.
Disconnecting Refrigerant Lines
Before removing the coil, you must disconnect the refrigerant lines. This stops the flow of refrigerant and protects the system.
- Turn off the power to the air conditioner.
- Use a gauge to check the refrigerant pressure.
- Recover the refrigerant using proper equipment.
- Loosen the flare nuts connecting the refrigerant lines.
- Carefully detach the lines from the coil.
Unfastening The Coil
After disconnecting the refrigerant lines, you can unfasten the coil from its housing. This step requires careful handling.
| Tool | Purpose |
|---|---|
| Wrench | Remove bolts holding the coil |
| Screwdriver | Unscrew clamps or panels |
| Gloves | Protect your hands during removal |
| Flashlight | Improve visibility in tight spaces |
Remove all bolts and screws securing the coil. Gently pull the coil out to avoid bending the fins or damaging other parts.
Credit: wheatandsons.com
Installing The New Coil
Replacing an air conditioner coil requires careful steps. Installing the new coil properly ensures the system works well and lasts longer.
Focus on positioning the coil correctly and securing it tightly. These parts keep the coil safe and efficient.
Positioning The Coil
Place the new coil exactly where the old one was removed. Align the coil with the system’s frame to avoid gaps and leaks.
- Check that the coil fits snugly in its space.
- Make sure the pipes connect without bending or stress.
- Verify the coil’s airflow direction matches the system’s design.
- Keep the coil level to prevent drainage problems.
Securing The Coil In Place
Once the coil is positioned, use screws, brackets, or clamps to hold it firmly. This stops movement that can damage the coil or pipes.
| Securing Method | Description | Tools Needed |
| Screws | Fasten the coil frame to the unit’s body | Screwdriver, Screws |
| Brackets | Support coil from underneath or sides | Drill, Screws, Brackets |
| Clamps | Hold pipes and coil tightly together | Wrench, Clamps |
Reconnecting Refrigerant Lines
Reconnecting refrigerant lines is a key part of replacing your air conditioner coil. These lines carry the refrigerant that cools your home. Proper connection ensures the system works safely and efficiently.
Take care to avoid leaks and damage during this process. Use the right tools and follow correct steps to reconnect the lines.
Prepare The Refrigerant Lines
Start by cleaning the ends of the refrigerant lines. Remove any dirt or old sealant. Cut off damaged sections if needed. This helps create a good seal and prevents leaks.
Align And Connect The Lines
Carefully align the refrigerant lines with the coil’s ports. Make sure the connections fit tightly. Avoid bending or kinking the lines. Use the proper flare nuts or fittings to secure the connection.
- Check that the flare nuts match the threads
- Tighten flare nuts by hand first
- Use a torque wrench for final tightening
- Avoid over-tightening to prevent damage
Test For Leaks And Final Checks
After connecting, test the lines for leaks. Use a leak detector or soapy water. Watch for bubbles around the joints. Tighten fittings again if you find leaks.
| Check | Action |
|---|---|
| Leak at joint | Tighten flare nut carefully |
| Damaged flare | Replace flare or line |
| Loose connection | Use torque wrench to secure |
| Corroded line | Clean or replace line |

Credit: www.reddit.com
Testing The Air Conditioner
After replacing the air conditioner coil, testing the system is vital. This ensures it works well and stays safe.
Check different parts carefully. Testing helps find issues early and keeps your AC cooling efficiently.
Checking For Leaks
Leaks in the coil or connections reduce cooling power and waste refrigerant. Look closely at all joints and pipes.
- Use a leak detector or soapy water on joints.
- Watch for bubbles or hissing sounds indicating leaks.
- Tighten or replace fittings if leaks appear.
- Re-test after repairs to confirm no leaks remain.
Ensuring Proper Cooling
Check that the air conditioner cools the room well after coil replacement. Measure temperature and airflow.
| Test | Normal Range | Notes |
| Temperature Drop | 15°F to 20°F (8°C to 11°C) | Measure difference between return and supply air |
| Airflow | 350 to 400 CFM per ton | Check using an anemometer at vents |
| Compressor Pressure | Check manufacturer’s specs | Use gauge set for accurate reading |
Maintenance Tips For Longevity
Replacing your air conditioner coil can improve cooling performance. Proper maintenance keeps the coil working longer.
Regular care helps avoid costly repairs and extends the life of your AC system.
Clean The Coils Regularly
Dirt and dust reduce the coil’s ability to cool air. Clean the coils at least once a year.
Use a soft brush or vacuum to remove debris gently. Avoid harsh chemicals that can damage the coil.
Check For Refrigerant Leaks
Low refrigerant levels make the coil freeze or lose efficiency. Inspect the system for leaks regularly.
If you notice ice or poor cooling, call a professional to fix leaks and refill refrigerant.
Keep The Area Around The Unit Clean
Remove leaves, grass, and debris near the outdoor unit. Blocked airflow makes the coil work harder.
- Trim plants and bushes around the unit
- Clear away dirt and trash
- Keep at least two feet of clearance
Replace Air Filters Often
Dirty air filters reduce airflow and cause the coil to freeze. Change filters every 1 to 3 months.
Clean filters help maintain good air quality and keep the coil efficient.
Schedule Professional Inspections
Experts can spot early problems with the coil and other parts. Have your AC checked yearly.
They clean, test, and fix issues before they cause big damage.
Frequently Asked Questions
How Do I Know If My Ac Coil Needs Replacement?
Signs include reduced cooling, ice buildup, leaks, and strange noises. Regular inspections reveal corrosion or damage, indicating a coil replacement is necessary.
Can I Replace The Ac Coil Myself Safely?
Replacing an AC coil requires HVAC knowledge and tools. DIY replacement is risky; hiring a professional ensures safety and proper installation.
How Long Does It Take To Replace An Ac Coil?
Typically, replacing an AC coil takes 2 to 4 hours. Time varies based on system complexity and technician experience.
What Costs Are Involved In Replacing An Ac Coil?
Costs include the coil unit, labor, and possible refrigerant recharge. Prices vary by AC model, coil type, and location.
Conclusion
Replacing an air conditioner coil takes care and patience. Follow each step carefully for the best result. Check your work to avoid leaks or damage. A well-maintained coil helps your AC run smoothly. This saves energy and keeps your home cool.
Regular care can extend your AC’s life. Stay safe and use the right tools. With practice, this task becomes easier. Keep your cool all summer long.