Is your car’s air conditioner blowing warm air instead of cool? The culprit might be a faulty compressor.
Knowing how to replace your car’s air conditioner compressor can save you time and money, and keep you comfortable on the road. In this guide, you’ll find simple, step-by-step instructions that anyone can follow—even if you’re not a car expert.
Keep reading, and you’ll learn exactly what you need to do to get your AC running smoothly again. Don’t let a broken compressor ruin your drive—take control and fix it yourself!
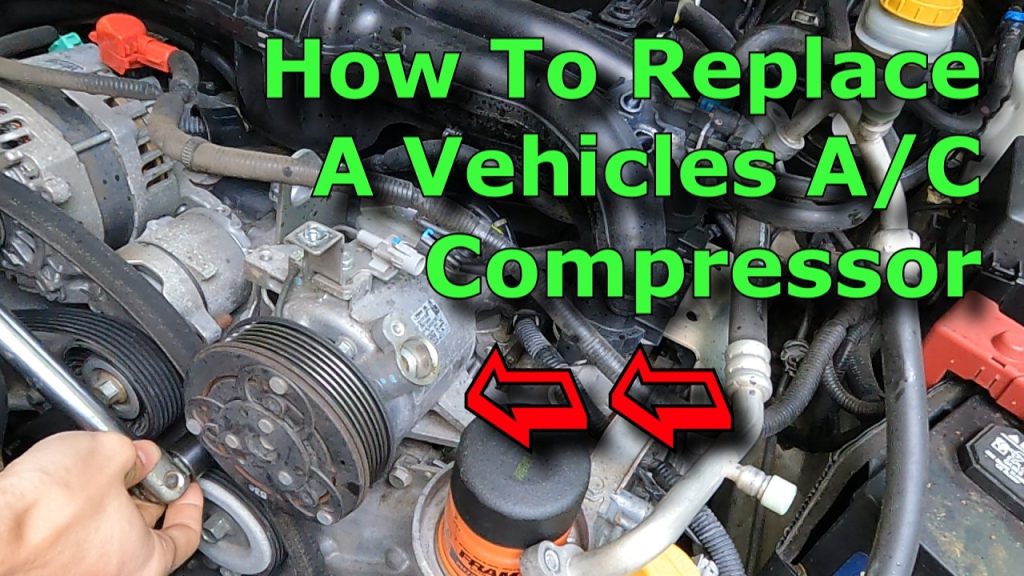
Credit: www.mazda3forums.com
Tools And Materials Needed
Replacing a car air conditioner compressor needs the right tools and materials. Having everything ready makes the job easier and safer.
This list covers the basic tools and materials you will need to replace the compressor properly.
Basic Hand Tools
You will need basic hand tools to remove and install parts. These tools help you reach bolts and screws on the compressor.
- Socket set with ratchet
- Wrenches (open-end and box)
- Screwdrivers (flathead and Phillips)
- Pliers (needle nose and regular)
- Breaker bar for tight bolts
Safety Equipment
Safety gear protects you from injuries and harmful chemicals. Always use proper safety tools when working on your car.
- Safety glasses to protect eyes
- Mechanic gloves for hand protection
- Face mask to avoid inhaling fumes
Ac System Tools
Specialized tools help you handle the air conditioning system parts safely. These tools are important to remove and recharge the AC system.
- AC manifold gauge set
- Vacuum pump for removing air and moisture
- Refrigerant recovery machine (optional but recommended)
- Refrigerant recharge kit
- O-ring pick tool
Replacement Parts And Materials
You will need new parts to replace the old compressor and ensure the system works well. Always use parts that match your car model.
- New air conditioner compressor
- New O-rings and seals
- Compressor oil (specified for your car)
- New receiver drier or accumulator
- Replacement refrigerant (check your car’s manual)
Safety Precautions
Replacing a car’s air conditioner compressor can be tricky. Safety is important to prevent accidents and injuries.
Before you begin, ensure you have the right tools and protective gear. Follow these precautions for a safe process.
Wear Protective Gear
Always wear protective gear to keep yourself safe from harm.
- Use safety goggles to protect your eyes.
- Wear gloves to protect your hands from sharp edges.
- Put on long sleeves to avoid skin contact with refrigerants.
Disconnect The Battery
Disconnecting the battery is crucial to prevent electrical shocks.
Remove the negative terminal first. This reduces the risk of short circuits. Store the disconnected cable safely.
Ventilate The Area
Ensure your workspace is well-ventilated. This prevents the buildup of harmful fumes.
Use The Right Tools
Using the correct tools makes the job easier and safer.
| Tool | Purpose |
| Socket Wrench | Remove bolts and nuts |
| Refrigerant Gauge | Check refrigerant levels |
| Screwdriver | Loosen or tighten screws |
Follow Manufacturer Instructions
Always follow the instructions provided by the manufacturer. This ensures that you replace the compressor correctly.
Refer to the car’s manual for specific guidelines. This helps in understanding unique requirements of your vehicle.
Locating The Ac Compressor
The AC compressor is a key part of a car’s air conditioning system. It pumps refrigerant to cool the air inside the car.
Finding the compressor is the first step before replacing it. Knowing its location helps you work safely and efficiently.
What Is The Ac Compressor?
The AC compressor compresses and circulates refrigerant gas. It powers the cooling cycle in your car’s air conditioner.
Where To Find The Compressor
The compressor is usually mounted on the engine block. It connects to the serpentine belt or drive belt.
- Look near the front of the engine
- Check for a pulley with a belt around it
- Find a round metal part with hoses attached
- Locate electrical connectors on the compressor
Tools To Help Locate The Compressor
Use these tools to find the compressor:
- A flashlight to see in dark engine areas
- A mirror to view hard-to-reach spots
- Gloves to protect your hands
- A diagram of your car’s engine layout
Signs You Have Found The Compressor
| Feature | Description |
| Shape | Round or oval metal housing |
| Connections | Two metal hoses attached |
| Location | Near engine belt system |
| Electrical | Wiring plug or connector present |
Removing The Old Compressor
Replacing a car’s air conditioner compressor starts with removing the old one. This process needs care and the right tools.
Follow each step to safely take out the old compressor before installing the new part.
Disconnecting The Battery
Always disconnect the car battery before working on the compressor. This stops electrical shocks and short circuits.
Use a wrench to remove the negative battery cable first. Then remove the positive cable.
Recovering Refrigerant
The refrigerant must be safely removed from the AC system. Releasing it into the air is illegal and harmful.
Use a recovery machine or take the car to a professional shop for refrigerant removal.
Removing Drive Belt
The drive belt powers the compressor. Remove it to free the compressor from the engine.
Use a wrench or belt tensioner tool to loosen the belt tension. Then slide the belt off the compressor pulley.
Detaching Electrical Connections
Disconnect all electrical connectors attached to the compressor. This includes sensors and clutch wires.
Press the release tabs on connectors and pull gently to avoid damage.
Unbolting The Compressor
Locate the mounting bolts that hold the compressor to the engine block. Use the correct socket size to remove them.
Support the compressor as you remove the last bolt. Carefully lift it out of the engine bay.
Preparing The New Compressor
Replacing a car’s air conditioner compressor needs care. Preparing the new compressor is important before installation.
This step helps the AC work well and last longer.
Comparing With Old Unit
Check the new compressor against the old one. Make sure they match in size and shape.
Look for the same mounting points and electrical connections. This avoids installation problems.
- Confirm the model number matches
- Compare pulley size and type
- Check connector types and locations
- Match mounting holes and brackets
Adding Compressor Oil
New compressors often come empty or with little oil. Add the correct oil type before installing.
Using the right amount of oil protects the compressor from damage and keeps it running smoothly.
- Check the vehicle manual for oil type and quantity
- Use only the recommended compressor oil
- Pour oil slowly into the compressor inlet
- Rotate the compressor clutch by hand to spread oil inside
Installing The New Compressor
After removing the old air conditioner compressor, you need to install the new one carefully. This process involves positioning, securing, and reconnecting parts correctly. Follow each step to ensure the compressor works well.
Take your time to avoid damaging any components. Proper installation helps keep your car’s air conditioning system running smoothly.
Positioning And Bolting
Place the new compressor in its mounting spot inside the engine bay. Make sure it aligns with the existing mounting points and hoses. Tighten the bolts evenly to hold the compressor securely.
- Align the compressor with the mounting bracket.
- Insert bolts through the mounting holes.
- Tighten bolts using a torque wrench to the manufacturer’s specs.
- Check that the compressor sits firmly and does not move.
Reconnecting Electrical Components
Connect the electrical plugs and wires to the new compressor. These connections control the compressor clutch and sensors. Make sure all connectors fit tightly without loose wires.
| Connector | Function | Tip |
|---|---|---|
| Clutch Wire | Engages compressor clutch | Push until it clicks |
| Pressure Sensor | Monitors refrigerant pressure | Check for clean contacts |
| Ground Wire | Completes electrical circuit | Ensure tight grounding |
Installing Drive Belt
Fit the drive belt around the new compressor pulley. The belt powers the compressor when the engine runs. Adjust the belt tension to avoid slipping or over-tightening.
- Loop the belt over the compressor pulley.
- Follow the belt routing diagram under the hood.
- Use the tensioner to apply correct belt tension.
- Spin the pulley by hand to check smooth movement.
Recharging The Ac System
Recharging the air conditioner system is a key step after replacing the compressor in your car. It ensures the system works properly and cools the air efficiently.
This process involves removing air and moisture from the system and adding the right amount of refrigerant. Follow these steps carefully to avoid damage.
Vacuuming The System
Vacuuming removes air and moisture from the AC system. This step is important because moisture can cause corrosion and damage the compressor.
- Connect a vacuum pump to the service ports.
- Turn on the pump and let it run for at least 30 minutes.
- Check the vacuum gauge to ensure the system holds a strong vacuum.
- If the vacuum drops, inspect for leaks and fix them before continuing.
- Once the vacuum is stable, close the valves and turn off the pump.
Adding Refrigerant
After vacuuming, add the correct type and amount of refrigerant to the system. Too little or too much refrigerant can harm the AC performance.
| Refrigerant Type | Recommended Amount | Notes |
|---|---|---|
| R-134a | 1.2 to 1.4 pounds (varies by vehicle) | Check vehicle manual for exact amount |
| R-1234yf | 0.9 to 1.1 pounds | Use special equipment for handling |
Use a refrigerant charging hose to connect the can to the low-pressure service port. Open the valve slowly and let the refrigerant flow into the system.
- Start the car and turn the AC to the highest setting.
- Watch the pressure gauge and add refrigerant slowly.
- Stop adding refrigerant when the pressure reaches the recommended level.
- Close the valve and disconnect the hose.
- Check the AC system for proper cooling performance.

Credit: www.youtube.com
Testing The Ac Performance
After replacing your car’s air conditioner compressor, test its performance. This ensures the AC system works well.
Testing includes checking for leaks and verifying how well the system cools the air inside your car.
Checking For Leaks
Leaks can cause the AC system to lose refrigerant. This lowers cooling efficiency and can damage parts.
Look for signs like oily spots or stains near AC hoses and connections. Use a leak detector if available.
- Inspect AC hoses and compressor seals for oil residue
- Use a UV dye and black light to spot leaks
- Listen for hissing sounds indicating escaping gas
- Check pressure with a gauge to find drops
Verifying Cooling Efficiency
Test the AC cooling by measuring the air temperature inside the car. The air should be much cooler than outside.
Run the AC on the highest setting and check the vents after a few minutes. Use a thermometer for accuracy.
- Turn on the AC and set to max cool and fan speed
- Wait 3 to 5 minutes for the system to stabilize
- Measure vent air temperature with a thermometer
- Compare vent temperature with outside air temperature
Credit: www.youtube.com
Frequently Asked Questions
How Do I Know If My Car Ac Compressor Is Bad?
Signs include warm air, strange noises, or AC not cooling well. Check for leaks or clutch issues. These indicate a failing compressor needing replacement.
What Tools Are Needed To Replace A Car Ac Compressor?
You need wrenches, screwdrivers, a refrigerant recovery machine, vacuum pump, and manifold gauge set. Proper tools ensure safe, effective compressor replacement.
How Long Does It Take To Replace A Car Ac Compressor?
Typically, it takes 2 to 4 hours depending on car model and experience. Time varies by complexity and additional repairs needed.
Can I Replace The Ac Compressor Myself Safely?
Yes, if you have mechanical skills and proper tools. Follow safety protocols and refrigerant handling guidelines to avoid injury or damage.
Conclusion
Replacing a car’s air conditioner compressor takes patience and care. Follow the steps carefully to avoid mistakes. Use the right tools and parts for best results. Take your time to check each connection and bolt. Proper installation helps your AC work well again.
This repair can save money compared to a full replacement. Stay safe and ask for help if needed. Your car will feel cooler and more comfortable soon.