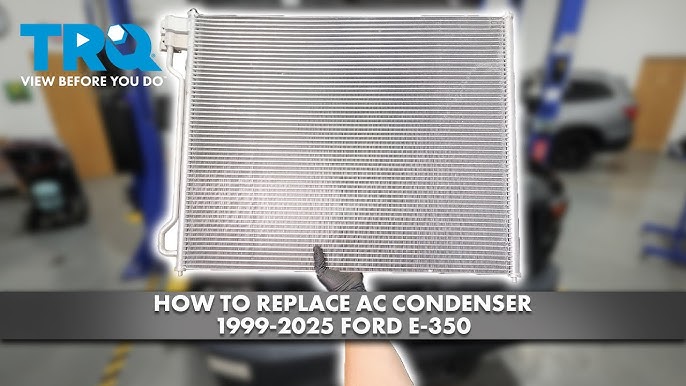
Is your air conditioner not cooling like it used to? The problem might be with your condenser.
Replacing your air conditioner condenser might sound tricky, but with the right steps, you can do it yourself and save money. You’ll learn exactly how to replace your air conditioner condenser safely and efficiently. Keep reading, and by the end, you’ll have the confidence to fix your AC and enjoy cool, comfortable air again.
Tools And Materials Needed
Replacing an air conditioner condenser needs the right tools and materials. Using proper equipment makes the job safer and easier.
This guide lists the essential items you need before starting the replacement process.
Basic Hand Tools
These tools help you remove and install parts on the condenser unit.
- Adjustable wrench
- Screwdrivers (flathead and Phillips)
- Pliers (needle nose and channel lock)
- Socket set
- Wire cutters
Safety Equipment
Safety gear protects you from injuries and electrical hazards during the work.
- Safety goggles
- Work gloves
- Dust mask
- Insulated tools
Replacement Parts And Supplies
Ensure you have the correct condenser unit and other materials to complete the replacement.
| Item | Description |
| Condenser Unit | Compatible with your AC model |
| Refrigerant | Type recommended by manufacturer |
| Electrical Wire | Proper gauge for your system |
| Capacitor | Matches condenser specifications |
| Sealant Tape | For refrigerant line connections |
Specialized Hvac Tools
These tools help handle refrigerants and test the system after installation.
- Manifold gauge set
- Vacuum pump
- Leak detector
- Refrigerant recovery machine
Safety Precautions
Replacing an air conditioner condenser requires careful attention to safety. Understanding the risks and preparing accordingly can prevent accidents.
Before starting the replacement, ensure you have the necessary tools and protective gear. This guide will help you take the right precautions.
Use Protective Gear
Wearing the right protective gear is essential for your safety. It protects you from potential hazards during the replacement process.
- Wear safety goggles to protect your eyes from debris.
- Use gloves to prevent cuts and abrasions.
- Ensure you have sturdy footwear to avoid foot injuries.
Disconnect Power Supply
Before working on the condenser, disconnect the power supply. This prevents electric shock and ensures a safe working environment.
| Action | Reason |
| Turn off the circuit breaker | Prevents electrical hazards |
| Use a voltage tester | Ensures no residual power |
| Label disconnected wires | Aids in reassembly |
Handle Refrigerant Safely
Refrigerants can be harmful if not handled properly. Follow these steps to manage refrigerant safely during the replacement.
- Consult a professional for refrigerant removal.
- Use approved containers for storage.
- Ensure proper ventilation in the work area.
Check Local Regulations
Local regulations may affect how you replace an air conditioner condenser. Be sure to check them before starting the project.
Shutting Off Power And Refrigerant
Replacing an air conditioner condenser needs safety steps. Shutting off power and refrigerant is important before starting.
This protects you from electric shock and stops refrigerant leaks. Follow these steps carefully.
Turning Off The Power
First, find the main electrical switch for your air conditioner. This switch is often near the outdoor unit or in your circuit breaker panel.
Turn off the switch to cut power to the condenser. Use a voltage tester to confirm no power flows to the unit.
- Locate the air conditioner’s power switch or breaker
- Switch it off to stop electricity flow
- Use a tester to double-check power is off
Recovering The Refrigerant
Before removing the condenser, the refrigerant must be recovered safely. Refrigerant is a gas that can harm the environment if released.
Use a recovery machine to remove the refrigerant from the system. This step usually needs special tools and knowledge.
- Connect a recovery machine to the service valves
- Run the machine to pull refrigerant out
- Store the refrigerant in an approved tank
- Never release refrigerant into the air

Credit: www.youtube.com
Removing The Old Condenser
Replacing an air conditioner condenser starts with removing the old unit. You need to work carefully to avoid damage.
This guide explains how to disconnect electrical parts, detach refrigerant lines, and lift out the condenser safely.
Disconnecting Electrical Components
First, turn off the power to the air conditioner. This stops any electrical accidents during removal.
Next, open the electrical box on the condenser. Carefully disconnect wires and cables from the terminals.
- Switch off power at the breaker panel
- Use a voltage tester to check no power flows
- Remove wire connectors or screws
- Label wires to reconnect later
Detaching Refrigerant Lines
Refrigerant lines connect the condenser to the indoor unit. These lines hold the cooling gas inside the system.
Only a certified technician should remove refrigerant. They must recover the gas safely before detaching lines.
- Wear protective gloves and goggles
- Use recovery machine to remove refrigerant
- Unscrew flare nuts from the condenser pipes
- Cap the lines to prevent dirt entry
Lifting Out The Condenser Unit
After disconnecting wires and lines, you can remove the condenser. It might be heavy, so get help if needed.
Loosen and remove mounting bolts or screws that hold the condenser in place. Lift the unit straight up to avoid damage.
- Clear the area around the condenser
- Use proper lifting techniques to protect your back
- Place the old condenser on a sturdy surface
- Dispose of the old unit according to local laws
Preparing The New Condenser
Replacing an air conditioner condenser needs careful preparation. Getting the new unit ready helps the installation go smoothly.
This guide covers how to inspect the new condenser and move parts from the old one.
Inspecting The Unit
Start by checking the new condenser for any damage from shipping. Look for dents, scratches, or broken parts.
Make sure the model and size match your old unit. Check the electrical connections and coils for cleanliness.
- Look for visible damage on the casing
- Confirm model number matches your system
- Inspect electrical terminals and wiring
- Check that coils are free of dirt and debris
- Verify mounting brackets are intact
Transferring Parts From Old Unit
Some parts from the old condenser may be reused. This saves cost and ensures compatibility.
Carefully remove parts like the fan motor, capacitor, and electrical disconnect box if they are still good.
- Disconnect power before working on the old unit
- Remove the fan motor carefully
- Take out the capacitor and check its condition
- Transfer the electrical disconnect box if possible
- Keep screws and mounting hardware for reuse
Installing The New Condenser
Installing a new air conditioner condenser requires careful steps. This guide covers key parts of the installation.
Follow safety rules and use the right tools to ensure proper setup and performance.
Positioning The Unit
Place the condenser on a flat, stable surface. Make sure it is level and clear of debris.
- Leave at least 2 feet of space around the unit for airflow.
- Keep the unit away from direct sunlight if possible.
- Ensure it is not near plants or obstacles that block air intake.
- Check that the unit is secure to avoid vibration and noise.
Reconnecting Refrigerant Lines
Reconnect the refrigerant lines carefully to avoid leaks. Use proper fittings and seals.
| Line Type | Connection Tip |
| Liquid Line | Tighten with a wrench, do not over-tighten |
| Suction Line | Check for insulation damage before connecting |
| Service Valves | Make sure valves are closed before pressure testing |
Wiring Electrical Connections
Connect the electrical wires according to the unit’s wiring diagram. Turn off power before starting.
- Match wire colors carefully to avoid mistakes.
- Use wire nuts or connectors for secure joints.
- Double-check grounding to prevent electrical hazards.
- Test the unit’s power supply before closing the panel.
Vacuuming And Charging Refrigerant
Replacing an air conditioner condenser requires careful handling of refrigerant. Vacuuming removes air and moisture from the system. Charging adds the correct amount of refrigerant to ensure efficient cooling.
Both steps are important for the AC to work properly and avoid damage. Follow the right procedure and use proper tools to do the job safely.
Vacuuming The System
Vacuuming clears out air and moisture inside the AC lines. Moisture can cause rust and freeze in the system. Use a vacuum pump connected to the service ports of the condenser unit.
- Connect the vacuum pump to the low and high service ports.
- Turn on the pump and run it for at least 30 minutes.
- Check the vacuum gauge to ensure it reaches below 500 microns.
- Close the valves and observe if the vacuum holds steady.
- If the vacuum drops, check for leaks and repair before continuing.
Charging Refrigerant
After vacuuming, add the correct refrigerant charge to the system. Too little or too much refrigerant harms performance. Use a refrigerant scale and manifold gauge set for accuracy.
| Task | Details |
| Connect Gauges | Attach manifold gauge to service ports and refrigerant tank. |
| Weigh Refrigerant | Place refrigerant tank on scale for precise measurement. |
| Open Valves | Slowly open valves to let refrigerant flow into system. |
| Monitor Pressure | Watch gauge readings to avoid overcharging. |
| Close Valves | Shut valves when desired charge is added. |

Credit: www.youtube.com
Testing The New Condenser
After installing a new air conditioner condenser, testing it is important. This ensures the unit works well and is safe to use.
Two main tests are needed: checking for leaks and verifying system operation. These steps help avoid future problems.
Checking For Leaks
Leaks can cause the system to lose refrigerant and stop cooling properly. Use these methods to find leaks in the new condenser.
- Apply a soap and water solution to all joints and connections.
- Look for bubbles forming, which show where leaks are.
- Use an electronic leak detector for more accuracy.
- Check the refrigerant lines carefully for any damage.
- Fix any leaks before running the system fully.
Verifying System Operation
After confirming no leaks, test the condenser’s performance. This check makes sure the air conditioner cools as expected.
| Test | What to Check | Expected Result |
| Power On | Condenser fan and compressor start | Both run smoothly without noise |
| Temperature | Air temperature at outlet | Cool air flows steadily |
| Pressure | High and low refrigerant pressure | Within manufacturer’s specifications |
| Noise | Listen for unusual sounds | Only normal running noise heard |
| Cycle | System turns on and off properly | Runs full cycles without short cycling |
Maintenance Tips For Longevity
Replacing your air conditioner condenser is a key task to keep your system running well. Proper maintenance helps the new condenser last longer. This guide shares simple tips to care for your AC unit after replacement.
Following these easy steps will protect your investment and improve the performance of your air conditioner. Regular care keeps your home cool and reduces repair costs over time.
Keep The Condenser Clean
Dirt and debris can block airflow and damage the condenser. Clean the area around the unit often to ensure it works well. Use a soft brush or a hose to remove dust and leaves from the fins and coils.
- Turn off power before cleaning
- Clear leaves and grass clippings nearby
- Use gentle water spray to rinse coils
- Do not bend or damage the fins
- Clean at least twice a year
Check Refrigerant Levels
Proper refrigerant levels keep your AC cooling efficiently. Low levels can cause the system to overheat and fail. Have a professional check and refill refrigerant as needed after replacing the condenser.
Inspect Electrical Connections
Loose or damaged electrical parts can cause system failure. Inspect wires and connections regularly. Tighten any loose screws and replace worn wires to prevent problems.
| Check Item | What to Look For | Action Needed |
| Wiring | Frays, cracks, loose ends | Replace or tighten |
| Capacitors | Bulging or leaking | Replace immediately |
| Contactors | Burn marks or pitting | Clean or replace |
Maintain Proper Airflow
Good airflow prevents overheating and improves cooling. Keep plants, furniture, and debris at least two feet away from the condenser. Replace air filters regularly to help the system breathe well.
- Keep area around condenser clear
- Trim bushes and grass near the unit
- Replace indoor air filters every 1-3 months
- Ensure vents inside the home are open and unobstructed
Credit: www.youtube.com
Frequently Asked Questions
How Do I Know When To Replace My Ac Condenser?
You should replace the AC condenser if it leaks refrigerant, makes loud noises, or fails to cool effectively. Frequent repairs and old age also signal replacement needs.
Can I Replace An Ac Condenser Myself Safely?
Yes, if you have HVAC knowledge and proper tools. However, handling refrigerants requires certification and caution. Otherwise, hire a professional for safety and efficiency.
What Is The Average Cost To Replace An Ac Condenser?
Replacing an AC condenser typically costs between $1,200 and $2,500. Costs vary by unit size, brand, and labor charges in your area.
How Long Does It Take To Replace An Ac Condenser?
Replacing an AC condenser usually takes 3 to 6 hours. Time varies based on system complexity and technician experience.
Conclusion
Replacing an air conditioner condenser can save money and extend unit life. Follow each step carefully for safety and best results. Use the right tools and take your time. Check connections and test the system before finishing. Regular maintenance helps avoid future problems.
You can handle this task with patience and care. Stay safe and enjoy cool air all summer long.