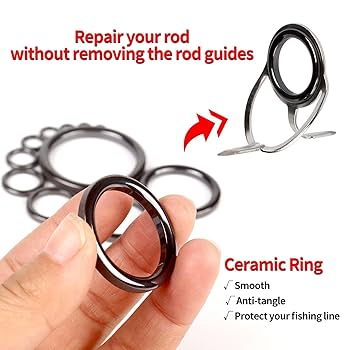
Have you ever been out fishing when suddenly your rod’s eye breaks? It’s frustrating and can ruin your whole day on the water.
But don’t worry—replacing the eye on your fishing rod is easier than you think. With a few simple tools and clear steps, you can fix your rod quickly and get back to fishing. Keep reading, and you’ll learn exactly how to replace that broken eye so your rod feels as good as new.

Credit: naavagreen.com
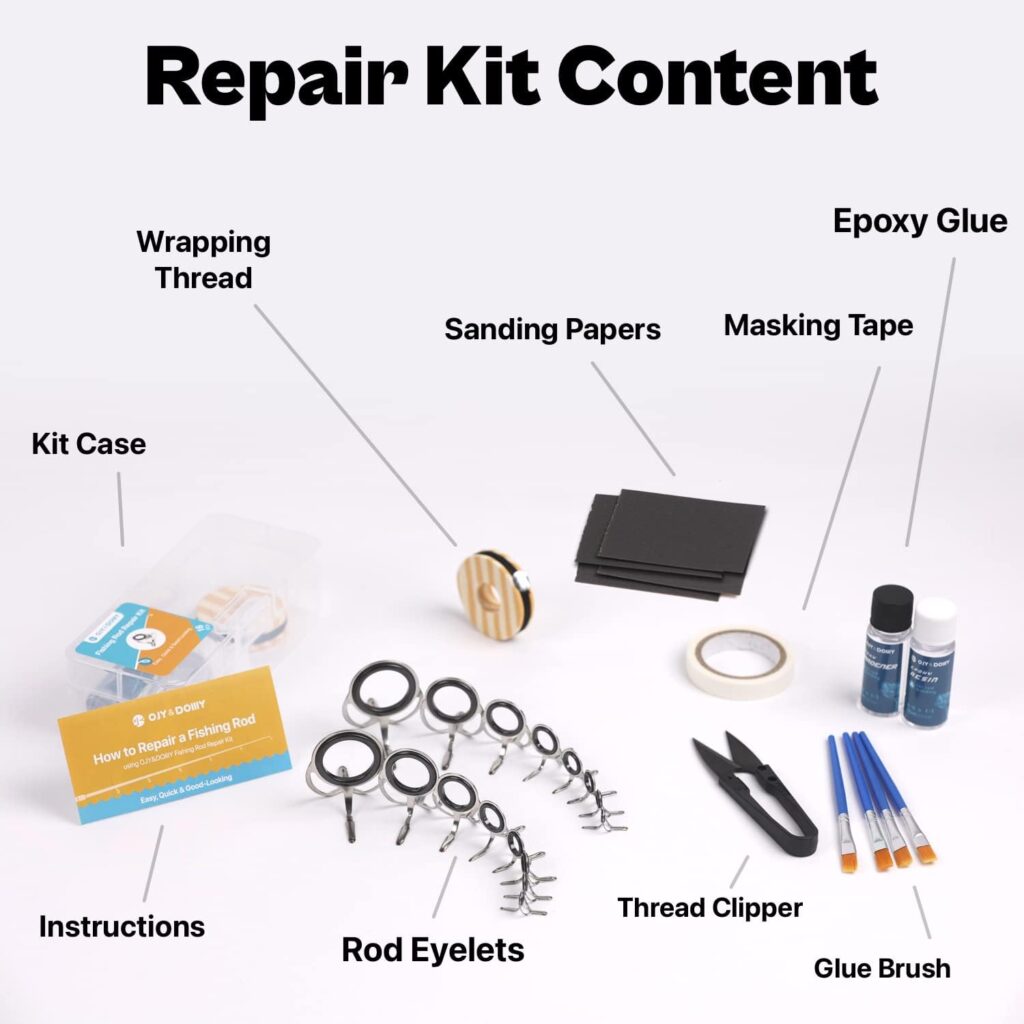
Tools You Need
Replacing an eye on a fishing rod is a simple task. You need the right tools to make it easy and effective.
This guide will help you gather the essential tools and optional supplies needed for the job.
Essential Tools
Having the correct tools is crucial for replacing a fishing rod eye. Here’s what you need.
- Needle-nose pliers: For removing the old eye and holding parts.
- Razor blade or sharp knife: To cut the old thread.
- Fishing rod glue: To attach the new eye securely.
- Thread: To wrap and secure the new eye.
- Scissors: To trim excess thread neatly.
Optional Supplies
These supplies are not necessary but can make the job easier and neater.
- Heat gun or lighter: To help remove glue residue.
- Rod wrapping jig: To hold the rod steady while working.
- Epoxy finish: To give a professional and durable finish.
Removing The Old Eye
Replacing an eye on a fishing rod starts with removing the old one. This process needs care to avoid damage.
Follow simple steps to loosen the thread, cut the wraps, and clean the rod surface.
Loosening The Thread
The thread holds the eye tightly to the rod. You must loosen it carefully before removal.
Use a sharp blade or small scissors to cut the thread gently. Avoid cutting the rod.
- Work slowly to avoid damage
- Cut only a few thread wraps at a time
- Keep the rod steady while cutting
Cutting The Wraps
Once the thread is loose, cut the remaining wraps that hold the eye. This frees the guide completely.
Use a hobby knife or small scissors to slice through the wraps cleanly.
- Cut wraps close to the rod surface
- Remove all thread pieces carefully
- Dispose of thread scraps properly
Cleaning The Rod Surface
After removing the eye, clean the rod surface well. Remove leftover glue or thread bits.
Use fine sandpaper or a cloth with rubbing alcohol to clean the area smoothly.
- Smooth the surface without scratching
- Remove all residues for better bonding
- Let the rod dry before adding a new eye
Choosing The Right Replacement Eye
Replacing a fishing rod eye is important to keep your rod working well. Picking the right replacement eye helps your rod cast and fight fish properly.
Different rods need different eyes. Choose carefully to make sure the new eye fits and lasts a long time.
Matching Size And Type
Check the size of your old eye before buying a new one. The new eye should match the diameter and length of the original.
There are several types of fishing rod eyes. Choose one that fits your rod’s use and design.
- Single-foot eyes are common for light rods.
- Double-foot eyes offer extra strength for heavy rods.
- Spinning eyes have a larger ring for spinning reels.
- Baitcasting eyes have smaller rings for baitcasting reels.
Material Options
Replacement eyes come in different materials. Choose one that fits your fishing style and rod type.
Common materials include stainless steel, ceramic, and titanium. Each has benefits for durability and smooth line flow.
- Stainless steel: Strong and rust-resistant, good for most fishing conditions.
- Ceramic: Smooth surface that protects the fishing line from wear.
- Titanium: Lightweight and very strong, ideal for high-end rods.
Attaching The New Eye
Replacing an eye on a fishing rod needs care and patience. Attaching the new eye correctly keeps the rod strong.
This guide covers how to attach the new eye firmly and neatly.
Positioning The Eye
Place the new eye where the old one was. Make sure it lines up with other eyes on the rod.
The eye should sit flat on the rod to avoid bending the fishing line.
- Align the eye with the rod’s curve
- Keep the eye straight with other guides
- Check it does not wobble or tilt
Wrapping The Thread
Use strong thread to wrap the foot of the eye onto the rod. Start with a tight base wrap.
Wrap the thread evenly around the foot, covering it fully without gaps.
- Begin wrapping a few millimeters before the eye foot
- Keep the thread tight and neat
- Wrap forward over the foot, then back
Securing The Wraps
Finish by locking the thread so it does not slip. Use a drop of glue on the last wrap.
Trim any extra thread close to the wraps for a clean look.
- Tie a small knot or half-hitch to lock thread
- Apply thin glue layer on the wraps
- Let glue dry fully before using the rod
Finishing Touches
After replacing the eye on your fishing rod, the final steps are important. These steps help make sure the repair lasts long and works well.
Careful finishing keeps the rod strong and ready for fishing again. Follow the steps below to finish your repair properly.
Applying Epoxy
Use epoxy to secure the new eye to the rod. Epoxy is strong and waterproof, perfect for fishing rods.
Apply a thin, even layer of epoxy around the base of the eye. Avoid using too much because it can drip or make a mess.
- Mix epoxy according to the instructions.
- Use a small brush to apply epoxy neatly.
- Cover all contact points between the eye and rod.
- Remove excess epoxy quickly before it hardens.
Allowing Proper Dry Time
Let the epoxy dry fully before using your rod. Drying time is key for a strong bond and durability.
Keep the rod in a dust-free place during drying. Avoid moving it to stop the epoxy from cracking or weakening.
- Check the epoxy package for recommended drying time.
- Drying usually takes 24 hours or more.
- Do not rush or test the rod too soon.
- After drying, inspect the eye for secure attachment.

Credit: www.amazon.ca
Testing The Repair
After replacing the eye on your fishing rod, you need to check if the repair holds well. Testing ensures your rod works safely and smoothly on your next trip.
Take time to inspect the repair carefully. This helps avoid any problems while fishing.
Checking Stability
Hold the rod firmly and gently shake it near the new eye. The eye should not move or wiggle. A stable eye keeps your line safe during casting and reeling.
Look for any cracks or loose glue around the eye. If you see any, the repair needs fixing before use.
- Grip the rod near the new eye
- Shake the rod gently side to side
- Watch for any movement of the eye
- Check for cracks or glue gaps
Ensuring Smooth Line Movement
Thread the fishing line through the new eye. Pull the line back and forth slowly. The line should glide without catching or rubbing hard.
Test the line movement several times. Smooth movement means the eye is properly aligned and ready for fishing.
- Insert the line through the eye
- Pull the line gently forward and backward
- Feel for any rough spots or snags
- Repeat the test to confirm smoothness
Tips For Maintenance
Keeping your fishing rod in good shape helps it last longer. Regular care prevents costly repairs.
Check your rod often to find problems early. Fixing small issues stops bigger damage.
Regular Inspection
Look closely at each eye on your fishing rod before and after every trip. Check for cracks, bends, or loose parts.
- Run your finger along the eyes to feel for rough spots
- Use a magnifying glass to spot tiny cracks
- Make sure the eyes are firmly attached to the rod
- Look for rust or corrosion on metal parts
Preventing Damage
Handle your fishing rod carefully to avoid damage to the eyes. Store it properly when not in use.
| Tip | Description |
| Use rod covers | Protects eyes from scratches during transport |
| Avoid dropping rod | Prevents bending or breaking eyes |
| Keep dry | Stops rust and corrosion on metal parts |
| Clean gently | Use soft cloth and mild soap to remove dirt |
| Store upright | Prevents pressure on eyes and rod |
Credit: collegeofems.com
Frequently Asked Questions
How Do I Remove A Broken Eye From My Fishing Rod?
To remove a broken eye, first cut off the damaged guide carefully. Use heat or a solvent to soften the epoxy. Gently slide or scrape off the old guide without damaging the rod blank. Clean the area thoroughly before installing the new eye.
What Tools Are Needed To Replace A Fishing Rod Eye?
You need a razor blade or knife, heat source or solvent, sandpaper, epoxy resin, a replacement eye guide, and a small brush. These tools help safely remove the old guide and securely attach the new one for a long-lasting repair.
How Do I Align The New Eye On My Fishing Rod?
Align the new eye straight along the rod’s line of guides. Ensure it matches the spacing and angle of the other eyes. Proper alignment reduces line friction and improves casting accuracy. Use temporary tape to hold it before the epoxy sets.
Can I Replace A Fishing Rod Eye Without Professional Help?
Yes, replacing a fishing rod eye is a simple DIY task. With basic tools and patience, anyone can do it. Follow proper removal, cleaning, alignment, and epoxy application steps for a secure, professional-quality repair at home.
Conclusion
Replacing an eye on a fishing rod is simple with the right steps. Take your time and follow each part carefully. Using the correct tools makes the job easier and safer. Fixing the eye helps your rod work better and last longer.
Try this repair next time your rod needs it. Enjoy fishing with a rod that feels like new. Keep practicing to get more confident with repairs. Small fixes save money and keep you on the water.