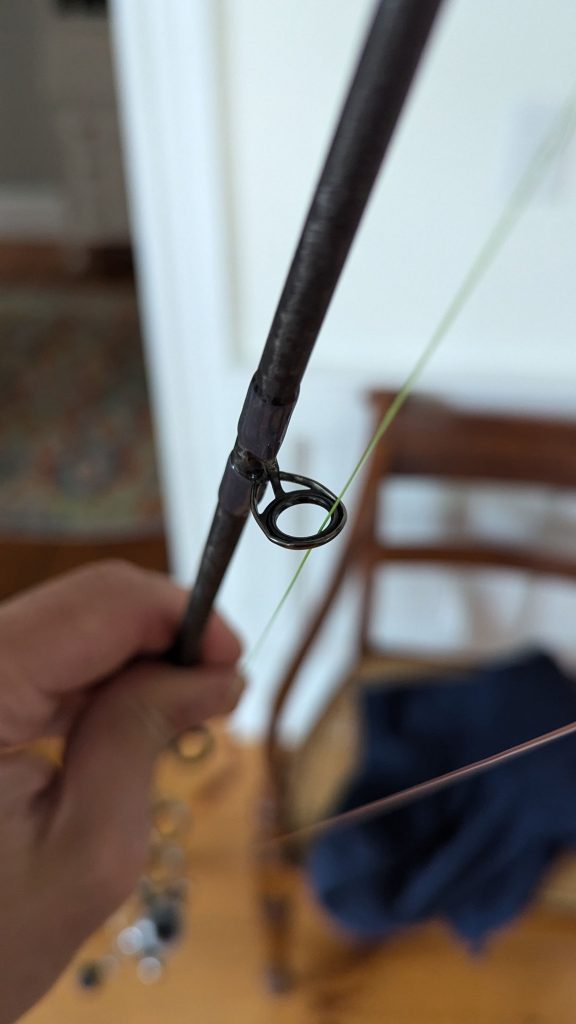
Have you ever been out fishing when suddenly your rod’s eye breaks or cracks? It’s frustrating and can ruin your whole trip.
But don’t worry—replacing an eye on your fishing rod is easier than you think. In this guide, you’ll learn simple steps to fix your rod quickly and get back to fishing without spending a lot of money. Keep reading, and you’ll discover how to make your rod as good as new in no time.

Credit: naavagreen.com
Tools Needed
Replacing an eye on a fishing rod needs the right tools. Using proper tools makes the job easier and safer.
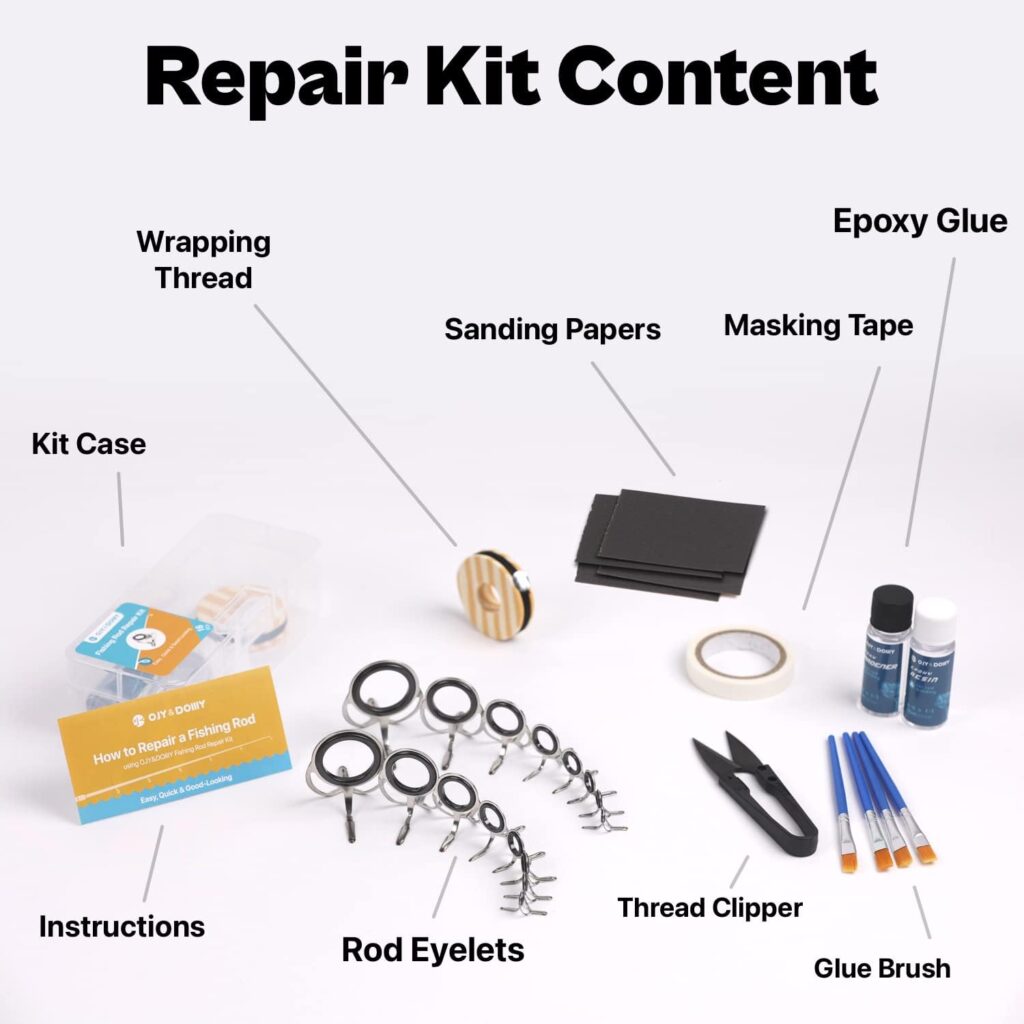
Here are the basic tools you will need to replace a fishing rod eye.
Replacement Rod Eye
You need a new eye that fits your fishing rod. Make sure it matches the size and style.
Heat Source
A heat source helps remove the old eye by softening the glue. A lighter or small torch works well.
Pliers
Pliers help to pull off the old eye and hold the new one in place during installation.
Sandpaper
Use sandpaper to clean the rod tip. This removes old glue and roughens the surface for better adhesion.
Epoxy Or Strong Glue
Epoxy or a strong glue will secure the new eye to the rod. Choose one that bonds well with metal and rod material.
Cloth Or Rag
A cloth helps wipe off excess glue and keep the work area clean during the process.
Choosing The Right Replacement Eye
Replacing the eye on a fishing rod needs the right part. The replacement eye must fit well for good fishing.
Choosing the correct eye helps the line move smoothly. It also keeps the rod strong and balanced.
Match The Size Of The Original Eye
Check the size of the old eye before buying a new one. A wrong size can cause line problems or rod damage.
Look at the diameter of the ring and the frame width. These measurements help find the perfect match.
Choose The Right Material
Replacement eyes come in different materials like ceramic, stainless steel, or aluminum oxide. Each has its benefits.
- Ceramic is smooth and reduces line wear
- Stainless steel is strong and rust-resistant
- Aluminum oxide is light and durable
Pick a material based on the type of fishing and water conditions.
Consider The Type Of Rod
Different rods need different types of eyes. Spinning rods use different eyes than casting rods.
Make sure the replacement eye fits the rod’s style and action. This keeps the fishing experience smooth.
Check The Frame Shape And Foot Style
The frame shape affects how the eye attaches to the rod. Common shapes include single foot and double foot.
- Single foot eyes are lighter and used on light rods
- Double foot eyes are stronger for heavy rods
Pick the frame style that matches your rod to keep it sturdy.
Match The Ring Color And Finish
Look for a ring color and finish that match your rod. This keeps the rod looking good after repair.
Common finishes include black, silver, and gold. Choose one that fits your rod’s style.
Removing The Old Eye
Replacing an eye on a fishing rod starts with removing the old one. This part is often tightly bound and glued. Taking your time helps avoid damage.
Use simple tools to loosen the thread and cut the binding cleanly. This makes the process smoother and safer for your rod.
Loosening The Thread
Thread holds the eye firmly in place. Loosening it lets you remove the eye without pulling hard on the rod. Use a sharp blade or scissors carefully.
- Find the end of the thread wrapping the eye.
- Use a sharp blade to gently cut the thread wrapping.
- Peel the thread away slowly to avoid scratching the rod.
- If the thread is glued, apply a small amount of heat to soften the glue.
- Work the thread loose by twisting it gently.
Cutting The Binding
The binding may include glue or varnish that keeps the eye tight. Cutting it cleanly is key to avoid damage. Use a sharp knife or blade.
| Tool | Purpose |
| Sharp blade | Cut thread and binding cleanly |
| Heat source (optional) | Soften glue for easier removal |
| Tweezers | Pull off loosened thread pieces |
| Fine sandpaper | Lightly smooth any rough edges after removal |

Credit: www.reddit.com
Preparing The Rod For The New Eye
Replacing an eye on a fishing rod starts with good preparation. This step helps ensure a strong and lasting fix.
Cleaning and inspecting the rod carefully will make the replacement easier and safer for your rod.
Cleaning The Area
Remove any dirt, old glue, or debris around the broken eye. This creates a clean surface for the new eye to stick well.
- Use a soft cloth to wipe the rod surface.
- Apply rubbing alcohol to remove grease or oils.
- Carefully scrape off old glue with a small blade or sandpaper.
- Clean again with a cloth after scraping.
Inspecting The Rod
Check the rod carefully for any cracks or damage near the eye area. This helps you decide if the rod can be repaired safely.
| Inspection Point | What to Look For |
|---|---|
| Rod Blank | Check for cracks or splits in the material. |
| Eye Seat | Look for worn or rough spots where the eye will attach. |
| Nearby Guides | Ensure other guides are firmly attached and not loose. |
Installing The New Eye
Replacing the eye on a fishing rod needs care and attention. Installing the new eye correctly ensures the rod works well.
This guide covers how to place the new eye and secure it with thread wrapping.
Positioning The Eye
Find the right spot for the new eye on the rod. It should match the position of the old eye.
Make sure the eye aligns with the other guides along the rod. This helps the fishing line move smoothly.
- Place the eye on the rod where the old one was
- Check that it lines up with the other eyes
- Hold the eye firmly in place before wrapping
Wrapping The Thread
Use strong thread to wrap the eye onto the rod. Start wrapping at the base of the eye foot.
Keep the wraps tight and close together. This holds the eye firmly without gaps.
- Begin wrapping a few millimeters behind the eye foot
- Wrap forward evenly over the foot
- Make several tight turns to secure the eye
- Finish wrapping a few millimeters beyond the foot
- Tie off the thread with a secure knot
Credit: collegeofems.com
Securing The Thread
Securing the thread is key when replacing an eye on a fishing rod. It keeps the guide strong and stable. You wrap the thread tightly around the rod and the new eye.
Good thread tension stops the eye from moving or loosening. You must keep the wraps close and even for a neat finish.
Applying Epoxy
After wrapping the thread, apply epoxy to protect and hold it. Epoxy seals the thread and makes the repair last longer. Use a thin coat to avoid lumps.
Brush the epoxy slowly over the thread wraps. Cover all the thread evenly. Do not miss any spots, as this can cause weak points.
- Use a small brush for better control
- Apply thin, even layers
- Avoid bubbles in the epoxy
- Cover the thread completely
Drying Time
Let the epoxy dry fully before using the rod. Drying time depends on the epoxy type and room temperature. Usually, it takes about 24 hours.
Keep the rod in a dust-free place while drying. Avoid moving it to stop smudges or uneven curing.
- Check epoxy instructions for exact drying time
- Keep rod still and clean during drying
- Do not touch the epoxy until hard
Testing The Repair
After replacing an eye on your fishing rod, it is important to test the repair. This ensures the new eye works well and the rod is safe to use.
Testing helps you find any problems before you go fishing. You can fix issues early and avoid damage to your line or catch.
Check The Alignment Of The Eye
Look closely to see if the new eye lines up with the other eyes on the rod. Proper alignment helps the fishing line run smoothly.
If the eye is crooked or not straight, the line may catch or wear out quickly. Adjust the eye if needed before testing with the line.
Inspect The Glue Or Wrapping
Make sure the glue or wrapping holding the eye is dry and strong. It should hold the eye firmly in place.
If the eye moves or feels loose, the repair is not secure. Add more glue or wrap the eye again to fix this problem.
Test The Line Movement
Run the fishing line through the new eye. Pull the line back and forth to see if it moves smoothly.
- Line should slide easily without catching.
- No rough spots or sharp edges should touch the line.
- Check for any rubbing noise when moving the line.
Simulate Casting And Reeling
Hold the rod and simulate casting motions to feel how the rod behaves. Reel the line in and out while watching the eye.
The eye should stay secure and not shift. The line should not get stuck or damaged during this motion.
Inspect For Any Damage After Testing
After testing, check the new eye and rod for any cracks or damage. Look for loose glue or wrapping that may need fixing.
If you find any issues, repair them before your next fishing trip. This keeps your rod in good condition and ready to use.
Tips For Maintenance
Keeping your fishing rod in good shape helps it last longer. Regular checks can prevent damage to the rod’s eye.
Learning how to replace an eye on a fishing rod is useful. Proper care makes fishing more enjoyable and safe.
Inspect The Eyes Regularly
Look closely at the eyes for cracks or bends. Damaged eyes can cause line breakage and reduce casting distance.
Check the eyes after each fishing trip. Early detection helps avoid bigger problems later.
Clean The Rod Eyes Carefully
Use a soft cloth to clean the eyes. Remove dirt and salt that can wear down the eye’s surface.
- Wipe eyes after every use
- Use mild soap and water for deep cleaning
- Avoid harsh chemicals that cause damage
Use The Right Tools For Replacement
Choose tools made for fishing rod repair. Using the right tools helps avoid extra damage during replacement.
A small screwdriver, sandpaper, and rod wrapping thread are good to have ready before starting.
Handle The Rod With Care
Hold the rod gently when working on the eyes. Avoid bending or twisting the rod too much.
Place the rod on a soft surface to protect the finish and prevent scratches during repair.
Store The Rod Properly
Keep the rod in a dry place to stop rust and corrosion. Use rod sleeves or cases for extra protection.
- Avoid exposure to extreme heat or cold
- Store rods vertically or in racks
- Keep away from heavy objects that can cause damage
Frequently Asked Questions
How Do You Remove A Broken Eye?
To remove a broken eye, carefully use pliers to grip the old eye. Gently twist and pull it away from the rod. Ensure not to damage the rod surface. If needed, use a razor blade to cut through any binding material.
What Tools Are Needed For Replacement?
You’ll need pliers, a razor blade, new rod eye, thread, and epoxy. Pliers help remove and attach eyes. The razor blade cuts binding material. Thread and epoxy secure the new eye in place. Having these tools ready ensures a smooth replacement process.
How Do You Secure The New Eye?
Begin by aligning the new eye with the rod. Use thread to wrap tightly around the eye’s foot. Apply epoxy over the thread to secure the wrapping. Allow it to dry completely before using the rod. Properly securing ensures the eye’s durability and functionality.
Can Beginners Replace A Fishing Rod Eye?
Yes, beginners can replace a fishing rod eye with patience and the right tools. Following a step-by-step guide simplifies the process. Ensure you understand each step before starting. Practice helps in getting better at such repairs, making it easier over time.
Conclusion
Replacing an eye on a fishing rod is simple and saves money. Take your time and follow each step carefully. A new eye keeps the line smooth and strong. This small fix can make your rod work like new. Keep your rod in good shape to enjoy fishing more.
Try this repair next time before buying a new rod. Practice makes the process easier and faster. You can do it yourself with just a few tools. Happy fishing!