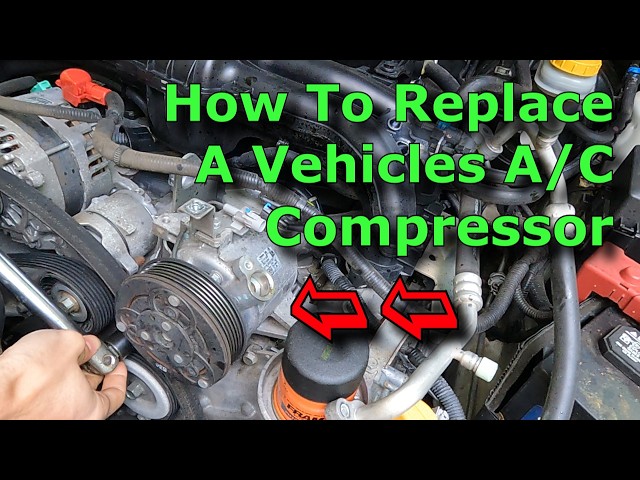
Is your air conditioner making strange noises or not cooling like it used to? The problem might be the clutch on your AC compressor.
Replacing this small but crucial part can save you from costly repairs or a full system replacement. In this guide, you’ll learn exactly how to replace the clutch on your air conditioner compressor step-by-step. By the end, you’ll feel confident tackling this repair yourself, saving time and money.
Keep reading to discover the simple tools and clear steps that will bring your AC back to life.
Tools And Materials Needed
Replacing the clutch on an air conditioner compressor requires specific tools and materials. Using the right items makes the job safer and easier.
Gathering all tools before starting helps avoid delays and frustration. Prepare everything in a clean workspace.
Basic Hand Tools
Basic hand tools are essential for loosening and tightening bolts and screws on the compressor. They help remove the old clutch and install the new one.
- Socket wrench set
- Screwdrivers (flathead and Phillips)
- Adjustable wrench
- Pliers
Clutch Removal Tools
Special tools help remove the clutch pulley and coil without damage. These tools ensure the clutch comes off smoothly.
- Clutch puller tool
- Snap ring pliers
- Soft mallet
Safety Equipment
Safety is important while working with compressors. Use protective gear to avoid injuries from sharp parts or electrical shocks.
- Safety glasses
- Work gloves
- Long-sleeve shirt
Replacement Parts And Consumables
You need the correct clutch kit for your air conditioner model. Also, some consumables help during installation.
- New clutch assembly (pulley, coil, and hub)
- Clutch hub bolt
- Clutch alignment tool (if available)
- Thread locker
- Cleaning cloth
Additional Tools
Some extra tools make the job easier and faster. These tools help check and adjust the clutch after installation.
- Multimeter (to test coil resistance)
- Torque wrench
- Service manual for your AC compressor

Credit: www.reddit.com
Safety Precautions
Replacing the clutch on an air conditioner compressor needs care and attention. Safety is the top priority to avoid injuries and damage.
Follow the correct steps and use safety tools to protect yourself during the repair process.
Disconnect Power Supply
Always turn off the main power before starting any work on the air conditioner. This prevents electrical shocks and accidents.
Use Protective Gear
Wear safety glasses and gloves to protect your eyes and hands. The compressor parts can be sharp or may release refrigerant.
Handle Refrigerant Properly
Refrigerant gas can be harmful. Avoid breathing it in and do not release it into the air. Use tools designed for refrigerant handling.
Secure The Work Area
Keep your workspace clean and organized. Remove any objects that can cause tripping or distractions.
- Clear the floor around the compressor
- Have proper lighting to see all parts
- Keep tools within reach but not cluttered
- Warn others to stay clear during repair
Use Correct Tools And Instructions
Using the right tools helps avoid damage to the compressor and injury to yourself. Follow the manufacturer’s instructions carefully.
| Tool | Purpose |
|---|---|
| Clutch puller | Remove the old clutch safely |
| Torque wrench | Tighten bolts to the correct level |
| Multimeter | Check electrical connections |
Locating The Compressor Clutch
The compressor clutch is a key part of your air conditioner’s compressor. It helps start and stop the compressor as needed. Knowing where to find it is important before you replace it.
This guide explains how to locate the compressor clutch safely and clearly. Follow the steps to find it without confusion.
Understanding The Compressor Location
The compressor sits in the engine bay or near the AC system. It looks like a small metal cylinder with several wires and hoses attached.
Look for a component connected to the serpentine belt. This belt drives the compressor and other engine parts.
Identifying The Clutch Assembly
The compressor clutch is on the front of the compressor. It is a round plate that spins freely when the AC is off.
- The clutch is usually smaller than the compressor body.
- It has an electrical connector going into it.
- The clutch connects to the serpentine belt pulley.
- You can see the air gap between the clutch and the pulley.
Tools To Help Locate The Clutch
| Tool | Purpose |
| Flashlight | See inside tight spaces |
| Mirror | View hidden parts behind the compressor |
| Gloves | Protect your hands from dirt and sharp edges |
| Service Manual | Provide exact location for your car model |
Safety Tips Before Inspection
- Turn off the engine and remove the key.
- Disconnect the battery to avoid electrical shocks.
- Wear gloves and safety glasses.
- Wait for the engine to cool down.
Credit: www.m5board.com
Removing The Old Clutch
Replacing the clutch on an air conditioner compressor starts with removing the old clutch. This process needs care to avoid damage to the compressor.
Follow each step carefully. Use the right tools and safety gear to protect yourself.
Disconnecting The Battery
First, disconnect the battery to cut off power. This stops any accidental starts while working on the compressor.
Removing The Drive Belt
Next, remove the drive belt from the compressor pulley. This belt powers the clutch and compressor.
- Locate the belt tensioner.
- Use a wrench to release tension on the belt.
- Slide the belt off the pulley carefully.
- Inspect the belt for wear and replace if needed.
Detaching The Clutch Plate
After the belt is off, remove the clutch plate. This part engages the compressor when the AC is on.
Use a puller tool to gently pull the clutch plate off the compressor shaft. Do not force it to avoid damage.
Taking Off The Pulley And Coil
Finally, remove the pulley and the electromagnetic coil. These parts work together to engage the clutch.
| Part | Tool Needed | Notes |
| Pulley | Socket wrench | Hold shaft steady while loosening |
| Coil | Socket wrench | Disconnect wiring before removal |
Inspecting The Compressor
Before replacing the clutch on an air conditioner compressor, you must inspect the compressor carefully. Checking the compressor helps find any damage or problems.
Proper inspection ensures the compressor works well after the clutch replacement. It also prevents future failures and extra repairs.
Check For Physical Damage
Look at the compressor body for cracks, dents, or leaks. Damage can cause the compressor to fail or not work properly.
Damaged parts may need repair or full replacement before changing the clutch.
Inspect The Electrical Connections
Check all wires and connectors attached to the compressor. Make sure they are tight and not corroded or broken.
Bad electrical connections can stop the compressor from running correctly.
Listen For Unusual Noises
Turn on the air conditioner and listen near the compressor. Strange noises like grinding or squealing may show internal problems.
If you hear odd sounds, the compressor might need more than just a clutch replacement.
Check Compressor Movement
Try to rotate the compressor shaft by hand. It should move smoothly without any tight spots or roughness.
Resistance or grinding means the compressor could be damaged inside.
Examine Refrigerant Leaks
Look for oil or refrigerant stains around the compressor. These stains often show leaks that need fixing.
Leaks reduce cooling efficiency and can harm the compressor over time.
Installing The New Clutch
Replacing the clutch on your air conditioner compressor requires careful installation. This ensures the clutch works properly and lasts longer.
Follow each step closely to mount the coil and pulley, attach the clutch plate, and align all parts correctly.
Mounting The Coil And Pulley
Start by placing the coil over the compressor shaft. Make sure it fits snugly without forcing it.
Next, position the pulley on the shaft. The pulley should spin freely but stay firmly in place.
- Secure the coil with its mounting bolts.
- Tighten the bolts evenly to avoid damage.
- Check that the pulley turns smoothly by hand.
Attaching The New Clutch Plate
Place the clutch plate onto the pulley hub. Align the bolt holes carefully to avoid cross-threading.
Use the correct bolts and tighten them to the recommended torque. This secures the clutch plate firmly.
- Match the clutch plate to the pulley hub.
- Insert bolts by hand to prevent damage.
- Use a torque wrench to tighten bolts evenly.
Aligning The Clutch Components
Proper alignment is key for smooth clutch operation. Check the air gap between the clutch plate and coil.
Adjust the gap to the manufacturer’s specifications. Use a feeler gauge for accuracy.
- Spin the pulley to test alignment.
- Adjust shims to set the correct air gap.
- Ensure the clutch engages and disengages smoothly.
Adjusting The Air Gap
The air gap is the small space between the clutch plate and the pulley on the air conditioner compressor. Adjusting it correctly ensures the clutch works smoothly and prevents damage.
Too small or too large an air gap can cause clutch slipping or failure. This guide explains how to measure and adjust the air gap properly.
Why Adjust The Air Gap?
The air gap controls how the clutch engages the compressor. If it is off, the clutch may drag or not engage at all. Proper adjustment helps save energy and extends the clutch life.
Tools Needed For Adjustment
- Feeler gauge set
- Wrench or socket set
- Screwdriver
- Flashlight for visibility
- Protective gloves
How To Measure The Air Gap
First, turn off the power to the air conditioner. Then, locate the clutch and use the feeler gauge to check the distance between the clutch plate and pulley.
The ideal air gap is usually between 0.3 mm and 0.5 mm, but check the compressor’s manual for exact specs.
Steps To Adjust The Air Gap
- Loosen the bolt that holds the clutch plate in place.
- Slide the clutch plate closer or farther from the pulley.
- Use the feeler gauge to set the correct air gap.
- Tighten the clutch plate bolt securely.
- Rotate the clutch by hand to ensure it spins freely.
Common Air Gap Sizes For Popular Compressors
| Compressor Model | Recommended Air Gap (mm) |
|---|---|
| Model A | 0.4 |
| Model B | 0.3 – 0.5 |
| Model C | 0.35 |
| Model D | 0.4 – 0.45 |
Reassembling And Testing
After replacing the clutch on your air conditioner compressor, reassembly and testing are key. This ensures the system works safely and correctly.
Follow each step carefully to avoid damage and to confirm the repair is successful.
Reinstalling The Drive Belt
Place the drive belt back onto the pulley system carefully. Make sure the belt sits properly in the grooves.
- Check the belt for any signs of wear or damage before reinstalling.
- Align the belt so it fits evenly on all pulleys.
- Tighten any tensioners to keep the belt firm but not too tight.
- Spin the pulleys by hand to ensure the belt moves smoothly.
Reconnecting The Battery
Reconnect the battery terminals to restore electrical power. Secure the connections tightly to avoid loose contacts.
| Terminal | Action |
| Positive (+) | Attach and tighten first |
| Negative (-) | Attach and tighten second |
Starting The Engine And Checking Operation
Start the engine and listen for any unusual noises from the compressor clutch. Watch the belt and compressor to confirm they run smoothly.
- Turn on the air conditioner to activate the compressor clutch.
- Check for proper clutch engagement and smooth operation.
- Look for any belt slipping or misalignment.
- Turn off the engine and inspect for loose bolts or parts.
Troubleshooting Common Issues
Replacing the clutch on an air conditioner compressor can fix many problems. Knowing how to spot issues helps you save time and money.
This guide covers common clutch problems and how to troubleshoot them before replacement.
Compressor Clutch Not Engaging
If the clutch does not engage, the compressor will not work. Check for electrical problems first.
- Inspect the fuse and relay for damage
- Test the clutch coil resistance with a multimeter
- Check wiring connections for corrosion or breaks
- Verify the air conditioning pressure is within normal range
Clutch Slipping Or Making Noise
A slipping clutch can cause noise and poor cooling. This usually means the clutch plate is worn out.
Look for oil or dirt on the clutch surface, which reduces friction.
| Cause | Effect | Solution |
|---|---|---|
| Worn clutch plate | Slips and noise | Replace clutch plate |
| Oil contamination | Reduced friction | Clean or replace parts |
| Misalignment | Uneven wear | Adjust pulley alignment |
Compressor Overheating
Overheating may cause the clutch to fail. Check for blocked airflow or low refrigerant.
- Clean condenser coils and fan
- Check refrigerant levels and refill if needed
- Inspect clutch pulley for smooth rotation
- Replace worn clutch components to prevent damage
Clutch Engages But Compressor Does Not Run
This issue may mean internal compressor failure. Test the compressor windings and pressure.
Replacing the clutch alone might not fix the problem if the compressor is faulty.

Credit: www.northamericanmotoring.com
Frequently Asked Questions
How Do I Know If My Ac Compressor Clutch Needs Replacement?
Signs include strange noises, AC not cooling, or clutch not engaging. Inspect for wear or damage to confirm replacement need.
What Tools Are Required To Replace An Ac Compressor Clutch?
You need a pulley puller, snap ring pliers, a clutch removal tool, and basic hand tools for this job.
Can I Replace The Ac Compressor Clutch Myself?
Yes, if you have mechanical skills and proper tools. Follow safety procedures and detailed instructions carefully.
How Long Does It Take To Replace An Ac Compressor Clutch?
Typically, it takes 1 to 2 hours depending on experience and vehicle model complexity.
Conclusion
Replacing the clutch on an air conditioner compressor is doable with care. Follow each step slowly and check your work often. Use the right tools to avoid damage and stay safe. A good clutch helps your AC run smoothly and cool your home well.
Taking time now saves bigger problems later. Trust yourself to handle this repair and keep your AC working. Small fixes can make a big difference in comfort and cost.