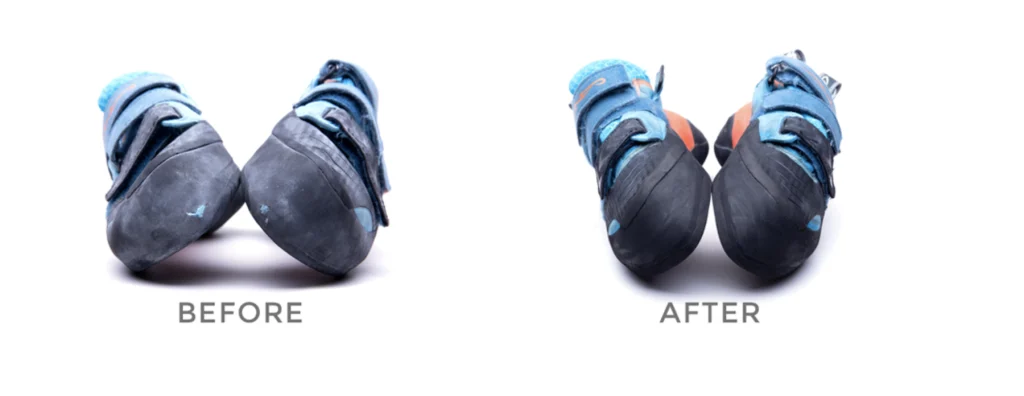
Your climbing shoes are more than just gear—they’re your trusted partners on every climb. When the soles start to wear out, you might think it’s time to buy new ones.
But what if you could save money and extend the life of your favorite shoes? Learning how to resole climbing shoes can keep them performing like new and ready for your next challenge. In this guide, you’ll discover simple steps to resole your shoes at home or decide when it’s best to seek professional help.
Keep reading, and take control of your climbing gear like never before.
Signs Your Shoes Need Resoling
Climbing shoes wear out over time and need resoling to keep performing well. Knowing the signs helps you avoid damage and climb safely.
Check your shoes often. Look for worn areas on the sole and other changes that show it’s time to resole.
Common Wear Patterns
Wear appears in certain spots depending on how you climb and the shoe’s design. Spotting these patterns helps you decide when to repair.
- Toe area: The front sole often wears down first from edging and toe hooks.
- Heel: Look for thinning or holes from heel hooks and friction.
- Edges: Side edges can get rounded or thin from smearing and edging.
- Midsole: Some shoes show wear in the middle if you put weight there.
When To Act
Resoling at the right time saves your shoes and money. Acting too late can damage the shoe’s shape and comfort.
| Condition | Action Needed |
| Sole thickness less than 2 mm | Resole soon to avoid damage |
| Holes or tears in rubber | Resole immediately |
| Rubber separating from shoe | Resole or repair |
| Midsole feels soft or weak | Check with professional |
| Worn edges affect grip | Resole to restore performance |
Tools And Materials Needed
Resoling climbing shoes needs the right tools and materials. These help you repair your shoes properly.
Using correct items makes your shoes last longer and stay comfortable. Let’s look at what you need.
Essential Repair Tools
You need some basic tools to take off old soles and attach new rubber. These tools make the job easier and safer.
- Shoe adhesive glue for strong bonding
- Sandpaper or a rasp to roughen surfaces
- A sharp knife or cutter to trim old rubber
- Clamps or heavy weights to hold parts together
- A brush to apply glue evenly
- Heat gun or hair dryer to soften glue if needed
- A clean cloth to wipe dirt and dust
Choosing The Right Rubber
Choosing rubber depends on the shoe type and climbing style. The right rubber gives grip and lasts long.
| Rubber Type | Grip Level | Durability | Best Use |
| Vibram XS Grip | High | Medium | Sport climbing and bouldering |
| Stealth C4 | Very High | Low to Medium | Technical climbs needing precision |
| Vibram XS Edge | Medium | High | Crack and trad climbing |
| Five Ten Stealth Rubber | High | Medium | All-around use |
Step-by-step Resole Process
Resoling climbing shoes extends their life and keeps them safe. The process needs care and the right tools.
This guide shows how to resole climbing shoes step by step. Follow each part closely for best results.
Removing Old Soles
Start by carefully removing the old sole from the shoe. Use a sharp knife or a sole remover tool.
Work slowly to avoid damaging the shoe’s upper material. Heat can help soften the glue for easier removal.
- Use a heat gun or warm water to soften glue
- Cut along the edge where the sole meets the shoe
- Peel the sole off gently
- Remove any leftover glue or rubber bits
Preparing The Shoe Surface
Clean the shoe surface where the new sole will go. Remove dirt, old glue, and rough spots.
Smooth the surface with sandpaper. This helps the new sole stick better and last longer.
- Wipe the surface with rubbing alcohol
- Sand gently with fine-grit sandpaper
- Remove dust with a dry cloth
- Make sure the surface is dry before gluing
Applying New Soles
Cut the new sole material to fit the shoe shape. Use the old sole as a pattern if possible.
Apply a strong contact glue to both the shoe and sole. Let it dry until tacky before pressing together.
- Cut new sole to match shoe size and shape
- Spread glue evenly on both surfaces
- Wait 5-10 minutes for glue to become sticky
- Press sole firmly onto shoe
- Use clamps or weights to hold in place
Finishing Touches
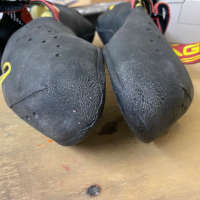
Trim any extra sole material along the edges. Make sure the sole fits perfectly to the shoe.
Let the glue dry fully before using the shoes again. This ensures a strong bond and longer shoe life.
- Use a sharp knife or sandpaper to trim edges
- Check for any loose spots on the sole
- Allow glue to cure for 24 hours
- Test shoes carefully before climbing
Credit: www.uncarvedblock.com.au
Tips For A Long-lasting Repair
Resoling climbing shoes extends their life and saves money. Using the right methods helps the repair last longer.
Good care during and after resoling keeps shoes strong and safe for climbing.
Proper Adhesive Use
Choosing the right glue is key for a strong bond. Use adhesives made for rubber and leather.
- Clean shoe surfaces before applying glue.
- Apply glue evenly on both parts.
- Press parts firmly together for several minutes.
- Let glue dry fully before using shoes again.
Avoiding Common Mistakes
Errors during resoling can weaken repairs. Avoid these common problems to keep your shoes in shape.
| Common Mistake | Effect | How to Avoid |
| Using wrong glue type | Poor bonding | Use rubber/leather adhesive |
| Not cleaning surfaces | Glue won’t stick well | Clean and dry shoe parts |
| Insufficient pressure | Weak bond | Press firmly during drying |
| Rushing drying time | Glue fails | Wait full curing time |
When To Seek Professional Help
Resoling climbing shoes can save money and extend shoe life. Some repairs are simple and can be done at home. Other problems need a professional’s skill and tools.
Knowing when to ask for expert help ensures your shoes stay safe and comfortable. This guide covers complex repairs and finding a good cobbler.
Complex Repairs
Some shoe damage is too hard to fix alone. Complex repairs include fixing deep sole damage, reshaping the shoe, or replacing the rand (the rubber sidewall).
- Big holes or tears in the sole
- Worn out or broken rand
- Shoe shape changes causing poor fit
- Glue failure on multiple parts
- Damaged shoe lining or inner padding
Trying these repairs without skills can make the shoes worse or unsafe for climbing.
Finding A Reliable Cobblers
Choosing the right cobbler is key for quality resoling. Here are tips to help you find one that fits your needs.
| Factor | What to Check |
| Experience | Years repairing climbing shoes or similar footwear |
| Reviews | Customer feedback on quality and timing |
| Materials | Use of climbing shoe-specific rubber and glue |
| Price | Clear and fair pricing for repairs |
| Turnaround Time | Reasonable repair duration |
Visit the cobbler with your shoes to discuss repair options. Ask questions about their process and warranty.

Credit: www.theclimbingguy.com
Maintaining Climbing Shoes Post-resole
Resoling climbing shoes can extend their life and improve performance. After resoling, proper care keeps them in good shape longer.
Good maintenance helps your shoes stay comfortable and ready for your next climb.
Cleaning And Storage
Clean your climbing shoes after each use to remove dirt and sweat. Use a soft brush or damp cloth to wipe them gently.
Do not soak your shoes in water. Let them dry naturally away from direct heat or sunlight.
- Remove dirt with a soft brush
- Use a damp cloth for stubborn spots
- Air dry shoes in a cool, shaded place
- Avoid direct heat sources like radiators
- Store shoes in a dry, ventilated area
Regular Inspection
Check your climbing shoes often for signs of wear or damage. Early detection helps avoid bigger problems.
Look at the rubber, stitching, and seams. Make sure the sole is firmly attached after resoling.
- Inspect soles for thinning or peeling
- Check stitching for loose threads
- Examine seams for gaps or tears
- Look for damage to the shoe upper
- Fix small issues before they grow

Credit: www.reddit.com
Frequently Asked Questions
How Often Should I Resole Climbing Shoes?
You should resole climbing shoes when the sole is thin or worn out. This ensures better grip and safety. Frequent climbers may need resoling every 6 to 12 months. Check soles regularly to maintain performance and avoid damage to the shoe’s structure.
Can I Resole Climbing Shoes At Home?
Resoling climbing shoes at home is possible but not recommended. It requires special tools and skills for proper adhesion and shaping. Poor resoling can reduce shoe performance and durability. It’s best to use professional resoling services for optimal results.
How Much Does It Cost To Resole Climbing Shoes?
The cost to resole climbing shoes typically ranges from $30 to $70. Price depends on the shoe model, sole type, and service provider. Premium or specialized soles may cost more. Investing in resoling extends shoe life and improves climbing safety.
What Type Of Rubber Is Best For Climbing Shoe Resoles?
Vibram XS Grip and Stealth C4 are popular rubber types for resoles. They offer excellent grip, durability, and performance on various surfaces. Choose rubber based on your climbing style and conditions. Quality rubber enhances shoe traction and climbing confidence.
Conclusion
Resoling climbing shoes extends their life and saves money. It’s an easy process with the right tools and patience. Regular checks help spot wear early. Early detection prevents bigger problems. Practice makes perfect. Don’t rush the job. Take your time.
Enjoy the process. It’s rewarding to fix things by yourself. You’ll feel proud of your work. Plus, you’ll keep shoes in top shape. Resoled shoes perform almost like new. So, keep climbing and keep resoling. Your feet and wallet will thank you.
Happy climbing!