Imagine this: your Tesla’s dash cam captures something important—an unexpected event, a scenic drive, or even a close call on the road. But how do you make sure that footage is safely saved and easy to access when you need it?
If you’ve ever wondered how to save Tesla dash cam footage without losing those valuable clips, you’re in the right place. You’ll discover simple, step-by-step tips to keep your recordings secure and ready for review anytime. Keep reading to unlock the secrets that will help you protect your Tesla’s most important moments effortlessly.
Tesla Dash Cam Basics
Understanding the Tesla Dash Cam Basics is essential before you start saving any footage. This feature is not just a cool gadget; it’s a powerful safety tool that can protect you in unexpected moments. Knowing how it works helps you make the most out of it and ensures you never lose important recordings.
What Is Tesla Dash Cam
The Tesla Dash Cam is a built-in camera system that continuously records video from multiple angles around your car. It uses the car’s external cameras to capture everything happening on the road while you drive. This means you have a silent witness to any incident, whether it’s a minor fender bender or something more serious.
Unlike traditional dash cams, Tesla’s system doesn’t require you to buy extra equipment. It’s integrated into the vehicle’s hardware and software, making it seamless and always ready. You just need to set up a USB drive to store the clips.
How It Works
The Dash Cam automatically records footage when your Tesla is in motion. It continuously loops video recordings, saving only the most recent moments unless you manually save a clip. This way, you don’t run out of storage space on your USB drive quickly.
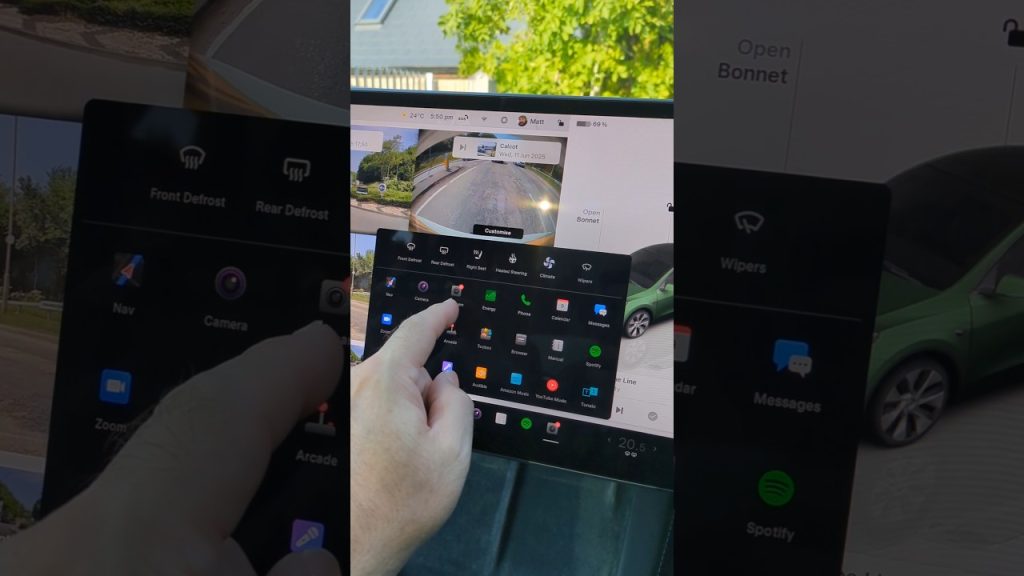
You can save footage by tapping the Dash Cam icon on your touchscreen or when the car detects an impact. The saved clips are stored on the USB drive plugged into your car’s USB port. Later, you can remove the drive and watch the videos on your computer.
Ever wondered how reliable the footage is during critical moments? Tesla’s system is designed to prioritize event recordings, so you don’t have to sift through hours of driving to find what matters most. This saves you time and stress when reviewing incidents.

Credit: www.pwscottlaw.com
Preparing Your Usb Drive
Getting your USB drive ready is the first and most important step to saving Tesla dash cam footage. A correctly prepared USB ensures your Tesla can record and store video clips without interruptions. Skipping this can lead to lost footage or errors that leave you empty-handed when you need evidence the most.
Choosing The Right Usb
Not all USB drives are created equal, especially for Tesla dash cams. You want a USB with fast write speeds—at least 20 MB/s—to handle continuous video recording smoothly. Avoid cheap or very small drives; a capacity of 32GB or more usually works well and gives you enough space before overwriting old clips.
Think about durability too. Metal casing or rugged designs resist heat and wear better than flimsy plastic. Have you ever lost important files because your drive failed at a crucial moment? Choosing a reliable USB is your first line of defense.
Formatting The Drive
Your USB must be formatted correctly to work with Tesla’s system. The car only recognizes FAT32 or exFAT file systems, with FAT32 often preferred for compatibility. Formatting also wipes out any old files and hidden data that might cause conflicts.
You can format the USB easily on your computer. On Windows, right-click the drive, select “Format,” then choose FAT32 or exFAT. Mac users can use Disk Utility and select the appropriate format. Don’t forget to back up any existing data before formatting—this process will erase everything.
Creating Teslacam Folder
After formatting, create a folder named “TeslaCam”in the root directory of your USB drive. This folder is where your Tesla saves all the dash cam footage and Sentry Mode videos. If the folder isn’t there, your car won’t record.
It’s a simple step but often overlooked. I once missed this and wondered why my dash cam wasn’t working—turns out, no TeslaCam folder meant no recordings. So, make sure this folder is in place before plugging the drive into your Tesla.
Recording Footage
Recording footage with your Tesla dash cam is essential for capturing important moments on the road. Whether it’s for security or evidence after an incident, understanding how to properly record and save footage can make all the difference. Let’s look at how you can activate and manage your Tesla dash cam recordings effectively.
Activating Dash Cam
To start recording, you first need to activate the dash cam feature. Plug a USB drive formatted to FAT32 or exFAT into the Tesla’s USB port. The car will automatically detect the drive and create a “TeslaCam” folder to store footage.
You can activate recording by tapping the dash cam icon on the touchscreen. It’s that simple. Once activated, the dash cam continuously records while driving, so you don’t have to worry about manually starting it every time.
Types Of Recordings
Your Tesla dash cam records several types of videos based on driving conditions and events. These include:
- Standard Driving Footage:Continuous loop recording of your drive.
- Saved Clips:Manually saved clips by tapping the dash cam icon.
- Event Clips:Automatically saved footage triggered by sudden braking or collisions.
- Sentry Mode Clips:Recordings activated when the vehicle is parked and detects nearby movement.
Knowing these types helps you quickly find the footage you need without sifting through hours of video.
Indicators And Notifications
Your Tesla provides clear indicators to show when the dash cam is recording. The dash cam icon on the touchscreen will appear red when actively recording and gray when inactive. This visual cue lets you know your footage is being captured without guesswork.
Additionally, if there’s an issue with the USB drive, like insufficient space or formatting problems, your Tesla will notify you. These alerts help you fix problems early, ensuring no important footage is lost when you need it most.
Have you ever missed saving a key moment because the dash cam wasn’t recording? Paying attention to these indicators can save you from that frustration.
Saving Videos To Usb
Saving Tesla dash cam footage to a USB drive ensures you keep important moments safe and accessible. Whether it’s capturing an unexpected event or just reviewing your driving, having the videos stored externally gives you peace of mind. Let’s look at how you can save videos to your USB quickly and efficiently.
Manual Save Process
To manually save a video, you first need a properly formatted USB drive plugged into your Tesla’s USB port. The dash cam icon on your screen shows when recording is active. If you see something worth keeping, tap the dash cam icon to save the last 10 minutes of footage.
This process stores the video in the “TeslaCam” folder on your USB. You can then remove the USB and view the footage on your computer. Have you ever wanted to save a moment immediately after a sudden event? This manual save lets you do just that without delay.
Automatic Saving Features
Your Tesla also has an automatic saving option for incidents. When the car detects a collision or sudden impact, it automatically locks and saves the video files surrounding the event. This includes footage from before, during, and after the incident, giving you a complete record.
These saved clips are protected from being overwritten, so you don’t lose critical evidence. To make sure this works, your USB drive must have enough free space and be formatted correctly. Have you checked your USB lately to avoid missing important automatic saves?
Accessing Saved Footage
Accessing your Tesla dash cam footage is essential to review important moments or secure evidence after an incident. The process is straightforward but varies depending on whether you want to view clips directly on your car or transfer them to another device. Understanding these options ensures you never miss a detail captured by your Tesla’s cameras.
Using Tesla Screen
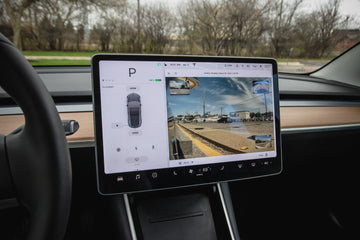
Your Tesla’s touchscreen makes it easy to view dash cam footage on the go. Simply tap the Dashcam icon on the top of the screen to open the saved clips. You can scroll through recent recordings and play them back without needing any external devices.
One tip I learned is to pause the video at key moments and use the screen’s zoom feature to examine details like license plates or road signs. This can be especially helpful if you’re trying to capture evidence right after an event before the footage gets overwritten.
Viewing On Computer
For a more thorough review or to save footage permanently, transferring files to a computer is the best option. Remove your USB drive from the Tesla’s USB port and plug it into your computer. The videos are stored in a folder named “TeslaCam” organized by date and event type.
Using a media player like VLC allows you to watch the videos smoothly. You can also copy important files to your hard drive or cloud storage for safekeeping. Have you ever tried organizing these clips by incident type? It can save you time when you need to find specific footage later.

Credit: www.youtube.com
Troubleshooting Common Issues
Troubleshooting Tesla dash cam issues helps keep your footage safe. Problems with USB recognition, saving files, or file corruption can disrupt your recordings. Identifying and fixing these issues ensures reliable video capture. The following sections explain common problems and solutions.
Usb Not Recognized
The Tesla may fail to detect the USB drive. Try these fixes:
- Check if the USB is properly inserted in the port.
- Format the USB drive to FAT32 or exFAT using a computer.
- Use a high-quality USB drive with at least 32GB capacity.
- Restart the Tesla system by rebooting the screen.
- Try a different USB port if available.
Using a compatible and well-formatted USB is key for detection.
Footage Not Saving
Sometimes, the dash cam records but does not save clips. Fix it by:
- Confirm the USB drive has enough free space.
- Ensure the Tesla dash cam icon is active on the screen.
- Press the dash cam icon to manually save important clips.
- Format the USB drive to clear errors and start fresh.
- Update your Tesla software to the latest version.
Saving clips depends on USB space and proper dash cam activation.
File Corruption Problems
Corrupted files can prevent playback or transfer. Avoid this by:
- Always eject the USB drive safely before unplugging.
- Use a reliable USB drive with good read/write speed.
- Regularly format the USB to prevent file system errors.
- Keep your Tesla software updated to fix bugs.
- Check the USB for errors using computer tools.
Proper handling and maintenance reduce file corruption risk.
Tips For Secure Storage
Keeping your Tesla dash cam footage safe is crucial. Losing important videos can be frustrating, especially if they contain evidence from an accident or a rare event on the road. Secure storage not only protects your files but also makes it easy to access and share them when needed.
Backing Up Videos
Always have a backup of your dash cam videos. Copying files to a secondary device, like an external hard drive or another USB stick, ensures you don’t lose anything if the original storage fails.
Try setting a routine, such as backing up your footage every week. It might sound tedious, but it saves a lot of stress later. Have you ever lost a file you wished you had saved?
Using Cloud Storage
Cloud storage offers a convenient way to keep your videos safe and accessible from anywhere. Services like Google Drive or Dropbox let you upload your footage automatically or manually, depending on your preference.
Keep in mind the file sizes; high-quality videos can quickly eat up your cloud space. Organizing videos by date or event can help you find what you need without scrolling through everything.
Keeping Usb Safe
Your USB drive is the heart of your Tesla dash cam footage. Treat it well by storing it in a dry, cool place away from direct sunlight or extreme temperatures.
Consider labeling your USB sticks if you use more than one. This simple step can prevent confusion and accidental overwriting of important files.
Credit: www.tesery.com
Frequently Asked Questions
How Do I Save Tesla Dash Cam Footage?
To save Tesla dash cam footage, insert a USB drive into the car’s USB port. Ensure the drive is properly formatted. The footage will be automatically saved when you press the dash cam icon on the screen. Check the USB drive on your computer to access the saved clips.
What Format Should The Usb Drive Be In?
The USB drive should be formatted in FAT32 or exFAT. This ensures compatibility with Tesla’s dash cam system. Make sure the drive has sufficient storage space for the footage. Proper formatting is crucial for the dash cam to recognize and save the video files correctly.
How Can I View Saved Dash Cam Footage?
To view saved footage, remove the USB drive from your Tesla. Connect it to your computer. Navigate to the TeslaCam folder to access recorded clips. Use any media player to watch the videos. Ensure the drive is safely ejected from your computer after viewing.
Can I Use Any Usb Drive For Tesla Dash Cam?
Not all USB drives are suitable for Tesla dash cam use. High-speed USB drives with sufficient storage capacity are recommended. They should be durable and reliable for continuous video recording. Ensure the drive is formatted correctly and has enough space to store multiple clips.
Conclusion
Saving Tesla dash cam footage helps protect your driving moments. Always use a properly formatted USB drive. Regularly check that recordings save correctly. Back up important clips to avoid losing them. This simple step keeps your videos safe and easy to find.
Stay aware of your Tesla’s dash cam features. Taking these small actions ensures peace of mind on every trip. Easy to follow, right? Now you’re ready to save your Tesla dash cam footage with confidence.