
Your cutting board is more than just a kitchen tool—it’s where your meals begin. But if it’s not properly sealed, it can soak up water, stains, and harmful bacteria, making it unsafe and shortening its life.
You want your board to stay strong, clean, and looking great for years to come. This guide will show you exactly how to seal your cutting board the right way, step by step. By the end, you’ll have the confidence to protect your board and keep your kitchen safer and more beautiful.
Ready to learn the simple secrets to sealing your cutting board? Let’s dive in.

Credit: kingsfleet.ca
Choosing The Right Cutting Board
Choosing the right cutting board helps keep your kitchen safe and clean. It also protects your knives and lasts longer.
Different materials have different qualities. Learn about wood and plastic boards before sealing your cutting board.
Wood Vs Plastic Options
Wood boards are gentle on knives and look natural. Plastic boards are easy to clean and often cheaper.
- Wood absorbs moisture and needs regular sealing.
- Plastic resists stains but can get deep cuts.
- Wood boards can last for years with care.
- Plastic boards may need replacing more often.
- Wood is better for heavy chopping and slicing.
- Plastic suits raw meat and dishwasher use.
Factors Affecting Durability
Durability depends on material, care, and use. Proper sealing helps wood boards last longer.
| Factor | Effect on Wood | Effect on Plastic |
| Moisture | Can cause warping or cracking | Usually no effect |
| Cleaning | Hand wash only; avoid soaking | Dishwasher safe |
| Knife Marks | Shows less, easy to sand | Deep cuts can harbor bacteria |
| Sealing | Necessary for protection | Not needed |
| Heat | Can damage wood finish | Generally heat resistant |
Types Of Sealants For Cutting Boards
Sealing your cutting board protects it from moisture and bacteria. Choosing the right sealant keeps the board safe for food use.
This guide covers common sealants and their benefits. You will learn about oils, wax blends, mineral oil, and commercial options.
Food-safe Oils
Food-safe oils soak into wood and create a barrier against water. They keep the board from cracking and drying out.
- Pure walnut oil
- Fractionated coconut oil
- Raw linseed oil (make sure it is food grade)
- Pure olive oil (not recommended long term)
Beeswax And Oil Blends
Beeswax and oil blends add a thicker layer of protection. Beeswax seals the wood surface and repels water better than oil alone.
- Softens the board surface for gentle cutting
- Provides long-lasting moisture resistance
- Easy to apply and safe for food contact
Mineral Oil Benefits
Mineral oil is clear, odorless, and tasteless. It does not go rancid, making it a popular choice for cutting boards.
| Feature | Benefit |
| Non-toxic | Safe for food contact |
| Inexpensive | Easy to find and use |
| Penetrates wood | Protects from moisture inside |
| Easy to reapply | Keeps board sealed over time |
Commercial Sealants
Commercial sealants are ready-made blends of oils, waxes, and other safe ingredients. They offer strong protection and easy use.
Benefits of commercial sealants:
- Food-safe certified
- Water-resistant finish
- Long-lasting durability
- Simple application
Preparing The Cutting Board
Sealing your cutting board starts with good preparation. This helps the finish last longer and protects the wood.
Cleaning and smoothing the board are key steps before you apply any sealant.
Cleaning And Drying
Clean your cutting board well to remove dirt and oils. Use warm water and mild soap for cleaning.
After washing, dry the board completely. A dry surface helps the sealant stick better.
- Rinse the board with warm water
- Use a soft sponge and mild soap
- Rinse soap off thoroughly
- Dry with a clean towel
- Let air dry for at least an hour
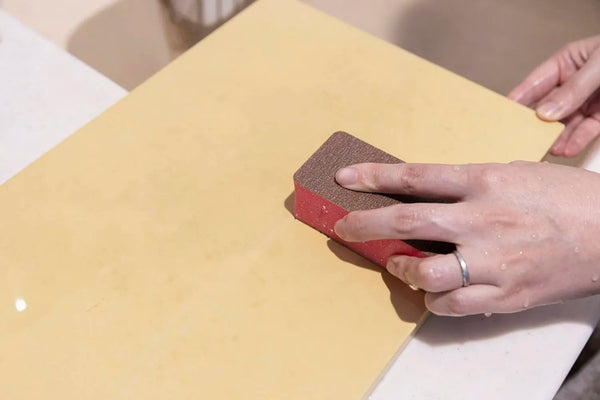
Sanding Tips For Smooth Surface
Sanding makes the cutting board smooth and ready for sealing. Use fine grit sandpaper for best results.
Sand evenly to remove any rough spots or scratches. Wipe off dust before sealing.
- Start with 120-grit sandpaper
- Finish with 220-grit sandpaper
- Sand along the grain of the wood
- Remove all dust with a damp cloth
- Allow the board to dry fully
Step-by-step Sealing Process
Sealing your cutting board protects it from water and stains. It also keeps the wood strong and looking good.
Follow these simple steps to seal your cutting board properly and make it last longer.
Applying The Oil Or Sealant
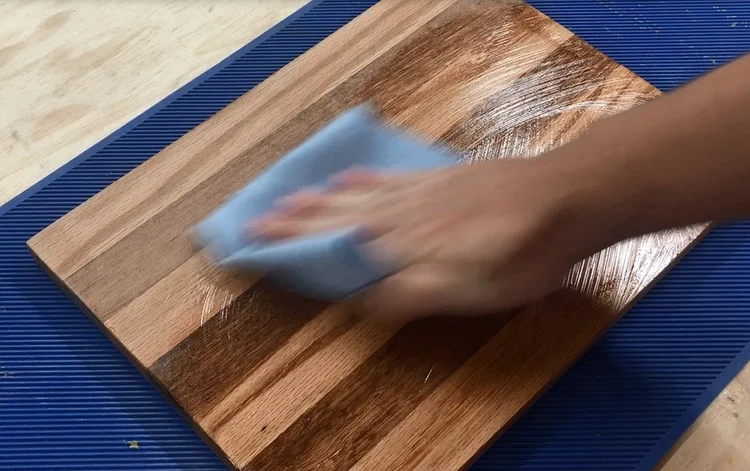
Start by choosing a food-safe oil or sealant like mineral oil or beeswax. Use a clean cloth or brush to apply it evenly.
Cover the whole surface, including edges and sides. Make sure no spots are left dry or uncovered.
Letting It Soak In
Let the oil or sealant soak into the wood. This usually takes about 20 to 30 minutes but can vary by product.
Keep the board in a dry place while it absorbs the sealant. Do not wipe it off during this time.
Removing Excess Sealant
After soaking, use a clean cloth to wipe off extra oil or sealant. This prevents sticky or oily surfaces.
Make sure the board feels smooth and dry to touch. Remove all visible excess sealant carefully.
Repeat Coating For Best Results
Apply another coat of oil or sealant after the first one dries. This builds better protection for your board.
Two or three coats usually give the best results. Let each coat soak and dry fully before adding the next.
Maintaining Your Sealed Cutting Board
Sealing your cutting board helps protect it from water and stains. Keeping the seal in good condition extends the board’s life. Proper care is key to maintaining its look and function.
Below are tips on how to keep your sealed cutting board in the best shape. Follow these simple steps to protect your investment.
Regular Reapplication Schedule
Sealing wears off over time and use. You should reapply the sealant regularly to keep the board protected. How often depends on how much you use the board.
Check your cutting board every few weeks for dullness or dryness. When the surface looks dry or loses its shine, it is time to reseal it.
- Apply food-safe mineral oil or wax once a month for frequent use
- For occasional use, reapply every two to three months
- Always clean and dry the board before applying sealant
Cleaning Tips To Preserve Seal
Cleaning your sealed cutting board properly helps keep the seal intact. Avoid soaking the board in water or using harsh chemicals. These can break down the seal and damage the wood.
Use mild soap and warm water to clean the board. Wipe it quickly and dry it with a towel. Never put the board in a dishwasher.
- Wash with soft sponge and mild soap
- Rinse quickly with warm water
- Dry immediately with a clean cloth
- Store board in a dry, ventilated area
Avoiding Damage And Stains
Protect the sealed surface by avoiding sharp or heavy impacts. Use the board only for cutting, not as a chopping block for heavy tools. Keep acidic foods from sitting too long on the surface.
Stains can sometimes seep through if the seal is weak. Wipe spills quickly and do not let liquids soak in. This helps keep your cutting board looking clean and new.
- Do not cut with very sharp or heavy blades in one spot
- Wipe up spills immediately
- Avoid prolonged contact with lemon, vinegar, or wine
- Do not use the board as a hot surface or trivet
Credit: www.globalkitchenjapan.com
Troubleshooting Common Issues
Sealing a cutting board protects it from water and food stains. Sometimes, problems can happen after sealing. Knowing how to fix these issues helps keep your board in good shape.
This guide covers common problems you might see with sealed cutting boards. It shows simple ways to fix them and keep your board working well.
Dealing With Sticky Or Tacky Surfaces
A sticky or tacky surface means the finish is not dry or cured properly. This can happen if you applied too much oil or sealer. It may also occur if the product needs more time to dry.
To fix this, wipe the surface with a clean cloth. Use a little mineral spirits or a gentle solvent to remove excess oil. Let the board dry in a warm, dry place for several days.
- Remove extra oil with a soft cloth
- Use mineral spirits carefully if needed
- Allow longer drying time in warm air
- Apply thinner coats next time
Fixing Cracks And Warping
Cracks and warping happen when the wood dries unevenly or gets too wet. These problems can ruin your cutting board’s shape and strength.
To fix small cracks, fill them with food-safe wood filler or a mix of sawdust and oil. Sand the area smooth after it dries. For warping, try soaking the board in water briefly, then press it flat under weight until dry.
- Fill cracks with wood filler or sawdust and oil
- Sand smooth after filler dries
- Soak warped board in water for a short time
- Press board flat with weights while drying
- Store board flat to prevent warping
When To Reseal Or Replace
You should reseal your cutting board if the surface looks dry or worn. Resealing keeps the wood safe from water and stains. Signs you need to reseal include dull color and rough texture.
Replace your cutting board if cracks are deep or the board is badly warped. Old boards can harbor bacteria even if cleaned well. A new board keeps your kitchen safe and clean.
- Reseal when surface feels dry or rough
- Reseal if water soaks in quickly
- Replace if cracks are large or deep
- Replace if board is badly warped or damaged
Credit: www.slightlycrookedworkshop.com
Frequently Asked Questions
What Is The Best Oil To Seal A Cutting Board?
The best oil to seal a cutting board is food-grade mineral oil. It penetrates the wood effectively, providing a protective barrier. This oil is non-toxic, odorless, and tasteless, making it safe for food contact. Regular application will help maintain the board’s condition and prevent warping or cracking.
How Often Should I Seal My Cutting Board?
Sealing your cutting board should be done once a month. Regular sealing helps maintain the board’s durability and appearance. If the board appears dry or dull, it’s time to reapply oil. Consistent maintenance ensures your board stays in top condition and extends its lifespan.
Can I Use Olive Oil To Seal My Cutting Board?
It’s not recommended to use olive oil for sealing. Olive oil can become rancid over time and leave an unpleasant smell. Instead, use food-grade mineral oil or specialized cutting board oil. These options provide a protective layer without the risk of spoilage or odor.
Why Does My Cutting Board Need Sealing?
Sealing your cutting board prevents moisture absorption, which can lead to warping or cracking. It also creates a barrier against bacteria and food stains. Regular sealing helps maintain the board’s appearance and prolongs its lifespan, ensuring it remains a safe and effective kitchen tool.
Conclusion
Sealing your cutting board protects it from water and stains. It also helps keep bacteria away and extends its life. Use food-safe oils or sealants for best results. Regular sealing keeps the board smooth and easy to clean. A well-sealed cutting board stays strong and looks good longer.
Take a little time to seal your board right. Your kitchen tools will thank you for it. Simple steps lead to great care and lasting use.