Your wooden cutting board is more than just a kitchen tool—it’s a surface that needs care to stay safe and last longer. But how do you protect it from cracks, stains, and bacteria?
The answer lies in sealing it properly. If you want to keep your board looking fresh and working perfectly, learning how to seal your wooden cutting board is a must. You’ll discover simple, effective steps to make your cutting board durable and hygienic.
Ready to give your board the care it deserves? Let’s get started!

Credit: kingsfleet.ca
Choosing The Right Sealer
Sealing a wooden cutting board protects it from water and stains. It also keeps the wood safe from bacteria. Picking the right sealer is important for food safety and durability.
There are many sealers available. Some are natural, and some are commercial products. You need to know which one fits your needs best.
Food-safe Options
Only use sealers that are safe for food contact. Some oils and waxes are natural and safe. Avoid sealers with toxic chemicals.
- Mineral oil is popular and safe for cutting boards.
- Beeswax is natural and helps seal wood.
- Food-grade tung oil is another option.
- Avoid vegetable oils that can go rancid.
Oil Vs. Wax
Oils soak into the wood to protect it from inside. Wax sits on the surface and adds a water-resistant layer. Both can be used alone or together.
| Type | Protection | Application |
| Oil | Penetrates wood, prevents drying | Rub into wood, let absorb |
| Wax | Seals surface, adds shine | Apply thin layer, buff to finish |
| Oil + Wax | Best of both, inside and outside protection | Oil first, then wax after drying |
Commercial Vs. Homemade Sealers
Commercial sealers are ready to use and tested for safety. Homemade sealers use simple ingredients but need care in preparation.
- Commercial sealers may last longer and are easy to apply.
- Homemade sealers often mix mineral oil with beeswax.
- Homemade options avoid chemicals but need correct ratios.
- Choose based on convenience and your confidence in making sealers.

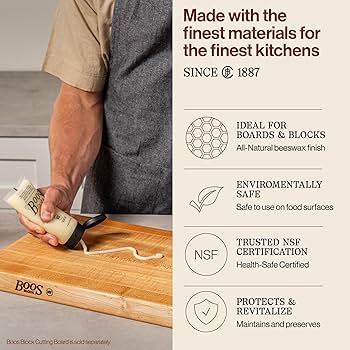
Credit: www.amazon.ca
Preparing The Cutting Board
Before sealing a wooden cutting board, you must prepare it well. This helps the sealant stick better and last longer.
Proper preparation also keeps the board safe for food use. Follow these steps to get your cutting board ready.
Cleaning And Drying
First, clean the cutting board to remove dirt and oils. Use warm water and mild soap for this task.
Rinse it well and dry the board completely. Let it air dry in a warm place for several hours.
Sanding For Smoothness
Sanding makes the surface smooth and ready for sealing. Use medium-grit sandpaper to start.
After the first sanding, wipe off dust. Then use fine-grit sandpaper for a smooth finish.
- Sand along the wood grain
- Remove all rough spots
- Wipe away dust between sanding steps
Removing Old Finishes
If your board has old oil or finish, remove it before sealing. Use a food-safe stripper or sand it off.
Make sure to clean and dry the board again after removing the old finish. This ensures the new sealant bonds well.
Applying Oil Sealers
Sealing a wooden cutting board protects it from water and stains. Using oil sealers keeps the wood healthy and durable.
Choosing the right oil and applying it correctly helps your cutting board last longer.
Types Of Oils To Use
Not all oils are safe or good for wooden cutting boards. Use food-safe oils that do not go rancid quickly.
- Mineral oil – clear, odorless, and safe for food contact.
- Walnut oil – natural and good for sealing but watch for allergies.
- Coconut oil – solid at room temperature and resists water well.
- Beeswax mixed with oil – adds extra protection and shine.
Application Techniques
Apply oil evenly for best results. Make sure the board is clean and dry before starting.
- Pour a small amount of oil onto the board surface.
- Use a clean cloth or paper towel to spread the oil.
- Rub the oil into the wood following the grain direction.
- Let the oil soak in for about 15 to 20 minutes.
- Wipe off any excess oil to avoid sticky spots.
Drying And Curing Times
Drying times vary by oil type and room temperature. Allow the board to cure fully before use.
| Oil Type | Drying Time | Curing Time |
| Mineral Oil | 2-4 hours | 24 hours |
| Walnut Oil | 4-6 hours | 48 hours |
| Coconut Oil | 6-8 hours | 48 hours |
| Beeswax Blend | 8-12 hours | 72 hours |
Using Wax For Extra Protection
Sealing a wooden cutting board with wax helps protect it from moisture and stains. Wax adds a durable layer that keeps the wood safe and looking good.
Using wax is a simple way to extend the life of your cutting board. It also keeps the surface smooth and easy to clean.
Choosing The Right Wax
Selecting the proper wax is important for good protection and safety. Food-safe waxes are best to avoid harmful chemicals.
- Beeswax is natural and safe for food contact.
- Carnauba wax is harder and offers extra durability.
- Some blends mix beeswax with mineral oil for easy application.
- Avoid synthetic or scented waxes that are not food-grade.
How To Apply Wax
Clean and dry your cutting board before applying wax. Warm the wax slightly to soften it for easier spreading.
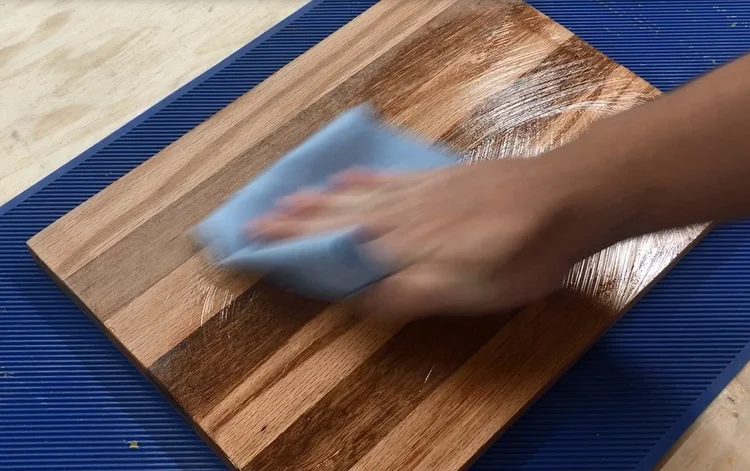
- Use a soft cloth or brush to apply a thin, even layer of wax.
- Cover all surfaces, including edges and corners.
- Let the wax sit for 10 to 20 minutes to soak into the wood.
- Apply additional coats if you want more protection, allowing drying time between coats.
Buffing For A Smooth Finish
Buffing removes excess wax and creates a smooth, shiny surface. Use a clean cloth for best results.
| Buffing Tool | Effect |
|---|---|
| Soft cotton cloth | Gentle shine and smooth feel |
| Microfiber cloth | Removes wax residue efficiently |
| Brush with soft bristles | Reaches grooves and edges |
Buff in circular motions until the board feels smooth and looks glossy. This step helps seal the wax layer tightly.
Maintaining Your Sealed Board
Sealing your wooden cutting board keeps it safe and strong. Proper care helps it last longer.
Follow simple steps to keep your board clean and sealed. This stops cracks and stains.
Regular Cleaning Tips
Clean your board after every use. Use warm water and mild soap. Avoid soaking the wood.
- Wipe the board with a soft cloth or sponge
- Rinse with warm water, no harsh scrubbing
- Dry the board completely with a towel
- Stand the board upright to air dry
- Do not put the board in the dishwasher
Reapplying Sealers
Reapply sealer every few months to protect the wood. This keeps moisture out and prevents damage.
- Clean and dry the board fully before sealing
- Use food-safe mineral oil or beeswax sealer
- Apply a thin, even coat with a clean cloth
- Let the sealer soak for several hours or overnight
- Wipe off any extra oil to avoid sticky spots
Avoiding Damage And Stains
Protect your board from stains and damage by following simple rules. Avoid cutting acidic foods directly on the wood.
| Damage Type | How to Prevent |
| Cracks and Warping | Keep dry and sealed, avoid soaking |
| Stains | Wipe acidic juices quickly |
| Knife Marks | Use a sharp knife and avoid heavy chopping |
| Mold Growth | Dry board completely before storing |
Troubleshooting Common Issues
Sealing a wooden cutting board helps protect it from damage. Sometimes, problems can happen even after sealing. These issues can be fixed with simple steps.
This guide covers how to handle sticky surfaces, remove odors, and fix water damage on your cutting board.
Dealing With Sticky Surfaces
Sticky surfaces can happen if oil or sealant builds up. It may feel tacky and attract dirt. This happens when too much oil is applied or it does not dry well.
To fix this, wipe the board with a clean cloth soaked in mineral spirits. Then let it dry fully before applying a thin new coat of oil or wax.
- Use mineral spirits to remove sticky residue
- Apply oil in thin, even layers
- Let each layer dry completely
- Buff the surface with a soft cloth
Removing Odors
Wood cutting boards can hold smells from food. Odors may stay even after cleaning. This happens when bacteria get inside the wood pores.
To remove odors, sprinkle baking soda on the board and rub it gently. Let it sit for a few hours, then rinse with warm water and dry well.
- Sprinkle baking soda over the surface
- Rub gently with a damp cloth
- Let baking soda sit for 2-3 hours
- Rinse and dry the board completely
Fixing Water Damage
Water damage can cause wood to warp or crack. It happens if the board stays wet too long or is soaked. Fixing water damage can restore the board’s shape.
Sand the damaged area lightly with fine sandpaper. Wipe off dust, then reapply a sealant like mineral oil to protect the wood.
- Use fine sandpaper to smooth warped areas
- Remove all sanding dust with a cloth
- Apply a fresh coat of mineral oil or sealant
- Dry the board completely before use
Credit: www.slightlycrookedworkshop.com
Frequently Asked Questions
How Often Should I Seal A Wooden Cutting Board?
Sealing your wooden cutting board every few months is recommended. Frequency depends on usage and wear. Regular sealing helps maintain its surface and prevent damage. This ensures the board remains hygienic and extends its lifespan. Use mineral oil or a specialized cutting board oil for best results.
What Oil Is Best For Sealing Cutting Boards?
Food-grade mineral oil is ideal for sealing wooden cutting boards. It is safe and effective. It penetrates the wood, providing protection and moisture resistance. Avoid using vegetable or olive oils, as they can turn rancid. Specialized cutting board oils are also great alternatives for maintaining your board.
Can I Use Beeswax To Seal My Cutting Board?
Yes, beeswax can be used to seal a wooden cutting board. It provides a protective barrier and shines. Combine it with mineral oil for enhanced results. This mixture conditions the wood and offers long-lasting protection. Beeswax is food-safe and helps in maintaining the board’s appearance.
Why Is Sealing A Cutting Board Important?
Sealing a wooden cutting board prevents moisture absorption and bacterial growth. It enhances durability and maintains hygiene. A well-sealed board is easier to clean and less prone to warping or cracking. Regular sealing also preserves the natural beauty of the wood, ensuring it lasts longer.
Conclusion
Sealing your wooden cutting board keeps it safe and long-lasting. It stops water and germs from soaking in. Regular sealing also helps prevent cracks and warping. Use food-safe oils or waxes for the best results. Take time to seal your board after cleaning.
This simple step protects your kitchen tool every day. Keep your cutting board looking fresh and working well. A well-sealed board makes food prep easier and safer. Try sealing soon and enjoy a better cutting surface.