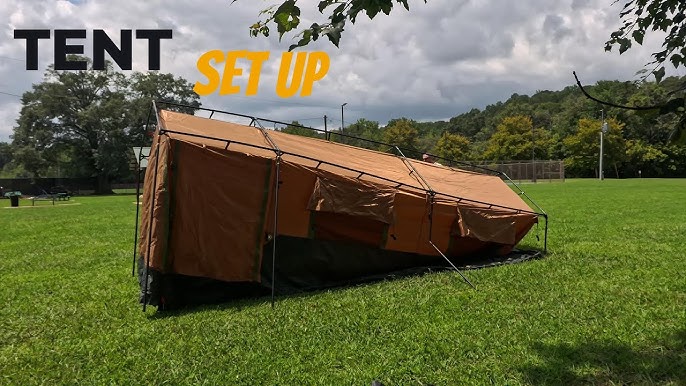
Setting up your Ozark Trail tent doesn’t have to be confusing or frustrating. Whether you’re heading out for a weekend camping trip or a longer outdoor adventure, knowing how to quickly and correctly pitch your tent can make all the difference.
Imagine arriving at your campsite, eager to relax, and having your shelter ready in minutes without stress. In this guide, you’ll discover simple, step-by-step instructions that anyone can follow—even if it’s your first time camping. Stick with me, and you’ll be enjoying the great outdoors under your Ozark Trail tent before you know it.

Credit: www.greensafaris.com
Choosing The Right Spot
Picking the right place to set up your Ozark Trail tent makes your camping safe and comfy. You need to look for a good spot that fits your needs.
This guide helps you find the best place to pitch your tent with ease and care.
Find A Flat Surface
Choose a flat area to keep your tent stable and comfortable. A flat surface stops you from sliding while you sleep and helps keep the tent secure.
- Look for smooth ground without rocks or roots
- Avoid slopes to prevent water pooling inside your tent
- Clear the area of sticks, stones, and debris
Avoid Hazards
Check your spot for dangers that could harm you or damage your tent. Safety is key for a good camping experience.
| Hazard | Reason to Avoid |
| Dead Trees or Branches | Could fall and hurt campers |
| Animal Trails | Might cause unexpected animal visits |
| Low-Lying Areas | Can flood during rain |
| Sharp Rocks | May tear tent floor or cause injuries |
Consider Wind Direction
Set your tent facing away from strong winds to protect it from damage. Knowing wind direction helps keep your tent steady and warm.
Tips for positioning your tent:
- Find out where the wind usually blows from.
- Place the tent door opposite the wind to reduce drafts.
- Use natural windbreaks like trees or bushes if possible.
- Stake down your tent firmly to resist gusts.
Credit: www.walmart.com
Unpacking Your Tent
Setting up your Ozark Trail tent starts with unpacking it carefully. Getting familiar with all parts helps the setup go smoothly.
Take your time to open the bag and check each piece before you start putting the tent together.
Check Tent Components
Look for every part included with your tent. Missing pieces can cause delays or problems during setup.
- Main tent body
- Rainfly cover
- Poles and connectors
- Stake pegs
- Guy lines
- Carry bag
- Instructions manual
Lay Out Tent Parts
Clear a flat area and spread out all the parts. This makes it easy to find what you need next.
| Part | Description |
| Main Tent Body | Fabric structure where you will sleep |
| Rainfly | Waterproof cover to protect from rain |
| Poles | Support rods to hold up the tent |
| Stake Pegs | Metal spikes to secure the tent to the ground |
| Guy Lines | Ropes for extra tent stability |
| Carry Bag | Storage bag for all tent parts |
Assembling The Frame
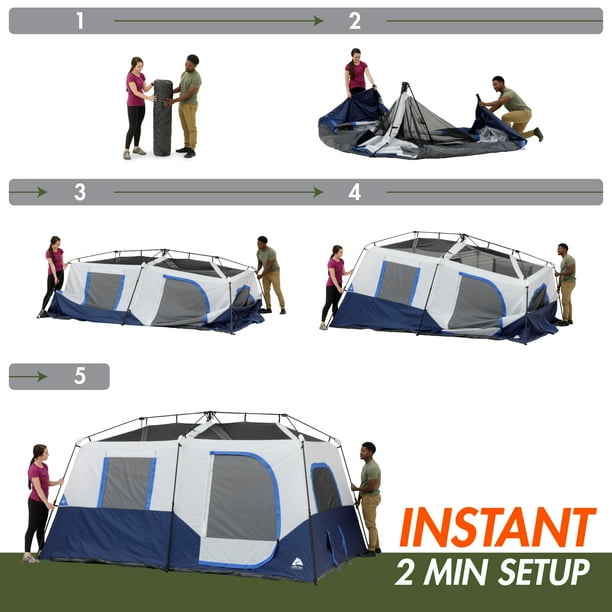
Setting up your Ozark Trail tent starts with building the frame. The frame holds the tent fabric and gives it shape.
Follow these steps to put together the frame quickly and correctly. This will make your tent strong and stable.
Connect Tent Poles
Begin by finding all the tent poles in the bag. The poles usually come in sections linked by elastic cords.
Pull the poles apart gently until all sections are straight and connected. Make sure each pole clicks into place.
- Locate all pole sections
- Unfold poles carefully
- Connect poles until you hear a click
- Check that poles are straight and secure
Insert Poles Into Tent Sleeves
Next, slide the connected poles into the tent sleeves. These sleeves are long fabric channels sewn on the tent body.
Start from one end and carefully push the poles through each sleeve. This guides the poles and shapes the tent.
- Find the tent sleeves on the tent fabric
- Insert the pole tip into the sleeve opening
- Push the pole through the entire length of the sleeve
- Repeat for all poles and sleeves
Securing The Tent Body
Setting up your Ozark Trail tent starts with securing the tent body. This step keeps your tent stable and ready for use.
Focus on attaching the tent to the poles and staking down the corners. These actions help protect your tent from wind and movement.
Attach Tent To Poles
First, connect the tent body to the poles. The poles give the tent its shape and support.
Slide the tent’s pole sleeves over each pole or clip the tent body onto the poles. Make sure each connection is tight and secure.
- Locate the pole sleeves or clips on the tent body
- Insert poles into sleeves or snap clips onto poles
- Check that poles are fully seated in grommets or pin ends
- Lift the tent slightly to test for stability
Stake Down Corners
Next, stake down the tent corners. This step anchors the tent to the ground and prevents it from moving.
Pull each corner tight and push a stake through the loop or grommet at the tent’s corner. Push the stake fully into the ground at an angle.
- Find the tent’s corner loops or grommets
- Pull the tent tight to remove slack
- Insert a stake through each loop or grommet
- Push stakes into the ground at a 45-degree angle
- Use a hammer or rock if the ground is hard
Adding The Rainfly
The rainfly is an important part of your Ozark Trail tent. It keeps you dry during rain and adds extra protection.
Setting up the rainfly correctly helps make your camping experience more comfortable and safe.
Position Rainfly Over Tent
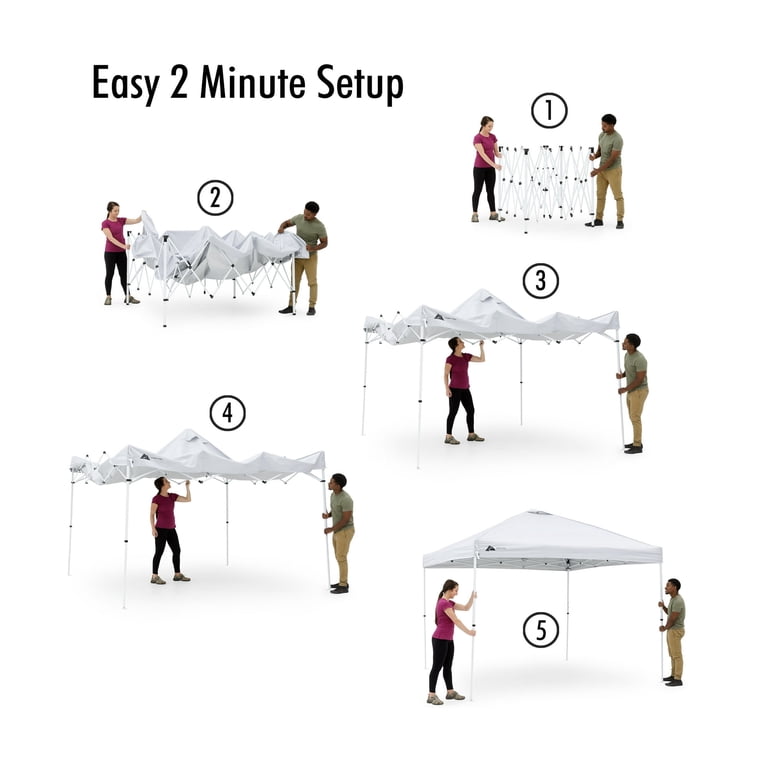
First, unfold the rainfly and hold it above the tent. Make sure the rainfly covers the entire tent roof.
Align the rainfly edges with the tent walls. Check that the rainfly doors match the tent doors.
- Spread the rainfly evenly over the tent
- Keep the rainfly taut to avoid sagging
- Match rainfly doors with tent openings
- Check for any twists or folds
Secure Rainfly With Clips And Stakes
Attach the rainfly clips to the tent frame. The clips hold the rainfly tight and prevent it from moving.
Use stakes to secure the rainfly edges to the ground. This stops wind from lifting the rainfly.
- Clip all rainfly hooks to the tent poles
- Pull rainfly edges out and stake them firmly
- Check that all clips and stakes are secure
- Adjust tension for a smooth rainfly surface
Final Adjustments
After setting up your Ozark Trail tent, it is important to make final adjustments. These help make sure your tent stays strong and safe.
Check each part carefully before you settle inside. This keeps you comfortable and protected from wind or rain.
Tighten Guy Lines
Guy lines keep your tent steady in wind. Tighten them to stop the tent from moving or sagging.
Pull each guy line firmly and adjust the tensioners. Make sure the lines are tight but not too tight to damage the fabric.
- Start with the front guy lines, then do the sides.
- Adjust lines evenly to keep the tent balanced.
- Check knots and tensioners for security.
Check For Stability
Walk around your tent and press on the poles gently. Check if the tent feels firm and does not wobble.
Make sure all poles are fully inserted and stakes are deep in the ground. Fix any loose parts before sleeping inside.
- Push down on tent corners to confirm stakes are secure.
- Look for gaps between tent fabric and ground.
- Adjust poles if you find weak spots.
Tips For Maintenance
Keeping your Ozark Trail tent in good shape helps it last longer. Proper care makes your camping trips easier and more comfortable.
Follow simple steps to clean and store your tent after each use. These tips prevent damage and keep your tent ready for the next adventure.
Cleaning After Use
Clean your tent soon after each trip. Dirt and moisture can cause mold and damage the fabric if left for too long.
Use a soft brush or cloth to remove dirt. Spot clean with mild soap and water if needed. Avoid harsh chemicals that can harm the material.
- Shake out loose dirt and leaves
- Use mild soap and water for stains
- Rinse well to remove all soap
- Let the tent air dry completely before packing
Proper Storage
Store your tent in a dry place away from direct sunlight. Heat and moisture can weaken the fabric and cause mildew.
Avoid keeping the tent packed tightly for long periods. Loosely fold or roll it to maintain the fabric and seams.
- Dry tent completely before storing
- Store in a cool, dry area
- Use a breathable storage bag instead of plastic
- Check tent periodically for signs of mold or damage
Credit: business.walmart.com
Frequently Asked Questions
How Do I Choose The Right Tent Site?
Selecting a flat, dry area is crucial for your Ozark Trail tent. Avoid low spots where water collects. Ensure the site is clear of debris and rocks. Choose a location with some shade if possible, and check for overhead hazards like branches.
What Tools Do I Need For Setup?
Setting up an Ozark Trail tent typically requires minimal tools. You’ll need the tent stakes, guy lines, and possibly a mallet. The mallet is useful for driving stakes into hard ground. Most essential tools are usually included in the tent package.
How Do I Properly Stake The Tent?
Start by securing the tent corners with stakes. Drive stakes at a 45-degree angle for best stability. Ensure the tent fabric is taut to prevent sagging. Use guy lines to enhance stability, especially in windy conditions.
Can I Set Up The Tent Alone?
Yes, setting up an Ozark Trail tent alone is possible. Follow the instructions carefully and take your time. Start by laying out the tent and assembling the poles. Use stakes and guy lines for stability. Practice will make the process easier.
Conclusion
Setting up your Ozark Trail tent can be simple and quick. Follow each step carefully and stay organized. Make sure all parts fit and are secure. Practice setting it up before your trip for confidence. A well-pitched tent keeps you safe and comfortable outdoors.
Enjoy your camping with less stress and more fun. Ready to explore? Your tent is now ready.