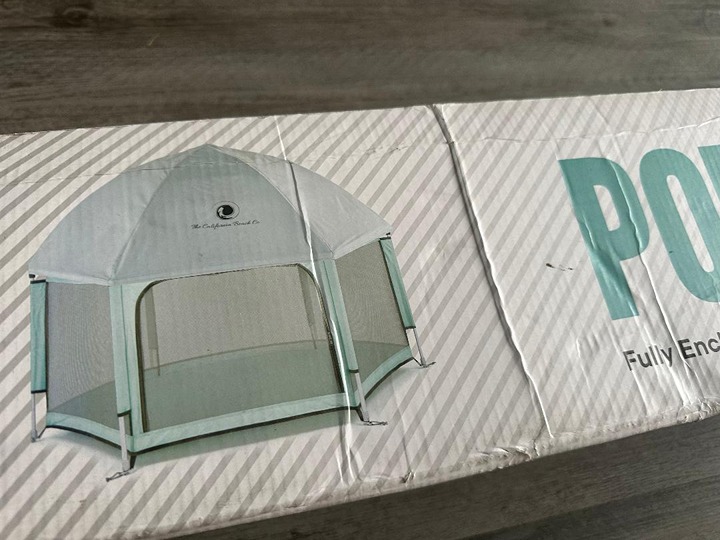
Setting up your California Beach Co tent doesn’t have to be a puzzle. Whether you’re gearing up for a day at the beach or a backyard hangout, having your tent ready quickly means more time to relax and enjoy.
In this guide, you’ll find simple, step-by-step instructions that anyone can follow. By the end, you’ll feel confident and ready to set up your tent effortlessly every time. Let’s get started and make your next outdoor experience smooth and stress-free!
Choosing The Right Location
Setting up your California Beach Co Tent starts with picking the best spot. The right location makes your time at the beach safer and more fun.
Think about where the tent will stand. Look for a place that is flat, safe, and easy to get to.
Check The Ground Surface
Look for a flat and firm ground to set your tent. Avoid rocky or soft sand that can make the tent unstable.
Hard sand or packed dirt works best. It helps keep the tent poles secure and stops the tent from moving.
- Choose flat areas without sharp rocks
- Avoid soft or loose sand that shifts easily
- Stay clear of wet or muddy spots
Consider Wind Direction
Check the wind before you set up the tent. Position the tent so the wind hits the side, not the front.
This helps keep the tent stable and stops it from blowing away. Use natural barriers like trees or dunes to block strong winds.
- Face the tent door away from the wind
- Use natural windbreaks if available
- Stake the tent securely into the ground
Find Shade And Accessibility
Pick a spot near shade if possible. It keeps the tent cooler during hot days and protects you from sunburn.
Also, choose a place easy to reach. This helps carry your gear and move around without trouble.
- Look for natural shade like trees or umbrellas
- Set up close to paths or parking areas
- Avoid spots far from water or restrooms
Unpacking The Tent Components
Before setting up your California Beach Co tent, start by unpacking all parts carefully. Make sure you have enough space to lay out everything.
Check each component as you unpack to avoid missing pieces. This will help your setup go smoothly.
Identify Poles And Stakes
The poles and stakes are the frame and anchors of the tent. Knowing which is which will save time during setup.
Poles are usually long and flexible. Stakes are shorter and pointed to secure the tent to the ground.
- Aluminum or fiberglass poles for the frame
- Thin metal stakes to hold the tent down
- Shock-corded poles that snap together
- Plastic or metal pegs for securing corners
Locate Tent Fabric And Accessories
The tent fabric includes the main body and rainfly. Accessories help with setup and comfort.
Look for these parts as you unpack to keep them organized and ready.
- Main tent body with mesh windows and doors
- Rainfly for extra weather protection
- Guy lines for stability in wind
- Carry bag for storage and transport
- Instructions or setup guide
Assembling The Tent Frame
Setting up the California Beach Co tent starts with building the frame. A strong frame keeps the tent stable and safe.
Follow these simple steps to assemble the tent frame correctly and quickly.
Connect Tent Poles
First, lay out all the tent poles on a flat surface. Check that you have all the pieces before you start.
Begin connecting the poles by matching their ends. They should fit snugly without forcing them.
- Identify poles by length and shape
- Push one pole end into the other
- Make sure connections are firm and straight
- Avoid bending or twisting poles too much
Secure Pole Joints
After connecting the poles, check all joints for tightness. Loose joints can cause the tent to collapse.
Use the provided clips or locks to secure each joint. This keeps the frame steady in wind and movement.
- Find all joint clips included in the kit
- Attach clips firmly around each pole joint
- Test joints by gently pulling the poles
- Reattach clips if any joint feels loose

Credit: www.amazon.com
Attaching The Tent Fabric
Attaching the tent fabric correctly makes your California Beach Co tent sturdy. This part of the setup helps protect you from wind and sun.
Follow the steps carefully to secure the fabric without damage. Proper attachment ensures the tent lasts longer and stays stable.
Drape The Tent Body
Start by unfolding the tent fabric and laying it over the frame. Make sure the fabric covers all sides evenly. Align the tent body so the door and windows match the frame openings.
- Unfold the tent fabric fully on a clean surface.
- Lift and place it gently over the frame poles.
- Adjust the fabric so it hangs evenly on all sides.
- Check that the door and window panels line up with the frame.
Clip Fabric To Poles
After draping, secure the fabric by clipping it to the poles. Use the attached clips to fasten the fabric tightly. This keeps the tent stable and prevents it from flapping in the wind.
| Clip Location | Purpose |
| Top corners | Hold fabric tight at frame peaks |
| Side poles | Secure fabric along the tent sides |
| Bottom edges | Keep fabric from lifting in wind |
Securing The Tent To The Ground
Setting up your California Beach Co tent on sandy ground needs extra care. Strong winds can lift or move the tent if it is not secured well. Use proper methods to keep your tent stable and safe.
This guide explains two key ways to secure your tent: driving stakes into sand and using guy lines for added stability.
Drive Stakes Into Sand
Driving stakes deep into the sand helps anchor the tent firmly. Use stakes designed for sandy or loose soil. Push or hammer them at an angle away from the tent.
- Choose long, wide stakes for better grip in sand.
- Insert stakes at a 45-degree angle away from the tent base.
- Push the stakes at least 12 inches deep into the sand.
- Check that the stakes feel secure by pulling gently.
- Attach tent loops tightly to the stakes.
Use Guy Lines For Stability
Guy lines add extra support by spreading tension across more points. They help the tent resist strong gusts and keep the structure steady.
| Guy Line Position | Purpose | Tips |
| Front corners | Prevent forward movement | Tighten evenly on both sides |
| Back corners | Stop backward pull | Use stakes placed well away from tent |
| Center points | Keep roof stable | Adjust tension to avoid sagging |
Adding The Canopy And Accessories
Setting up your California Beach Co tent is simple and quick. This guide focuses on adding the canopy and accessories. Follow these steps to enhance your tent’s shade and protection.
Adding the sunshade and side panels increases comfort. These parts help block the sun and wind effectively. Let’s look at how to attach them properly.
Attach The Sunshade
The sunshade adds extra coverage on the front or sides of the tent. It is easy to attach using the built-in Velcro strips and straps.
Start by unfolding the sunshade. Align it with the top frame of the tent. Use the Velcro to secure the sunshade in place. Then, fasten the straps around the poles for more support.
- Unfold the sunshade fully
- Align with the tent’s top frame
- Attach Velcro strips firmly
- Wrap and tighten the straps around poles
- Adjust for even coverage and tension
Set Up Side Panels
Side panels give your tent extra privacy and wind protection. They attach easily with zippers or Velcro along the tent’s frame.
First, position each side panel along the tent’s side. Connect the zippers or Velcro strips to secure the panel. Adjust the bottom edges to keep the panel tight and neat.
- Line up side panels with tent sides
- Zip or Velcro panels to the frame
- Ensure all fasteners are closed
- Tighten the bottom edges if needed
- Check for any gaps or loose spots
Tips For Quick And Easy Setup
Setting up your California Beach Co tent can be simple and fast. A little planning helps you enjoy your beach day more.
Follow these tips to save time and avoid stress when putting up your tent.
Practice Before The Beach Day
Try setting up your tent at home before you go to the beach. This helps you learn the steps and find any missing parts.
Practicing makes the real setup quicker. You will feel more confident and ready.
Use A Helper For Efficiency
Ask a friend or family member to help you set up the tent. Two people can work faster than one.
One person can hold the poles while the other secures the tent. This teamwork makes the process smooth and easy.

Credit: www.walmart.com
Maintaining Your Tent After Use
Taking care of your California Beach Co tent after each use helps it last longer. Proper maintenance keeps the fabric and structure strong for many beach trips.
Two important steps are cleaning sand and debris and drying the tent before storage. These steps prevent damage and mold growth.
Clean Sand And Debris
Remove all sand, leaves, and dirt from your tent to avoid wear and tear. Sand can scratch the fabric and damage zippers if left inside.
- Shake the tent gently to remove loose sand.
- Use a soft brush or cloth to sweep away dirt.
- Check corners and seams for trapped debris.
- Clean zippers carefully to prevent clogging.
Dry Before Storage
Always dry your tent completely before packing it away. Moisture can cause mold and bad smells if stored while damp.
| Drying Tips | Details |
| Air Dry | Set up the tent in a shaded area to dry naturally. |
| Check All Areas | Look under flaps and inside pockets for moisture. |
| Use a Towel | Pat dry spots that take longer to air dry. |
| Store Loosely | Fold the tent loosely to avoid creases that trap moisture. |

Credit: www.et-arts.com
Frequently Asked Questions
How Do I Set Up My California Beach Co Tent?
To set up your California Beach Co tent, first lay out all parts. Assemble the frame, attach the canopy, and secure it with stakes and ropes.
What Tools Are Needed To Assemble The Tent?
No special tools are needed. The tent includes all required parts for easy hand assembly and staking.
How To Secure The Tent In Windy Conditions?
Use all provided stakes and guy ropes. Add extra weights or sandbags on tent legs for added stability.
Can I Set Up The Tent Alone?
Yes, the tent is designed for easy solo setup. However, having a helper can speed up the process.
Conclusion
Setting up a California Beach Co Tent is easy with this guide. Just follow the steps carefully. Remember to check all parts before starting. Practice makes perfect, so don’t rush. Enjoy the shade and comfort it brings. Perfect for sunny beach days or camping trips.
Whether with friends or family, it’s a great addition. You’ll love the convenience and ease. Stay organized and keep your tent clean. Now you’re all set for a fun beach day. Enjoy your time outdoors!