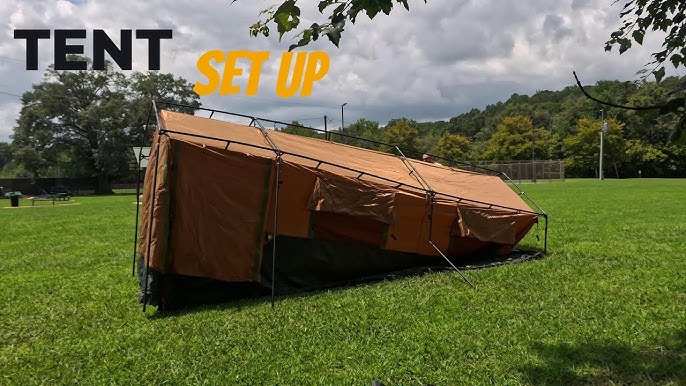
Setting up your Ozark Trail tent doesn’t have to be tricky or time-consuming. Whether you’re a first-timer or just need a quick refresher, this guide will walk you through every step clearly and simply.
Imagine having your tent ready in minutes, giving you more time to enjoy the outdoors and less time struggling with poles and stakes. Ready to make your camping experience smoother and more fun? Keep reading to learn how to set up your Ozark Trail tent quickly and easily.
Choosing The Right Spot
Picking the right spot for your Ozark Trail tent helps you have a safe and fun camping trip. A good place keeps you dry, comfortable, and protected from weather.
Look carefully at the ground and the surroundings before setting up your tent. This guide will help you find the best spot.
Flat And Clear Ground
Find a flat area to pitch your tent. It makes sleeping easier and keeps the tent stable. Avoid hills or slopes where water can run inside.
Clear the ground of rocks, sticks, and debris. These can poke through the tent floor or make sleeping uncomfortable.
- Check the ground for flatness
- Remove stones and sharp objects
- Clear tall grass or sticks
Avoiding Wind And Water
Set up your tent away from strong wind paths. Use natural barriers like trees or bushes to block the wind. This helps keep your tent warm and steady.
Avoid low spots where water can collect during rain. Water pools can flood your tent and cause damage.
- Face the tent door away from the wind
- Find natural windbreaks like trees
- Stay on higher ground to avoid water pooling
Sunlight And Shade Considerations
Set your tent where it gets morning sun. This helps dry dew and moisture inside your tent. Afternoon shade keeps it cool in hot weather.
A good mix of sun and shade makes camping more comfortable. Avoid full sun spots to prevent overheating during the day.
- Choose spots with morning sunlight
- Look for shade in the afternoon
- Avoid places with too much direct sun

Credit: www.greensafaris.com
Unpacking And Organizing
Setting up your Ozark Trail tent starts with unpacking and organizing all parts. This process helps you find everything quickly and avoid missing pieces.
Taking time to sort and prepare your equipment makes pitching the tent easier and faster. Here is how to begin.
Checking Tent Components
Open the tent bag and spread out all items on a clean surface. Check each part carefully to confirm you have everything needed.
- Main tent body
- Rainfly
- Poles
- Stakes
- Guy lines
- Footprint or tarp (if included)
- Carry bag
Sorting Poles And Stakes
Organize poles by length and type before assembly. Group the stakes together by size and shape. This helps speed up setup and reduces confusion.
| Item | Description |
| Poles | Usually color-coded and connected by elastic cords |
| Stakes | Metal or plastic pins used to secure the tent to the ground |
| Guy lines | Ropes or cords for extra tent stability |
Preparing The Footprint Or Tarp
Lay out the footprint or tarp on the ground where you plan to set up. This protects the tent floor from dirt and damage.
- Pick a flat, clear area free of rocks and sticks
- Align the footprint with the tent shape
- Leave some extra space around edges
- Secure corners with stakes if windy
Setting Up The Tent Body
Setting up the tent body is the first step to enjoy your Ozark Trail tent. It includes laying out the tent, assembling the poles, and inserting them into the sleeves. These steps prepare the tent frame for the rainfly and stakes.
Follow these simple instructions to set up the tent body correctly. Doing it right ensures the tent stands firm and lasts longer during your camping trip.
Laying Out The Tent
Find a flat and clear area to set up your tent. Remove any sharp objects like rocks or sticks. This protects the tent floor from damage.
Unfold the tent body and spread it out on the ground. Make sure the tent door faces your preferred direction for easy access.
- Choose a level spot without debris
- Unfold the tent completely
- Position the door where you want it
Assembling The Poles
Take the tent poles from the bag. Each pole is connected by an elastic cord inside. Gently pull the poles apart to assemble them.
Make sure all pole sections are fully connected. This keeps the poles strong and ready to hold up the tent.
- Remove poles from the bag
- Separate poles by pulling gently
- Connect all pole sections firmly
Inserting Poles Into Tent Sleeves
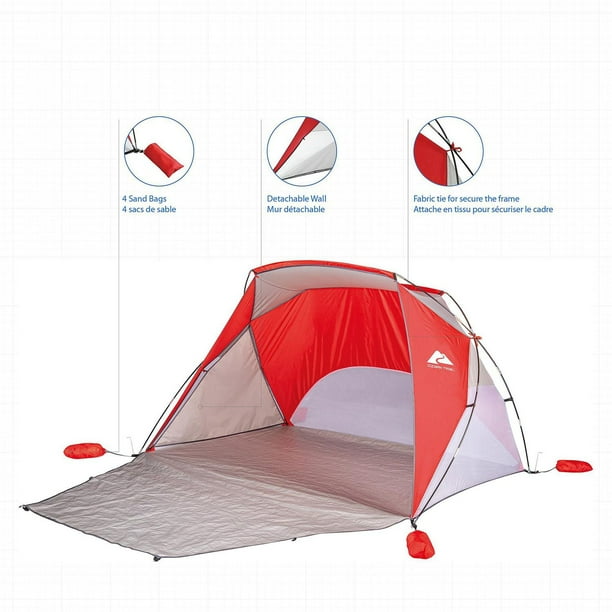
Locate the long fabric sleeves on the tent body. These sleeves guide the poles to form the tent frame. Insert the poles into these sleeves one at a time.
Push the poles all the way through each sleeve. Once all poles are in place, gently flex them to stand the tent up.
- Find the pole sleeves on the tent
- Slide each pole through the sleeves
- Bend poles to raise the tent body
Credit: www.walmart.ca
Securing The Tent
Securing your Ozark Trail tent keeps it stable and safe in wind and rain. Proper setup helps prevent damage and keeps you comfortable inside.
Focus on staking corners, adjusting tension, and attaching guy lines. These steps make your tent strong and steady.
Staking Down Corners
Start by staking the four corners of the tent. This holds the tent base firmly to the ground.
Push the stakes at a 45-degree angle away from the tent. Use a hammer or rock to drive stakes deep.
- Place stakes through the corner loops or grommets
- Keep stakes tight to avoid loose fabric
- Check all corners for even tension
Adjusting Tension
Adjust the tent fabric to remove slack. Tight fabric reduces flapping in the wind.
Pull the tent walls evenly and tighten any straps or cords. Check the floor and roof for wrinkles.
- Use adjustable straps or buckles to tighten
- Keep the tent floor flat for comfort
- Re-tighten if fabric loosens after wind or rain
Attaching Guy Lines
Guy lines help secure the tent in strong wind. Attach them to loops on the tent fly or body.
Stake the guy lines out from the tent at a 45-degree angle. Tighten the lines to keep the tent stable.
- Use guy line tensioners for easy adjustments
- Place stakes firmly in the ground
- Check lines regularly for tightness
Adding The Rainfly
Setting up your Ozark Trail tent includes adding the rainfly. The rainfly protects the tent from rain and provides extra shade.
Follow these simple steps to correctly position and secure the rainfly. This ensures maximum protection and comfort.
Positioning The Rainfly
Unfold the rainfly and identify the front and back. Align it with the tent’s entrance.
Make sure the rainfly covers the tent evenly. Check that all corners are aligned properly.
Securing With Clips And Straps
Attach the clips on the rainfly to the tent poles. This keeps the rainfly in place.
Use the straps to tighten the rainfly. Ensure the straps are snug to prevent movement in the wind.
- Secure all clips before tightening straps
- Double-check for any loose areas
- Adjust as necessary for a snug fit
Ventilation Tips
Proper ventilation keeps the tent fresh. Open vents on the rainfly for airflow.
Avoid closing all vents, even in rain. This helps reduce condensation inside the tent.
- Adjust vents based on weather
- Ensure vents are not blocked
- Use mesh windows to increase airflow
Final Checks And Tips
Setting up your Ozark Trail tent is almost done. Taking time for final checks ensures safety and comfort. These tips help you enjoy your camping experience fully.
Use this guide to inspect your tent’s stability, organize your space inside, and pack essentials for a quick setup next time.
Inspecting Stability
Check all poles and stakes to make sure they hold tight. Look for loose fabric or sagging areas. Adjust and tighten ropes and stakes as needed to keep the tent firm against wind or rain.
- Push all poles fully into connectors.
- Drive stakes deep into the ground.
- Tighten guy lines evenly on all sides.
- Check the rainfly for proper attachment.
- Look for any tears or holes in fabric.
Organizing Inside Space
Organize your gear to keep the tent tidy and accessible. Use pockets and gear lofts to store smaller items. Keep sleeping bags and pads arranged for easy access and comfort.
| Area | Purpose |
| Gear Loft | Store lights, phones, or small tools |
| Pockets | Hold maps, glasses, or snacks |
| Floor Space | Keep sleeping bags and pads neatly placed |
| Entrance | Clear for easy in and out |
Packing Essentials For Quick Setup
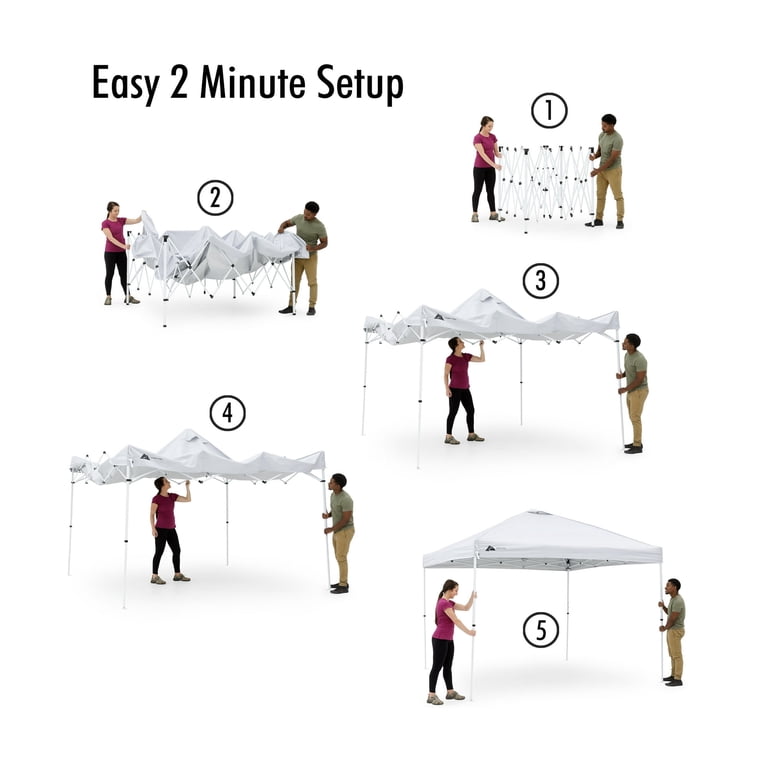
Prepare the right gear for fast and easy tent setup next time. Keep your stakes, poles, and rainfly in one bag. Store a small repair kit and a mallet nearby.
- All tent poles and connectors
- Stakes and guy lines
- Rainfly and tarp
- Repair kit (patches, extra clips)
- Mallet or hammer for stakes
Credit: www.walmart.com
Frequently Asked Questions
How Do I Start Setting Up An Ozark Trail Tent?
Begin by selecting a flat, clear area. Lay out the tent and stake the corners. Assemble the poles and insert them into the tent sleeves or clips. Raise the tent by securing poles and tightening the fabric.
What Tools Are Needed To Set Up An Ozark Trail Tent?
No special tools are required. The tent kit includes poles, stakes, and a rainfly. You only need your hands to assemble and secure the tent properly.
How Do I Secure The Ozark Trail Tent In Windy Conditions?
Use all provided stakes and guy lines. Angle stakes away from the tent for better hold. Tighten guy lines and check stability regularly during strong winds.
Can I Set Up The Ozark Trail Tent Alone?
Yes, the tent is designed for easy solo setup. Follow the instructions carefully, and take your time to ensure proper assembly.
Conclusion
Setting up your Ozark Trail tent is easier than it seems. Follow each step carefully, and you will have a sturdy shelter in no time. Practice makes perfect, so try setting it up at home first. Enjoy the outdoors with confidence and comfort.
A good tent means better camping nights and happy memories. Take your time, stay organized, and your camping trip will be a success. Ready for your next adventure?