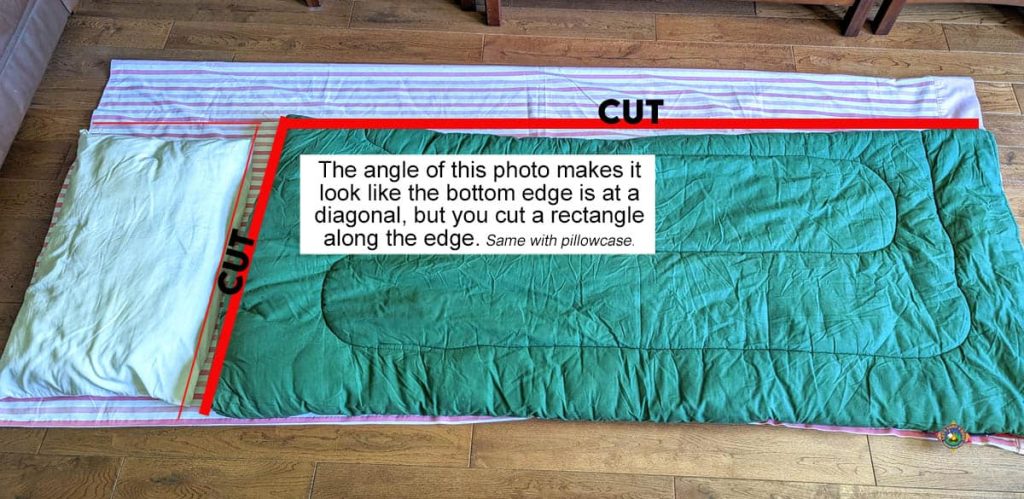
Are you ready to make your camping trips more comfortable without spending a fortune? Sewing your own sleeping bag liner is easier than you think, and it can keep you warmer and cleaner on every adventure.
Imagine having a liner tailored exactly to your needs, using fabrics you love. In this guide, you’ll learn step-by-step how to sew a sleeping bag liner that fits perfectly and feels great. Keep reading, and by the end, you’ll have a cozy, custom liner ready for your next night under the stars.
Materials Needed
Making a sleeping bag liner needs certain materials. Choosing the right supplies helps create a liner that is comfortable and durable.
This guide covers the fabric choices, sewing tools, and extra accessories you might want for your project.
Choosing The Right Fabric
Select fabric that is soft, lightweight, and breathable. Cotton, flannel, or silk are popular choices. The fabric should feel gentle on the skin and keep you warm without adding bulk.
- Cotton: soft and easy to wash
- Flannel: warm and cozy for cold nights
- Silk: light and smooth, great for summer
- Nylon or polyester: quick-drying and durable
Essential Sewing Tools
Having the right tools helps you sew accurately and finish faster. Basic tools are enough for a simple liner.
| Tool | Purpose |
| Sewing machine | Stitches fabric pieces together |
| Fabric scissors | Cut fabric cleanly |
| Measuring tape | Measure fabric size |
| Pins or clips | Hold fabric pieces in place |
| Thread | Matches fabric color for stitching |
| Iron | Press seams flat |
Optional Accessories
Extra items can make your sleeping bag liner more useful or easier to care for. These accessories are not required but can improve the final product.
- Zipper: to open and close the liner easily
- Drawstring: to secure the liner inside the sleeping bag
- Bias tape: to finish edges neatly
- Fabric marker: to mark cutting lines
- Seam ripper: to fix stitching mistakes
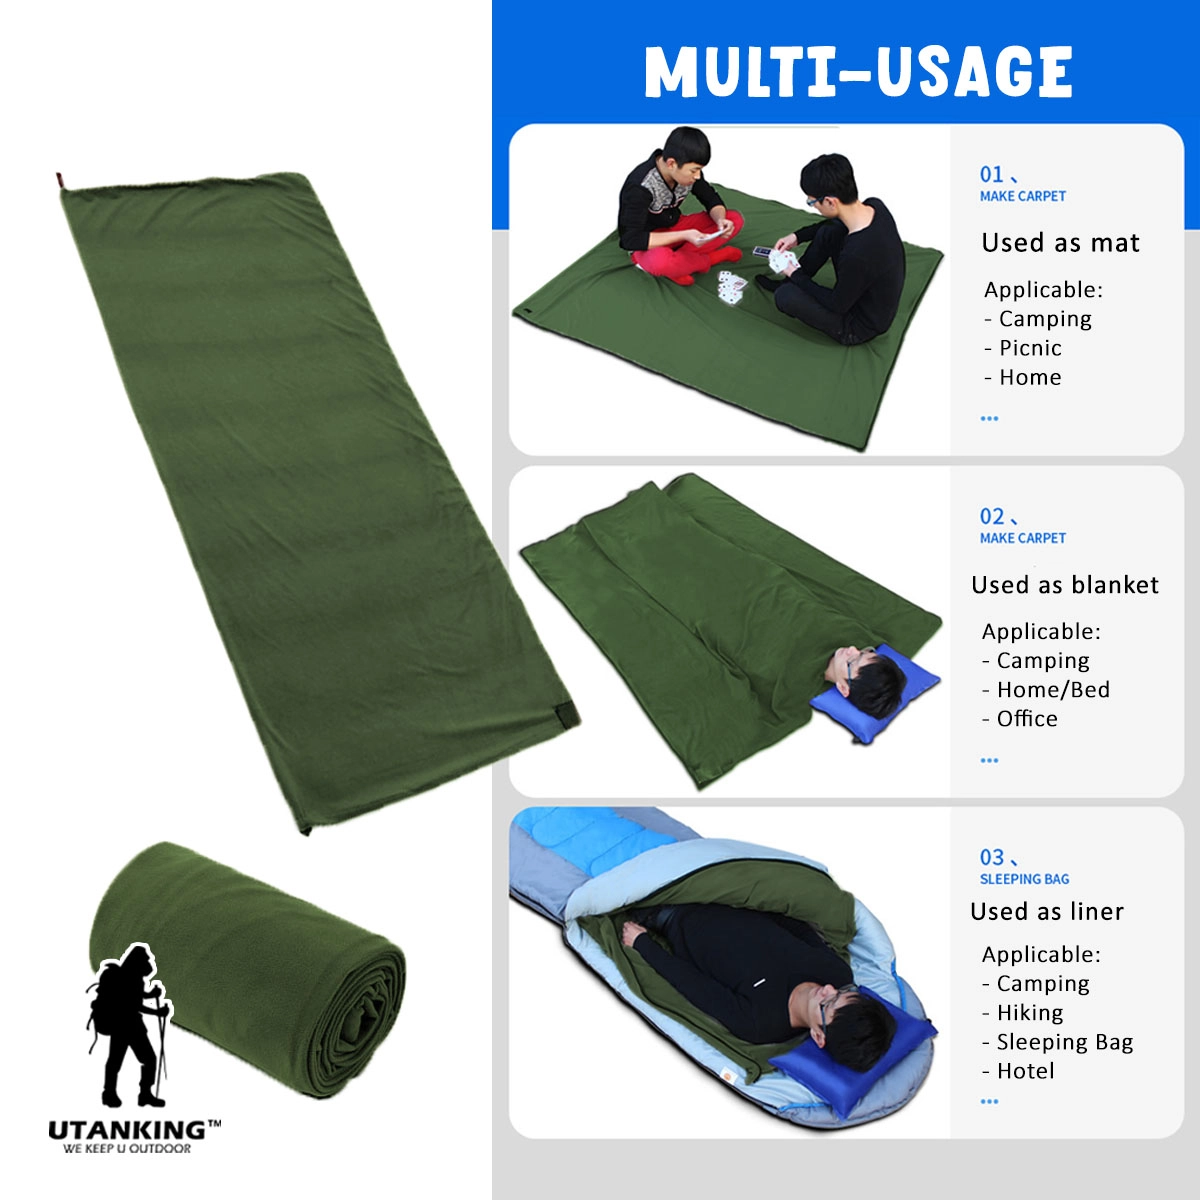
Credit: www.utanking.com
Preparing The Fabric
Sewing a sleeping bag liner is a fun project. It keeps your sleeping bag clean and adds warmth.
The first step is preparing the fabric. This ensures your liner is comfortable and fits well.
Measuring Your Sleeping Bag
To start, measure your sleeping bag carefully. This helps you cut the fabric to the right size.
- Lay your sleeping bag flat on the floor.
- Use a measuring tape to measure its length and width.
- Write down the measurements on a piece of paper.
Cutting Fabric Pieces
After measuring, it’s time to cut the fabric. Be careful to cut straight lines for neat edges.
| Fabric Type | Recommended Width | Recommended Length |
| Cotton | Same as bag width | Same as bag length + 10 cm |
| Fleece | Same as bag width | Same as bag length + 15 cm |
| Silk | Same as bag width | Same as bag length + 5 cm |
Pre-washing And Ironing
Pre-washing the fabric is important. It prevents shrinkage later and makes sewing easier.
Here are some tips for pre-washing:
- Use cold water and a gentle cycle.
- Air dry to prevent damage.
- Iron the fabric for smoothness after drying.
Basic Sewing Techniques
Sewing a sleeping bag liner needs simple skills. You can do it with basic sewing techniques.
We will explain setting up your sewing machine, straight stitch tips, and seam finishing methods.
Setting Up Your Sewing Machine
First, clean your sewing machine. Remove dust and old threads. This helps the machine run smoothly.
Use the right needle for your fabric. Choose a sharp needle for lightweight fabrics like cotton or nylon.
- Thread the machine carefully following the guide.
- Set the stitch length to about 2.5 mm for seams.
- Use polyester thread for strength and flexibility.
Straight Stitch Tips
The straight stitch is the most common stitch for sewing liners. Keep your stitches even and straight for a neat seam.
Guide the fabric gently without pulling. Let the machine feed the fabric at its own pace.
- Use a stitch length of 2.5 mm for strong seams.
- Backstitch at the start and end of a seam to lock stitches.
- Press seams flat with an iron for a clean finish.
Seam Finishing Methods
Finishing seams helps stop fabric edges from fraying. It makes your liner last longer.
Choose a seam finish based on your tools and fabric type.
- Use a zigzag stitch along the raw edge to prevent fraying.
- Try pinking shears to cut edges with a zigzag pattern.
- Fold edges twice and sew a topstitch for a clean finish.
Constructing The Liner
Sewing a sleeping bag liner makes your camping gear warmer and cleaner. The liner adds an extra layer between you and the sleeping bag.
Constructing the liner involves sewing fabric pieces, adding closures, and shaping the foot area. These steps help you make a comfortable and useful liner.
Sewing The Main Body
Cut the fabric into two rectangular pieces for the front and back. Use lightweight, breathable fabric like cotton or silk for comfort.
Sew the two pieces together along three sides, leaving one long side open. Use a straight stitch for a strong seam. Finish edges with a zigzag stitch or serger to prevent fraying.
Adding A Drawstring Or Zipper
Add a drawstring or zipper to close the liner at the open end. A drawstring lets you tighten the liner around your shoulders to keep warmth in.
For a zipper, sew it along the open edge for easy entry and exit. Choose a lightweight zipper that won’t add bulk to the liner.
- For drawstring: sew a fabric tube along the open edge as a casing.
- Thread the drawstring through the casing using a safety pin.
- For zipper: pin the zipper along the open edge before sewing.
- Use a zipper foot to sew close to the teeth.
Creating A Foot Box
A foot box shapes the liner at the bottom for more comfort. Cut two trapezoid-shaped pieces to match the width of the liner bottom.
Sew these pieces together to form a pouch. Attach the foot box to the bottom edge of the liner’s main body. This gives your feet more space and warmth.
- Cut two identical trapezoids for the foot box.
- Sew the two pieces together along three sides.
- Pin the foot box to the liner’s bottom edge.
- Sew the foot box to the liner, matching edges carefully.
Customizing Your Liner
Making your own sleeping bag liner lets you add features that suit your needs. You can choose the style, materials, and extra details.
Customizing helps improve comfort and usefulness. Small changes can make a big difference on your trips.
Adding Pockets
Pockets add storage space inside your liner. You can keep small items like a phone, flashlight, or keys close by.
- Choose lightweight fabric for pockets
- Sew pockets inside near the chest or hips
- Make pockets with zippers or Velcro for security
- Use mesh pockets to reduce weight and add breathability
Choosing Insulation Options
Pick the right insulation to stay warm without feeling bulky. Different materials offer various warmth and weight benefits.
| Insulation Type | Warmth Level | Weight | Care |
| Fleece | Medium | Light | Machine washable |
| Down | High | Very light | Dry clean or special wash |
| Synthetic | Medium-high | Moderate | Machine washable |
| Wool | Medium | Heavy | Hand wash preferred |
Personalizing With Colors And Patterns
Choose colors and patterns that match your style. Bright colors help find your bag in low light. Patterns add a fun touch.

Credit: gearjunkie.com
Care And Maintenance
A sleeping bag liner keeps you warm and clean during camping trips. Proper care helps it last longer and stay fresh.
Follow simple washing, storage, and repair tips to keep your liner in good shape.
Washing Instructions
Wash your sleeping bag liner carefully to avoid damage. Use mild detergent and cold water for the best results.
- Turn the liner inside out before washing.
- Use a gentle cycle on your washing machine.
- Avoid bleach and fabric softeners.
- Rinse thoroughly to remove all soap.
- Air dry the liner by hanging it in a shaded area.
Storage Tips
Store your sleeping bag liner properly to keep it clean and dry. Avoid folding it tightly for long periods.
| Storage Method | Details |
|---|---|
| Loose Bag | Store in a large cotton or mesh bag to allow airflow. |
| Dry Place | Keep away from moisture to prevent mold and mildew. |
| Away from Sunlight | Prevent fabric fading and weakening by avoiding direct sun. |
Repairing Small Tears
Fix small tears quickly to stop them from getting bigger. Use simple tools and materials at home.
- Clean the area around the tear with mild soap and water.
- Use a fabric patch or repair tape designed for sleeping bags.
- Apply the patch on the inside for a smooth outer surface.
- Press firmly and let it dry before use.
- Check repaired areas regularly for wear.

Credit: www.advnture.com
Frequently Asked Questions
What Materials Are Best For Sewing A Sleeping Bag Liner?
Use lightweight, breathable fabrics like cotton, flannel, or silk. These materials ensure comfort and help regulate temperature inside the liner.
How Do I Measure Fabric For A Sleeping Bag Liner?
Measure your sleeping bag’s length and width, then add a few inches for seams. This ensures a proper, comfortable fit inside the bag.
Can I Sew A Sleeping Bag Liner Without A Sewing Machine?
Yes, hand sewing is possible but slower. Use strong thread and tight stitches for durability. A sewing machine speeds up the process.
How To Add A Zipper To A Sleeping Bag Liner?
Choose a zipper matching the liner’s length. Sew it along one side or the bottom for easy entry and exit. Ensure it’s secure and smooth.
Conclusion
Sewing a sleeping bag liner is easier than it seems. You only need basic materials and simple steps. This project saves money and adds comfort on trips. A homemade liner also keeps your sleeping bag clean. Try different fabrics to find what suits you best.
With practice, your sewing skills will improve quickly. Enjoy warmer nights and better rest outdoors. Start your sewing project today and sleep well tomorrow.