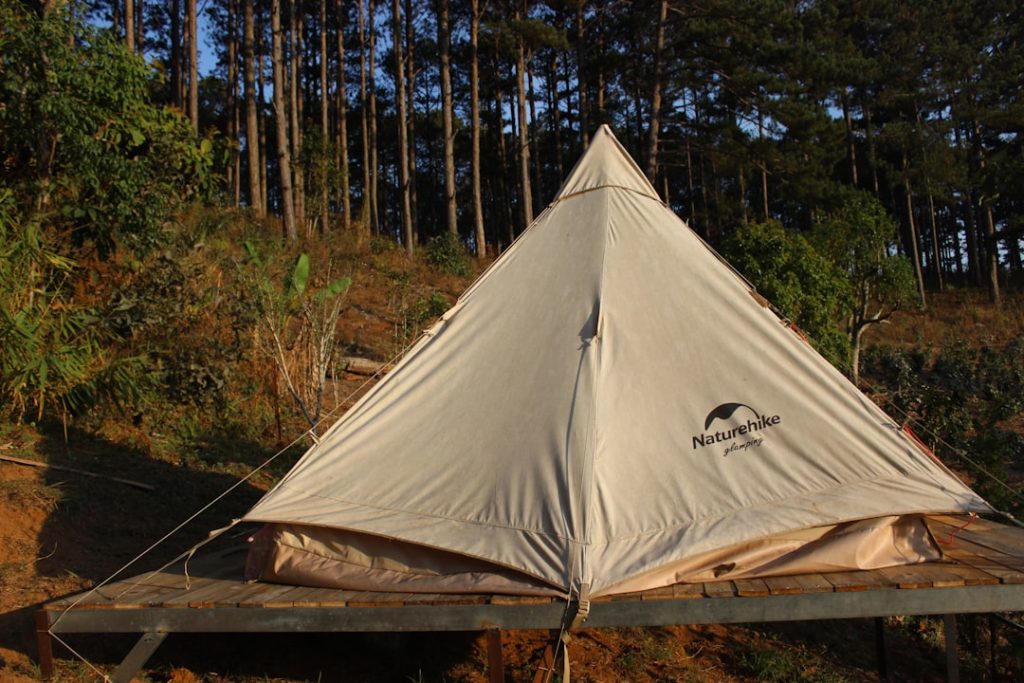
Are you ready to create a cozy hideaway that’s perfect for kids, guests, or even your own quiet moments? Sewing a teepee tent might sound tricky, but with the right steps, you can easily make one yourself.
Imagine having a beautiful, custom tent that fits your style and space perfectly. In this guide, you’ll discover simple techniques and insider tips to sew your own teepee tent from start to finish. Keep reading—you’re just a few stitches away from crafting a unique space that brings comfort and charm to any room or backyard.
Choosing Materials
Picking the right materials is important for making a strong teepee tent. Good materials keep the tent safe and comfortable.
This guide helps you choose fabric, support poles, and sewing supplies for your teepee project.
Fabric Options
Choose fabric that is thick and durable. Cotton canvas is a popular choice. It is strong and easy to sew.
You can also use polyester blends. These fabrics dry quickly and resist tears. Avoid thin or stretch fabrics.
- Cotton canvas: strong and natural
- Polyester blends: lightweight and quick-dry
- Duck cloth: heavy and durable
- Avoid stretchy or very thin fabrics
Support Poles
Support poles hold the tent up and shape it. Wood poles are traditional and look nice. They are easy to find.
Metal poles are strong and light. They last longer but can be harder to cut. Bamboo poles are eco-friendly and flexible.
- Wood poles: sturdy and natural
- Metal poles: durable and light
- Bamboo poles: flexible and eco-friendly
- Choose poles about 6 to 7 feet tall
Sewing Supplies
You need strong thread to hold the fabric well. Polyester thread works best for outdoor tents.
Use sharp scissors and pins to cut and hold fabric pieces. A heavy-duty sewing needle helps with thick fabric.
- Polyester thread for strength
- Sharp fabric scissors
- Pins to hold fabric in place
- Heavy-duty sewing needle
- Measuring tape for accuracy
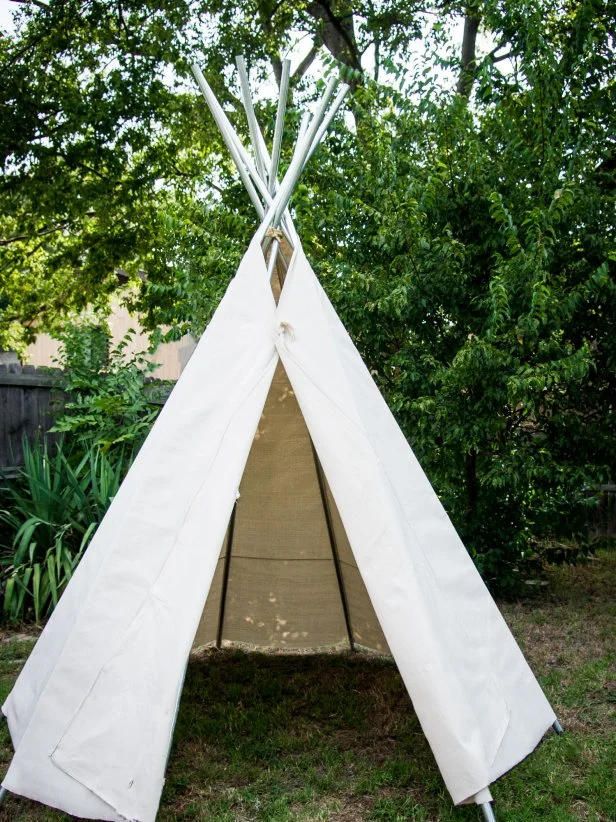
Credit: www.hgtv.com
Measuring And Cutting Fabric
Creating a teepee tent can be a fun project. Begin with measuring and cutting your fabric correctly.
Accurate measurements ensure your tent stands tall and looks good. Let’s start with the basics.
Determining Tent Size
First, decide how big your teepee needs to be. Think about how many people it should fit.
Measure the height and width you desire. This will guide your fabric cutting.
- Height: Measure from the floor to the top point.
- Width: Measure the base width for stability.
- Consider adding a little extra for seams.
Marking Fabric Pieces
Lay your fabric flat on a large surface. Use chalk or a fabric marker to outline your pieces.
Mark clearly to avoid mistakes. Double-check measurements before cutting.
- Use a ruler for straight lines.
- Label each piece for easy assembly.
- Ensure you have enough fabric for all panels.
Cutting Tips
Use sharp scissors to cut your fabric. This helps prevent frayed edges.
Cut slowly and follow your markings carefully. Keep pieces organized as you cut.
- Double-check each piece after cutting.
- Keep fabric taut while cutting for cleaner lines.
- Use a rotary cutter for long straight cuts.
Sewing The Tent Panels
Sewing the panels for your teepee tent is a key part of building it. This step joins the fabric pieces to form the tent’s shape.
Careful sewing ensures your tent is strong and lasts long. Focus on stitching seams, reinforcing edges, and making door flaps.
Stitching Seams
Start by placing two fabric panels with the right sides together. Sew along the edges using a straight stitch. Keep your stitches tight and even.
Use a seam allowance of about 1/2 inch. This gives enough fabric to strengthen the seam and prevent fraying.
Reinforcing Edges
Edges are weak points in the tent. Add extra strength by reinforcing them. Fold the fabric edges twice and sew along the fold.
- Fold edges 1/4 inch twice to hide raw fabric
- Sew close to the inner fold for a clean finish
- Use a zigzag stitch or bias tape for extra durability
Creating Door Flaps
Cut a slit in one panel for the door. Hem the edges to stop fraying. Then, add fabric strips to make flaps that open and close easily.
| Door Flap Parts | Description | Sewing Tip |
|---|---|---|
| Flap Edges | Fold and hem all edges of the door slit | Sew slowly to keep fabric flat |
| Ties or Buttons | Add closures to hold the door open | Attach securely to avoid tearing |
| Flap Overlap | Make flaps overlap to block wind | Use extra fabric for better coverage |

Credit: www.fleecefun.com
Assembling The Teepee Frame
Building the frame is the first step to sewing a teepee tent. The frame holds the fabric and gives the tent its shape.
Using wooden poles or dowels, you create a stable structure that will support the fabric cover. This guide shows you how to arrange and secure the poles.
Arranging Poles
Start by choosing 4 to 6 long poles of equal length. These will form the main frame of the teepee.
Lay the poles on the ground in a circle shape. Make sure the bottoms of the poles are spread evenly to balance the tent.
- Use poles that are at least 6 feet long
- Place the poles so the tops meet in the center
- Leave enough space between poles for the tent door
Securing Pole Tops
Bring the tops of all poles together at one point. This creates the peak of the teepee.
Tie the poles tightly using strong rope or twine. Wrap the rope several times around the pole tops to hold them firmly.
- Use a tight knot like a clove hitch or square knot
- Check that the poles do not slip after tying
- Leave some rope length to adjust if needed
Attaching Fabric To Frame
Drape the teepee fabric over the frame, starting at the tied pole tops. Spread the fabric evenly around the poles.
Secure the fabric edges to the bottom of the poles using clips, ties, or stitches. Make sure the fabric is tight to avoid sagging.
- Align fabric seams with pole gaps
- Use fabric ties or Velcro to fasten at the bottom
- Cut a door flap in the fabric if needed
Adding Finishing Touches
After sewing the main structure of your teepee tent, adding the final details can make it both beautiful and practical.
These finishing touches help improve comfort and style for your teepee space.
Decorative Elements
Decorations give your teepee a cozy and unique look. You can use fabric paint, ribbons, or patches to add personality.
- Attach colorful tassels or pom-poms along the edges
- Sew on patches with fun shapes or patterns
- Use fabric markers to draw simple designs
- Add a small flag or banner at the top pole
Ventilation Options
Good airflow keeps the inside fresh and prevents stuffiness. Add vents or windows to your teepee for air circulation.
| Vent Type | Description | Benefits |
| Mesh Window | Window with mesh fabric | Keeps bugs out, allows air in |
| Flap Vent | Foldable fabric flap | Can open or close for airflow control |
| Roof Vent | Small opening at the top | Lets hot air escape easily |
Flooring Ideas
Flooring adds comfort and warmth inside the teepee. Choose soft and durable materials for a nice base.
Try these flooring options for your teepee:
- Thick fleece blankets for softness
- Outdoor rugs for durability and easy cleaning
- Foam mats to add cushioning
- Layered quilts for a cozy feel

Credit: www.fleecefun.com
Maintaining Your Teepee Tent
Keeping your teepee tent in good shape makes it last longer. Regular care helps avoid big problems and keeps it safe to use.
This guide covers simple ways to clean, store, and fix your teepee tent. Follow these tips to enjoy your tent for many adventures.
Cleaning Tips
Clean your teepee tent after each use. Remove dirt and dust with a soft brush or cloth. Use mild soap and water for stains.
- Spot clean with a damp cloth and mild soap
- Do not use harsh chemicals or bleach
- Rinse well to remove soap residue
- Let the tent dry completely before storage
Storage Advice
Store your teepee tent in a dry, cool place. Avoid damp areas that cause mold or mildew. Use a breathable storage bag if possible.
| Storage Condition | Why It Matters |
|---|---|
| Dry | Prevents mold and bad smells |
| Cool | Protects fabric and poles from heat damage |
| Dark or shaded | Stops fading from sunlight |
| Breathable bag | Allows air flow to avoid moisture build-up |
Repairing Small Damages
Fix small tears and holes quickly to keep your tent strong. Use fabric patches or sewing kits made for outdoor gear.
- Clean the damaged area gently
- Cut a patch slightly larger than the tear
- Apply fabric glue or sew the patch in place
- Let the repair dry fully before use
Frequently Asked Questions
What Materials Are Needed To Sew A Teepee Tent?
You need fabric, wooden poles, sewing thread, scissors, measuring tape, and fabric chalk. Choose durable, breathable fabric for comfort and stability. Wooden poles should be sturdy and straight for proper support.
How Long Does It Take To Sew A Teepee Tent?
Sewing a teepee tent usually takes 3 to 5 hours. Time depends on your sewing skills and tent size. Preparing materials and measuring accurately can save time during assembly.
What Sewing Techniques Work Best For Teepee Tents?
Use straight stitching for seams and reinforced stitching at stress points. Double stitching enhances durability. Always pre-wash fabric to avoid shrinking after sewing.
Can I Customize The Size Of My Teepee Tent?
Yes, you can customize the teepee size by adjusting fabric dimensions and pole length. Measure your desired height and width carefully. Customizing allows for a perfect fit in your space.
Conclusion
Sewing a teepee tent can be fun and simple. Follow each step with care and patience. Choose the right fabric and tools to make it strong. Take your time sewing to get neat edges. Enjoy making a cozy space for kids or yourself.
This project brings creativity and comfort together. Now, you have a unique teepee to use or gift. Try different colors or patterns next time. Keep practicing to improve your sewing skills. Happy sewing and enjoy your handmade teepee tent!