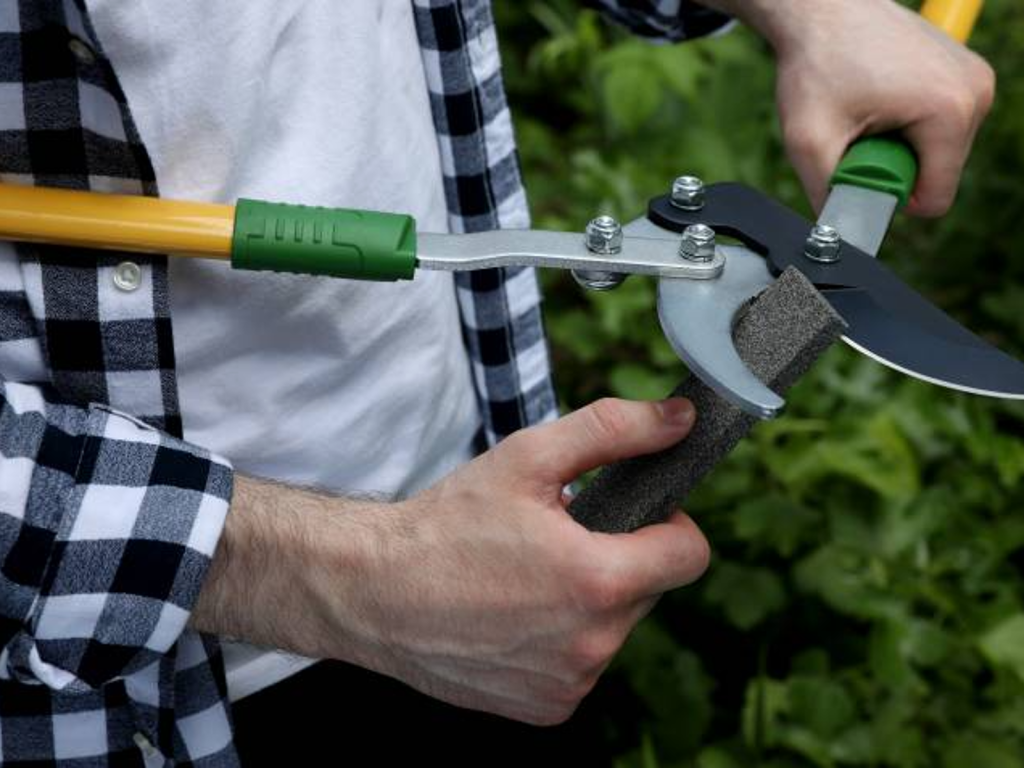
Are your pruners feeling dull and struggling to make clean cuts? Sharpening your pruners is easier than you think, and it can save you time, effort, and frustration in your gardening tasks.
Imagine slicing through branches smoothly, without tearing or crushing the stems. In this guide, you’ll learn simple, step-by-step methods to bring your pruners back to life. Keep reading to discover how sharpening your pruners can make your gardening faster, safer, and more enjoyable.

Credit: www.youtube.com
Choosing The Right Tools
Sharpening pruners makes cutting easier and safer. Using the right tools helps keep your pruners sharp and in good shape.
Picking the right sharpening tool depends on your pruner type and how often you use them. Safety gear protects you during the sharpening process.
Types Of Sharpening Tools
Different tools work best for various pruner blades. Choose a tool that fits your blade shape and sharpness needs.
- Sharpening Stone:Good for fine edges and curved blades. Use water or oil with the stone.
- Diamond File:Works well on very hard steel blades. Easy to control and lasts long.
- Sharpening Rod:Ideal for quick touch-ups. It fits the blade shape well.
- Electric Sharpener:Fast and effective for regular sharpening. Use with care to avoid over-sharpening.
- Sandpaper:Useful for light sharpening and cleaning rust.
Safety Gear To Use
Wearing safety gear helps prevent injuries while sharpening pruners. Protect your eyes, hands, and skin.
| Safety Gear | Purpose |
|---|---|
| Safety Glasses | Protect your eyes from metal filings and sparks |
| Gloves | Shield your hands from sharp edges and abrasions |
| Long-Sleeve Shirt | Protect your arms from scratches and debris |
| Mask | Prevent inhaling dust from sharpening materials |
Credit: www.gardeningknowhow.com
Preparing Your Pruners
Before sharpening your pruners, you need to prepare them well. Proper preparation helps you sharpen the blades safely and effectively.
Cleaning and sometimes taking the pruners apart makes the sharpening process easier. Let’s look at how to get your pruners ready.
Cleaning The Blades
Start by removing dirt and sap from the blades. Clean blades sharpen better and last longer.
Use warm soapy water or a cloth soaked in rubbing alcohol. Wipe both sides of the blades carefully.
- Wear gloves to protect your hands.
- Use a soft brush to remove stuck debris.
- Dry the blades completely to stop rust.
Disassembling For Better Access
Take your pruners apart if the blades are hard to reach. Disassembly gives you full access to sharpen every edge.
Remove the central bolt or screw carefully. Keep all small parts safe so you can put them back easily.
- Use the right screwdriver or wrench.
- Place parts on a clean surface in order.
- Check for any worn parts to replace.
Sharpening Techniques
Sharpening pruners is essential for their performance. Dull blades make cutting difficult and can damage plants. Regular sharpening keeps them efficient and safe to use.
There are different techniques to sharpen pruners. Each method has its tools and angles. Here, we explore three common methods.
Using A Sharpening Stone
A sharpening stone is a traditional tool. It is great for maintaining pruners. Wet the stone before use for better results.
Hold the blade at the correct angle. Move it across the stone smoothly. Repeat until the blade is sharp.
- Choose a fine-grit stone for a sharp edge
- Keep the stone wet during sharpening
- Use consistent pressure on each stroke
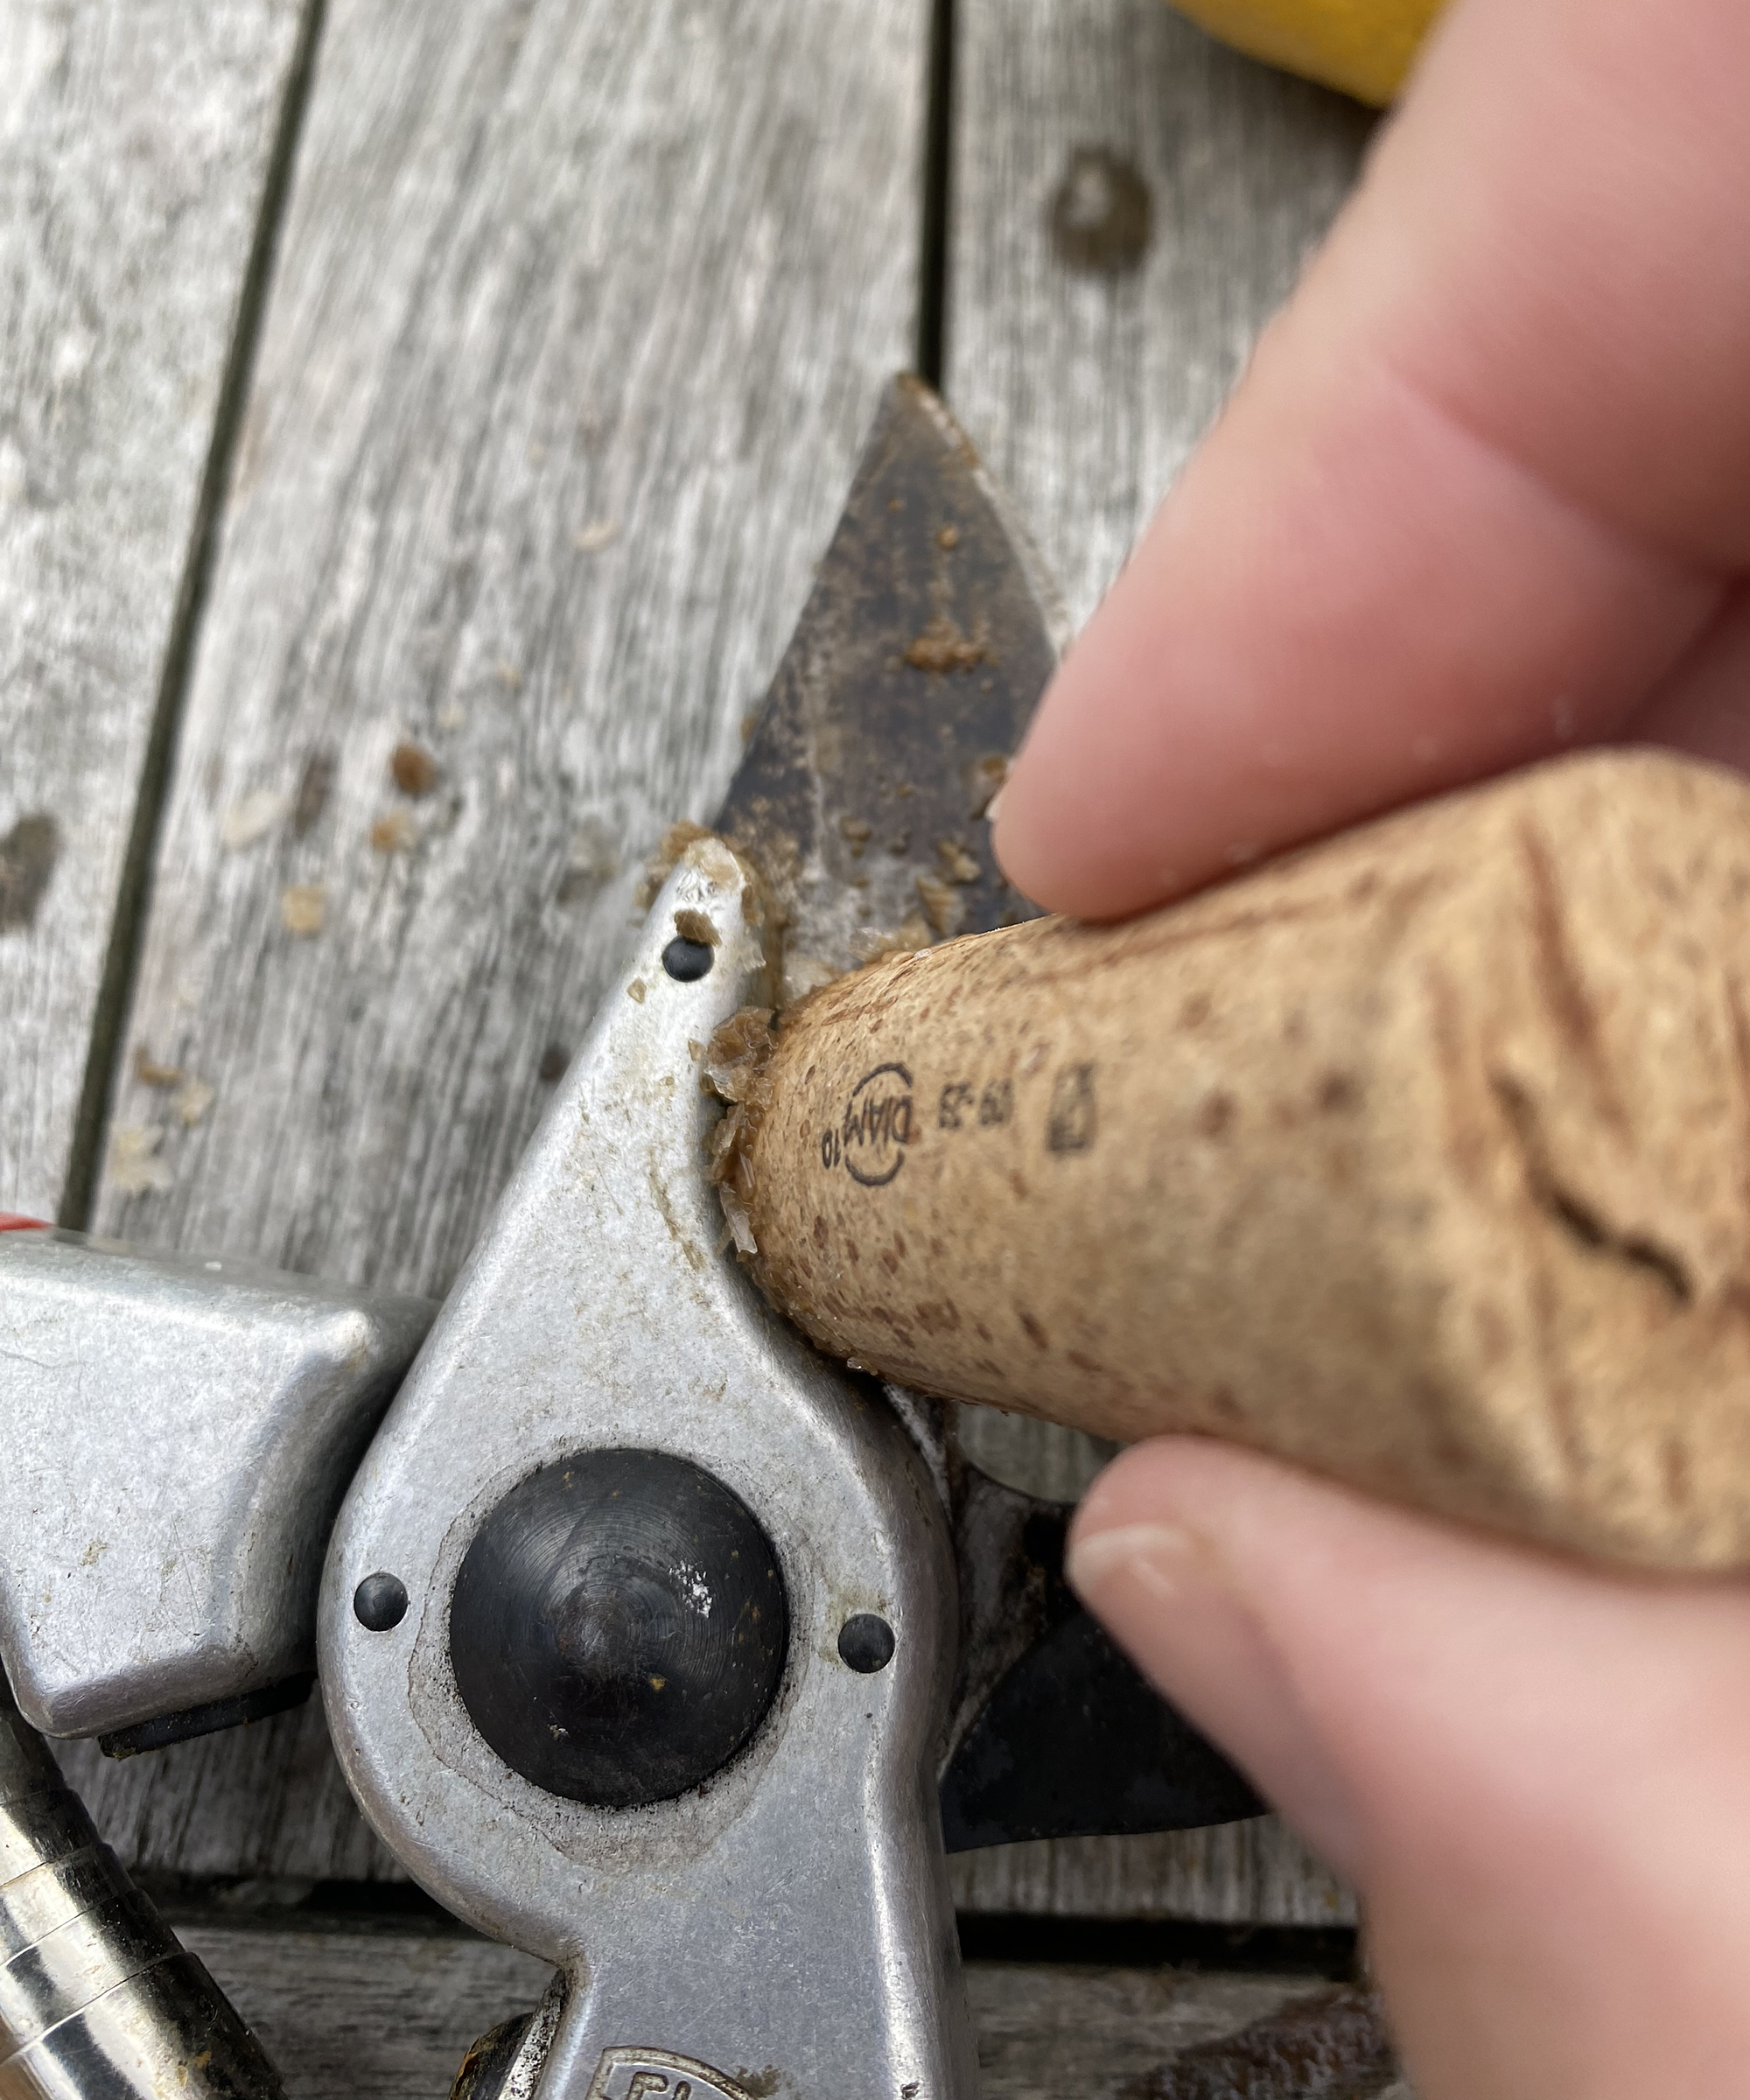
Using A Diamond File
A diamond file is effective for pruners. It removes metal quickly. It is also easy to handle for precise sharpening.
Hold the file at the correct angle. Move it along the blade with steady strokes. Check the blade’s sharpness regularly.
- Choose a medium-grit file for regular sharpening
- Use light, even strokes for control
- Check the blade’s sharpness after a few strokes
Maintaining The Correct Angle
The angle is crucial when sharpening pruners. It affects the blade’s sharpness and durability. A common angle is 20 to 25 degrees.
Use a guide if needed to maintain the angle. This ensures even sharpening. It prevents the blade from becoming uneven.
- Use an angle guide for precision
- Check the angle regularly during sharpening
- Adjust as necessary to maintain the angle
Finishing Touches
After sharpening your pruners, some final steps keep the blades in good shape. These steps help your tools work smoothly and last longer.
Focus on removing any rough edges and making sure the blades move easily. Proper care will protect your pruning tools from damage.
Removing Burrs
Burrs are small rough edges left on the blade after sharpening. They can cause the blade to snag or tear plants.
- Use a fine sharpening stone or a piece of fine sandpaper.
- Gently rub the blade edge to smooth out the burrs.
- Check for any sharp points that could catch on plant stems.
- Repeat until the edge feels smooth to the touch.
Lubricating The Blades
Lubricating the blades reduces friction and prevents rust. It also helps the pruners open and close easily.
| Type of Lubricant | Purpose | Application Tips |
|---|---|---|
| Light machine oil | Prevents rust and keeps blades smooth | Apply a few drops and wipe excess |
| Silicone spray | Reduces friction and repels dirt | Spray lightly on pivot and blades |
| WD-40 | Loosens stuck parts and cleans blades | Use sparingly, then wipe clean |
Tips For Long-lasting Sharpness
Keeping your pruners sharp helps you cut cleanly and safely. Sharp pruners reduce plant damage and make pruning easier.
Regular care and good storage protect the blades and keep them sharp longer. Follow these tips to keep your pruners in top shape.
Regular Maintenance Routine
Cleaning and sharpening your pruners after each use prevents rust and dullness. Use a soft cloth to wipe dirt and sap from the blades.
- Wash blades with warm soapy water and dry thoroughly.
- Use a sharpening stone or file to sharpen the cutting edge.
- Apply a few drops of oil to the pivot and blades to prevent rust.
- Check screws and tighten if needed to keep blades aligned.
Proper Storage Practices
Store pruners in a dry place to avoid moisture buildup. Avoid leaving them outside where weather can cause damage.
| Storage Tip | Reason |
|---|---|
| Keep pruners in a protective case or pouch | Prevents blade damage and accidental cuts |
| Hang pruners on a tool rack | Keeps them dry and easy to find |
| Oil blades before storing for long periods | Stops rust and keeps blades moving smoothly |
| Store away from children and pets | Ensures safety and prevents accidents |
Credit: www.youtube.com
Frequently Asked Questions
How Often Should I Sharpen My Pruners?
Sharpen pruners after every 20-30 hours of use. Frequent sharpening keeps blades clean and efficient. It prevents damage and ensures smooth cuts. Regular maintenance extends pruner lifespan and improves plant health.
What Tools Do I Need To Sharpen Pruners?
You need a sharpening stone, fine file, or diamond sharpener. A cloth for cleaning and lubricant oil also helps. These tools ensure a precise, smooth edge on blades. Proper tools make sharpening easy and effective.
Can I Sharpen Pruners At Home Safely?
Yes, sharpening pruners at home is safe with proper care. Use gloves to protect hands and follow step-by-step instructions. Work slowly and avoid forcing the blade. Regular home sharpening saves money and maintains cutting quality.
Why Are My Pruners Not Cutting Well?
Dull blades or rust buildup often cause poor cutting. Lack of lubrication or misalignment can also affect performance. Sharpen blades regularly and clean pruners after use. Proper maintenance ensures sharp, smooth cuts every time.
Conclusion
Sharpening pruners keeps them working well and safe to use. Clean blades cut plants smoothly and avoid damage. Regular sharpening saves time and effort in the garden. A sharp tool helps plants heal faster after cutting. Take your time and follow steps carefully for best results.
Keep your pruners sharp, and gardening feels easier. Practice often to keep your skills fresh and steady. Healthy plants start with sharp, well-maintained tools.