Have you ever faced the frustration of a leaky or broken garden hose right in the middle of watering your plants? Instead of rushing to buy a new one, what if you could fix it yourself quickly and easily?
Learning how to splice a garden hose can save you time, money, and effort. You’ll discover simple steps to repair your hose so it works like new again. Keep reading, and by the end, you’ll have the confidence to handle this common problem on your own.

Credit: www.amazon.ca
Tools And Materials Needed
Splicing a garden hose lets you fix leaks or extend its length. You need some simple tools and parts.
Having the right materials makes the splice strong and leak-free. Here are the main tools and materials.
Garden Hose Cutter Or Sharp Knife
You need a clean, straight cut on the hose ends. A hose cutter or sharp knife works best for this.
A dull blade can crush the hose, making the splice weak or leaky.
Hose Connector Or Coupling
A hose connector joins the two cut ends together. Choose one that fits your hose size and type.
- Barbed connectors for flexible hoses
- Threaded couplings for tougher hoses
- Brass or plastic materials
Hose Clamps
Hose clamps secure the hose ends to the connector. They keep the connection tight and prevent leaks.
- Metal clamps with screw tightening
- Plastic clamps for light use
Measuring Tape Or Ruler
Measure the hose length before cutting. This helps you get a precise and clean cut for the splice.
Marker Or Pencil
Mark the spot where you want to cut the hose. This prevents mistakes and keeps the cut straight.
Identifying The Leak Location
Finding the exact spot where a garden hose leaks is important. It helps you fix the hose quickly and save water.
Leaks can happen anywhere on the hose. Look closely to spot the problem area before you start fixing.
Check For Visible Damage
Look over the entire hose for cracks, holes, or worn spots. These are common leak points.
Damage often shows up near the ends or where the hose bends a lot.
Feel For Wet Areas
Run your hand along the hose while water is flowing. Wet spots usually mean a leak.
- Turn on the water to low pressure
- Slowly touch the hose surface
- Stop when you feel moisture or water spray
Listen For Hissing Sounds
Leaks can make a soft hissing or spraying noise. Listen closely near suspicious areas.
Find a quiet place to hear the sound better. It helps locate small leaks.
Use Soapy Water To Spot Leaks
Mix soap with water and apply it to the hose. Bubbles will form where air or water escapes.
- Fill a spray bottle with soapy water
- Spray the hose along its length
- Look for bubbles forming on the surface
Cutting The Damaged Section
Garden hoses can get damaged over time. You can fix this by cutting out the bad part.
This guide will show you how to cut the damaged section. Follow these simple steps to keep your garden hose working well.
Identify The Damaged Area
Look for cracks or leaks in the hose. These spots need to be removed.
Mark the damaged section with a marker. Make sure you clearly see where to cut.
Gather Your Tools
Collect the tools you need for the job. You will need a sharp knife or scissors.
Make sure the tools are clean and ready to use. This helps in making a clean cut.
- Sharp knife or scissors
- Marker
- Measuring tape
- Replacement connectors (if needed)
Cut The Hose
Place the hose on a flat surface. Use the knife or scissors to cut at the marked spots.
Make sure the cut is straight. This helps in connecting the hose back together later.
Check Your Work
Inspect the hose after cutting. Ensure the damaged part is fully removed.
If the cut is clean, you are ready for the next steps. This may include adding connectors to join the hose sections.

Credit: www.amazon.com
Selecting The Right Hose Connector
Splicing a garden hose needs the right connector. A good connector joins hoses firmly without leaks.
Choosing the right connector saves time and keeps water flowing smoothly.
Match Connector Size To Hose Diameter
Check the hose diameter before buying a connector. Connectors come in sizes like 5/8 inch or 3/4 inch.
A connector too small or too big will cause leaks or weak joints.
Choose The Connector Material
Connectors come in plastic, brass, or aluminum. Each material has pros and cons.
- Plastic connectors are light and cheap but may break easily.
- Brass connectors last long and resist rust but cost more.
- Aluminum connectors are lightweight and strong but can corrode.
Select a material based on your budget and how often you use the hose.
Pick The Connector Type
There are different connector types like quick-connect, threaded, or clamp style.
- Quick-connect makes joining hoses easy and fast.
- Threaded connectors screw tightly for a secure fit.
- Clamp connectors use metal clips for strong holds.
Choose a type that fits your hose and how you plan to use it.
Check For Leak-proof Features
Look for connectors with rubber washers or seals inside. These stop water leaks.
Good seals keep the connection tight and save water.
Consider Connector Durability
Pick connectors that resist weather, sunlight, and rough handling.
- Brass connectors handle sun and cold well.
- Plastic connectors may crack in cold weather.
- Check product details for durability information.
Durable connectors last longer and need fewer replacements.
Preparing Hose Ends For Splicing
Splicing a garden hose helps fix leaks or extend its length. Preparing the hose ends correctly is important for a strong, leak-free connection.
Clean and trim the hose ends before connecting them. This makes sure the splice fits well and lasts longer.
Cut The Hose Evenly
Use a sharp knife or scissors to cut the hose straight. Avoid jagged or angled cuts. A clean cut helps the splice fit tightly.
- Lay the hose flat on a solid surface
- Cut perpendicular to the hose length
- Make sure the cut is smooth and even
Remove Debris And Dirt
Clean the inside and outside of the hose ends. Dirt or debris can cause leaks or weak connections.
- Rinse the hose ends with water
- Use a cloth to wipe away dirt
- Let the hose dry before splicing
Check For Damage
Inspect the hose ends for cracks or wear. Damaged sections can cause leaks or break after splicing.
- Look for cracks or splits in the hose
- Cut off damaged parts if needed
- Use only healthy hose ends for splicing
Trim The Hose Lining
Some hoses have a plastic lining inside. Trim the lining to match the hose cut. This helps the splice fit better.
- Pull back the lining slightly
- Cut the lining flush with the hose end
- Ensure the lining does not block the splice
Attaching The Connector Securely
Attaching the connector properly is key to a strong garden hose splice. A secure fit stops leaks and keeps water flowing well.
This guide explains how to attach the connector tightly and safely. Follow these tips to make sure your hose stays connected.
Prepare The Hose Ends
Cut the hose ends cleanly and square. Remove any dirt or old fittings. This makes the connection smooth and tight.
Insert The Connector Fully
Push the connector deep into each hose end. Make sure it fits snugly inside the hose to avoid gaps.
Tighten Hose Clamps
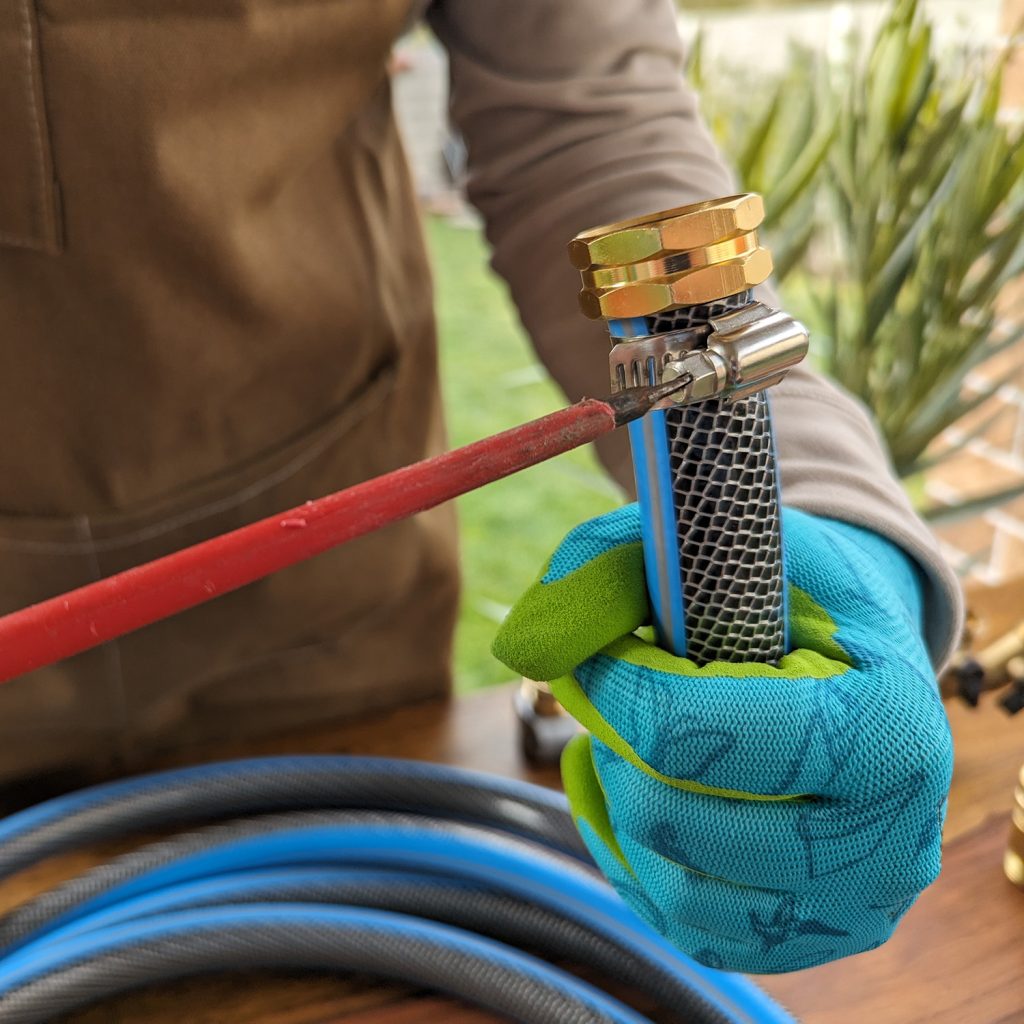
Use hose clamps to hold the connector in place. Tighten them evenly to prevent leaks and slipping.
- Place the clamp over the hose end and connector joint.
- Use a screwdriver to turn the clamp screw clockwise.
- Check if the hose is firmly attached by gently pulling it.
- Tighten more if the hose moves or leaks appear.
Check The Connection
Turn on the water and watch for leaks. If you see water dripping, tighten the clamps more or reposition the connector.
| Issue | Cause | Fix |
|---|---|---|
| Water Leak | Loose clamp or connector | Tighten clamp or push connector further |
| Hose Slips Off | Connector not fully inserted | Insert connector fully and secure clamp |
| Clamp Damages Hose | Over-tightening clamp | Loosen clamp slightly to avoid damage |
Testing The Splice For Leaks
After splicing your garden hose, it is important to check for leaks. A secure splice keeps water flowing and avoids waste.
This guide explains how to test the splice properly to ensure it is tight and leak-free.
Prepare The Hose For Testing
Before turning on the water, inspect the splice area. Make sure all connectors are tight and the hose is aligned correctly.
Turn On The Water Slowly
Open the faucet slowly to let water enter the hose. This helps prevent pressure spikes that might worsen leaks.
Check For Drips And Wet Spots
Look closely at the splice area for any water drips or wet spots. Use a dry cloth to wipe the area and watch for new moisture.
- Inspect the hose ends and connectors
- Feel around the splice for moisture
- Watch for water pooling under the hose
- Listen for any hissing sounds of escaping air or water
Test Under Normal Water Pressure
Keep the water running at normal pressure for several minutes. This shows if the splice can hold steady without leaks.
Use A Table To Record Leak Checks
| Test Area | Leak Detected | Action Needed |
| Splice Connector | No | None |
| Hose Ends | Yes | Tighten Clamp |
| Hose Body | No | None |
Fix Leaks If Found
If you find leaks, turn off the water and tighten the connectors. Replace any worn parts before testing again.
Try this quick checklist:
- Turn off water
- Tighten hose clamps
- Replace washers if needed
- Retest for leaks

Credit: www.familyhandyman.com
Tips For Maintaining Hose Durability
Garden hoses can last longer with proper care. Small actions help avoid cracks and leaks.
Learn simple tips to keep your hose strong and ready for use every season.
Store Hose Properly
Always coil the hose neatly after use. Avoid sharp bends or kinks. Store it in a cool, dry place.
Avoid Sun Damage
Keep the hose out of direct sunlight when not in use. UV rays can weaken the material and cause cracks.
Use Hose Connectors Correctly
- Choose connectors that fit well to prevent leaks.
- Do not overtighten connectors to avoid damage.
- Replace worn washers regularly.
Drain Hose After Use
Remove all water from the hose after watering. This stops freezing and reduces pressure on the hose walls.
Repair Small Damages Quickly
| Damage Type | Recommended Repair |
| Small Crack | Use waterproof tape or hose patch |
| Leak at Connector | Replace washer or tighten fitting |
| Split Hose | Splice with a hose repair kit |
Frequently Asked Questions
How Do You Splice A Garden Hose Effectively?
To splice a garden hose, cut the damaged section cleanly. Insert a hose connector into both ends. Secure with hose clamps. This method restores water flow and prevents leaks efficiently.
What Tools Are Needed To Splice A Garden Hose?
You need a sharp utility knife, hose connectors, and hose clamps. Optionally, use pliers for tightening clamps securely. These tools ensure a neat, durable hose repair.
Can I Splice Any Type Of Garden Hose?
Yes, most standard garden hoses can be spliced. However, ensure compatibility of connectors with hose diameter and material. This guarantees a strong, leak-free splice.
How Long Does A Garden Hose Splice Last?
A properly spliced garden hose can last several seasons. Durability depends on quality of connectors and clamps used. Regular checks help maintain the splice’s integrity.
Conclusion
Splicing a garden hose saves money and extends its life. You only need a few tools and simple steps. Tighten connections well to prevent leaks. Check the hose regularly for damage or wear. Fix small problems early to avoid bigger issues.
With practice, splicing becomes quick and easy. Enjoy a strong, reliable hose for your garden. Keep your plants happy and your work smooth. Simple repairs keep your garden running well all season.