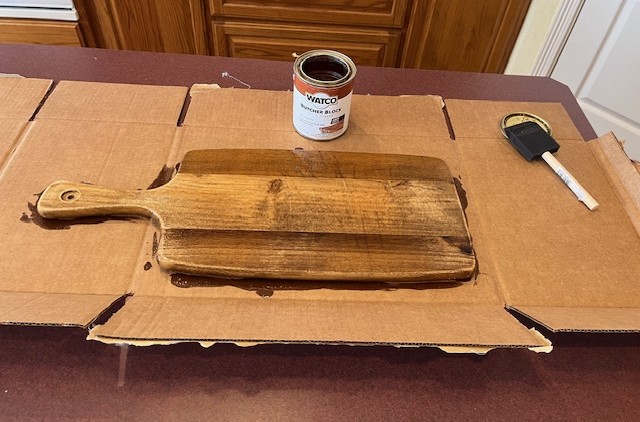
Your cutting board is more than just a kitchen tool—it’s where you prepare meals, share stories, and create memories. But over time, it can lose its charm, looking dull or stained.
What if you could bring it back to life with a simple staining process that not only protects your board but also makes it look stunning? In this guide, you’ll discover easy, step-by-step tips to stain your cutting board like a pro.
By the end, you’ll have a beautiful, long-lasting finish that makes your kitchen centerpiece truly shine. Ready to transform your cutting board? Let’s get started!

Credit: www.smorhome.com
Choosing The Right Stain
Staining a cutting board improves its look and protects the wood. Picking the right stain is very important. The wrong stain can damage the wood or make it unsafe.
This guide explains types of wood stains, food-safe options, and how to match stain to your wood type. Use this to pick the best stain for your cutting board.
Types Of Wood Stains
Wood stains come in many types. Each type changes the color and finish of the wood differently. Some common types are oil-based, water-based, and gel stains.
- Oil-Based Stains:Soak into the wood well and give a rich color. They take longer to dry.
- Water-Based Stains:Dry faster and clean up easily with water. They have less odor.
- Gel Stains:Thicker and sit on the wood surface. Good for uneven or rough wood.
Selecting Food-safe Options
Since cutting boards touch food, use only food-safe stains. Some stains contain harmful chemicals. Avoid them to keep your food safe.
| Stain Type | Food-Safe? | Notes |
| Pure Tung Oil | Yes | Natural and safe for cutting boards |
| Beeswax Mixture | Yes | Protects wood and safe for food contact |
| Commercial Wood Stains | No | May contain toxins, avoid on cutting surfaces |
| Water-Based Stains | Sometimes | Check label for food-safe certification |
Matching Stain To Wood Type
Different woods absorb stain differently. Hardwoods like maple and walnut need different stains than softwoods like pine.
- Maple:Use light oil-based stains to keep the natural look.
- Walnut:Dark stains work well and bring out the grain.
- Cherry:Use gel stains for even color on this dense wood.
- Pine:Use water-based stains to avoid blotchy spots.
Preparing The Cutting Board
Preparing your cutting board is important before staining. A clean and smooth board helps the stain soak evenly. This makes the wood look better and last longer.
Start with cleaning and sanding the board. Then, remove any old finishes. Finally, dry the board well and remove dust before staining.
Cleaning And Sanding
Wash the cutting board with warm water and mild soap. Use a sponge or soft brush to remove food bits and stains. Rinse well and let it dry a bit.
After cleaning, sand the board to smooth the surface. Use fine-grit sandpaper (around 220 grit). Sand in the direction of the wood grain to avoid scratches.
- Remove any rough spots
- Open the wood pores for better stain absorption
- Make the surface even and smooth
Removing Old Finishes
If your cutting board has an old finish, remove it before staining. Old finishes can block the stain and cause uneven color.
Use a chemical stripper or sand the board deeply to take off the old finish. Make sure to follow safety instructions if using chemicals. After this, clean off any residue.
- Apply chemical stripper carefully
- Let it sit as instructed
- Scrape off old finish gently
- Sand the board after stripping
- Wipe off leftover residue with a clean cloth
Drying And Dust Removal
Let the cutting board dry completely before staining. Moisture can prevent the stain from soaking into the wood well.
Remove all dust from sanding using a soft brush or a tack cloth. Dust can cause rough spots and uneven stain on the board.
- Air dry in a warm, dry place
- Do not use heat to dry quickly
- Brush off dust with a clean, dry cloth
- Use tack cloth for fine dust removal
Applying The Stain
Staining a cutting board changes its look and protects the wood. Applying the stain properly helps the color last longer.
This guide will show you how to apply stain evenly and smoothly on your cutting board.
Tools And Materials Needed
Gather all tools before starting. This makes the process easier and faster.
- Wood stain of your choice
- Clean, lint-free cloths or rags
- Foam brush or paintbrush
- Sandpaper (fine grit)
- Gloves to protect your hands
- Drop cloth or newspaper to protect surfaces
- Stir stick for mixing stain
Step-by-step Staining Process
Follow these steps to apply stain on your cutting board safely and smoothly.
- Sand the cutting board with fine grit sandpaper.
- Wipe off dust with a clean cloth.
- Stir the stain well before use.
- Put on gloves to protect your hands.
- Use a brush or cloth to apply a thin, even coat of stain.
- Let the stain sit for 5 to 15 minutes to absorb.
- Wipe off extra stain with a clean cloth.
- Let the board dry completely before using or applying more coats.
Tips For Even Coverage
Use these tips to avoid blotches and get a smooth, even finish on your cutting board.
- Apply stain along the wood grain for better absorption.
- Work in small sections to keep the stain fresh.
- Do not apply too much stain at once to prevent drips.
- Use a clean cloth to wipe off excess stain evenly.
- Allow enough drying time between coats.
- Test stain on a small corner before full application.

Credit: www.slightlycrookedworkshop.com
Sealing And Protecting
Staining a cutting board is only part of the process. Sealing and protecting the wood keeps it safe from moisture and stains. It also helps maintain its look and durability for a long time.
Choosing the right finish and applying it correctly is key. Allow time for the finish to cure and dry well before use.
Choosing The Right Finish
Pick a finish that is safe for food contact and protects the wood. Oil finishes soak in and keep the board from drying out. Waxes add a thin protective layer on top.
- Food-grade mineral oil is popular and easy to apply.
- Beeswax adds a smooth, water-resistant finish.
- Tung oil penetrates deeply and hardens over time.
- Avoid finishes with harmful chemicals or strong smells.
Applying Food-safe Sealers
Apply sealers in thin, even coats to protect the wood. Let each coat soak in before adding the next. Use a clean cloth or brush made for food use.
| Sealer | Application Tips |
| Mineral Oil | Rub in well and wipe off excess |
| Beeswax | Warm slightly and spread evenly |
| Tung Oil | Apply thin coats, let dry fully |
Curing And Drying Time
Give the finish time to cure and dry fully. This helps the protection last longer and makes the board safe to use with food.
- Apply the final coat of sealer.
- Let the board dry in a well-ventilated area.
- Wait at least 24 hours before use.
- Reapply oil every few weeks for best care.
Maintaining Your Stained Cutting Board
Keeping your stained cutting board in good shape helps it last longer. Proper care keeps the colors bright and the wood safe.
Regular maintenance prevents stains from fading or damage from setting in. Follow simple steps to care for your board.
Cleaning Tips
Clean your stained cutting board right after use. Use mild soap and warm water to avoid stripping the stain.
Do not soak the board in water. Dry it quickly with a towel to stop warping or cracking.
- Wash with soft sponge and mild soap
- Rinse with warm water
- Dry immediately with a clean cloth
- Never put in dishwasher
- Avoid harsh chemicals or bleach
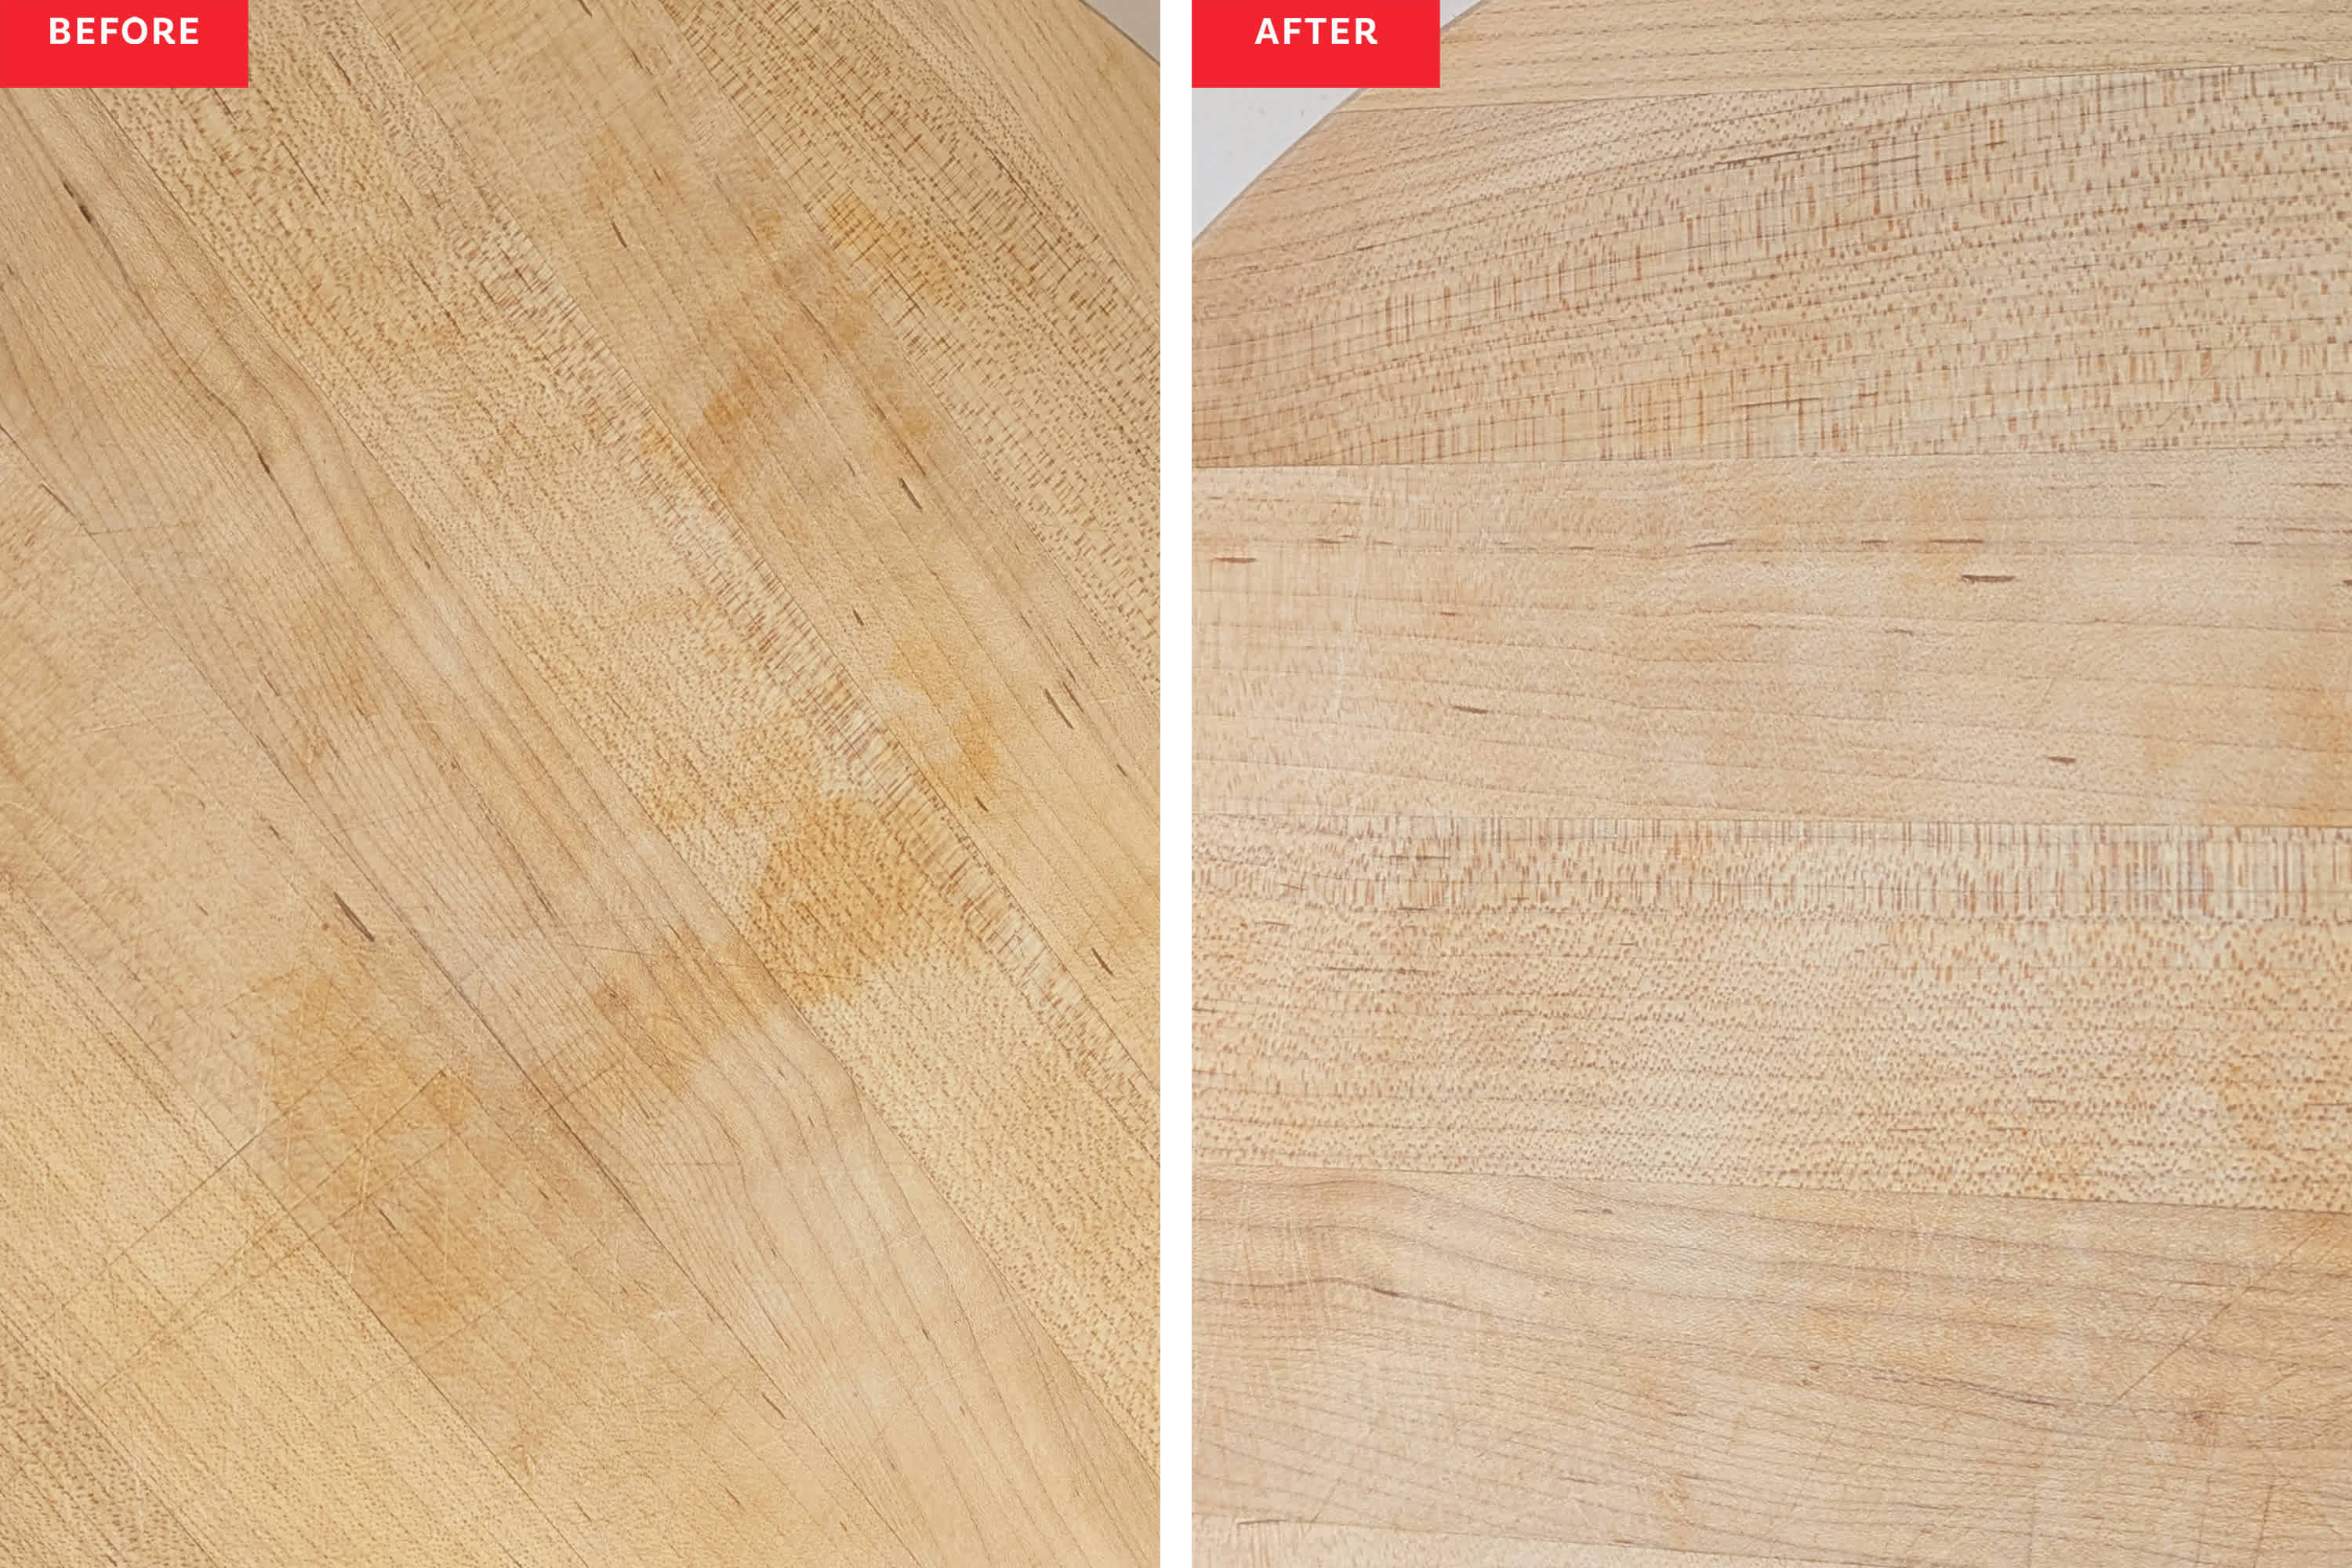
Re-staining When Needed
Over time, the stain may fade or wear off. You can re-stain your cutting board to keep it looking fresh.
Lightly sand the surface with fine-grit sandpaper before applying a new coat of stain. Let it dry fully.
- Sand gently to remove old finish
- Clean dust off before staining
- Apply stain evenly with a cloth or brush
- Allow stain to dry completely
- Finish with a food-safe oil or sealant
Avoiding Damage
Protect your stained cutting board from heat and sharp tools. These can cause cracks or chips in the wood and stain.
Use the board only for cutting and avoid placing hot pots or pans on it. Store in a dry place to prevent mold.
- Do not cut with very sharp knives too hard
- Avoid placing hot items on the board
- Keep board dry and store upright
- Use food-safe oils to keep wood hydrated
- Inspect regularly for cracks or damage
Credit: www.thekitchn.com
Frequently Asked Questions
What Is The Best Stain For Cutting Boards?
The best stain for cutting boards is food-grade mineral oil. It enhances the wood’s natural beauty and provides protection. Avoid using stains with harmful chemicals as they can be unsafe for food contact.
How Often Should You Stain A Cutting Board?
Stain your cutting board once every month or when it appears dry. Regular staining keeps the board moisturized and prolongs its lifespan. Always ensure the board is clean and dry before applying the stain.
Can You Stain A Bamboo Cutting Board?
Yes, you can stain a bamboo cutting board using food-safe mineral oil. Bamboo cutting boards benefit from regular staining to maintain their durability and appearance. Apply the oil generously and let it soak overnight for best results.
How Long Does It Take To Stain A Cutting Board?
Staining a cutting board typically takes about 24 hours. Apply the stain and let it soak for several hours. Wipe off excess oil and let it dry completely before use. This ensures the board is properly conditioned and safe for food.
Conclusion
Staining a cutting board adds beauty and protection. Choose the right stain for your wood type. Apply the stain evenly and wipe off the extra. Let it dry fully before use. Regular oiling helps keep your board in good shape.
Clean it gently to avoid damage. A well-stained board lasts longer and looks great. Try these steps for a simple, effective stain job. Your kitchen will thank you with a fresh, natural look. Enjoy cooking on a board that feels like new.