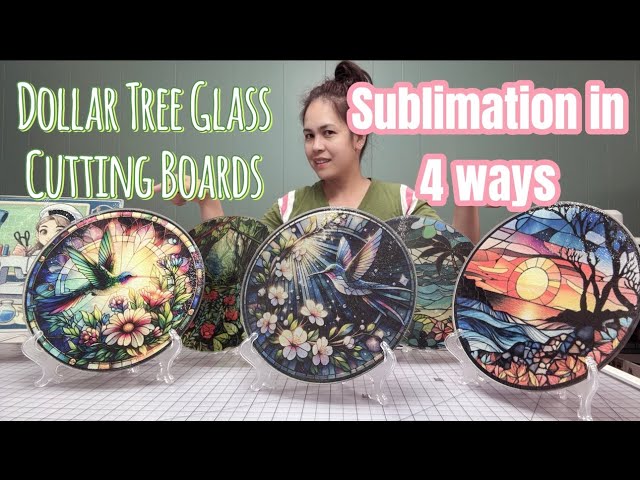
Are you looking to add a personal touch to your kitchen or create a unique gift? Sublimating on a glass cutting board is a fantastic way to make your ideas come to life with vibrant colors and lasting quality.
But if you’ve never tried it before, the process might seem tricky. Don’t worry—you’re about to discover simple, clear steps that will guide you through every part of sublimating on glass cutting boards. By the end of this article, you’ll have the confidence and know-how to create stunning, custom designs that stand out.
Ready to transform your glass cutting boards into works of art? Let’s get started!
Materials Needed
Sublimating on a glass cutting board needs special materials. Using the right items helps you get clear, lasting designs.
Below are the key materials for a smooth sublimation process on glass cutting boards.
Glass Cutting Board Selection
Choose a glass cutting board that is smooth and white on the surface. The white coating helps colors show vividly after sublimation.
- Tempered glass boards work best for safety and durability.
- Ensure the surface is flat for even heat transfer.
- Pick a size that fits your heat press area.
- A white or light-colored coating improves image quality.
Sublimation Ink And Paper
Use sublimation ink and special paper designed for heat transfer. Regular ink or paper will not work well on glass.
| Material | Description |
| Sublimation Ink | Ink that turns into gas under heat and bonds to coated surfaces. |
| Sublimation Paper | Paper that holds the ink and releases it when heated. |
| Inkjet Printer | Printer compatible with sublimation ink for printing your design. |
Heat Press Equipment
A heat press machine applies heat and pressure to transfer the design onto the glass board.
- Use a heat press with adjustable temperature and pressure settings.
- Choose a press size that fits your glass board dimensions.
- Flat platen heat presses are best for even heating.
Protective Accessories
Protective items help keep your workspace clean and safe during sublimation.
- Teflon sheets to cover the glass and paper for heat protection.
- Heat-resistant gloves to protect your hands.
- Heat tape to keep the sublimation paper in place.
- Lint-free cloths to clean the glass surface before pressing.
Preparing The Design
Preparing your design is an important step before sublimating on a glass cutting board. Good preparation helps your image look clear and sharp.
This guide will help you get your design ready for printing and transferring on glass.
Choosing The Right Image
Select an image with high resolution to avoid blurry prints. Clear and simple images work best on glass.
Use images with bright colors and good contrast. Avoid dark or dull pictures that may not show well.
- Use images with at least 300 DPI resolution
- Choose simple designs with clear lines
- Pick bright colors that stand out on glass
- Avoid images with too many small details
Adjusting Design Size
Measure your glass cutting board before sizing your design. The design should fit well without going over the edges.
Resize your image in your design software to match the board size. Keep the aspect ratio to avoid stretching.
- Measure the printable area on the cutting board
- Resize the design to fit inside this area
- Keep the image proportions correct
- Leave some space at the edges for better results
Mirror Printing Techniques
Mirror printing flips your image horizontally. This is needed because sublimation prints on the back of the transfer paper.
Use your printer or design software to flip the image before printing. This step ensures the design appears correct on the board.
- Flip the image horizontally in design software
- Check the preview before printing
- Mirror only the parts that will transfer
- Use transfer paper made for sublimation
Preparing The Glass Board
Preparing your glass cutting board is key for good sublimation results. You need a clean and ready surface before you start. This helps the design stick well and last longer.
Two main steps are cleaning the surface and applying heat resistant tape. Both protect your board and improve print quality.
Cleaning The Surface
Remove all dust, grease, and fingerprints from the glass board. Use a soft cloth and rubbing alcohol to clean it. Avoid using oily or waxy cleaners.
- Wipe the board with a microfiber cloth
- Apply rubbing alcohol on the cloth
- Clean the entire surface thoroughly
- Let the board dry completely
Applying Heat Resistant Tape
Heat resistant tape holds the sublimation paper in place. It also stops the paper from moving during pressing. Use tape that can handle high temperatures.
| Type of Tape | Heat Resistance | Use |
|---|---|---|
| Kapton Tape | Up to 500°F (260°C) | Best for high heat presses |
| Heat Resistant Paper Tape | Up to 400°F (204°C) | Good for short presses |
| Aluminum Foil Tape | Up to 600°F (316°C) | Works well for uneven surfaces |

Credit: www.thecountrychiccottage.net
Heat Press Settings
Sublimating on a glass cutting board needs the right heat press settings. These settings make sure the design sticks well and looks clear.
Using the correct temperature, time, and pressure helps the sublimation process work perfectly on glass surfaces.
Temperature Recommendations
Set your heat press temperature between 375°F and 400°F for glass cutting boards. This range helps the sublimation ink transfer well without damaging the glass.
Too low temperature causes dull prints. Too high can crack the glass or blur the design.
Time Duration
Press the design for about 60 seconds to get good results. This time helps the ink turn into gas and bond with the special coating on the glass.
Shorter times may cause incomplete transfer. Longer times can cause the colors to fade or the glass to overheat.
Pressure Settings
Use medium pressure for sublimation on glass cutting boards. This pressure allows good contact between the board and the transfer paper.
Too much pressure can break the glass. Too little pressure causes poor image transfer.
- Medium pressure is firm but not hard
- Adjust pressure based on your heat press model
- Test small pieces before full production
Sublimation Process
Sublimating on a glass cutting board is a fun way to add custom designs. It uses heat to transfer ink from paper to glass.
This process needs careful steps to get clear and lasting images. Follow each part closely for best results.
Positioning The Design
Place your printed sublimation design on the glass cutting board. Make sure the design side faces down on the glass.
Use heat-resistant tape to hold the design in place. Check that it is centered and straight.
Pressing Steps
Preheat your heat press to 400°F (204°C). Place the glass board with the taped design inside the press.
Press with medium pressure for about 60 seconds. Keep the heat steady and do not move the board.
- Preheat press to 400°F (204°C)
- Use medium pressure
- Press for 60 seconds
Cooling And Removal
After pressing, carefully remove the glass board from the heat press. Let it cool before handling.
Once cool, gently peel off the tape and sublimation paper. Your design should now be bright and clear on the board.
Troubleshooting Tips
Sublimating on glass cutting boards can be tricky. Small mistakes cause big problems.
Knowing how to fix common issues saves time and material. Here are tips to help.
Common Issues
Glass boards may crack or images may peel after sublimation. Uneven heat or pressure causes this.
Check that your heat press temperature and time settings match the sublimation paper instructions. Use a heat-resistant tape to hold the design firmly in place.
Fixing Color Problems
Colors that look faded or too dark usually mean incorrect settings or poor-quality ink.
- Use sublimation inks meant for glass surfaces.
- Set the heat press temperature between 375°F and 400°F.
- Press for 60 seconds to avoid under or over transfer.
- Make sure your printer color profile matches sublimation paper.
- Replace old or expired sublimation paper and ink cartridges.
Preventing Image Blurring
Blurry images come from movement during pressing or low-quality images.
| Cause | How to Fix |
|---|---|
| Design shifts during heat press | Use strong heat tape and hold the design tightly |
| Low-resolution image | Use images with at least 300 DPI for clear print |
| Uneven pressure | Check heat press plates are clean and press evenly |
| Excess moisture on glass | Dry the glass completely before pressing |
Care And Maintenance
Caring for your sublimated glass cutting board keeps it looking great. Proper maintenance helps protect the design and glass surface.
Follow simple steps to clean, avoid damage, and extend the life of the artwork on your board.
Cleaning Instructions
Clean the glass cutting board gently to avoid harming the sublimated design. Use mild soap and warm water.
- Use a soft cloth or sponge for wiping.
- Do not use abrasive cleaners or scrubbers.
- Avoid soaking the board for long periods.
- Dry with a soft towel to prevent water spots.
Avoiding Damage
Prevent scratches and cracks by handling your cutting board carefully. Avoid dropping or hitting hard surfaces.
| Action | Effect |
| Using sharp knives directly on the board | Can scratch the glass and damage design |
| Placing the board on uneven surfaces | May cause cracks or chips |
| Exposing to extreme heat | May fade or peel sublimated design |
| Cleaning with harsh chemicals | Can dull or remove the artwork |
Extending Design Longevity
Keep your sublimated design bright and clear by following these tips to prolong its life.
- Store the board away from direct sunlight.
- Use cutting mats on top to protect the design.
- Wash by hand instead of dishwasher cleaning.
- Apply a gentle glass cleaner for extra shine.

Credit: www.amazon.com

Credit: www.thecountrychiccottage.net
Frequently Asked Questions
What Materials Do I Need To Sublimate On Glass Cutting Boards?
You need a glass cutting board, sublimation printer, sublimation paper, heat-resistant tape, and a heat press. Ensure the board is coated for sublimation to achieve vibrant, lasting prints.
How Do I Prepare The Glass Cutting Board For Sublimation?
Clean the glass cutting board thoroughly to remove dust and oils. Use rubbing alcohol for best results. Ensure it is completely dry before applying the sublimation paper.
What Temperature And Time Settings Work For Sublimating Glass Boards?
Set your heat press to around 400°F (204°C) and press for 60 seconds. Use medium pressure and always check manufacturer recommendations for best results.
Can I Use Any Sublimation Ink On Glass Cutting Boards?
Use only high-quality sublimation inks designed for coated surfaces. Regular inks won’t bond properly, resulting in faded or washed-out images on the glass board.
Conclusion
Sublimating on a glass cutting board can be fun and creative. Follow the steps carefully for best results. Use the right materials and tools to avoid mistakes. Keep the design simple and clear for easy transfer. Practice makes your work look better each time.
Enjoy making personalized gifts or home decor with this method. Try different ideas and colors to find what you like. Sublimation on glass offers many ways to express your style. Keep experimenting and have fun with your projects.