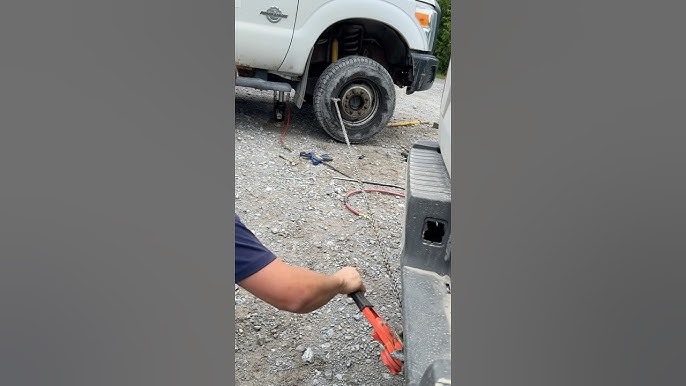
Have you ever faced a flat tire and wished you could fix it yourself? Knowing how to take a car tire off a rim can save you time, money, and frustration.
Whether you’re changing a tire, repairing a puncture, or just curious, this skill is easier than you think. In this guide, you’ll discover simple, step-by-step instructions that anyone can follow. Stick with me, and by the end, you’ll feel confident handling your tire like a pro.
Ready to get started? Let’s dive in!
Credit: www.jkowners.com
Tools Needed
Removing a car tire from its rim requires the right tools. Using proper equipment makes the job safer and easier.
This guide breaks down the tools into essential equipment and optional helpful tools. Knowing these will prepare you well.
Essential Equipment
The essential equipment includes tools you must have to take a tire off a rim correctly. Without these, the task can be difficult or unsafe.
- Tire Iron or Pry Bar:Used to pry the tire bead over the rim edge.
- Bead Breaker:Breaks the tight seal between the tire and rim.
- Valve Stem Tool:Removes the valve core to deflate the tire fully.
- Lubricant:Helps the tire bead slide off the rim more easily.
- Safety Gloves:Protects your hands from sharp edges and pinches.
- Floor Jack and Jack Stands:Lifts and supports the vehicle safely if the tire is still on the car.
Optional Helpful Tools
Optional tools are not necessary but can make the job faster and more convenient. They also help avoid damage to the tire or rim.
| Tool | Purpose |
| Tire Mounting Machine | Automates tire removal and installation for efficiency. |
| Plastic Rim Protectors | Prevents scratches on alloy rims during prying. |
| Air Compressor | Inflates the tire after mounting. |
| Torque Wrench | Tightens lug nuts to the correct specification. |
| Rubber Mallet | Helps tap the tire bead without damage. |

Credit: onefixharry.ca
Preparing The Workspace
Taking a car tire off a rim needs a clean and safe workspace. This helps you work faster and avoid accidents.
Before starting, get ready by choosing the right spot and cleaning the tire and rim well.
Choosing A Safe Area
Pick a flat and stable surface to work on. Avoid places with heavy traffic or slopes.
- Choose a dry spot to prevent slipping.
- Work in a well-lit area so you see clearly.
- Keep tools nearby but away from your feet.
- Clear the area of any objects that can cause trips.
- Make sure children and pets stay away while working.
Cleaning The Tire And Rim
Cleaning removes dirt and grease. It makes it easier to handle the tire and rim safely.
| Cleaning Item | Purpose | Tools Needed |
| Tire Surface | Remove dirt and debris | Brush, soapy water |
| Rim Edges | Clear grease and rust | Cloth, degreaser |
| Valve Area | Prevent damage | Soft cloth, mild cleaner |
Wipe the tire and rim dry before you start. This prevents slipping and helps tools grip better.
Deflating The Tire
Before removing a car tire from its rim, you must deflate the tire fully. This makes the tire easier and safer to take off.
Deflating removes all the air inside the tire. This step is important to avoid damage to the tire or rim.
Removing The Valve Core
The valve core controls the air inside the tire. Removing it lets the air escape quickly.
You need a valve core removal tool. It fits inside the valve stem to unscrew the core.
- Locate the valve stem on the tire.
- Insert the valve core removal tool into the valve stem.
- Turn the tool counterclockwise to unscrew the core.
- Pull out the valve core carefully.
Ensuring Complete Air Release
After removing the valve core, the air will start to escape. Make sure all air leaves the tire.
You can press the tire sidewall to help push air out faster. Wait until no hissing sound is heard.
- Remove the valve cap if it is still on.
- Press the tire gently to speed air release.
- Listen for air escaping until it stops.
- Check the tire to feel if it is soft and empty.
Breaking The Bead
Breaking the bead is the first step to removing a car tire from its rim. The bead is where the tire seals against the rim. You need to break this seal before you can take the tire off.
This process requires some force and the right tools or methods. It is important to do it carefully to avoid damaging the tire or rim.
Using A Bead Breaker Tool
A bead breaker tool is made to break the bead seal with less effort. It applies pressure to separate the tire from the rim evenly around the wheel.
- Place the wheel on a flat surface.
- Position the bead breaker tool on the tire sidewall near the rim.
- Activate the tool to push the tire away from the rim.
- Move the tool around the tire to break the bead all the way.
- Check if the bead has separated from the rim on both sides.
Manual Methods For Bead Breaking
You can break the bead manually without special tools. This method uses common items and body weight to apply pressure.
| Method | Tools Needed | Steps |
|---|---|---|
| Using a C-Clamp | C-Clamp, wooden block | Place block on tire sidewall, clamp to rim, tighten slowly to push bead. |
| Using Car Weight | Wooden block, car jack | Position block on tire sidewall, carefully lower car wheel onto block to push bead. |
| Using a Tire Iron | Tire irons or spoons | Insert irons between tire and rim, pry bead loose carefully around tire. |
Removing The Tire From The Rim
Taking a tire off a rim is a key skill for changing or repairing tires. It needs care and the right tools. This guide helps you remove the tire safely.
Focus on loosening the tire bead and using tools to lift the tire off. Follow the steps carefully to avoid damage.
Lubricating The Bead
Lubricate the tire bead to make it easier to remove from the rim. The bead is the edge of the tire that seals against the rim.
Use a soap and water mix or a special tire lubricant. Apply it evenly around the bead for smooth removal.
- Mix mild soap with water
- Use a brush or cloth to apply
- Cover the entire bead area
- Let it soak for a few minutes
Using Tire Irons Or Levers
Tire irons or levers help pry the tire off the rim safely. Choose tools that fit the size of your tire and rim.
Insert the tire iron under the tire bead and hook it on the rim. Use two irons for better control and to avoid damage.
- Insert first iron under the bead
- Hook it on the rim edge
- Place second iron 6 inches away
- Work both irons to lift the tire
Prying The Tire Off
After loosening the bead and inserting the irons, pry the tire off the rim. Move slowly to avoid tearing the tire.
Lift the tire bead over the rim edge in small sections. Keep working around the tire until it is free from the rim.
- Start prying near the valve stem
- Lift small sections of the bead
- Work your way around the rim
- Remove the tire completely
Inspecting The Rim And Tire
Before taking a car tire off a rim, it is important to inspect both parts. This helps avoid damage and makes the process safer.
Check the rim and tire closely for any signs of wear or problems. This step saves time and effort later.
Checking For Damage
Look at the rim for cracks, bends, or dents. These issues can make removing the tire difficult or unsafe.
Also, inspect the tire for cuts, bubbles, or worn spots. Damaged tires need special care during removal.
- Check rim edges for bends or cracks
- Look for rust or corrosion on the rim
- Inspect tire sidewalls for bubbles or cuts
- Examine tire tread for uneven wear
Cleaning Residue
Remove dirt, grease, and old sealant from the rim and tire. Clean surfaces help the tire come off smoothly.
Use a cloth and mild cleaner to wipe the rim and tire bead. Avoid harsh chemicals that can damage rubber or metal.
- Wipe rim edges and tire bead area
- Remove grease and dirt buildup
- Use a soft brush for stuck residue
- Dry all parts before starting removal
Tips For Safety
Taking a car tire off a rim can be dangerous without the right safety steps. Use care and follow safety tips to avoid injuries.
Always prepare your workspace and tools before starting. Safety should be your top priority to keep the job smooth.
Protective Gear
Wear protective gear to guard yourself from sharp edges and flying debris. Good gear lowers the chance of cuts and bruises.
Basic protective gear includes gloves, eye protection, and closed-toe shoes. These protect your hands, eyes, and feet during the work.
- Heavy-duty gloves to protect your hands
- Safety goggles to shield your eyes
- Closed-toe shoes to protect your feet
- Long sleeves to prevent skin scrapes
Avoiding Common Mistakes
Many people rush and make mistakes when removing a tire from a rim. These mistakes can cause damage or injury.
Take your time and follow the right steps. Avoid using too much force or wrong tools to keep the rim and tire safe.
- Do not use sharp tools that can cut the tire or rim
- Avoid applying uneven pressure on the rim edges
- Never work on a tire without deflating it first
- Do not skip securing the wheel to stop it from moving
- Always check your tools before use to ensure they are safe

Credit: www.youtube.com
Frequently Asked Questions
How Do You Remove A Tire From A Rim Safely?
To remove a tire safely, deflate the tire completely first. Use tire levers to pry the tire bead over the rim edge. Work slowly around the rim to avoid damage. Always wear gloves and eye protection during the process for safety.
What Tools Are Needed To Take Off A Car Tire?
You need tire levers or spoons, a valve core remover, and bead breaker tools. A tire iron and lubricant like soapy water also help ease tire removal. Proper tools prevent rim and tire damage and make the job easier.
Can I Remove A Tire From A Rim Without A Machine?
Yes, removing a tire manually is possible with the right tools and patience. Use tire levers and break the bead with a bead breaker. Lubricate the bead area for easier removal. Manual removal requires care to avoid damaging the tire or rim.
How To Deflate A Tire Before Removing It From The Rim?
Remove the valve cap and use a valve core remover to unscrew the valve core. This allows air to escape quickly. Fully deflate the tire before attempting removal to prevent sudden bursts and ensure easier bead separation.
Conclusion
Taking a car tire off a rim is manageable. With the right tools, it’s simpler. Always ensure your safety first. Gloves and goggles are essential. Remember to work on a flat surface. This prevents accidents. Practice makes perfect. The more you do, the easier it becomes.
If unsure, seek help from a professional. It saves time and ensures safety. Learning this skill is beneficial. You save money on repairs. Plus, it boosts your confidence. Now, you can handle minor car issues. Keep practicing, and soon, you’ll be a pro.
Safe driving!