
If you own a stackable GE washer dryer, knowing how to take it apart can save you time and money. Whether you need to fix a small issue or clean hard-to-reach spots, taking your unit apart the right way is key.
In this guide, you’ll find simple, step-by-step instructions that anyone can follow. By the end, you’ll feel confident handling your washer dryer without stress or confusion. Keep reading to unlock easy solutions for your laundry problems.
Tools Needed
Taking apart a stackable GE washer dryer needs the right tools. Using these tools makes the job safer and easier.
Here are the main tools you will need before starting to disassemble your unit.
Screwdrivers
You need screwdrivers to remove screws holding panels and parts. A Phillips head screwdriver fits most screws.
A flathead screwdriver helps pry off clips and open covers safely.
- Phillips head screwdriver (medium size)
- Flathead screwdriver (small to medium size)
Socket Wrench Set
Many bolts on the washer and dryer need a socket wrench to remove. A set with multiple sizes is best.
A ratchet handle lets you turn bolts quickly in tight spaces.
- Socket wrench handle (ratchet)
- Socket sizes from 8mm to 13mm
Pliers
Pliers help you grip and pull small parts like wires or clips. Needle-nose pliers are useful for tight spots.
- Needle-nose pliers
- Standard slip-joint pliers
Putty Knife Or Plastic Pry Tool
A putty knife or plastic pry tool helps remove panels without damage. It fits under edges to lift covers gently.
Plastic tools reduce the risk of scratching the washer or dryer surfaces.
- Putty knife
- Plastic pry tool
Work Gloves
Wear work gloves to protect your hands from sharp edges and dirt. Gloves improve your grip on tools and parts.
- Durable work gloves
Flashlight Or Work Light
Good lighting helps you see screws and parts inside the washer dryer. A flashlight or work light brightens dark areas.
- Small flashlight
- Portable work light
Credit: blog.yaleappliance.com
Safety Precautions
Taking apart a stackable GE washer dryer needs care. Safety must come first to avoid accidents.
This guide covers key safety steps before you start disassembly. Follow each to protect yourself.
Disconnect Power And Water
Always unplug the washer dryer from the electrical outlet. This stops any chance of electric shock.
Turn off the water supply valves before you begin. This prevents water leaks and flooding.
- Unplug the appliance from the wall socket
- Close both hot and cold water valves
- Drain any water left in the hoses
Wear Protective Gear
Use gloves to protect your hands from sharp edges inside the machine. Safety glasses shield your eyes.
Wear closed-toe shoes to protect your feet from heavy parts or tools that may fall.
- Put on sturdy gloves
- Wear safety glasses
- Use closed-toe shoes
Work In A Clean, Dry Area
Clear the workspace of clutter to avoid tripping or knocking over parts. Keep the floor dry to prevent slips.
Good lighting helps you see small screws and parts. It also reduces mistakes during disassembly.
- Remove unnecessary items from the area
- Wipe up any water or spills
- Ensure bright lighting
Use Proper Tools
Choose the right tools for each part. Using wrong tools can cause damage or injury.
Keep tools in good condition and handle them carefully to avoid slips and cuts.
- Use screwdrivers that fit screws well
- Handle wrenches and pliers carefully
- Do not use damaged tools
Avoid Heavy Lifting Alone
The stackable washer dryer is heavy and bulky. Get help to move or lift it safely.
Use lifting straps or carts to reduce strain on your back and arms.
- Ask someone to help you lift
- Use lifting aids if possible
- Lift with your legs, not your back
Read The User Manual
Check the GE washer dryer manual for safety tips and disassembly instructions. Follow the manufacturer’s advice.
The manual may show how to disconnect parts safely without damage.
- Locate the manual before starting
- Follow the safety warnings inside
- Use the disassembly steps as a guide
Preparing The Area
Taking apart a stackable washer and dryer requires a clear workspace. Proper preparation helps keep parts organized and prevents damage.
Before you start, gather all tools and clear the surrounding area. This will make the process easier and safer.
Clear The Space Around The Unit
Move furniture and other items away from the washer and dryer. Give yourself enough room to work on all sides.
Gather Necessary Tools
Having the right tools ready helps the process go smoothly. You will need screwdrivers, pliers, and a wrench set.
- Phillips and flathead screwdrivers
- Adjustable wrench
- Needle-nose pliers
- Socket set
- Flashlight
Protect The Floor And Nearby Surfaces
Place a protective cover under the washer and dryer to catch dirt and avoid scratches. Use a drop cloth or old blanket.

Credit: applianceo.com
Disconnecting Power And Water
Before taking apart a stackable GE washer dryer, you must disconnect power and water. This ensures your safety and prevents damage.
This guide will help you safely disconnect the power and water connections from your appliance.
Turning Off The Power
Locate the electrical outlet or circuit breaker that supplies power to the washer dryer. Switch off the power to avoid electric shock.
- Unplug the washer dryer from the wall outlet.
- If you cannot reach the plug, turn off the circuit breaker for the laundry area.
- Confirm the power is off by trying to start the machine. It should not turn on.
Shutting Off The Water Supply
Find the water valves that feed water to your washer dryer. These are usually behind the machine or near the laundry area.
Turn off both hot and cold water valves by twisting them clockwise until tight. This stops water flow and prevents leaks.
| Valve Type | Location | Action |
| Hot water valve | Behind washer, left side | Turn clockwise to close |
| Cold water valve | Behind washer, right side | Turn clockwise to close |
Disconnecting Water Hoses
After shutting off the water supply, disconnect the water hoses from the back of the washer. Use a wrench to loosen the hose fittings.
- Place a towel or bucket under the connection to catch drips.
- Turn the hose counterclockwise to loosen.
- Keep track of washers inside hose fittings to avoid leaks later.
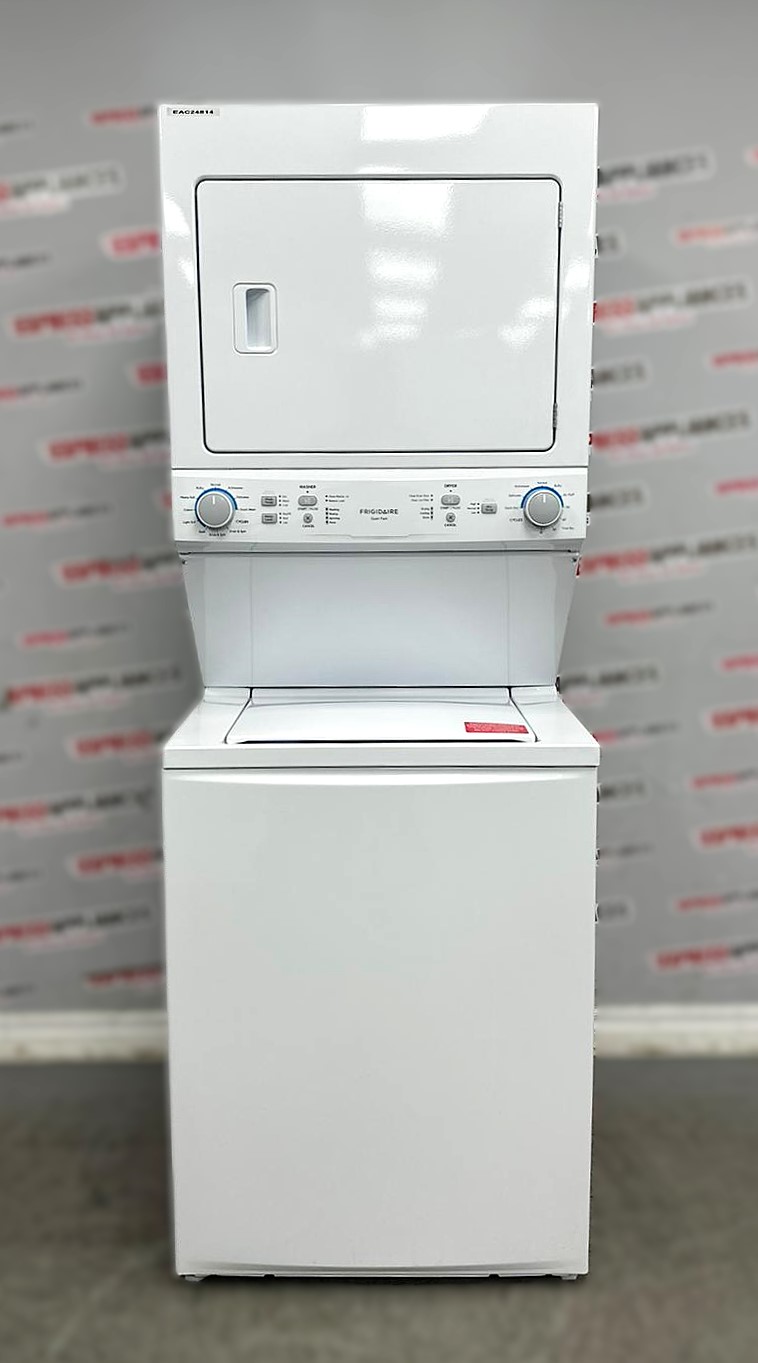
Removing The Dryer
Taking apart a stackable GE washer and dryer starts with removing the dryer. This process needs care to avoid damage.
Follow these steps to safely unfasten and lift the dryer from the washer below.
Unfastening Dryer From Washer
First, unplug both machines from the power source. This keeps you safe while working.
Locate the brackets or clips holding the dryer to the washer. These are usually at the front or sides.
- Use a screwdriver to remove the screws or bolts.
- Keep the hardware in a safe place for reassembly.
- Check if the dryer vent hose is disconnected.
- Disconnect the vent if needed to avoid damage.
Lifting And Moving The Dryer
After unfastening, carefully lift the dryer straight up. It can be heavy and bulky.
Ask for help to avoid dropping or hurting yourself. Use a firm grip on both sides.
- Clear the area to create space for moving.
- Lift with your legs, not your back.
- Place the dryer on a soft surface to prevent scratches.
- Check for any attached cords or hoses before moving.
Detaching The Washer
Taking apart a stackable washer dryer can seem complex. Start by detaching the washer safely.
Follow these steps to ensure a smooth process. This guide focuses on disconnecting hoses and cords, and removing the washer from its position.
Disconnecting Hoses And Cords
Unplug the washer from the electrical outlet. This is a crucial safety step.
Next, turn off the water supply to the washer. This prevents leaks.
- Disconnect the water hoses from the back of the washer
- Have a bucket ready to catch any water that spills
- Remove the drain hose carefully
Removing The Washer From Position
Ensure the washer is empty before moving it. This makes it lighter and easier to handle.
Carefully slide the washer away from the wall. Use a dolly if needed to avoid injury.
- Check for any remaining cords or hoses still attached
- Make sure the path is clear to avoid tripping
- Position the washer in an open space for further disassembly
Cleaning And Maintenance Tips
Keeping your stackable washer dryer in good shape is important. Regular cleaning helps it run smoothly and efficiently.
Follow these tips to ensure your appliance lasts longer and works better. Proper maintenance can prevent costly repairs.
Regular Drum Cleaning
Cleaning the drum of your washer dryer is simple but necessary. It removes detergent residue and odors.
- Run an empty cycle with hot water and vinegar.
- Wipe down the inside with a damp cloth.
- Leave the door open to let it dry.
Lint Filter Maintenance
The lint filter needs regular attention to prevent fire hazards. Cleaning it also helps the dryer work efficiently.
| Action | Frequency |
| Remove lint | After every load |
| Deep clean | Once a month |
Ventilation Check
Proper ventilation is crucial for your dryer’s performance. Blocked vents can cause overheating.
Inspect the vent pipe for blockages. Ensure that it is clear and connected properly to the outside vent.
Credit: expressappliances.ca
Frequently Asked Questions
How Do I Safely Disconnect A Ge Stackable Washer Dryer?
First, unplug the unit from the power source. Then, turn off the water supply valves. Disconnect the water hoses carefully. Finally, detach the vent hose and electrical connections before separating the washer and dryer.
What Tools Are Needed To Take Apart Ge Stackable Units?
You’ll need a screwdriver, pliers, and possibly a socket wrench. A towel or bucket helps catch water. Use a utility knife to cut seals if necessary. These tools ensure safe and efficient disassembly.
How Do I Separate The Washer From The Dryer?
Remove the screws or brackets securing the dryer on top. Lift the dryer carefully off the washer. Use a helper if the unit is heavy. Ensure all hoses and cords are disconnected before separating.
Can I Disassemble The Ge Washer Dryer Without Professional Help?
Yes, with basic tools and careful steps, you can do it safely. Follow the user manual instructions closely. If unsure, seek professional help to avoid damage or injury.
Conclusion
Taking apart a GE stackable washer dryer needs care and patience. Follow the steps slowly and keep track of all parts. Use the right tools to avoid damage. Always unplug the machine before starting. Safety comes first. Doing this yourself saves money and helps you understand your appliance better.
Keep this guide close for easy reference. You can handle the task confidently with the right approach. Ready to fix or clean your washer dryer? Now you know how to take it apart easily.