If you want your turkey to come out juicy, tender, and perfectly cooked, tenting it with foil is a simple trick you need to master. You might think foil is just for wrapping leftovers, but when used right, it can make a huge difference in how your turkey turns out.
Wondering how to tent a turkey with foil the right way? Keep reading, because this easy technique will help you avoid dry meat and impress everyone at your dinner table. You’re just a few steps away from cooking the perfect turkey!
Why Tent A Turkey
Tenting a turkey with foil means covering it loosely with aluminum foil. This simple step helps protect the bird while it cooks.
Many cooks tent a turkey to improve its taste and texture. It helps control heat and moisture during roasting.
Benefits Of Foil Tenting
Foil tenting offers several benefits that make your turkey turn out better. It shields the skin and keeps the inside juicy.
- Protects the turkey from too much direct heat
- Helps cook the bird evenly
- Prevents the skin from burning or drying out
Avoiding Overcooking
Tenting slows the cooking process by blocking intense heat. This stops the turkey from overcooking on the outside while the inside finishes.
| Without Foil | Skin may burn before inside cooks |
| With Foil Tent | Even cooking, no burnt skin |
Enhancing Moisture Retention
Foil traps steam and moisture near the turkey. This keeps the meat tender and juicy.
- Locks in natural juices
- Prevents dryness in the breast meat
- Improves overall flavor and texture
Choosing The Right Foil
Tenting a turkey with foil keeps it moist and helps it cook evenly. Picking the right foil is key to good results.
Not all aluminum foil is the same. Learn about the types, thickness, and size to tent your turkey well.
Types Of Aluminum Foil
There are two main types of aluminum foil: standard and heavy-duty. Standard foil works for light tasks. Heavy-duty foil is thicker and stronger. It holds up better during long cooking times.
- Standard foil is thin and easy to tear.
- Heavy-duty foil is thicker and resists punctures.
- Non-stick foil has a special coating to prevent sticking.
Thickness Matters
Foil thickness affects how well it holds heat and resists tearing. Thin foil can rip easily and may not protect the turkey well. Thick foil is better for tenting because it stays strong and holds heat better.
| Foil Type | Thickness | Best Use |
| Standard | 0.016 mm | Light cooking, short time |
| Heavy-Duty | 0.024 mm | Long cooking, tenting |
| Non-Stick | 0.016 mm | Delicate foods, less sticking |
Size And Shape Tips
Choose foil wide enough to cover the whole turkey. Fold it to create a loose tent. This lets heat circulate and keeps the bird juicy.
- Pick foil at least 18 inches wide for most turkeys.
- Use two sheets if one is not wide enough.
- Leave space between foil and turkey to avoid sticking.
- Fold edges gently to seal the tent without crushing the turkey.
Preparing The Turkey
Preparing a turkey is an essential part of a delicious meal. Follow these steps to ensure your turkey is ready for cooking.
We’ll cover cleaning, seasoning, and trussing for an evenly cooked turkey.
Cleaning And Drying
Start by cleaning the turkey thoroughly. This removes any unwanted residues and prepares it for seasoning.
- Rinse the turkey under cold water.
- Pat dry with paper towels.
- Ensure the cavity is clear of any excess water.
Seasoning Strategies
Seasoning adds flavor and enhances the taste of your turkey. Use a blend of herbs and spices for best results.
| Seasoning | Flavor Profile |
| Salt and Pepper | Basic and essential |
| Garlic Powder | Rich and savory |
| Rosemary | Earthy and aromatic |
Trussing For Even Cooking
Trussing helps the turkey cook evenly. It involves tying the legs and wings close to the body.
Use a piece of kitchen twine to keep the turkey’s shape. This ensures all parts are cooked at the same rate.
Foil Tenting Techniques
Tenting a turkey with foil helps keep it moist while resting. It protects the meat from drying out. Using foil correctly ensures even heat and better flavor.
Learn simple foil tenting methods to cover your turkey well. This guide shows how to create a loose tent, cover wings and drumsticks, and avoid foil touching the skin.
Creating A Loose Tent
Make a tent by shaping foil over the turkey without pressing it down. Leave space between the foil and the bird. This allows steam to escape and air to circulate.
- Use a large piece of foil wide enough to cover the turkey.
- Place the foil gently over the bird.
- Do not wrap foil tightly; keep it loose to avoid touching the skin.
- Fold edges under the roasting pan to hold the tent in place.
Covering Wings And Drumsticks
Wings and drumsticks cook faster and can burn easily. Cover these parts with extra foil to protect them. This helps them stay moist and prevents overcooking.
| Part | Foil Covering Tip |
|---|---|
| Wings | Wrap loosely with a small foil patch to shield tips |
| Drumsticks | Cover with foil to prevent drying and burning |
Avoiding Foil Contact With Skin
Foil touching the turkey skin can cause sticking and tear the skin. Keep foil raised with a loose tent. Use foil balls or crumpled foil to lift the edges if needed.
- Do not press foil directly on the skin.
- Place foil so it floats above the turkey surface.
- Use rolled foil balls at corners to hold foil up.
- Check the foil during resting to keep it from collapsing.
Timing And Temperature
Tenting a turkey with foil helps keep it juicy while cooking. You cover the bird with foil during some part of the roasting process.
Knowing when to tent and the right oven temperature is key to perfect turkey skin and moist meat.
When To Tent The Turkey
Tent the turkey once it has browned enough but still needs more cooking time. Covering too early keeps the skin from crisping.
- Start roasting the turkey uncovered.
- Watch for golden brown skin on top.
- When skin looks nicely browned, cover with foil.
- This slows browning and prevents overcooking the outer meat.
Oven Temperature Tips
| Temperature Range | Purpose |
| 325°F to 350°F | Slow and even cooking |
| 375°F to 400°F | Initial browning before tenting |
| Lower than 325°F | Not recommended for roasting turkey |
Use a higher temperature at first to brown the skin. Then lower heat for the rest of cooking with the foil tent in place.
Removing The Tent For Crispiness
Take off the foil tent near the end of cooking to crisp the skin. This step is important for texture.
- About 20 to 30 minutes before the turkey is done, remove the foil.
- Increase oven temperature to 400°F if needed for better crispiness.
- Watch closely to avoid burning the skin.

Credit: parade.com
Common Mistakes To Avoid
Tenting a turkey with foil helps keep it moist while resting. Many people make simple mistakes that affect the turkey’s texture and flavor.
Knowing what to avoid can improve your turkey’s taste and appearance. Here are common errors to watch out for.
Foil Too Tight Or Loose
Wrapping foil too tightly can trap steam and make the skin soggy. Loose foil may not protect the turkey from drying out.
It is best to tent the foil loosely, allowing some air to circulate while keeping heat inside.
- Tight foil causes soft skin
- Loose foil can dry out the meat
- Loosely tented foil balances moisture and crispness
Leaving Tent On Too Long
Leaving the foil tent on for too long can cause the turkey skin to lose its crispness. The trapped steam softens the skin.
Remove the foil after 20 to 30 minutes of resting to keep the skin crispy and the meat juicy.
- Too long under foil softens the skin
- Remove foil after resting to keep crispness
- Resting time usually lasts 20 to 30 minutes
Ignoring Internal Temperature
Not checking the turkey’s internal temperature can lead to undercooked or overcooked meat. Temperature guides help ensure safety and taste.
Use a meat thermometer to check the thickest part of the turkey. The safe temperature is 165°F (74°C).
- Always check the internal temperature
- 165°F (74°C) is the safe cooking temperature
- Rest the turkey after cooking for even heat
Serving And Resting
Tenting a turkey with foil helps keep it warm and juicy after cooking. Resting the bird before serving is very important for flavor and texture.
Proper resting and carving make the turkey taste better and easier to serve. Let’s look at how to rest, carve, and store your turkey.
Resting Time Benefits
Resting the turkey under foil lets the juices settle inside the meat. This keeps the meat moist and tender.
If you cut the turkey right away, the juices will run out and make the meat dry. Resting helps the flavors stay in the turkey.
- Juices spread evenly through the meat
- Meat becomes easier to carve
- Temperature evens out for better taste
Carving Tips For Juicy Meat
Use a sharp knife to carve the turkey carefully. Cut thin slices along the grain of the meat for tenderness.
Start by removing the legs and wings, then slice the breast meat. Cut against the grain to keep meat juicy and soft.
- Let the turkey rest before carving
- Use a sharp, long knife
- Cut thin slices against the grain
- Serve slices immediately for best taste
Storing Leftovers Safely
Store leftover turkey in shallow containers for quick cooling. Keep it in the fridge within two hours after cooking.
Use leftovers within three to four days. Reheat turkey to 165°F (74°C) before eating to stay safe.
- Cut turkey into smaller pieces
- Use airtight containers
- Label with the date stored
- Reheat leftovers to safe temperature
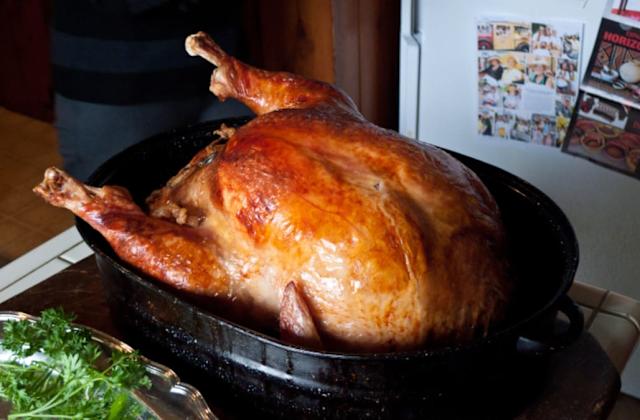
Credit: themodernproper.com

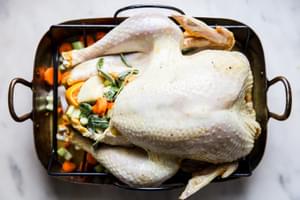
Credit: www.food.com
Frequently Asked Questions
How Do You Properly Tent A Turkey With Foil?
To tent a turkey, loosely cover it with foil to prevent over-browning. Make a tent shape by folding the foil without touching the skin. This traps heat and moisture, keeping the turkey juicy while allowing it to cook evenly.
Why Is Tenting A Turkey With Foil Important?
Tenting with foil protects the turkey from direct heat, preventing burnt skin. It helps retain moisture, ensuring tender meat. This simple step also allows the turkey to cook evenly without drying out the outer layers.
When Should You Tent A Turkey During Cooking?
Tent the turkey halfway through roasting or when the skin starts browning too fast. This timing helps avoid overcooking the skin while allowing the meat to finish cooking thoroughly and remain juicy.
Can I Reuse Foil When Tenting A Turkey?
It’s best to use fresh foil each time you tent the turkey. Reusing foil can cause tearing and reduce its effectiveness in reflecting heat. Clean foil ensures better coverage and consistent cooking results.
Conclusion
Tenting a turkey with foil keeps it juicy and tender. It stops the skin from burning while the meat cooks. You can easily do this at home with a few simple steps. Just wrap the turkey loosely with foil, and let it rest.
This small step makes a big difference in flavor and texture. Try tenting your turkey next time for a better meal. Simple, easy, and effective. Your family will notice the difference.