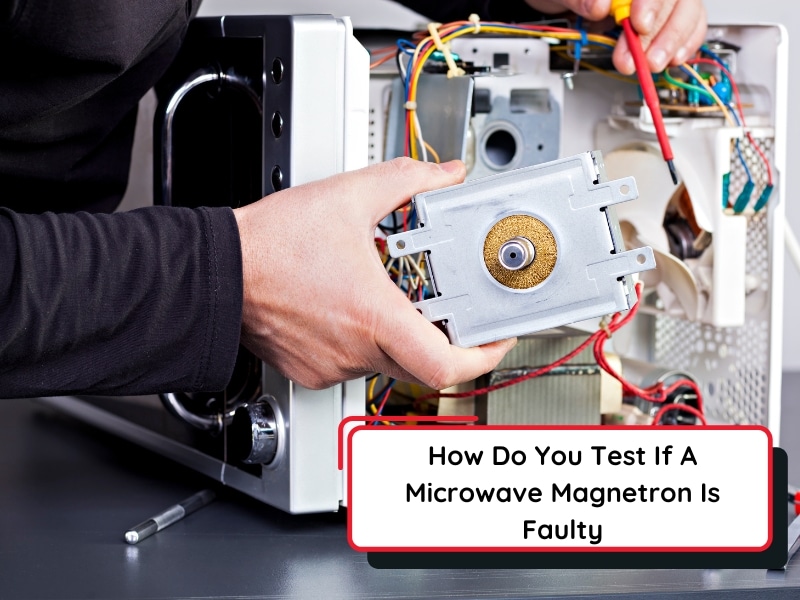
Ever wondered why your microwave oven isn’t heating food as effectively as it used to? The culprit might be the magnetron, a crucial component responsible for generating the microwaves that cook your food.
Testing your microwave oven’s magnetron might sound daunting, but it’s simpler than you think. By understanding how to check this key part, you can save money on repairs and ensure your meals are cooked to perfection. In this guide, you’ll discover clear, step-by-step instructions to test your magnetron.
You’ll gain the confidence to diagnose and potentially fix your microwave, ensuring it’s always ready to serve you. Curious to know more? Let’s dive into the details and empower you with the knowledge to keep your kitchen running smoothly.
Microwave Magnetron Basics
The magnetron is the heart of your microwave oven, responsible for generating the microwaves that heat your food. Understanding its basics helps you troubleshoot issues more effectively and know when it’s time to test or replace this critical component. Let’s dive into what the magnetron does and the common problems it might face.
Role In Microwave Operation
The magnetron converts electrical energy into microwave radiation. These microwaves penetrate your food, causing water molecules to vibrate and produce heat quickly. Without a functioning magnetron, your microwave won’t heat anything, even if the timer and turntable work perfectly.
Think about a time your microwave ran but didn’t warm your food. That’s a classic sign the magnetron could be failing. It’s the part that makes the microwave “microwave,” so its role is absolutely vital.
Common Magnetron Issues
Magnetrons can wear out or get damaged over time due to heat, electrical surges, or general use. Here are some typical issues to watch for:
- No heating:The microwave runs but doesn’t heat food.
- Strange noises:Buzzing or humming that’s louder than usual.
- Burnt smell:Overheating magnetrons may emit a strong, unpleasant odor.
- Intermittent heating:Food heats inconsistently, sometimes cold, sometimes warm.
Have you noticed any of these signs in your microwave? Recognizing these early can save you from bigger problems down the road and help you decide if testing the magnetron is necessary.

Credit: www.youtube.com
Safety Precautions
Testing the magnetron in your microwave oven involves working with electrical components that can be dangerous if mishandled. Prioritizing safety is essential to prevent injuries or damage to your appliance. Understanding and following key precautions will help you carry out the testing process confidently and securely.
Power Disconnection
Always unplug the microwave before opening the casing or touching any internal parts. Even if the microwave is off, it can still hold a charge in its components. Double-check that the power cord is disconnected to avoid accidental shocks.
Have you ever thought about how residual power can linger inside? Capacitors in the microwave can store electricity long after it’s unplugged. This makes it crucial to wait a few minutes before starting your testing or discharging the capacitor safely.
Handling High Voltage
The magnetron operates at high voltage, which can be lethal if you come into direct contact with it. Use insulated tools designed for electrical work to minimize risk. Avoid touching terminals or wires linked to the high voltage transformer.
Remember, the high voltage capacitor can still hold a dangerous charge. Use a properly rated resistor or a capacitor discharge tool to safely release stored energy. Never rely on guesswork or quick fixes; your safety depends on thorough care.
Protective Gear
Wear rubber gloves and safety goggles when working inside your microwave. Rubber gloves provide insulation against electric shocks, while goggles protect your eyes from sparks or debris. Make sure your clothing is non-conductive and avoid wearing metal accessories.
Do you have a dedicated workspace with good lighting and no distractions? Setting up the right environment helps you stay focused and lowers the risk of accidents. Safety gear and a clean workspace are your best defense while working on electrical appliances.
Tools Needed
Testing a microwave oven magnetron requires specific tools to ensure safety and accuracy. Using the right equipment helps detect faults and avoid damage. The tools must measure electrical values and check insulation properly.
Gathering these tools before starting saves time and avoids interruptions. Each tool plays a unique role in testing the magnetron’s condition.
Multimeter Use
A multimeter measures voltage, resistance, and continuity. It is essential for checking the magnetron’s electrical paths. Set the multimeter to the resistance mode to test the magnetron terminals. A good magnetron shows a specific resistance range. If the reading is zero or infinite, the magnetron may be faulty.
Insulation Resistance Tester
This tester checks the insulation between magnetron parts and the metal casing. It prevents electrical shorts and hazards. The tester applies a high voltage and measures leakage current. Low insulation resistance indicates damaged insulation. This tool ensures the magnetron is safe to use.
Additional Equipment
- Screwdrivers: For opening the microwave oven casing safely.
- Protective gloves: To avoid electric shock during testing.
- Safety goggles: Protect eyes from debris or sparks.
- Service manual: Guides on the magnetron’s specifications and wiring.
Initial Visual Inspection
Before testing the microwave oven magnetron, start with a careful visual check. This step helps identify obvious problems that may affect the magnetron’s function. It saves time and keeps the process safe. Use a flashlight and a magnifying glass for better viewing. Make sure the microwave is unplugged to avoid electric shock.
Checking For Damage
Look closely at the magnetron and its surroundings. Check for cracks, dents, or broken parts. Damaged components can stop the magnetron from working properly. Pay attention to the metal fins and the antenna, which are important for its operation.
Signs Of Burn Marks
Burn marks are a clear sign of overheating or electrical problems. These marks often appear as dark or blackened spots on the magnetron or nearby wiring. If you see burn marks, the magnetron may need replacement. Avoid testing further until you fix these issues.
Loose Connections
Check all wires and connectors attached to the magnetron. Loose or corroded connections can cause the microwave to fail. Gently wiggle wires to see if they move easily. Tighten any loose connections and clean corrosion if present. Secure connections ensure proper power flow.
Testing Magnetron Continuity
Testing the continuity of your microwave oven’s magnetron is a key step to diagnosing its condition. Continuity testing helps you understand if the magnetron’s internal filament is intact or broken. Without this, the magnetron won’t generate the microwaves needed to heat your food.
Setting Up Multimeter
Start by turning off and unplugging the microwave to avoid any risk of electric shock. Set your multimeter to the lowest ohms setting, usually marked as 200Ω or similar. This setting helps measure the low resistance expected in the magnetron filament.
Remove the microwave’s cover carefully to access the magnetron terminals. Make sure your multimeter probes are clean and ready for precise contact. If you’re unsure where the terminals are, they are often two metal pins sticking out from the magnetron.
Measuring Filament Resistance
Touch the multimeter probes to the magnetron terminals. It’s important to hold the probes steadily to get an accurate reading. The resistance should be low, typically between 0.2 and 3 ohms, indicating the filament is continuous and not broken.
If the reading is infinite or very high, it means the filament is broken, and the magnetron is faulty. Make sure you don’t touch the metal parts with your fingers during testing, as this can affect the reading. Do you notice how small resistance differences can reveal big problems?
Interpreting Results
A low resistance reading means your magnetron filament has continuity and is likely functioning. However, even if the filament is good, other issues could still affect microwave performance. A high or infinite resistance reading is a clear sign the magnetron needs replacement.
Keep in mind, continuity testing only checks if the filament is intact, not the entire magnetron’s health. If you get unexpected readings, double-check your multimeter setup and probe contact. Have you considered that sometimes replacing the magnetron might be more cost-effective than repairing it?
Testing For Short Circuits
Testing for short circuits in your microwave oven’s magnetron is crucial to ensure safety and proper functioning. A short circuit can cause the microwave to stop working or even damage other components. By checking specific points with a multimeter, you can quickly identify if the magnetron has any internal shorts.
Checking Between Terminals
Start by setting your multimeter to the ohms (Ω) setting. Place the probes on the two magnetron terminals and observe the reading.
- If the meter shows a very low resistance (close to zero), it indicates a possible short circuit between the terminals.
- A normal magnetron typically shows some resistance, not a direct short.
Have you ever been surprised by how a simple resistance check reveals hidden faults? This quick test often saves you from unnecessary replacements.
Testing Magnetron To Ground
Next, test for shorts between each terminal and the magnetron’s metal casing (ground). Touch one probe to a terminal and the other to the metal body.
- A reading close to zero suggests the terminal is shorted to ground, which means the magnetron is faulty.
- Ideally, you should see no continuity (infinite resistance) between terminals and ground.
Always remember, magnetrons are high-voltage parts; make sure the unit is unplugged and properly discharged before testing.
Detecting Faults
Combining these tests gives a clear picture of the magnetron’s health. If either terminal shorts to ground or the terminals short to each other, it indicates internal damage.
Keep in mind that a faulty magnetron not only affects cooking but can also pose safety risks. Does your microwave show signs of weak heating or strange noises? These symptoms paired with your test results confirm the need for replacement.
Advanced Testing Methods
Advanced testing methods provide deeper insight into the magnetron’s condition. These techniques help identify subtle faults that basic tests might miss. Using specialized tools ensures accurate and reliable results. This section explains two key advanced tests for magnetrons.
Using Insulation Resistance Tester
An insulation resistance tester checks the magnetron’s internal insulation quality. Poor insulation can cause electrical shorts or failures. Connect the tester leads to the magnetron terminals and housing. The tester measures resistance, usually in megaohms (MΩ).
A good magnetron shows very high resistance, typically above 20 MΩ. A low reading signals insulation breakdown or moisture inside. This test protects against electrical hazards and improves safety during use.
Microwave Power Output Test
The power output test measures how well the magnetron generates microwaves. Use a power meter or a wattmeter designed for microwave ovens. Place the meter inside the oven cavity or use a specialized sensor.
Run the microwave at full power for a short time, about 30 seconds. Compare the reading to the manufacturer’s specifications. A significantly lower output means the magnetron is weak or failing. This test ensures the microwave heats food effectively and efficiently.

Credit: www.youtube.com
Common Troubleshooting Tips
Troubleshooting your microwave oven magnetron can feel tricky, but knowing the right tips can save you time and frustration. Many common issues have simple fixes, but some require careful attention to avoid costly mistakes. Let’s look at practical ways to diagnose and handle magnetron problems effectively.
When To Replace Magnetron
Not every microwave hiccup means the magnetron is dead. If your microwave is not heating but the turntable and lights work, the magnetron might be faulty. Use a multimeter to check for continuity across the magnetron terminals.
If the multimeter shows no continuity, it usually means the magnetron is broken and needs replacement. Another sign is a burning smell or unusual noises during operation. These symptoms suggest internal damage that cannot be repaired.
Keep in mind, replacing a magnetron isn’t cheap. Consider the age of your microwave before investing in parts. Sometimes, a newer model might be a smarter choice than fixing an old one.
Avoiding False Diagnoses
Jumping to conclusions about the magnetron can lead to unnecessary repairs. Start by checking simpler parts like the door switches, fuses, and control board. A faulty door switch can prevent the microwave from starting, mimicking magnetron failure.
Use a reliable multimeter and follow safety steps strictly—high voltage components inside microwaves can be dangerous. Testing with incorrect tools or methods may give false readings and waste your time.
Ask yourself: have you ruled out all basic issues before blaming the magnetron? Sometimes, replacing a fuse or resetting the control board fixes the problem. Step back and review each component methodically to avoid needless replacements.

Credit: microwavefactory.com.au
Frequently Asked Questions
How Do I Test A Microwave Oven Magnetron Safely?
To test a magnetron safely, unplug the microwave first. Use a multimeter to check continuity on the magnetron terminals. Avoid touching internal components to prevent electric shock. Always discharge the capacitor before testing. Follow safety guidelines and consider professional help if unsure.
What Tools Are Needed To Test A Magnetron?
You need a digital multimeter, insulated screwdriver, and gloves. A multimeter checks electrical continuity and resistance. Insulated tools help prevent electric shocks. Gloves protect your hands from sharp parts. These tools ensure accurate and safe testing of the magnetron.
How To Identify A Faulty Microwave Magnetron?
A faulty magnetron causes weak or no heating. Use a multimeter to check for no continuity or high resistance. Strange noises or burning smells also indicate issues. If tests show irregular readings, the magnetron likely needs replacement.
Can I Test Magnetron Without Removing It?
Testing without removal is risky and less accurate. Removing the magnetron allows proper inspection and safe testing. It ensures correct multimeter contact and better fault diagnosis. Always unplug and discharge the microwave before removal.
Conclusion
Testing a microwave oven magnetron helps keep your appliance safe and working. Simple steps can show if the magnetron needs fixing or replacing. Always take care when handling electrical parts. Using a multimeter and following basic checks makes the process easier.
Knowing how to test saves time and money. Stay cautious and follow instructions closely. Your microwave will heat food better when the magnetron works well. Keep your kitchen safe and appliances efficient with regular checks.