Are you curious about the inner workings of your audio equipment or vintage radio? Vacuum tubes, those small glass cylinders, play a vital role in amplifying sound and ensuring your devices run smoothly.
But what happens when they start malfunctioning? Instead of replacing them blindly, you can test them yourself and save both time and money. In this guide, you’ll discover simple, effective methods to test vacuum tubes, ensuring your equipment functions at its best.
By understanding how to check these essential components, you can maintain the quality of your sound system and potentially revive your cherished gadgets. Let’s dive into the world of vacuum tube testing and keep your devices in top shape!

Credit: www.youtube.com
Tools Needed For Testing
Testing vacuum tubes requires specific tools to ensure accurate results. Having the right equipment helps check tube health and performance quickly. This section breaks down essential tools used for vacuum tube testing. Each tool plays a key role in diagnosing issues and confirming tube quality.
Multimeter Essentials
A multimeter measures electrical properties like voltage, current, and resistance. It is vital for basic vacuum tube testing. Check tube pins for continuity and shorts using the multimeter.
- Digital or analog multimeter with resistance and voltage modes
- Probes for precise contact with tube pins
- Battery test function to check tube heaters
Tube Tester Devices
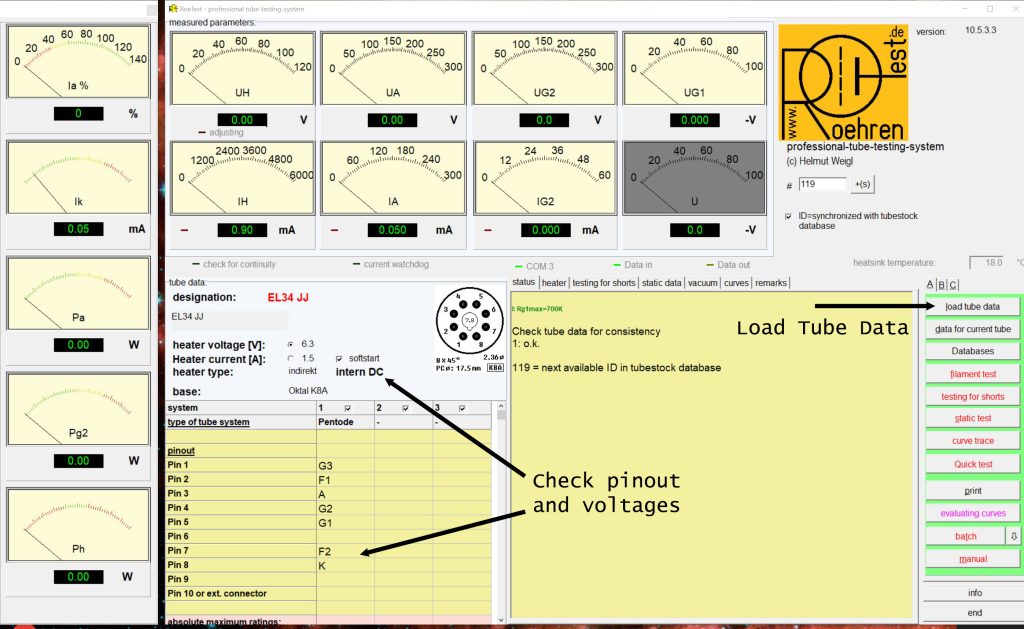
Tube testers are specialized devices designed to test vacuum tubes. They measure emission, mutual conductance, and shorts inside the tube. Tube testers provide detailed and reliable test results.
- Classic analog tube testers for quick checks
- Modern digital tube testers with advanced diagnostics
- Socket adapters for different tube types
Additional Accessories
Extra accessories improve testing accuracy and safety. They make handling and analyzing tubes easier. These tools complement multimeters and tube testers.
- Tube sockets and adapters matching tube pins
- Insulated gloves for safe handling
- Cleaning brushes to remove dirt from pins
- Magnifying glass for close inspection

Credit: www.remusic.it
Preparing The Vacuum Tube
Preparing the vacuum tube properly is essential before testing. This stage helps ensure accurate results and protects the tube from damage. Careful preparation also keeps you safe during the testing process.
Inspecting For Physical Damage
Look closely at the vacuum tube for cracks or chips on the glass. Check the pins for bending, corrosion, or dirt. Any visible damage can affect tube performance or cause failure during testing. Discard tubes with serious damage to avoid inaccurate readings.
Cleaning The Tube
Use a soft, dry cloth to gently wipe the glass surface. Remove dirt, dust, and grease from the tube body. Clean the pins carefully with a contact cleaner or rubbing alcohol. This step improves electrical contact and ensures better test results.
Safety Precautions
- Always unplug equipment before removing or handling tubes.
- Handle tubes by the base, not the glass envelope.
- Avoid touching pins with bare hands to prevent oils and static.
- Work in a well-lit area with proper ventilation.
- Wear safety glasses to protect eyes from accidental breakage.
Basic Testing Methods
Basic testing methods help you quickly identify if a vacuum tube is functioning properly or needs replacement. These tests don’t require expensive equipment and can often be done with tools you already have. Understanding these basics lets you save time and avoid guessing when troubleshooting your vintage electronics or audio gear.
Visual Inspection Tips
Start by carefully looking at the tube’s glass envelope. Check for cracks, cloudiness, or any discoloration inside the tube, which often signal damage or burnout.
Look closely at the filament inside the tube—if it appears broken or unusually darkened, the tube might be dead. Also, inspect the pins for corrosion or bent contacts, as these can cause poor connections.
Have you ever found a tube that looked fine but still didn’t work? Visual inspection can save you from wasting time on tubes that are obviously damaged, but it’s just the first step.
Checking For Filament Continuity
You need a multimeter set to the continuity or resistance mode to check the filament. Touch the meter probes to the filament pins—usually listed in the tube’s datasheet—to see if the filament circuit is complete.
A continuous filament will show a low resistance reading or beep if your meter has a continuity function. If the meter shows open circuit or infinite resistance, the filament is broken, and the tube won’t heat up or function.
Don’t skip this test even if the tube looks good. I once replaced a noisy amplifier tube only to find out later that the filament was open despite the intact glass.
Measuring Tube Resistance
Measuring resistance beyond the filament can give clues about internal shorts or open elements. Use your multimeter to measure resistance between various pins according to the tube’s pinout.
Expect certain ranges depending on the tube type. For example, some tubes show a few hundred ohms across the filament, while others have much higher resistance between plate and cathode pins.
If you find zero ohms or very high resistance where there shouldn’t be, the tube may be shorted or broken inside. Do you have the tube’s datasheet handy? It’s your best guide for correct pin identification and expected resistance values.
Using A Tube Tester
Using a tube tester is a straightforward way to check the condition of vacuum tubes. This device measures the tube’s electrical performance and shows if it still works well. It helps avoid guesswork and saves time by giving clear results.
Setting Up The Tester
Place the tube tester on a flat surface near an electrical outlet. Make sure the tester is clean and free from dust. Connect the tester to power and turn it on. Allow the tester to warm up for a few minutes before use. This ensures accurate readings and stable operation.
Selecting The Correct Tube Type
Find the tube type number printed on the glass or metal base of the tube. Use the tube tester’s manual or chart to locate the correct setting. Adjust the tester’s controls to match the tube type. This step is important for accurate testing results. Using the wrong settings can damage the tube or give false readings.
Interpreting Tester Readings
Insert the tube into the tester’s socket carefully. Start the test by pressing the appropriate button or switch. Look at the meter or digital display to see the results. Readings usually show as “Good,” “Weak,” or “Bad.” A “Good” result means the tube works well. “Weak” suggests the tube may fail soon. “Bad” means the tube is no longer usable and should be replaced.
Advanced Testing Techniques
Advanced testing techniques help you dig deeper into the condition and performance of vacuum tubes. Basic checks might tell you if a tube works or not, but advanced methods reveal how well it works and spot subtle issues that affect sound quality and reliability. These techniques require some specialized tools but deliver detailed insights that can save you from costly replacements and improve your gear’s lifespan.
Emission Testing
Emission testing measures how effectively a vacuum tube’s cathode emits electrons. This is crucial because weak emission causes poor amplification and distorted sound. You can perform emission tests with a tube tester that applies voltage and measures current flow through the tube.
Look for tubes with emission values close to the manufacturer’s specifications. A tube that shows significantly lower emission may still light up but won’t perform well. I once found a guitar amp’s hiss was due to a tube with barely half the required emission rating. Replacing it restored the tone instantly.
Mutual Conductance Measurement
Mutual conductance, or transconductance, measures how effectively the tube controls the flow of electrons between cathode and anode based on the grid voltage. This test gives you a clear idea of the tube’s gain capability and overall health.
High mutual conductance means the tube is amplifying signals as it should. Low values hint at aging or damage. Using a specialized tester, you apply a known voltage and measure the resulting current changes to calculate this parameter. This test is especially valuable for high-fidelity audio and radio equipment where precision matters.
Leakage And Shorts Detection
Leakage and shorts inside a tube can cause hum, noise, or complete failure in your equipment. Detecting these faults early prevents damage to other components. To check for leakage, you measure resistance between different tube elements with a multimeter or tube tester set to leakage mode.
Shorts can be more subtle but often show as very low resistance between elements that should be isolated. I recall troubleshooting a vintage radio that kept blowing fuses until I found a tube with a hidden short inside the glass envelope. Identifying and replacing that tube fixed the problem immediately.
Have you ever wondered how much performance you’re losing by ignoring these hidden defects in your tubes? Taking time to run these advanced tests can dramatically improve your audio experience and gear reliability.

Credit: shaunmerrigan.info
Troubleshooting Common Issues
Troubleshooting common issues with vacuum tubes can be tricky if you don’t know what signs to look for. Tubes might seem fine at first glance but still cause problems in your equipment. Understanding these issues helps you pinpoint faults quickly and keep your gear running smoothly.
Dealing With Weak Tubes
A weak tube often causes a noticeable drop in performance. You might hear a loss of volume, distortion, or a dull sound that wasn’t there before. Checking the tube’s filament glow is a quick way to spot weakness; if it’s dim or flickering, the tube may be losing power.
Using a tube tester can confirm if the tube’s emission levels are below standard. Keep in mind, some tubes weaken gradually, so don’t ignore subtle changes in sound quality. Have you ever noticed your amp sounding less vibrant over time without any obvious damage? That’s usually a sign of tube weakness.
Identifying Intermittent Failures
Intermittent failures are some of the hardest problems to track down. These occur when a tube works fine one moment and cuts out the next. The cause might be loose internal connections or micro-cracks inside the glass.
To find these failures, gently tap the tube while the device is on and listen for crackling or sound dropouts. Another trick is to swap the tube with a known good one and see if the problem goes away. Have you ever had a piece of gear that only acts up sporadically? Intermittent tube failure is often the culprit.
When To Replace Tubes
Knowing when to replace tubes saves you time and frustration. If a tube consistently fails tests, shows visible damage like cracks or dark spots, or causes persistent noise, replacement is the best option. Don’t wait for complete failure—proactive replacement keeps your system reliable.
Also, consider the tube’s age and usage hours. Tubes have limited lifespans depending on their type and how hard they’re used. Ask yourself: is the cost of troubleshooting worth it compared to just installing a fresh tube? Often, swapping out an old tube is the simplest fix.
Maintaining Vacuum Tubes
Maintaining vacuum tubes is key to keeping your vintage electronics running smoothly. These delicate components need careful handling and regular attention to avoid unexpected failures. Proper maintenance not only preserves their performance but also saves you time and money in replacements.
Proper Storage Tips
Store vacuum tubes in a cool, dry place away from direct sunlight and moisture. Excessive heat or humidity can damage the glass envelope and internal components.
Use original packaging or cushioned containers to prevent physical shocks and vibrations. Label each tube clearly to avoid confusion later, especially if you have multiple types.
Regular Testing Schedule
Set a routine to test your vacuum tubes every few months, even if your equipment seems fine. Tubes can degrade silently, affecting sound quality or device operation before complete failure.
Use a tube tester or swap tubes with a known good one to check performance. Keeping a log of test results helps you spot trends and predict when a tube might need replacement.
Extending Tube Lifespan
Always warm up your equipment gradually to reduce stress on the tubes. Avoid sudden power surges by using a surge protector or power conditioner.
Handle tubes with clean hands or gloves to prevent oils from damaging the glass. If you notice any flickering or unusual noise, address the issue immediately to prevent further damage.
Frequently Asked Questions
How Do You Check If A Vacuum Tube Is Bad?
To check a vacuum tube, use a tube tester or multimeter. Look for no glow or unusual noises. Replace tubes showing cracks, dark spots, or low emission.
What Tools Are Needed To Test Vacuum Tubes?
You need a tube tester, multimeter, and sometimes an oscilloscope. These tools measure voltage, current, and emission levels to assess tube health accurately.
Can You Test Vacuum Tubes Without Special Equipment?
Basic tests include visual inspection and listening for hum or noise. However, accurate testing requires specialized tube testers for reliable results.
How Often Should Vacuum Tubes Be Tested?
Test vacuum tubes every 6 to 12 months, especially in high-use equipment. Regular testing prevents unexpected failures and maintains optimal performance.
Conclusion
Testing a vacuum tube is simple with the right steps. Use a tube tester or a multimeter for best results. Check for signs of damage or wear before testing. Carefully follow safety rules to avoid electric shock. Regular testing keeps your equipment working well.
Practice often, and you will gain confidence. Small efforts save money on repairs later. Keep your tubes clean and dry for longer life. Testing helps find problems early and fix them fast. Stay patient and take your time during each test.